Configure scheduling practice settings
Details about the remaining configuration options for scheduling are included below.
Appointment Statuses
Appointment statuses are separated into Before Check In and After Check In. System default statuses can be renamed and recoloured.
- Go to Practice Settings > Scheduling > Appointment Statuses
- Select Create New Status Before Check In or Create New Status After Check In
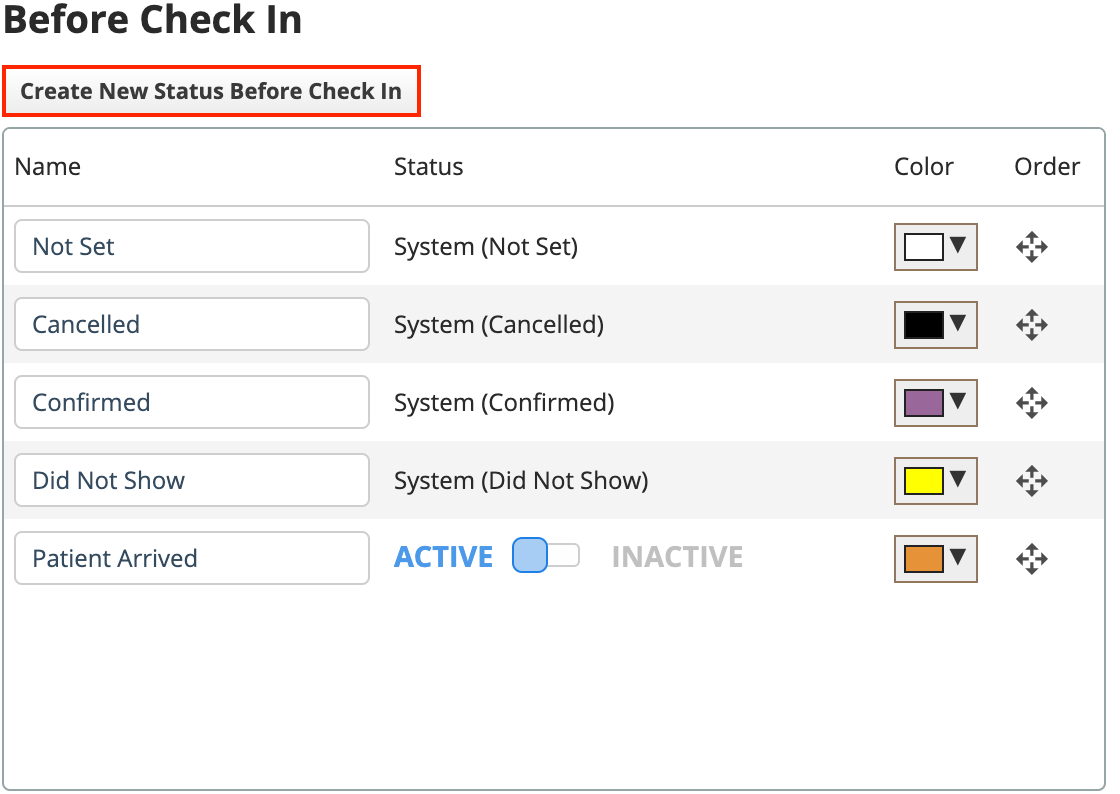
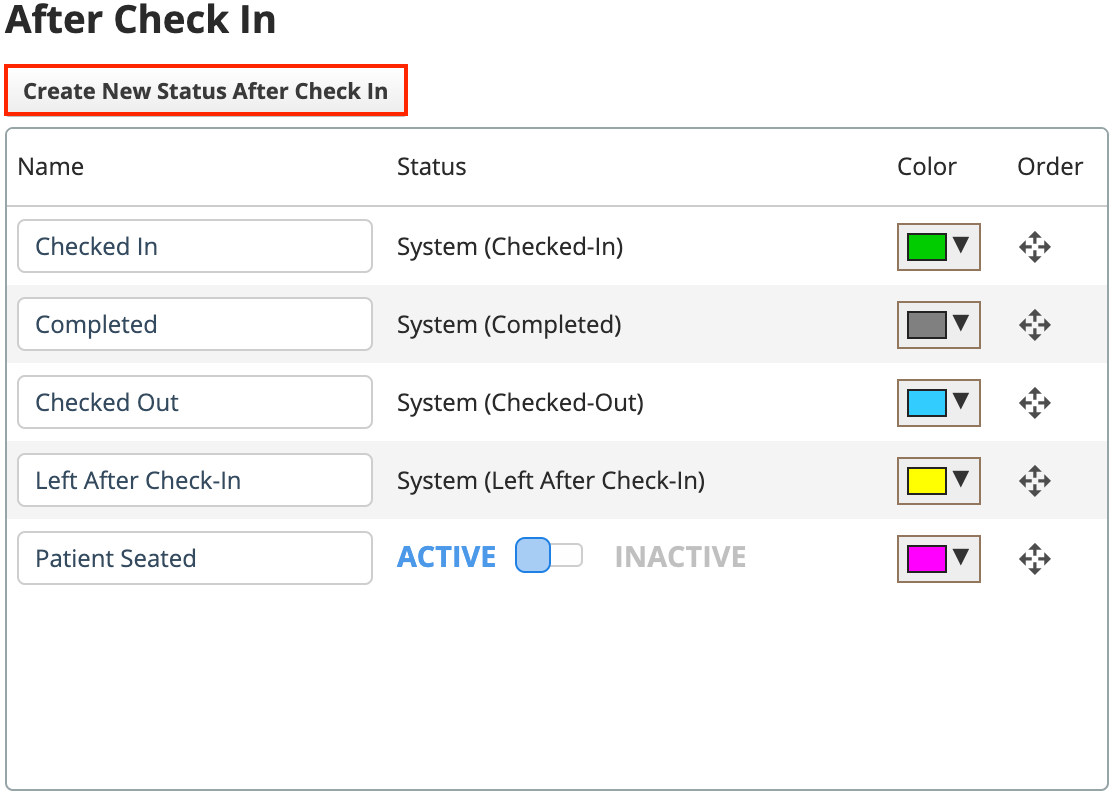
- A new line appears at the end of the list
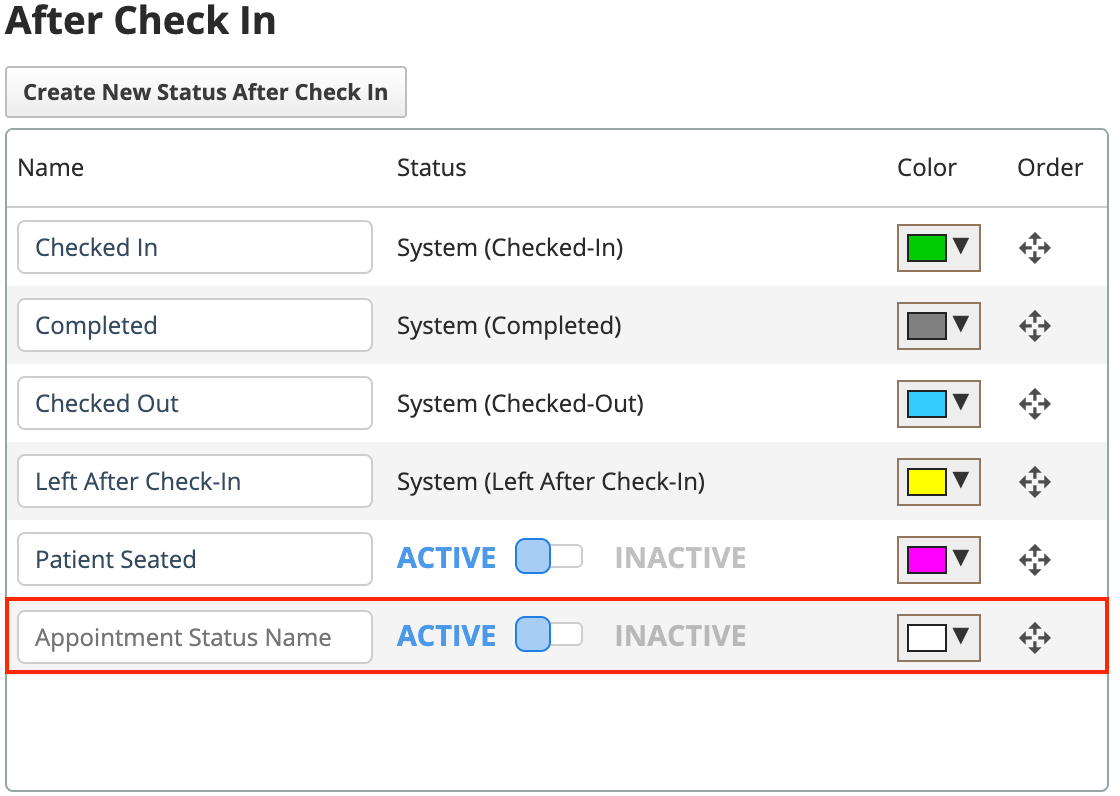
- Specify:
- Appointment status name: The short description that appears when editing an appointment.
- Status: Active statuses appear for use in the system. Inactive statuses cannot be used, but appear in historical references.
- Color: This colour appears on the left side of the appointment body.
- To change the order the statuses appear in drop-down menus, Select
 and drag the appointment status to its new location.
- Select Save to save your changes
- Select Cancel to discard your changes.
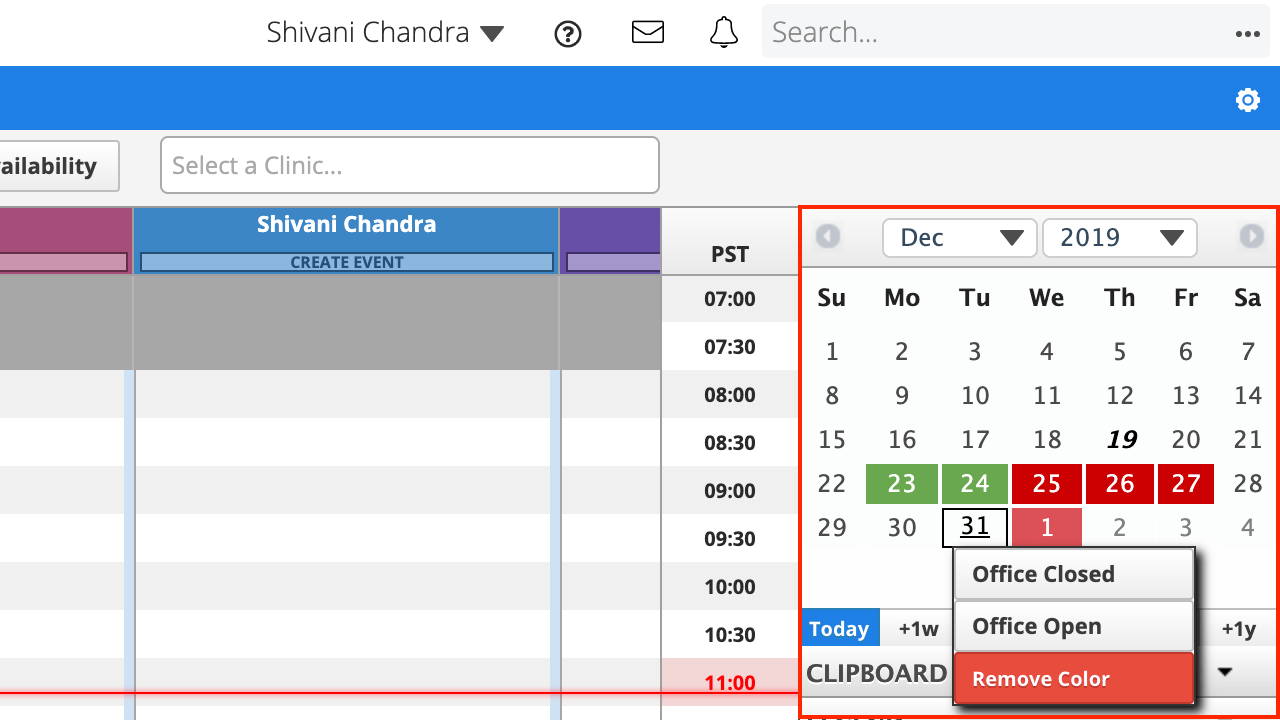
Calendar Colors
The mini-calendar in Scheduling can be colour-coded to highlight special days, such as holidays or other office closures.
Color options are configured in Practice Settings, and they can also be assigned to days from here or from the mini-calendar by right-clicking dates on the mini-calendar.
Each date can only have one calendar color assigned.
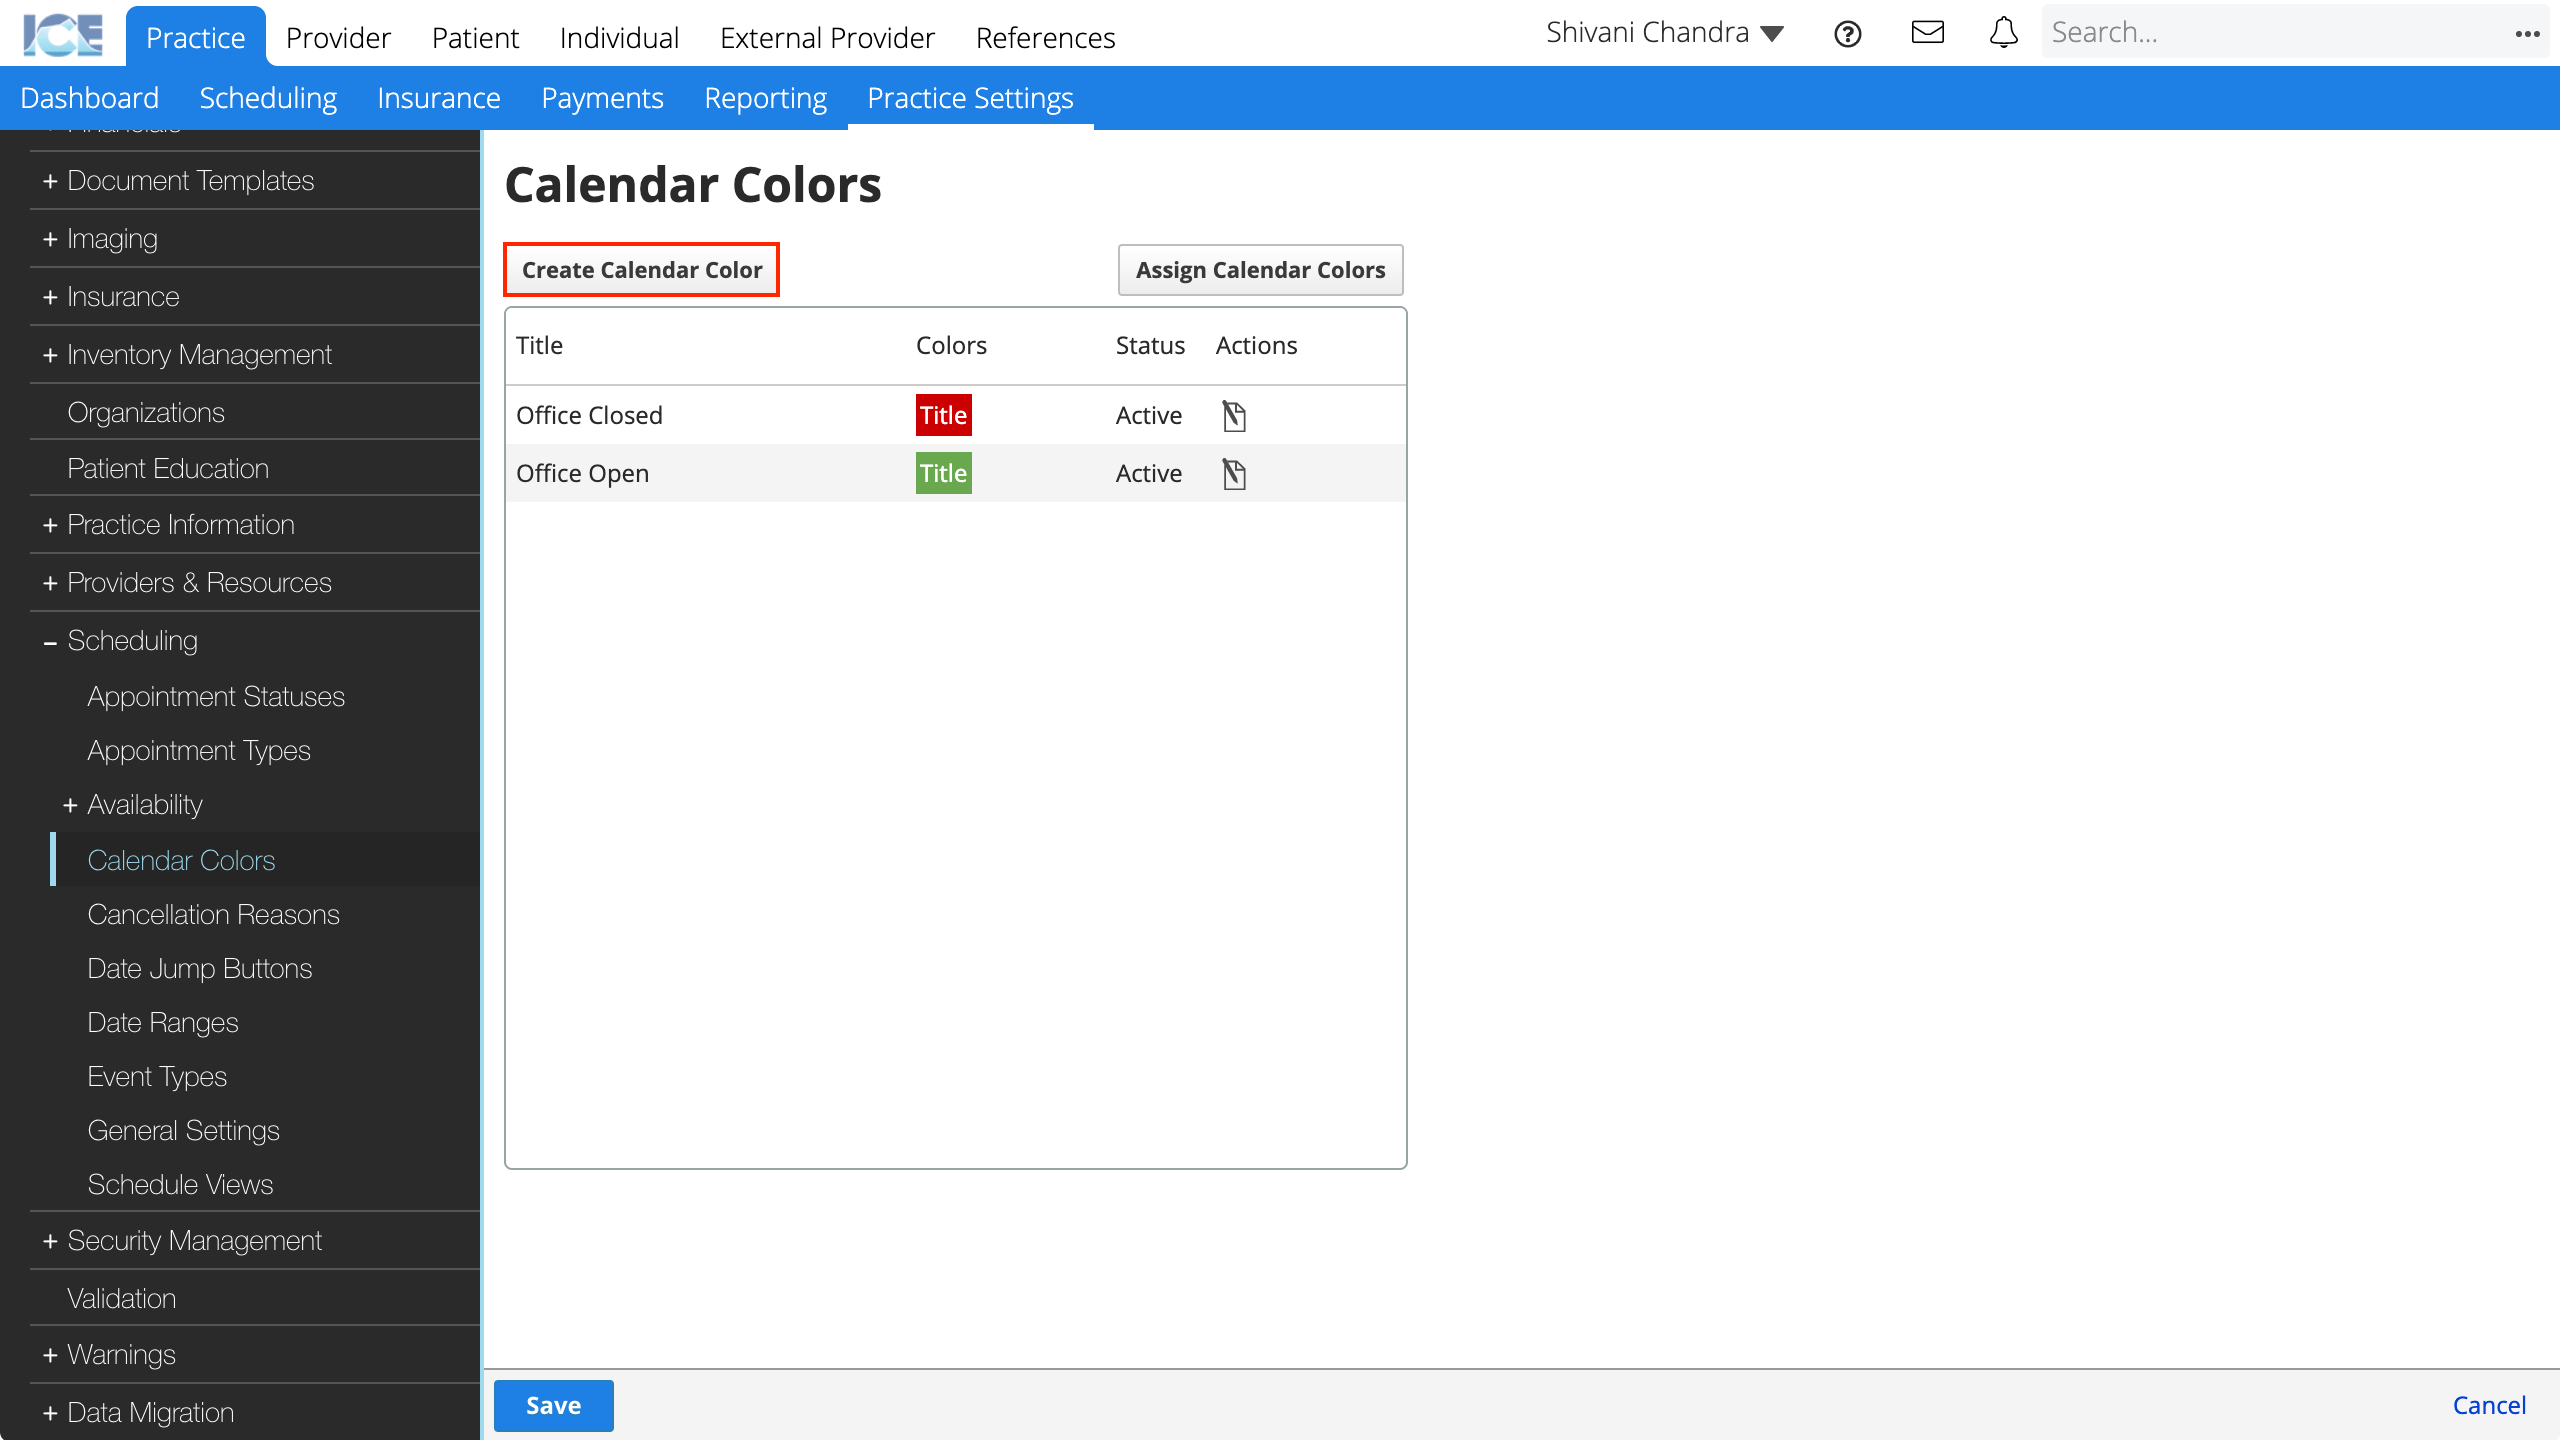
To create a new calendar color:
- Go to Practice Settings > Scheduling > Calendar Colors
- Select Create Calendar Color
- Complete the required fields
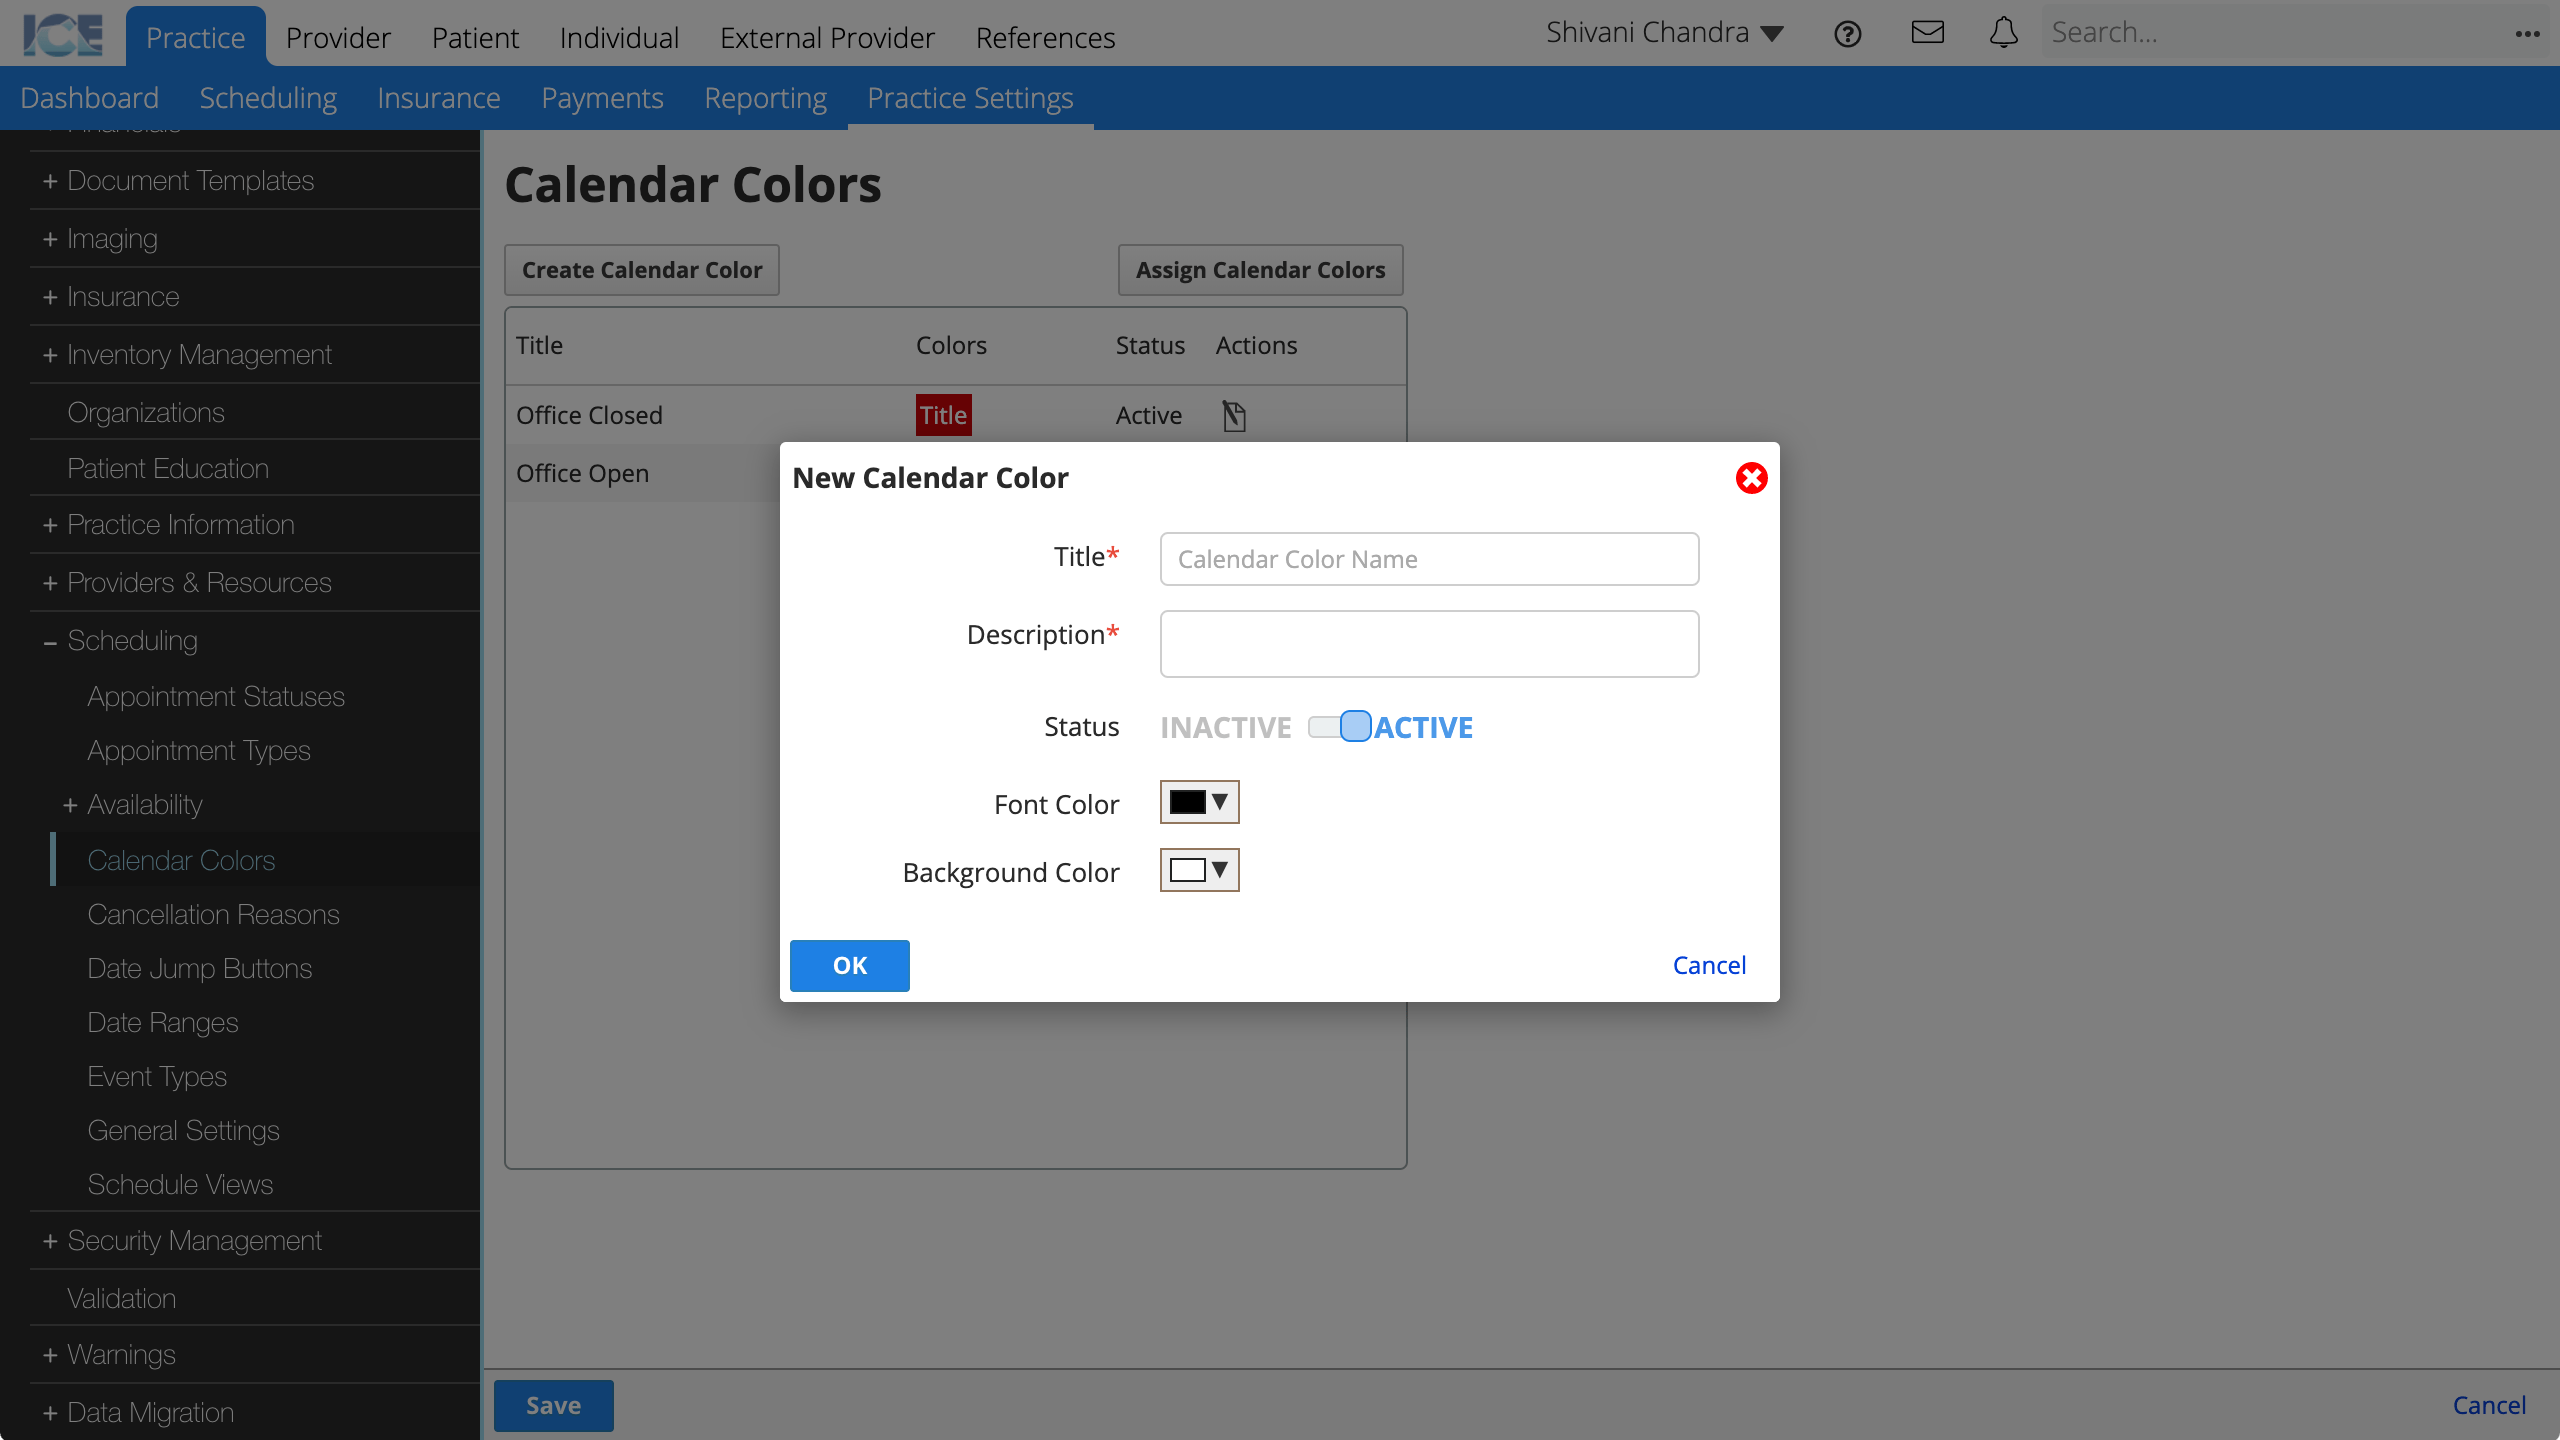
- Title: A short description that appears when assigning calendar colors.
- Description: A longer description that only appears here in Practice Settings.
- Status: Active calendar colors appear for use in the system. Inactive calendar colors cannot be used, but appear in historical references.
- Colors: The font and background colours that appear on a mini-calendar date when a calendar color is assigned to that date.
- Select OK to create the new calendar color
- Repeat steps 2 to 4 to create more calendar colors.
- Select Save to save your changes
- Select Cancel to discard your changes.
To edit an existing calendar color, select ![]() in the Actions column.
in the Actions column.
To assign colors to days on the mini calendar:
- Select Assign Calendar Colors
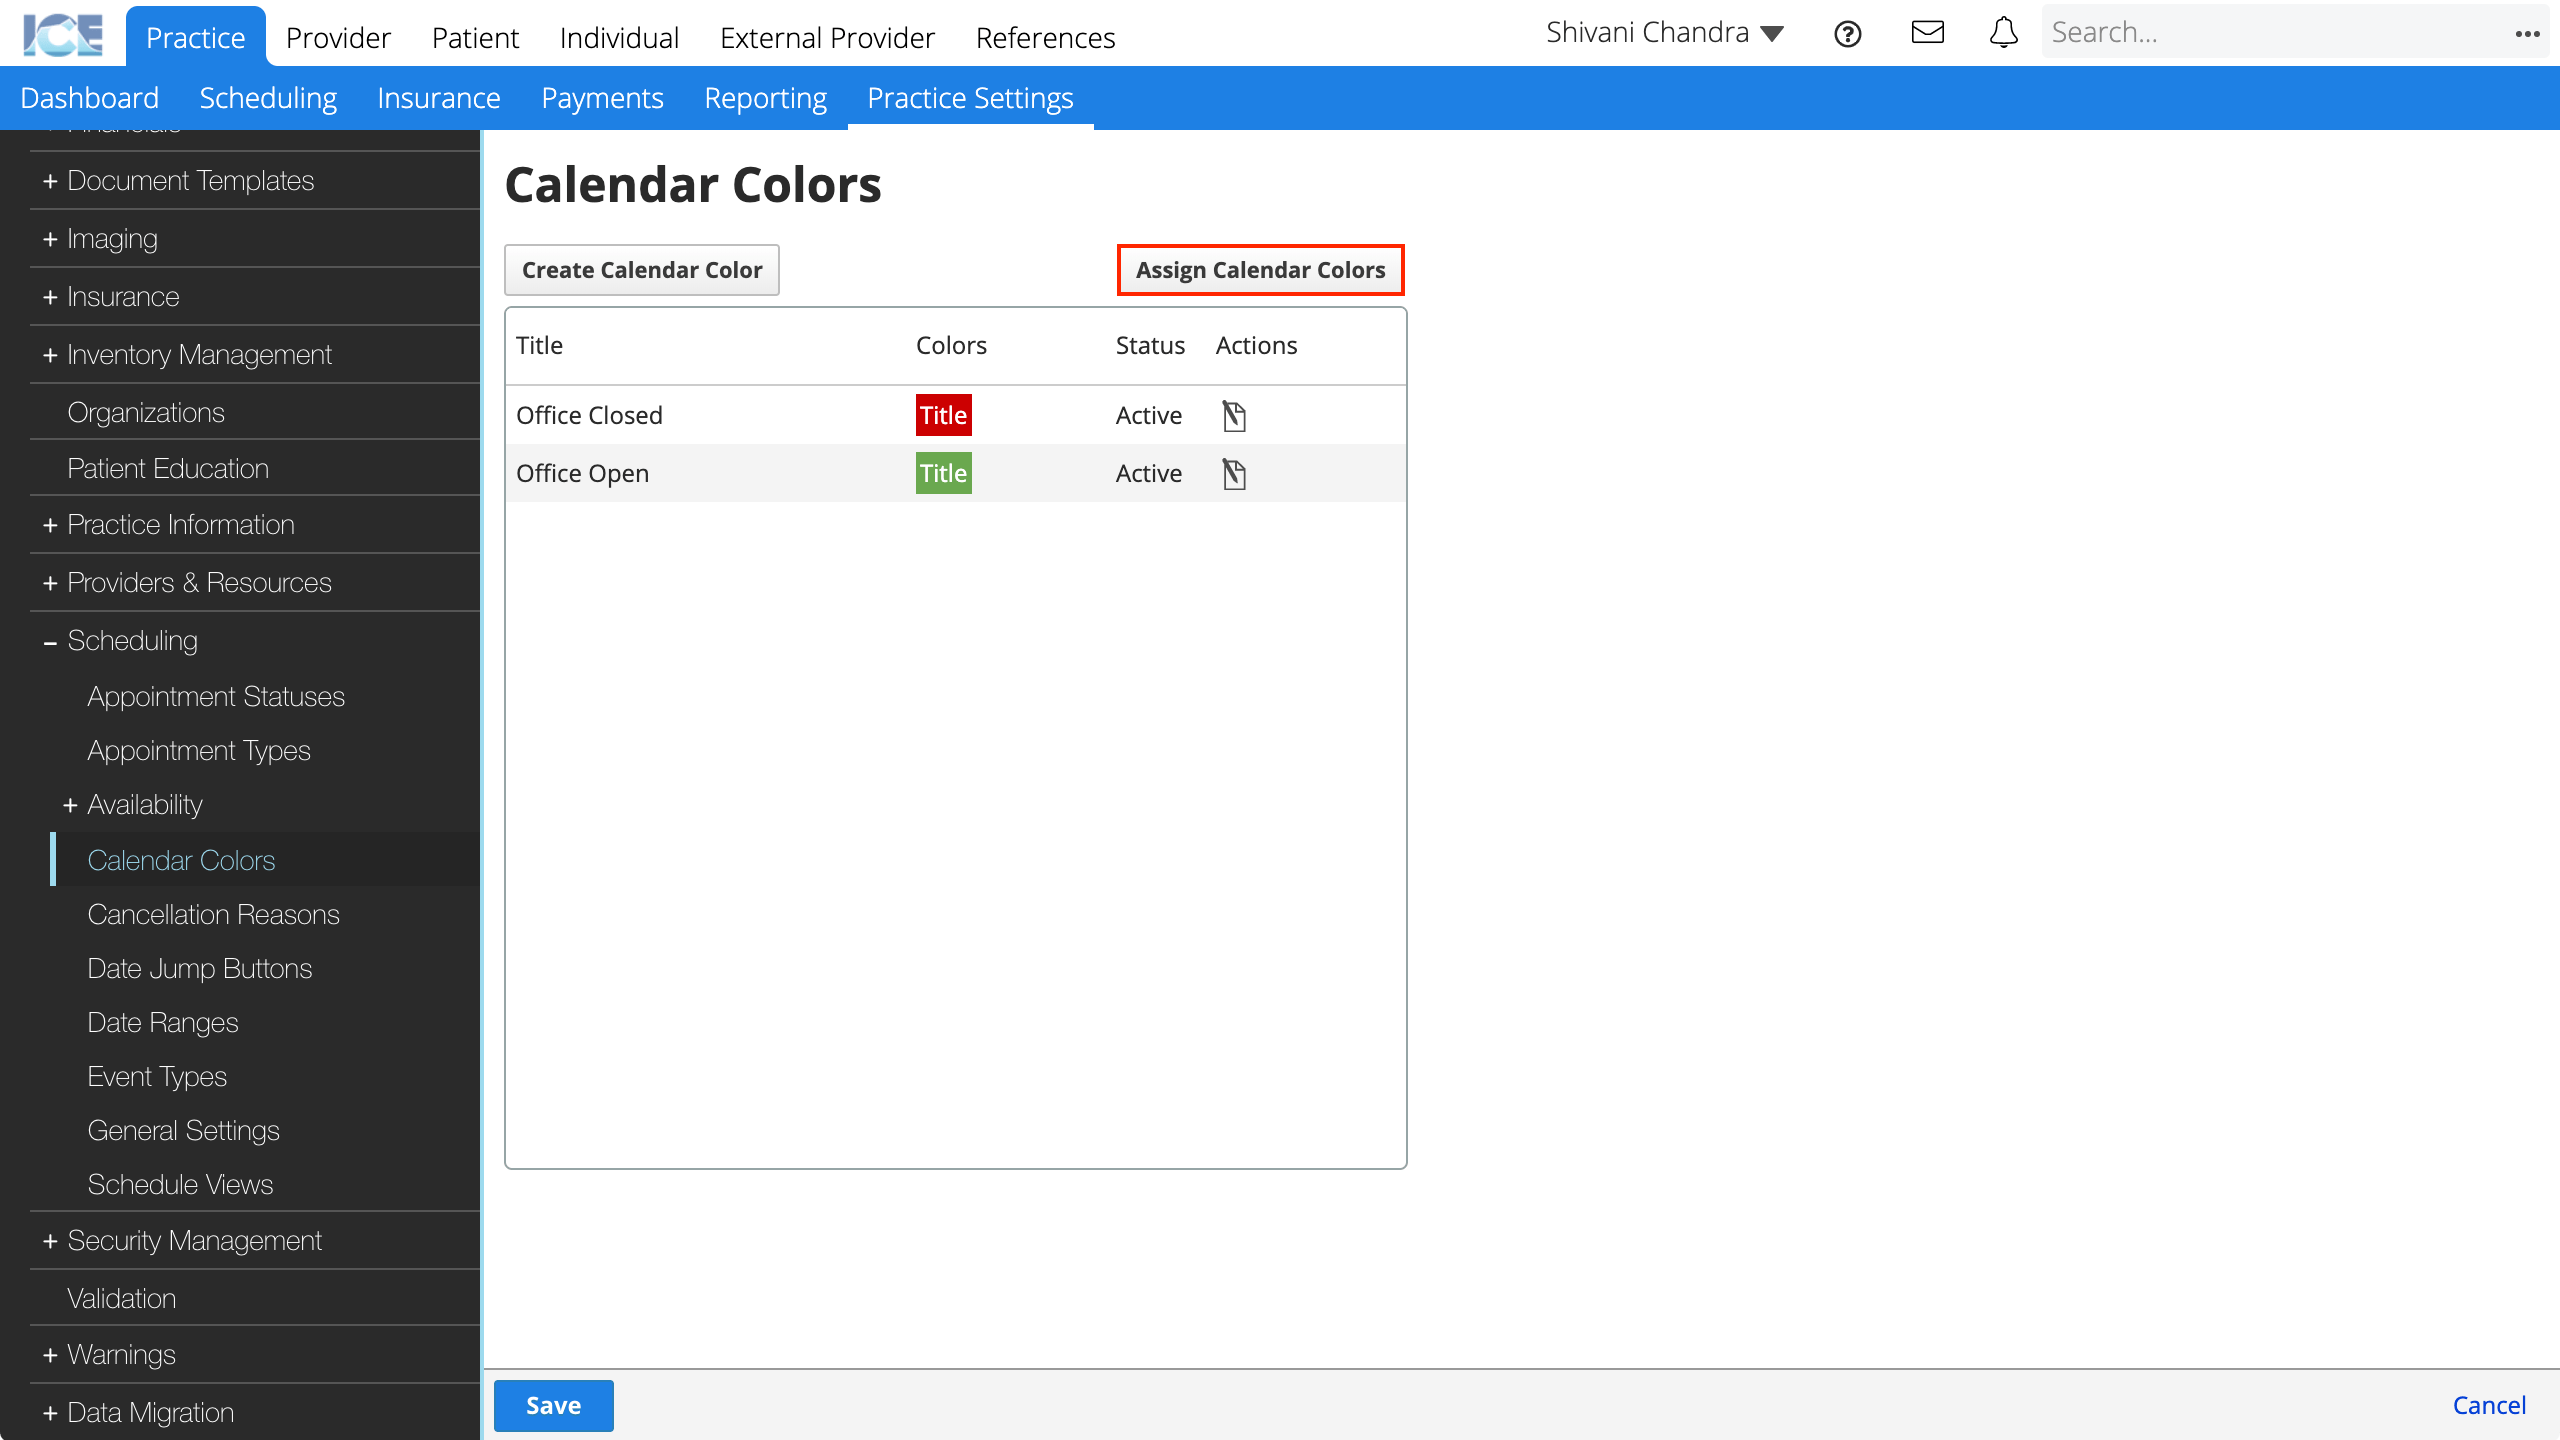
- This opens a new window with the current month and upcoming 11 months
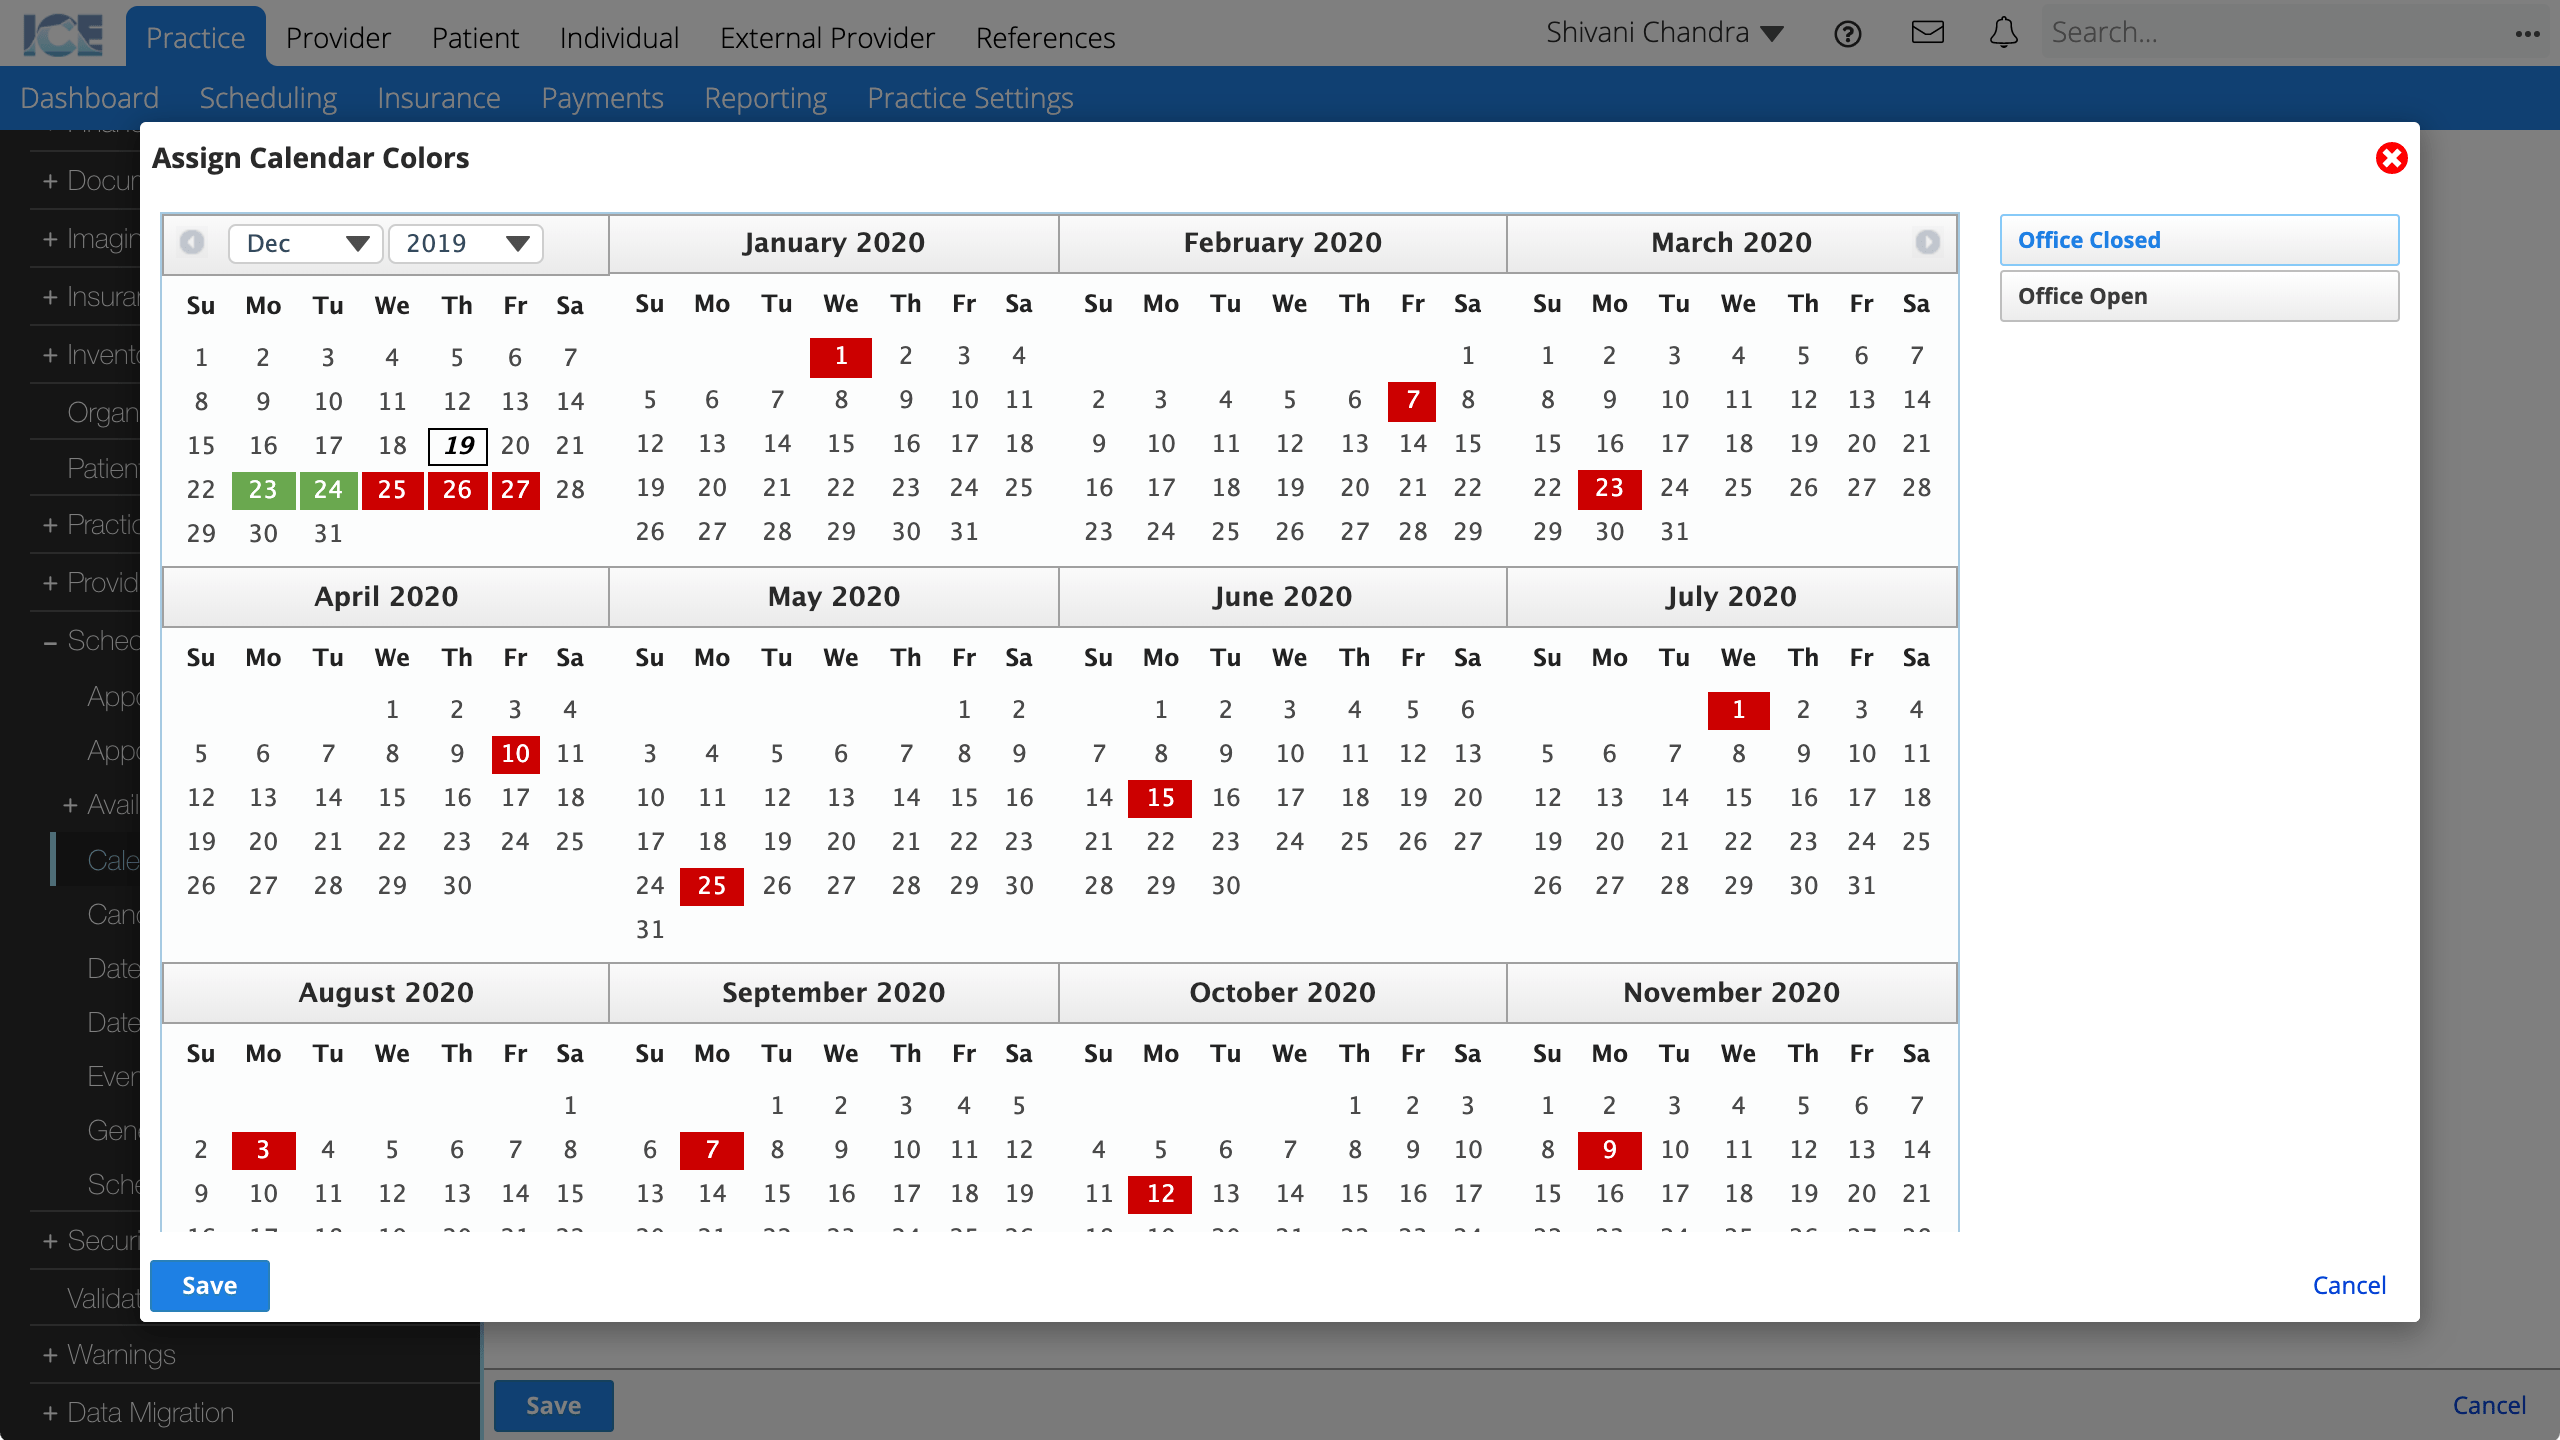
- In the top right corner, is a list of your available calendar colors.
- Use the jump buttons at the bottom to see previous or future months.
- Select the calendar color you want to assign from the list on the right
- The one highlighted in blue is the active one that you are assigning.
- To assign the active color, select days on the calendar
- To select a date range, select the first day in a range and then hold Shift on your keyboard and select the end of the range.
- Select Save to save your changes
- Select Cancel to discard your changes.
The calendar colors that you assigned appear on the mini calendar in Scheduling. Each date can only have one calendar color assigned.
Cancellation Reasons
If a patient cancels or does not show up for an appointment, you can add a cancellation reason. Cancellation reasons appear in patient appointment history reports and can add a strike to a patient's record.
- Go to Practice Settings > Scheduling > Cancellation Reasons
- Select Create Cancellation Reason

- Complete the required fields
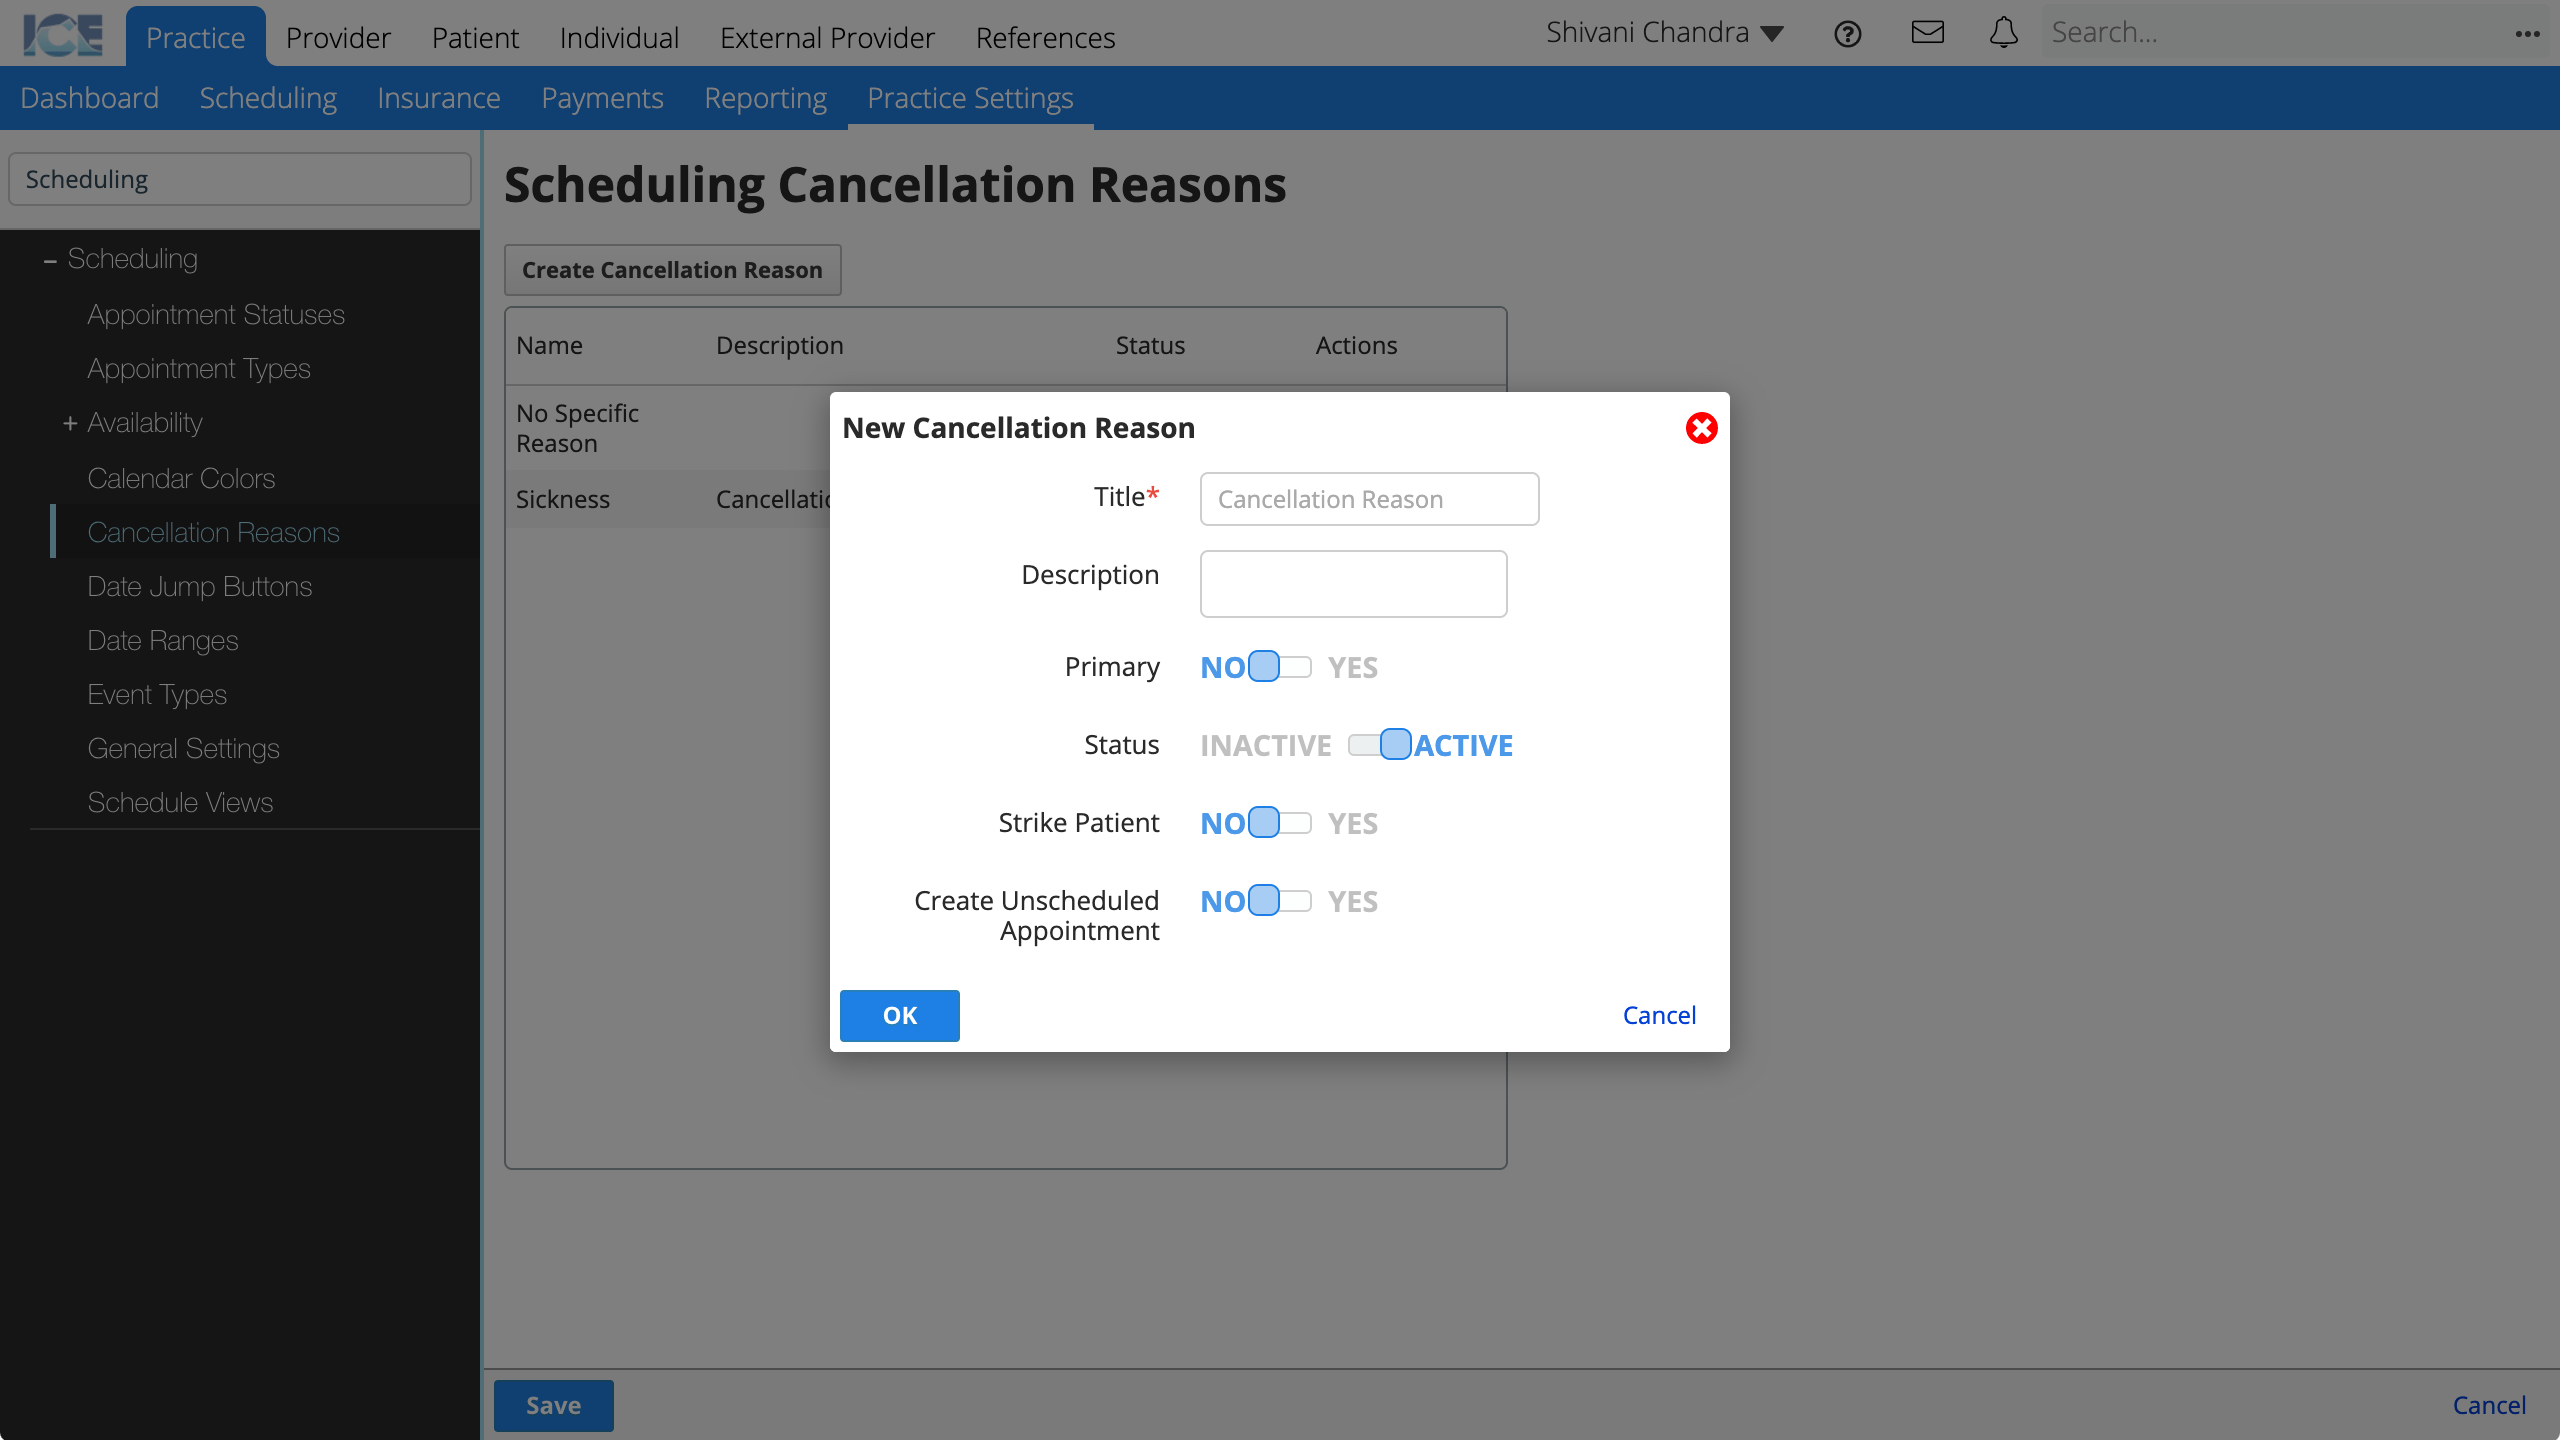
- Title: A short description that appears when cancelling an appointment and in a patient's cancelled appointment history.
- Description: A longer description that only appears here in Practice Settings.
- Primary: Should this cancellation reason be the default option when cancelling an appointment?
- Status: Active reasons appear for use in the system. Inactive reasons cannot be used, but appear in historical references.
- Strike Patient: Should cancelling an appointment with this reason add a strike to the patient's record?
- You can edit this option when cancelling an appointment.
- Create Unscheduled Appointment: Should cancelling an appointment with this reason create an unscheduled appointment with the same appointment type and clinic for re-scheduling?
- You can edit this option when cancelling an appointment.
- To change the order cancellation reasons appear in the drop-down menu, select and drag the reason to a new location.
- Select OK
- Repeat steps 2 to 4 to create more reasons
- Select Save to save your changes
- Select Cancel to discard your changes.
To edit an existing cancellation reason, select ![]() in the Actions column.
in the Actions column.
Date Jump Buttons
Configure the labels and jump values for the date jump buttons below the mini-calendar. The Today button cannot be configured.
- Go to Practice Settings > Scheduling > Date Jump Buttons
- Update the available settings
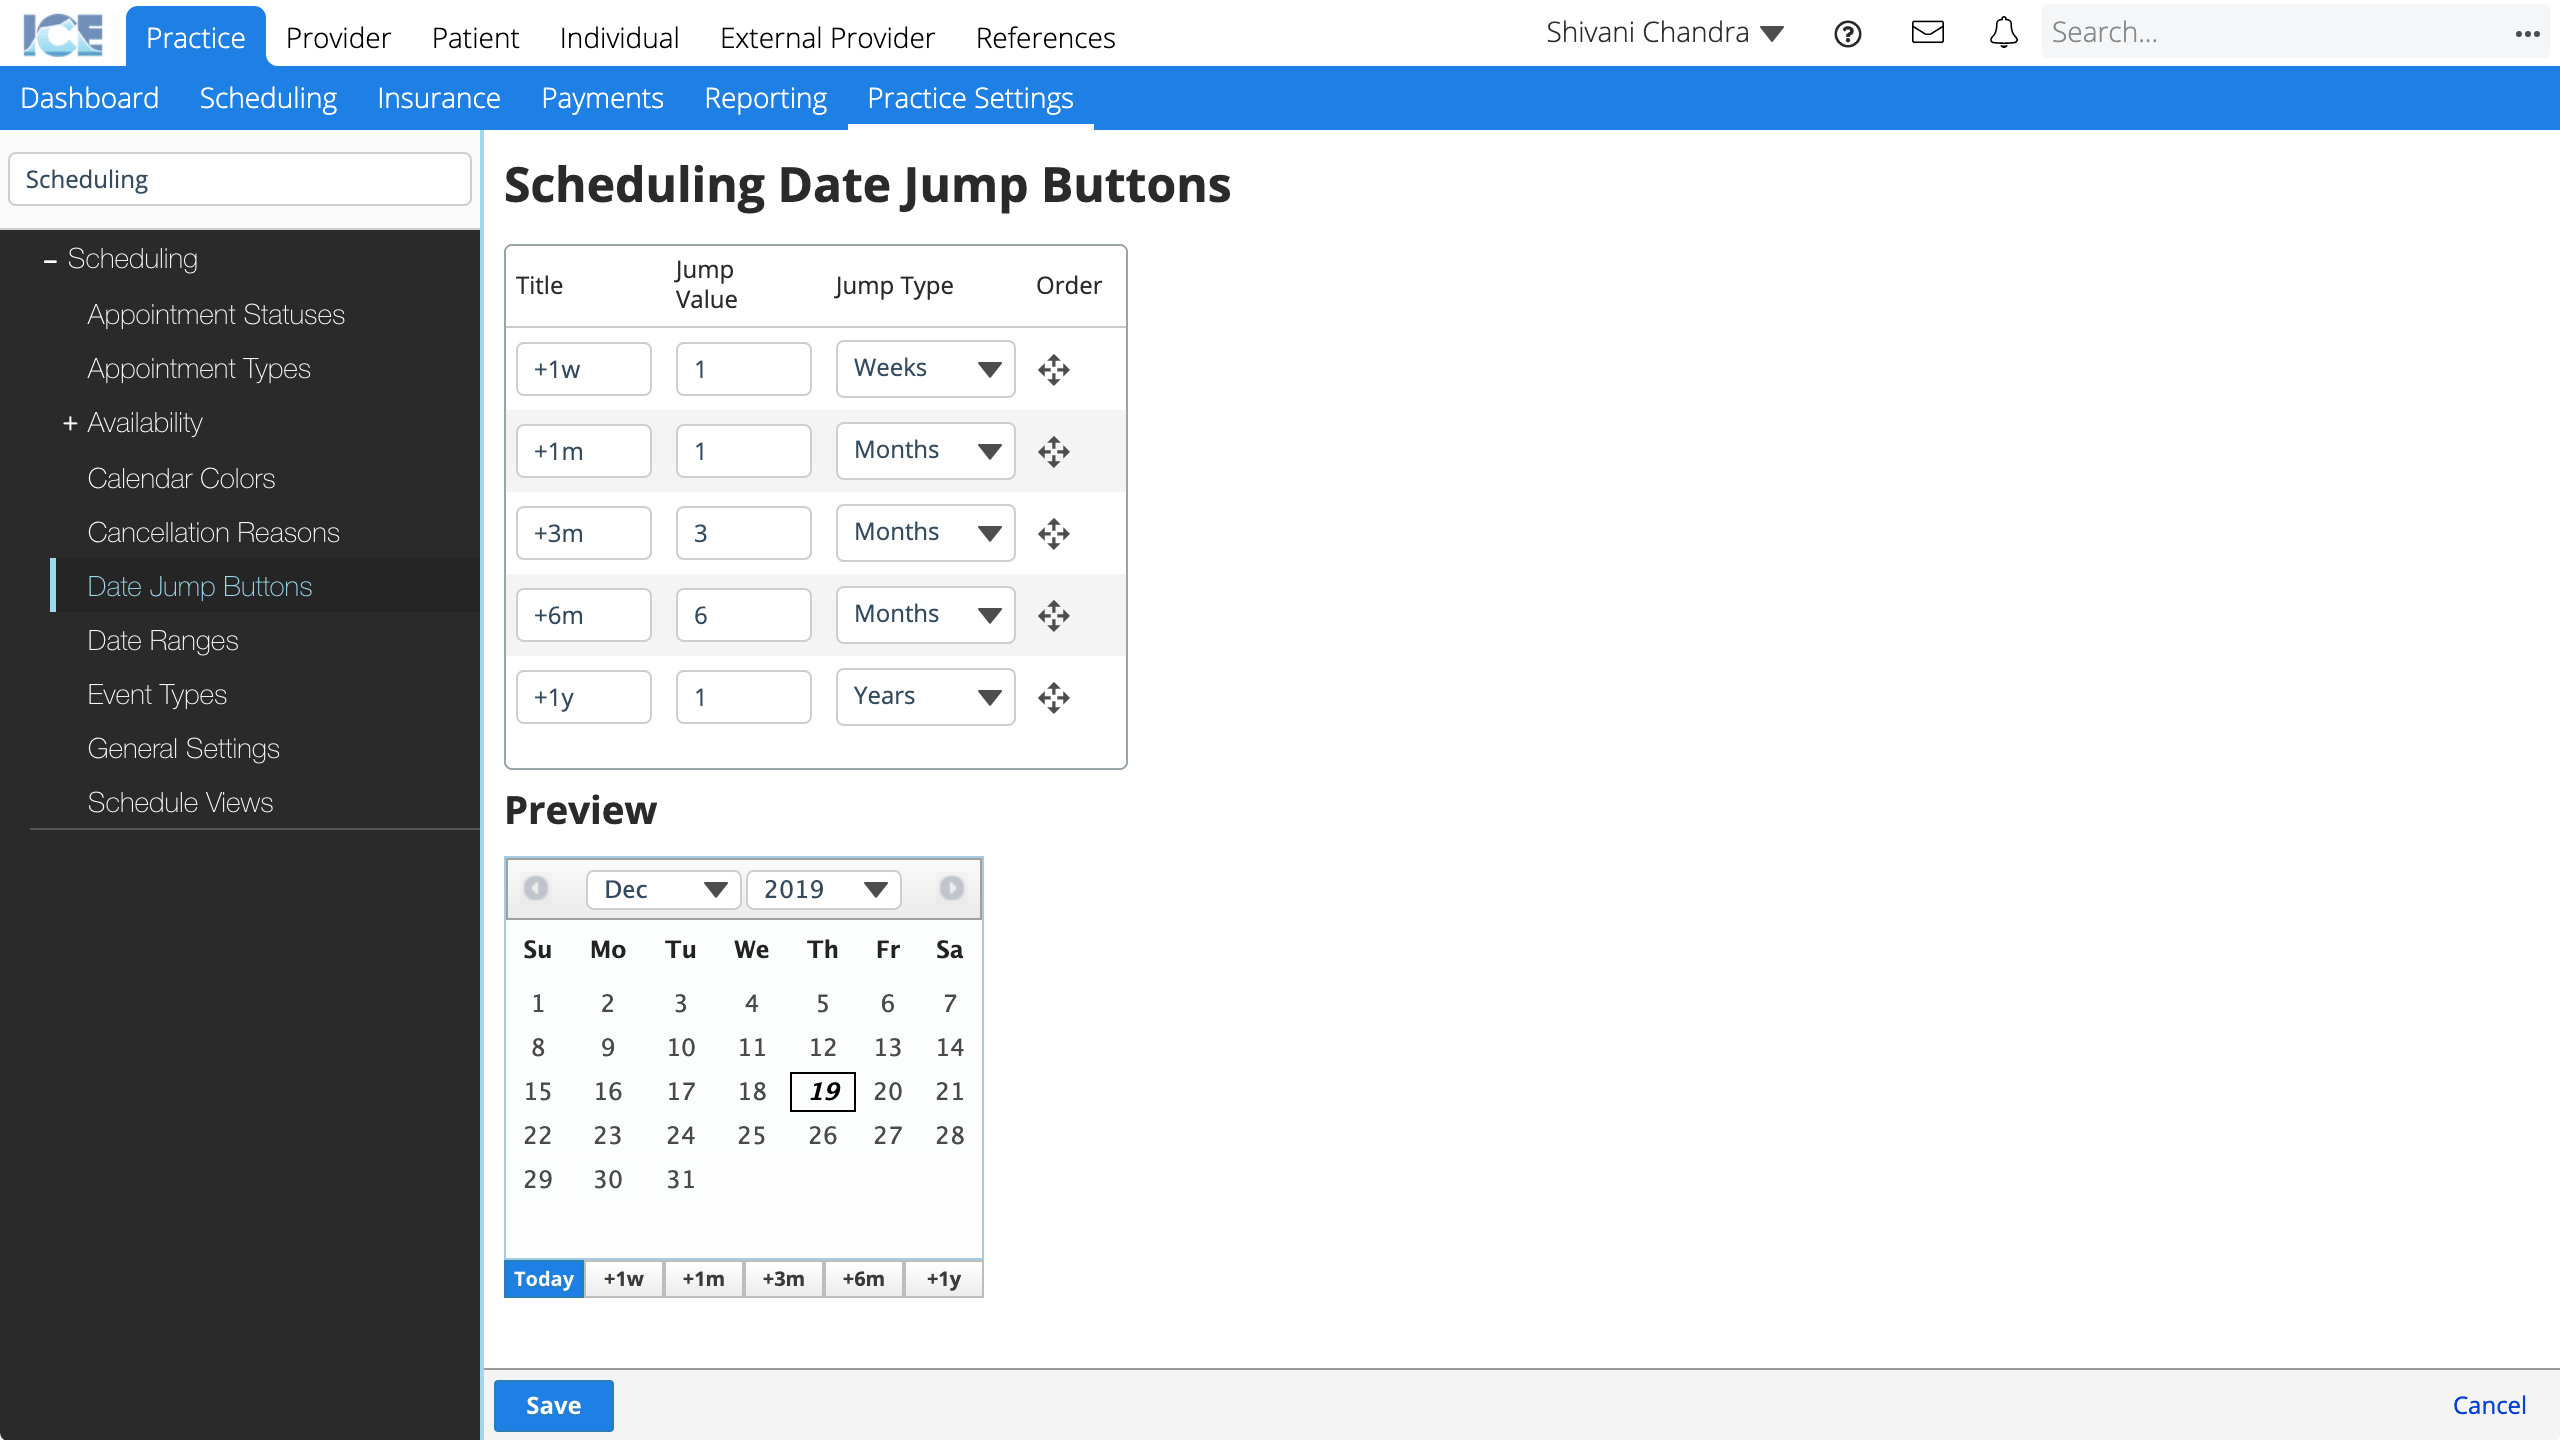
- The interactive preview shows what your changes look like and how they work on the mini-calendar.
- Title: The short description that appears on the date jump button itself.
- Jump Value: How far to jump back or forward on the calendar. Negative values enable jumps back in time.
- Jump Type: What type of jump to make. Days, weeks, months, or years.
- Order: To change the order of the date jump buttons, select and drag it to a new spot in the list.
- Repeat as necessary
- Select Save to save your changes
- Select Cancel to discard your changes.
Date Ranges
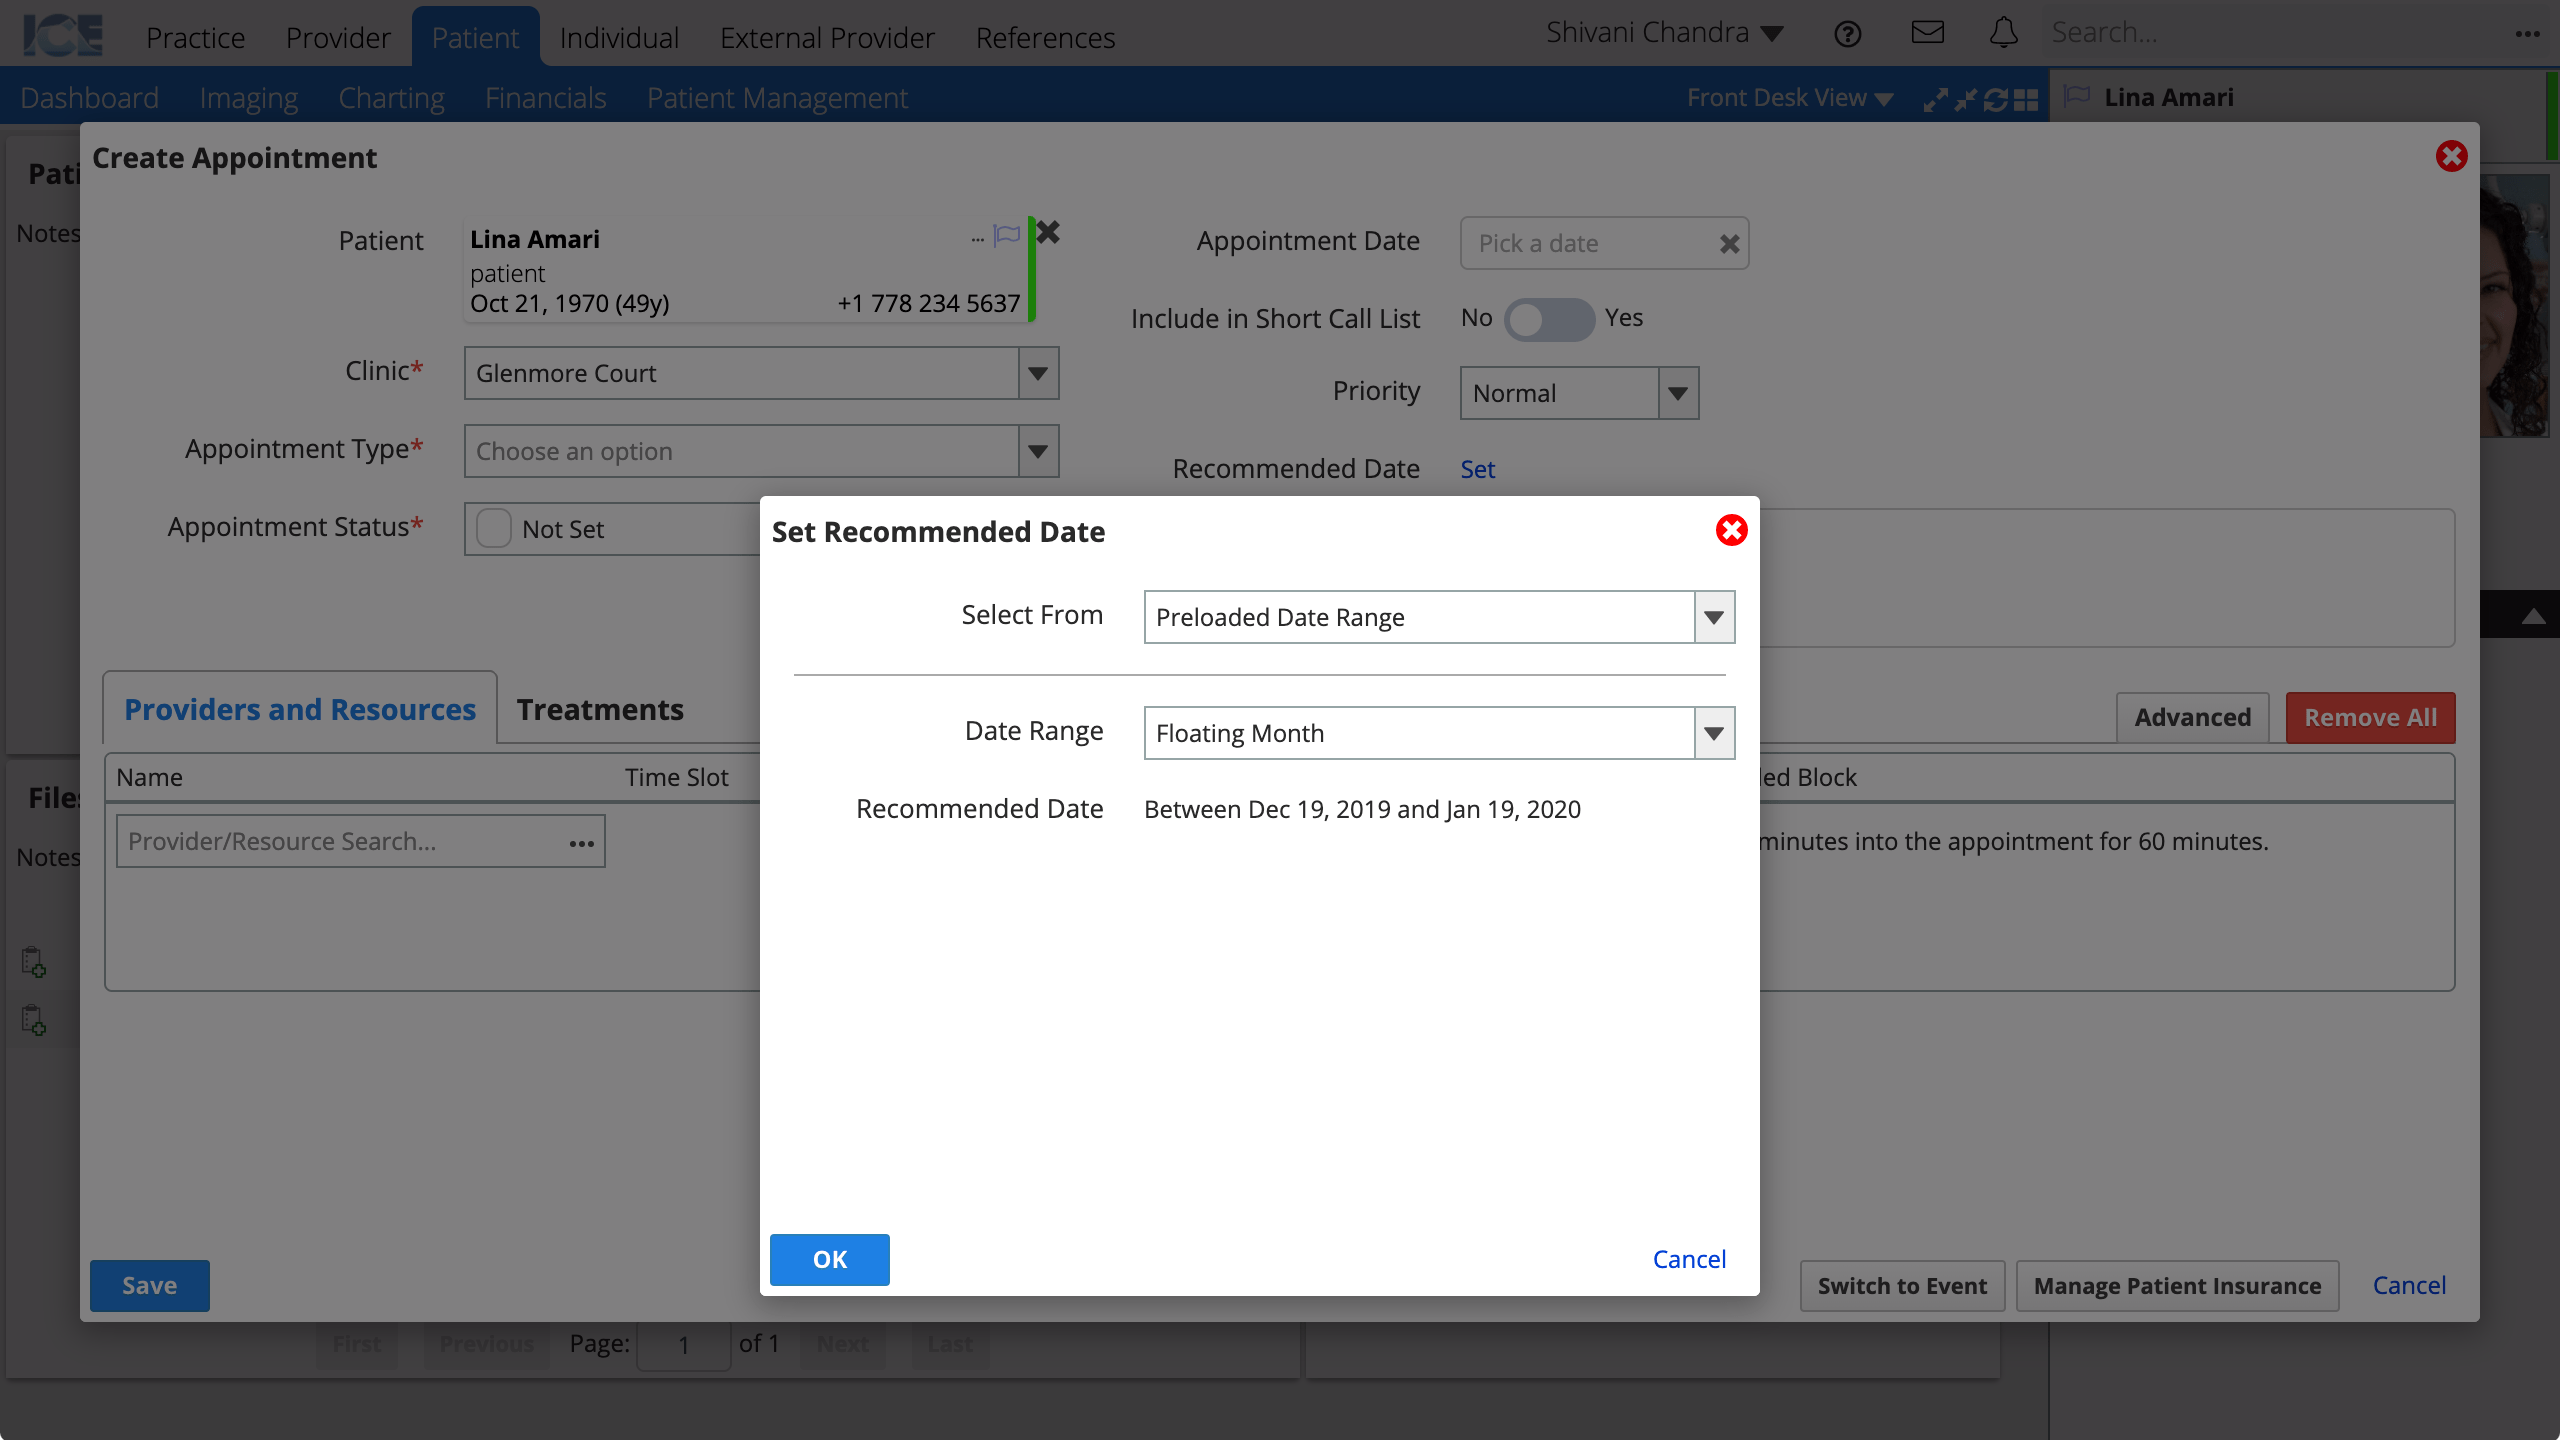
These date ranges appear when setting a recommended date for an unscheduled or short call list appointment and choosing the Preloaded Date Range option.
- Go to Practice Settings > Scheduling > Date Ranges
- Select Create Date Range
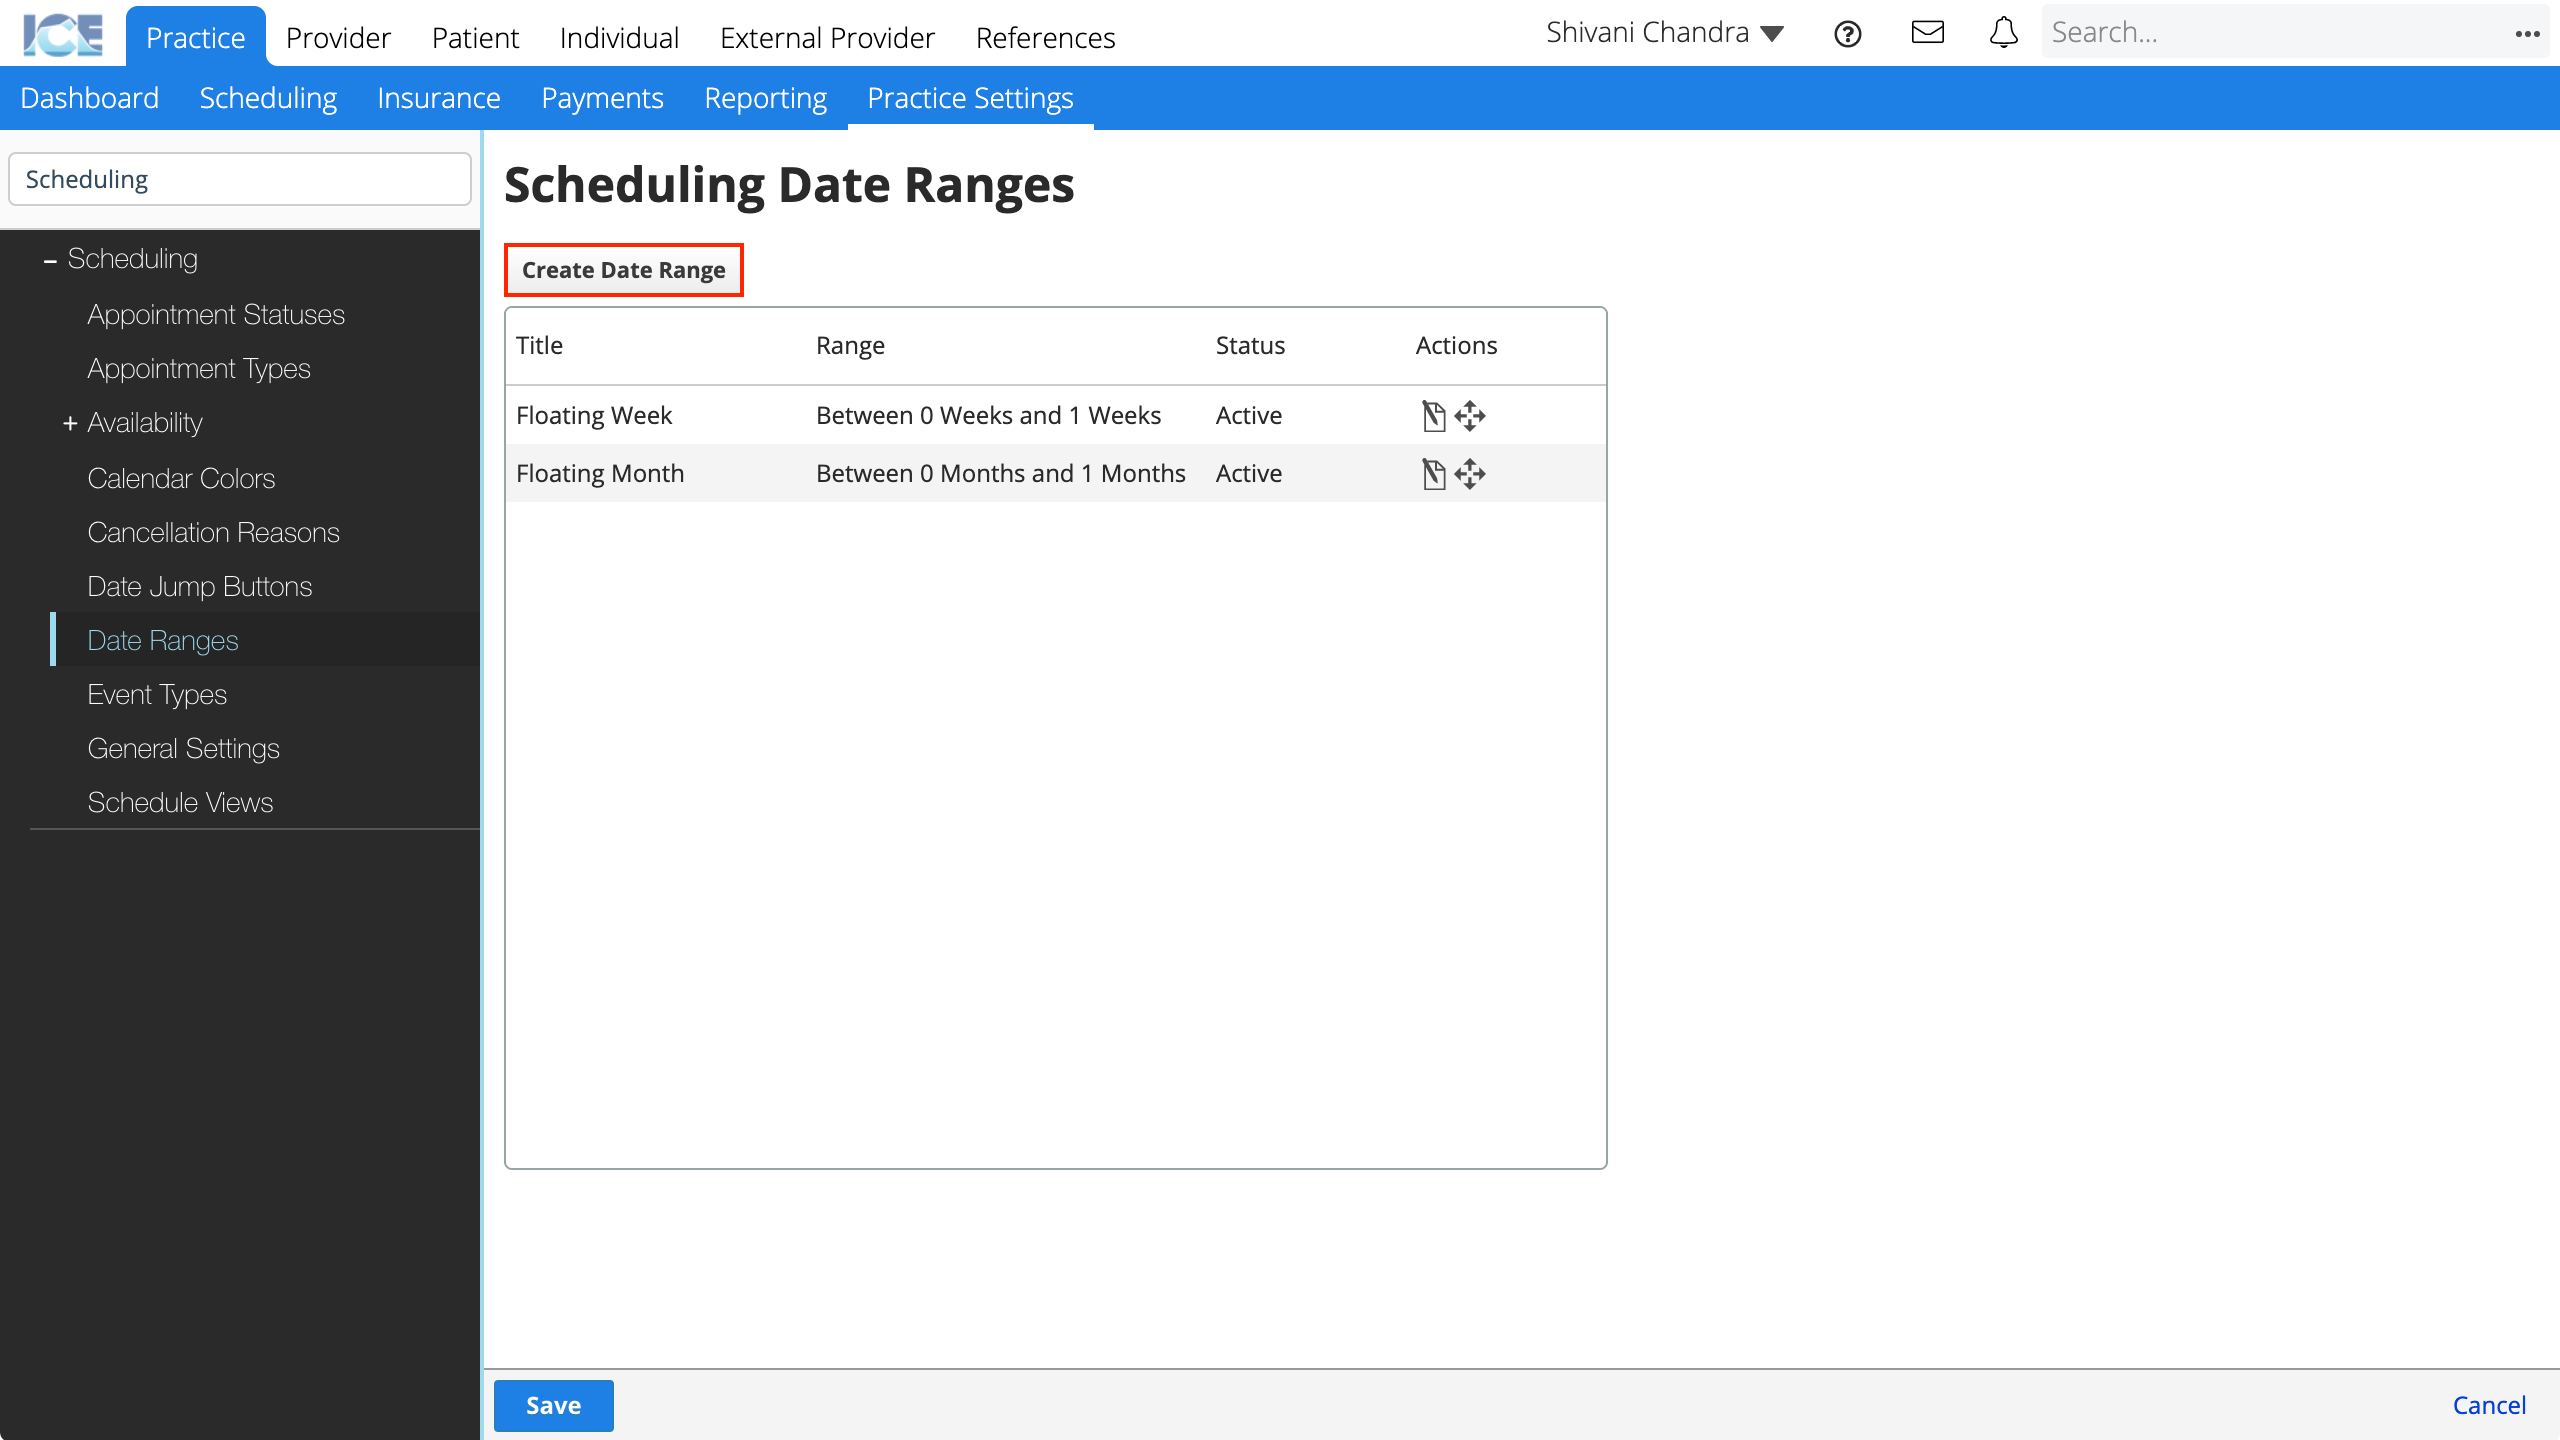
- Complete the required fields
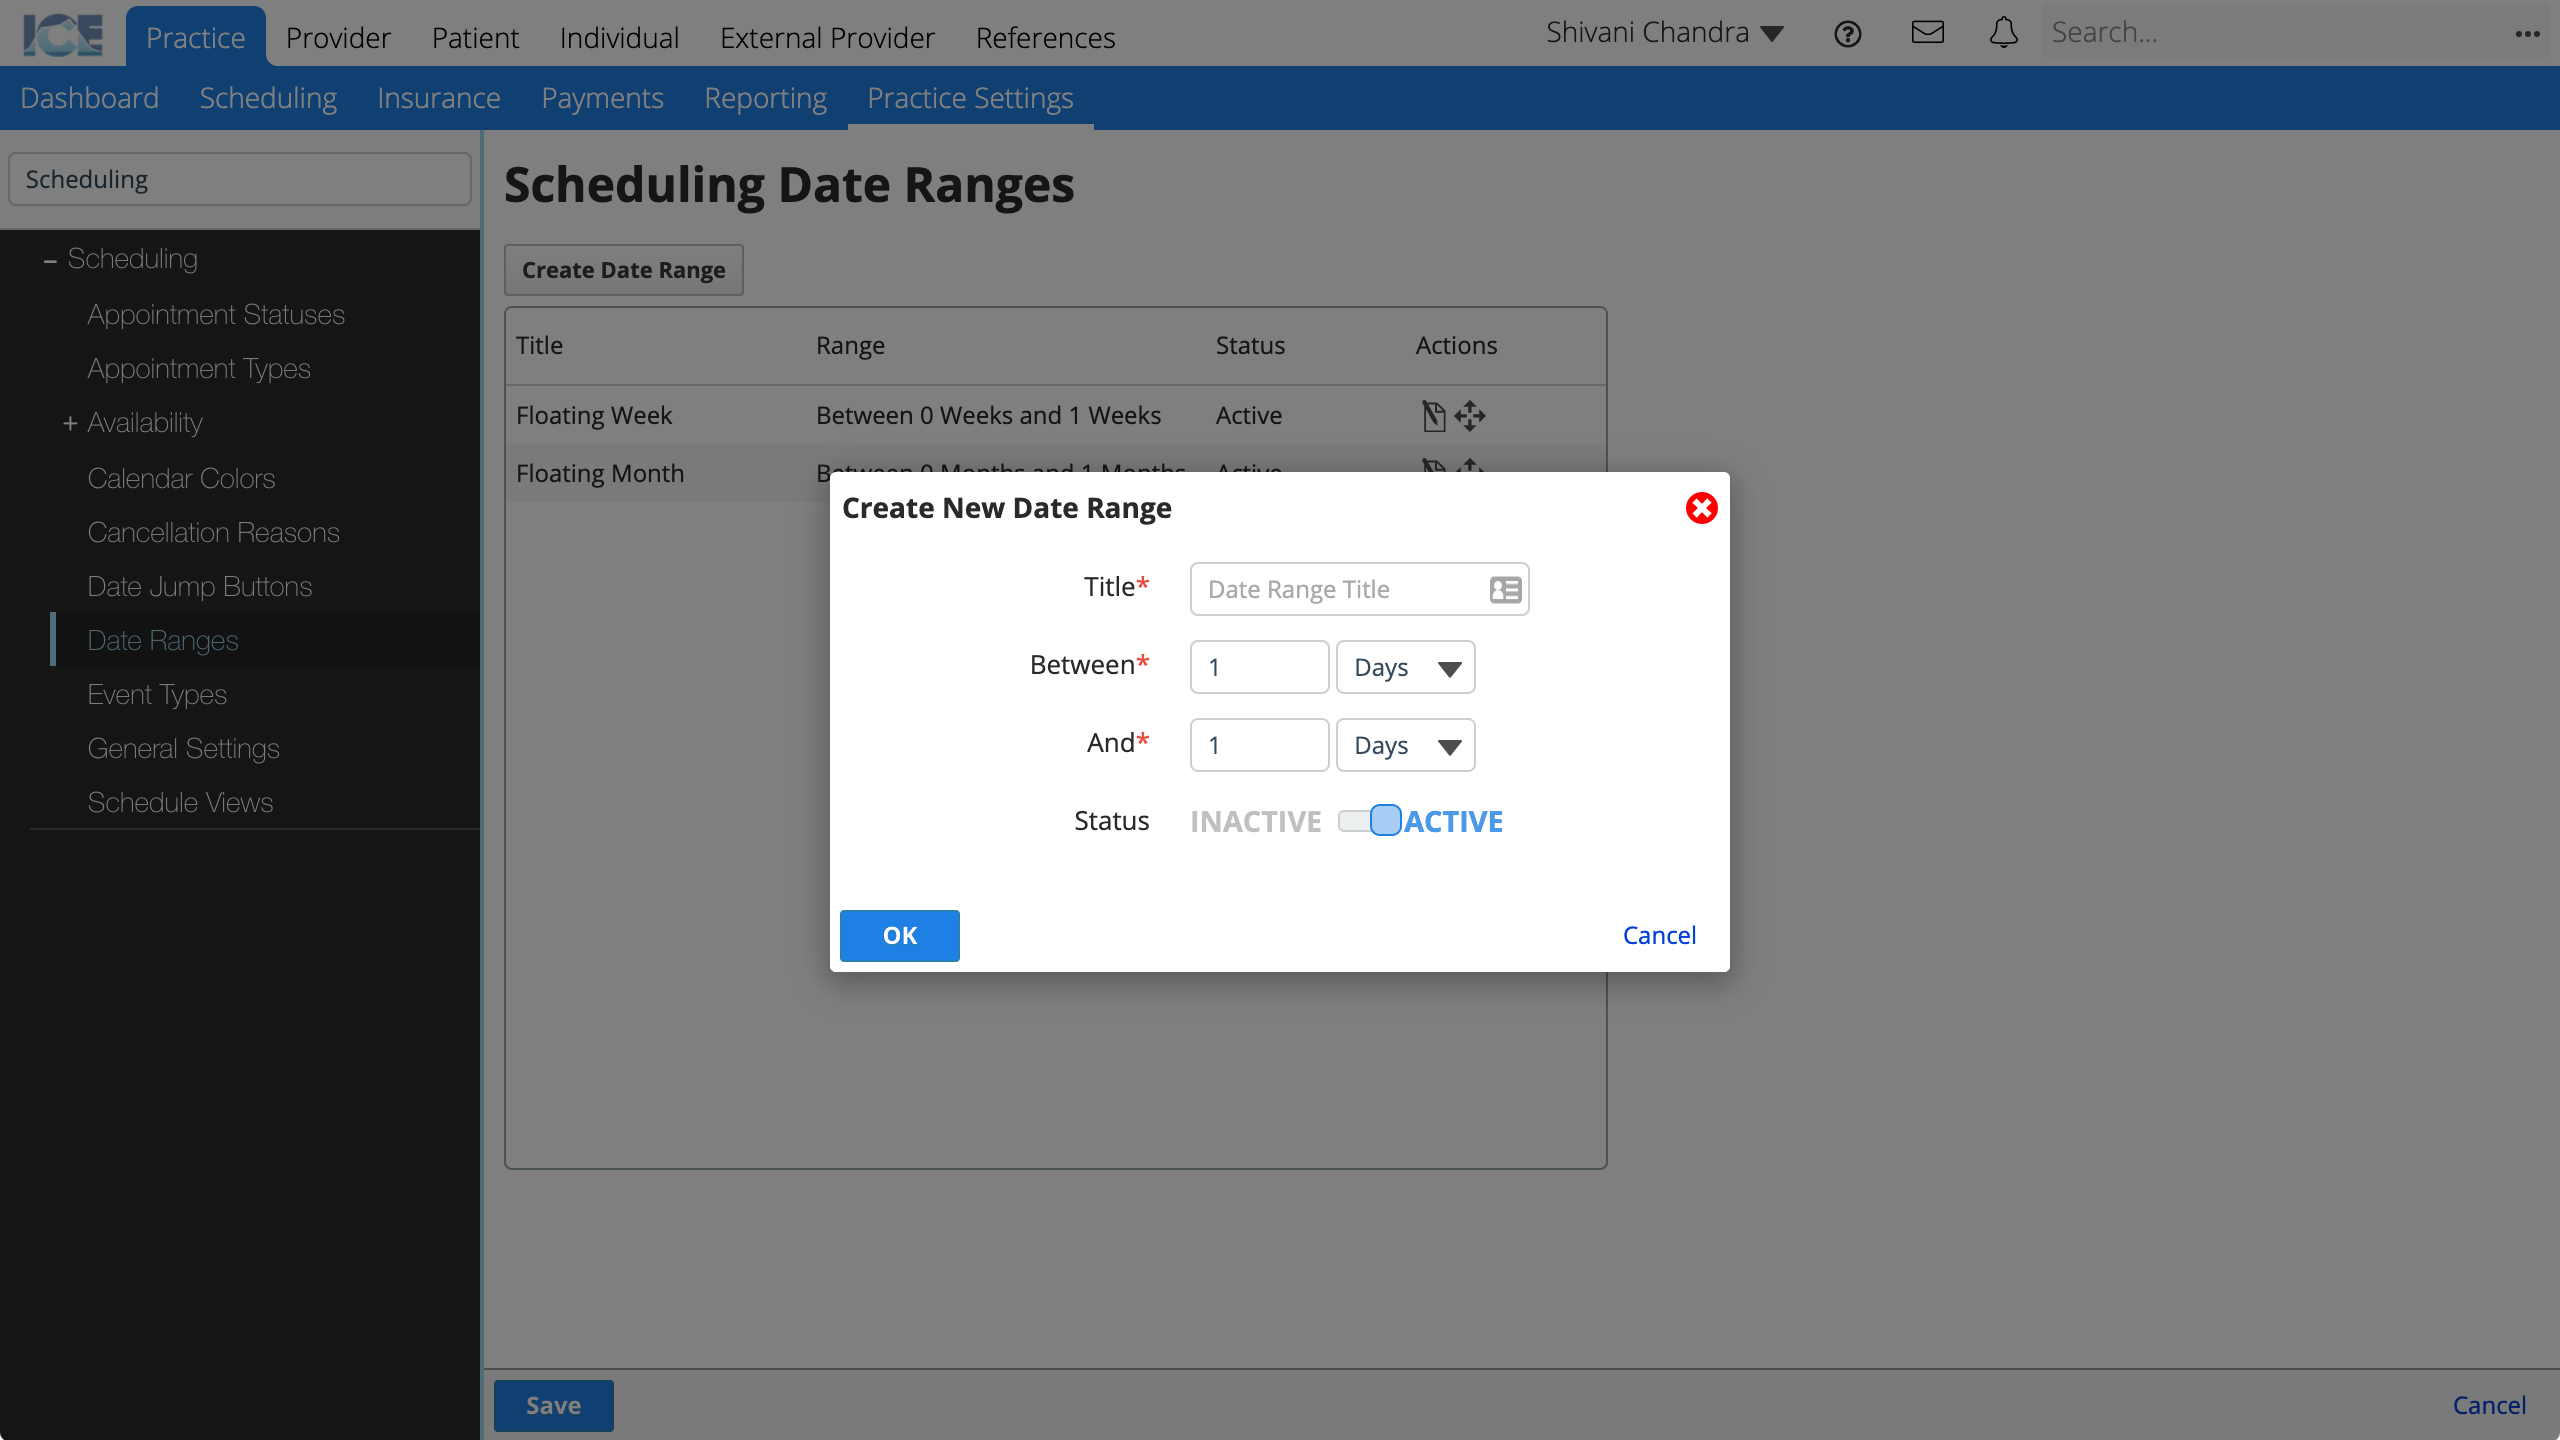
- Title: A short description that appears in the drop-down menu when selecting a preloaded date range for setting a recommended appointment date.
- Range: Use the Between and And fields to create a range of days, weeks, months or years.
- When a scheduler chooses one of these ranges, the actual date values are calculated based on today's date.
- For example, a range of Between 0 Weeks and 1 Weeks, shows a recommended date of between today and one week from today.
- Status: Active ranges appear for use in the system. Inactive ranges cannot be used, but appear in historical references.
- To change the order of the date ranges, Select and drag the date range to its new location
- Select OK to save the new date range
- Repeat steps 2 to 4 to create more ranges
- Select Save to save your changes
- Select Cancel to discard your changes.
To edit an existing date range, select ![]() in the Actions column.
in the Actions column.
General Settings
Change general scheduling settings throughout your practice.
- Go to Practice Settings > Scheduling > General Settings
- Update the available settings
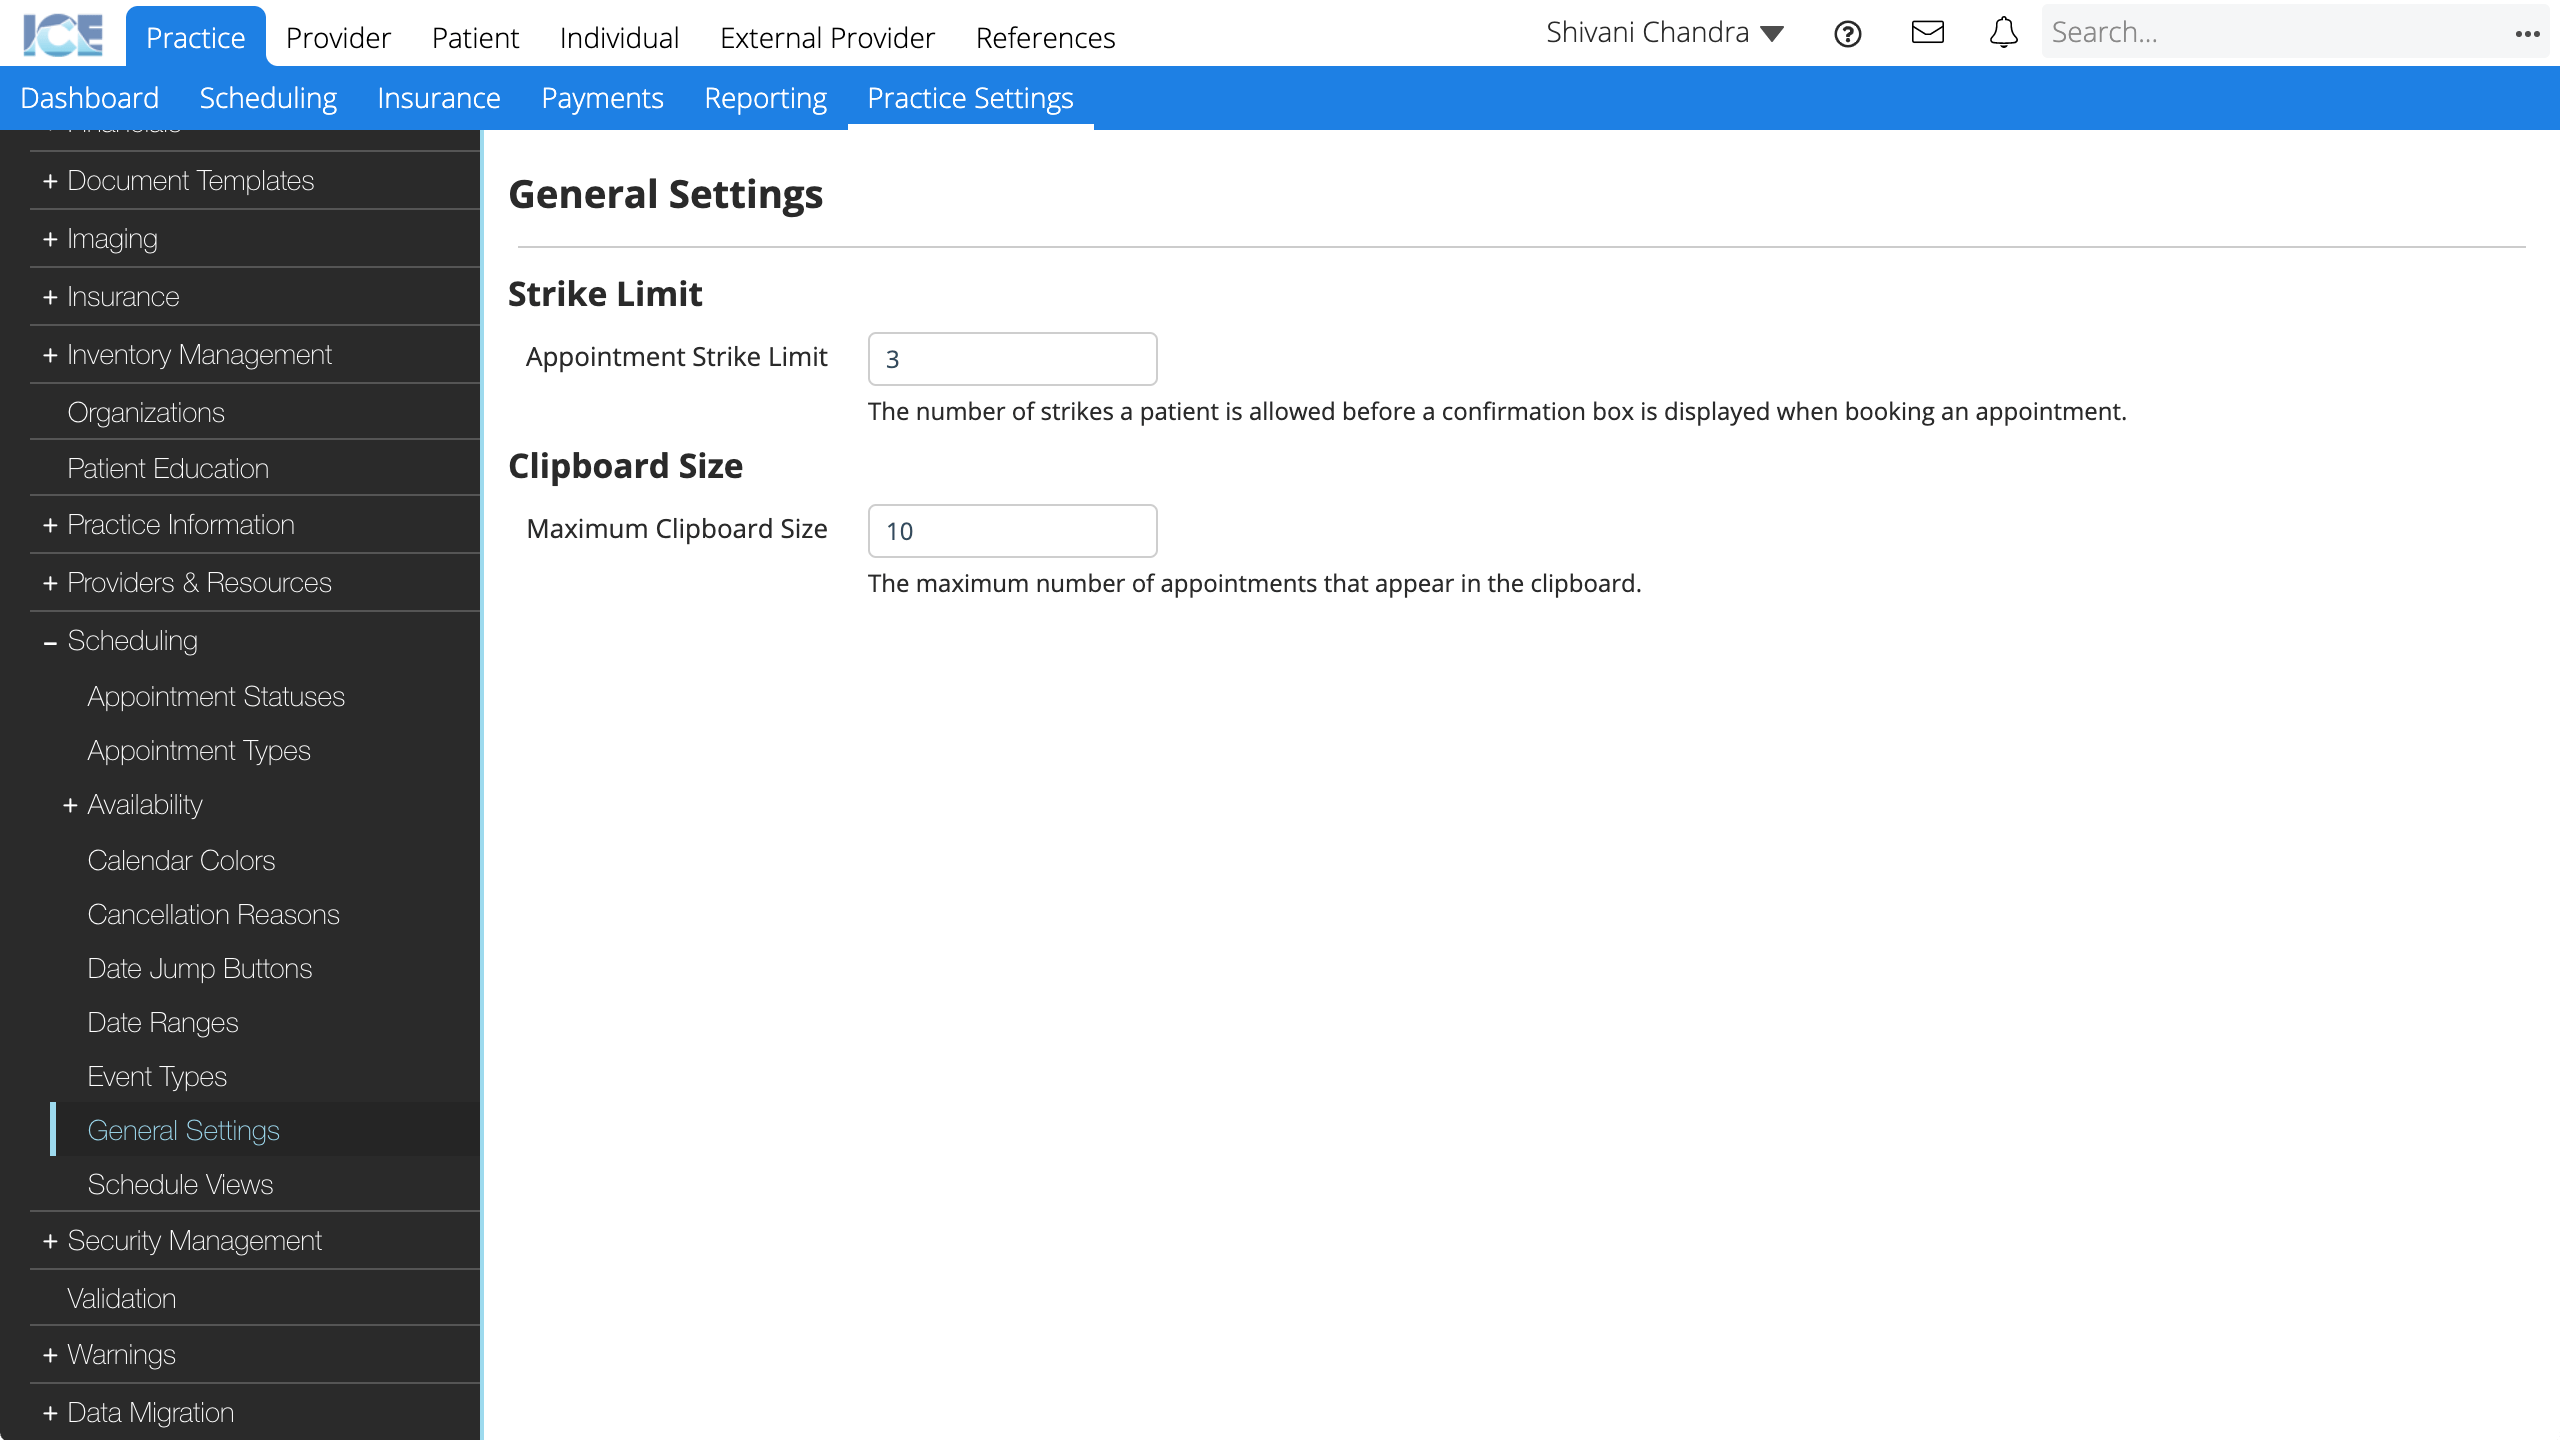
- Strike Limit: What is the number of strikes a patient is allowed before a warning is displayed when booking an appointment with them?
- Patients with the maximum number of allowable strikes cannot be scheduled and show a warning when booking.
- You can override the strike limit for a specific patient by going to Patient > Patient Management > Scheduling.
- To learn more, see Cancel an appointment.
- Clipboard Size: What is the maximum number of appointments that can appear in the clipboard?
- The filter tools search on all appointments that should appear on the clipboard, but only show the number of results defined here.
- Strike Limit: What is the number of strikes a patient is allowed before a warning is displayed when booking an appointment with them?
Your changes are saved automatically.
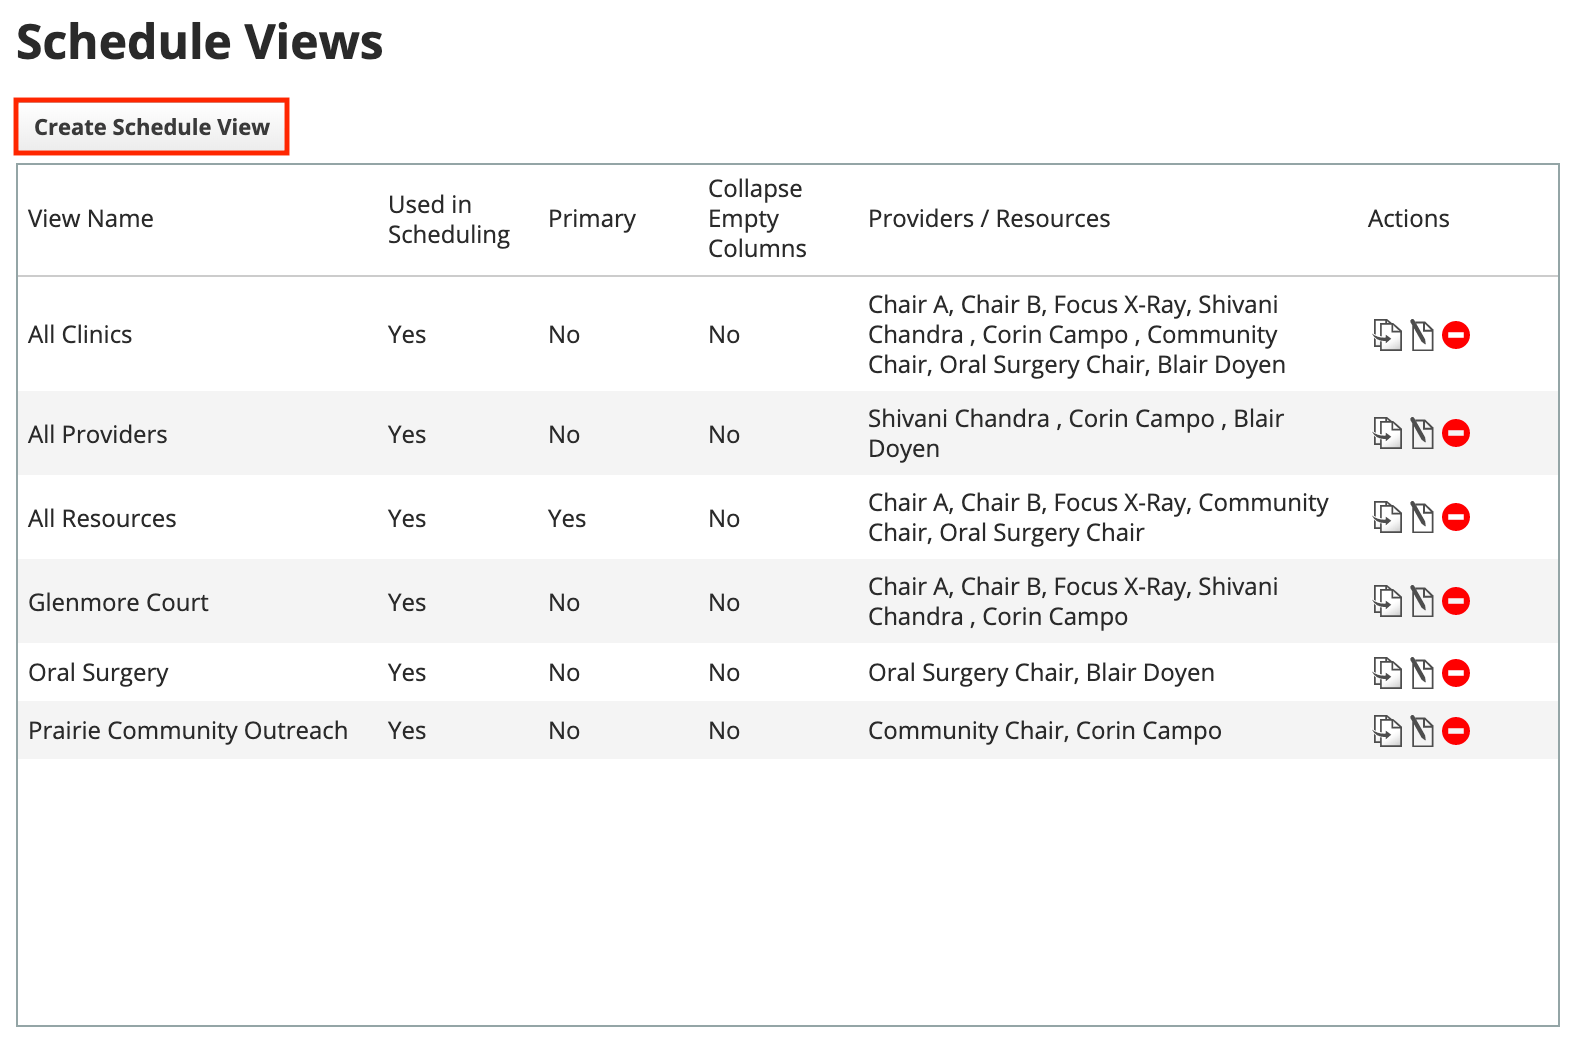
Schedule Views
Schedule views allow you to define different combinations of people, chairs, or other resources to be displayed side-by-side on the schedule grid.
You can decide whether to create different views for each clinic, to create views for all providers or all chairs, or simply create one view with every possible provider and resource in it.
- Go to Practice Settings > Scheduling > Schedule Views
- Select Create Schedule View
- Complete the required fields
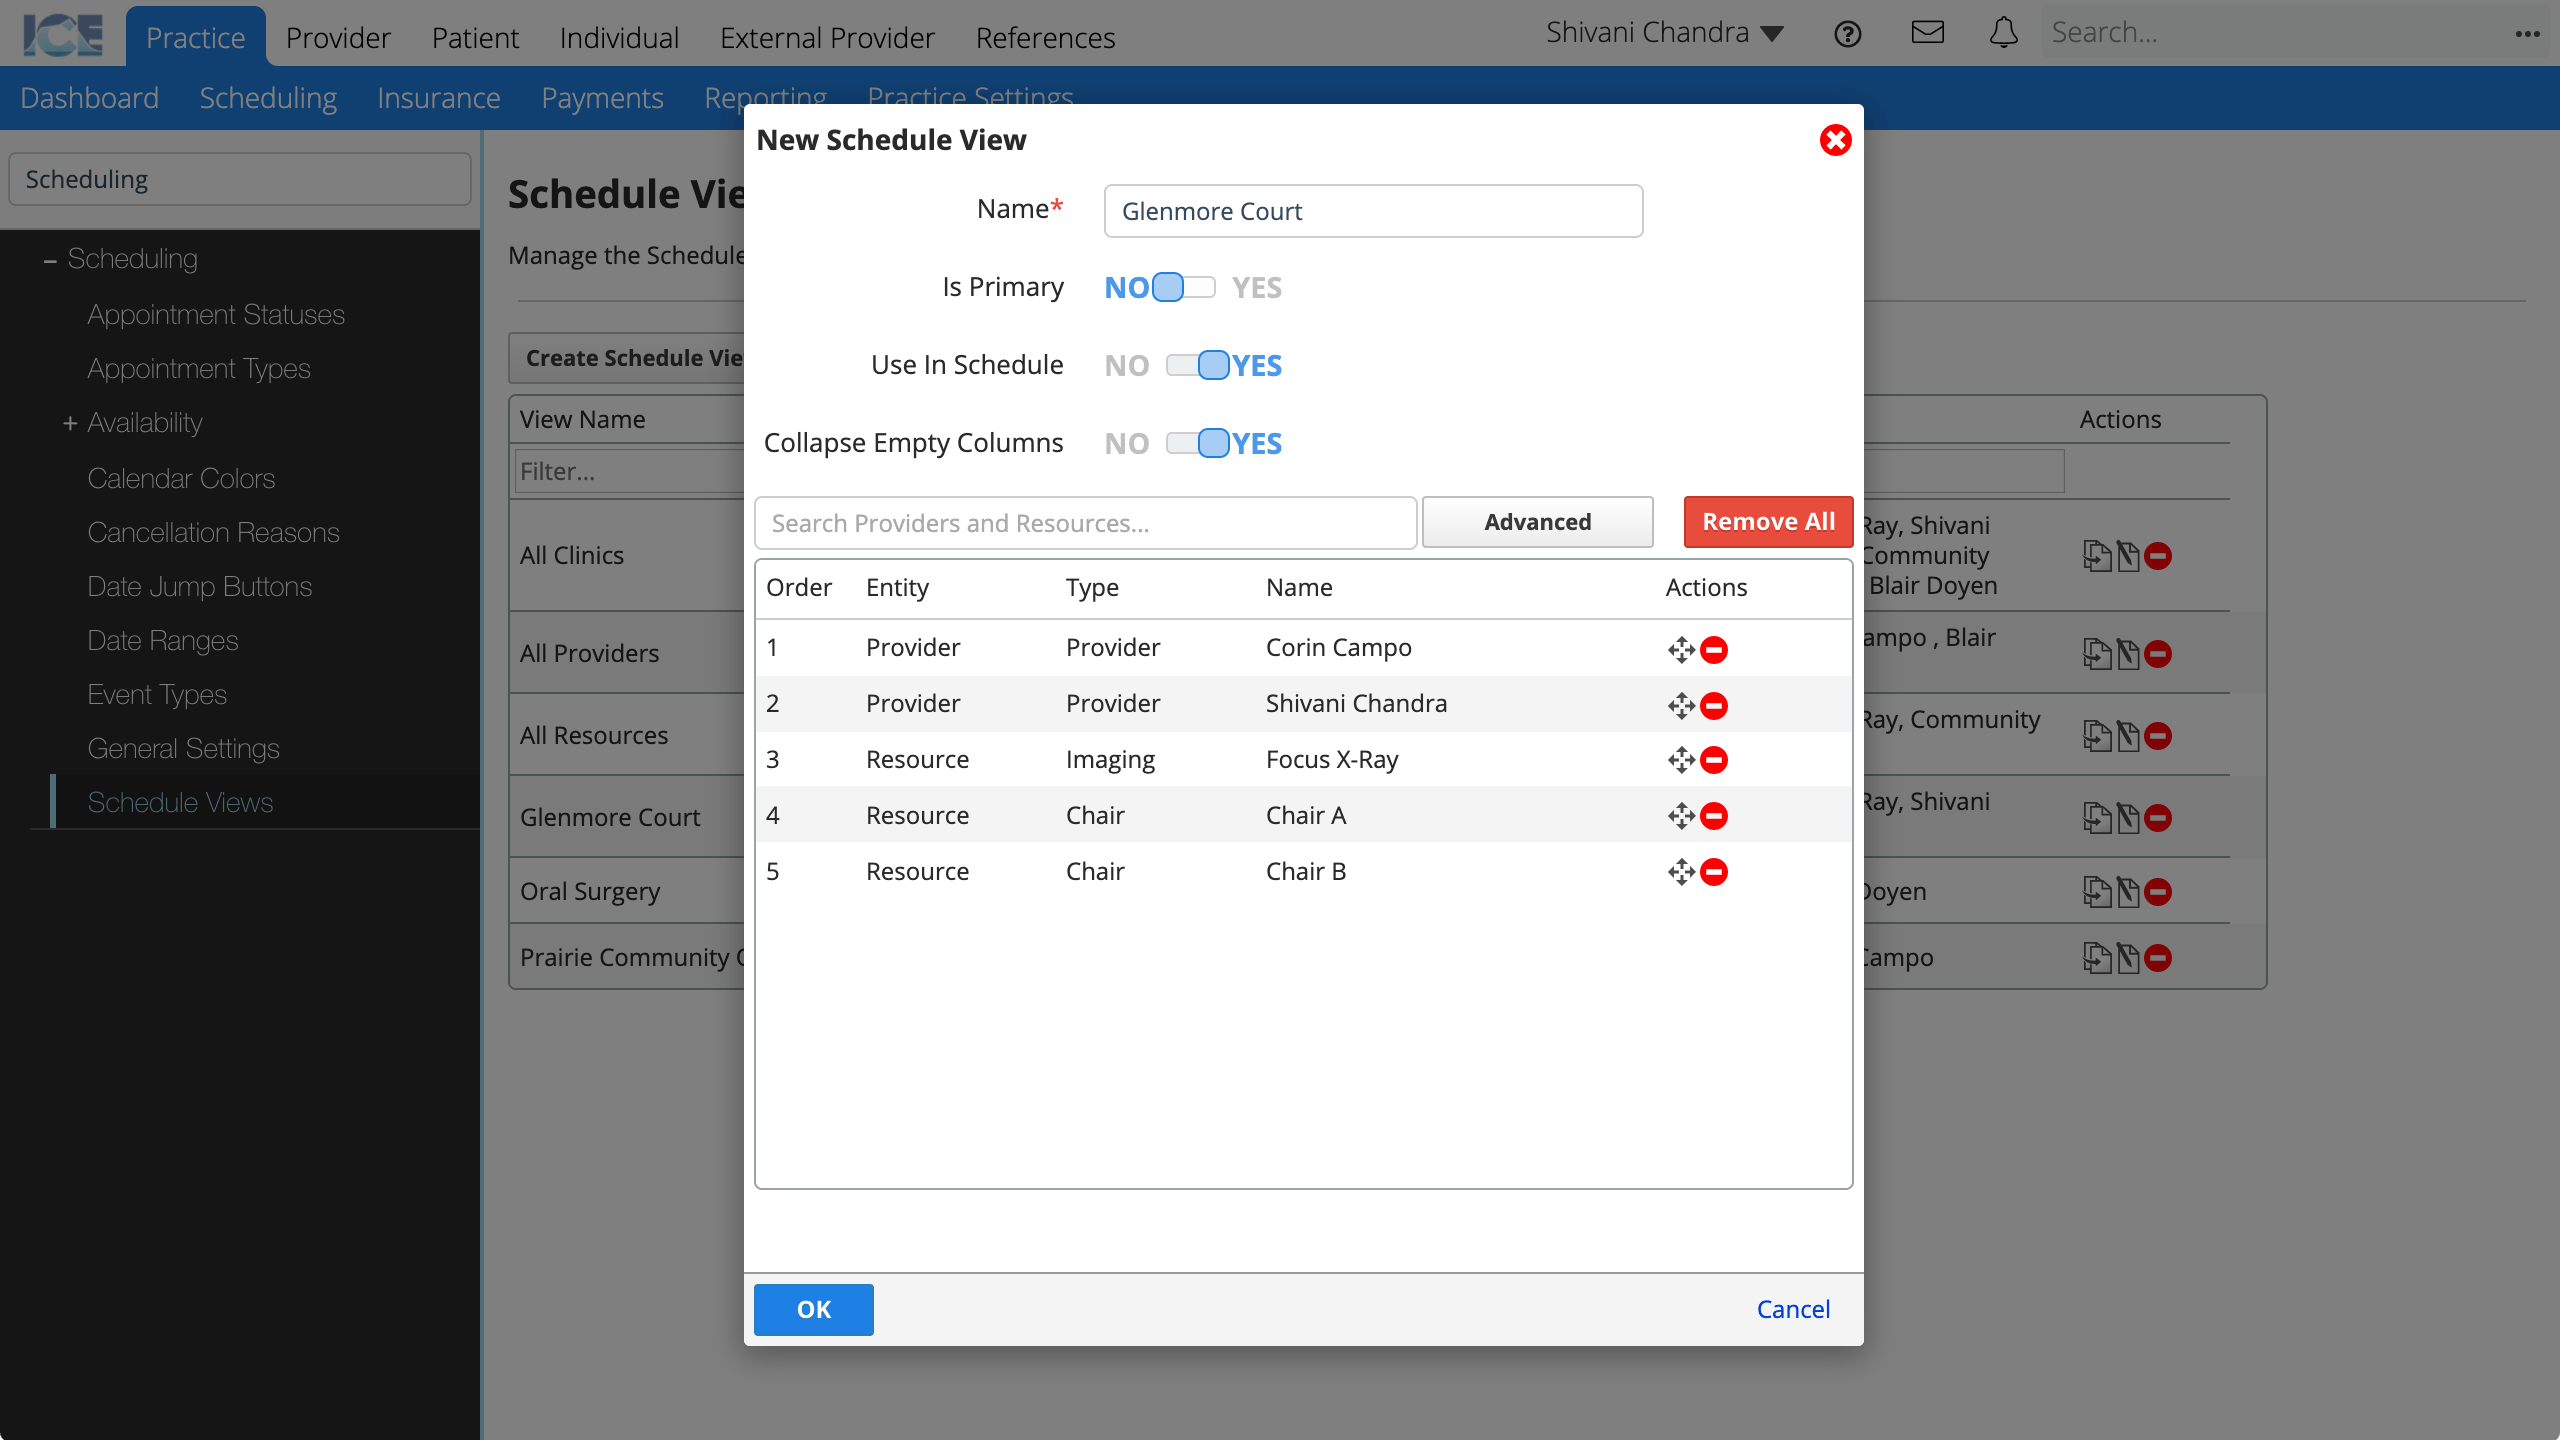
- Name: A short description that appears in Scheduling when selecting a schedule view to display.
- Is Primary: This is for organizational purposes in this table only and does not affect a person's use of Scheduling.
- Only one schedule view can be primary.
- Use in Schedule: If No, the view is only available from Advanced Provider Select.
- Collapse Empty Columns: Should empty columns on this view be collapsed and hidden by default?
- A scheduler can always choose to show empty columns on their own screen.
- Add providers and resources to a view by using the search field or using advanced search
- Drag to reorder the providers and resources.
- Select
 to remove a provider or resource from the view.
- Drag
- Select OK to save your changes
- Select Cancel to discard your changes.
- Repeat steps 2 to 5 to create more schedule views
To edit an existing schedule view, select ![]() in the Actions column.
in the Actions column.
To create a copy of an existing schedule view, select ![]() in the Actions column.
in the Actions column.
To delete an existing schedule view, select ![]() in the Actions column.
in the Actions column.