Practice settings: insurance
You can configure your practice's insurance claim queues, billing and treating dentists, the employers associated with policies, or adjust EOB display and ERA payment method auto-fill settings.
Batches
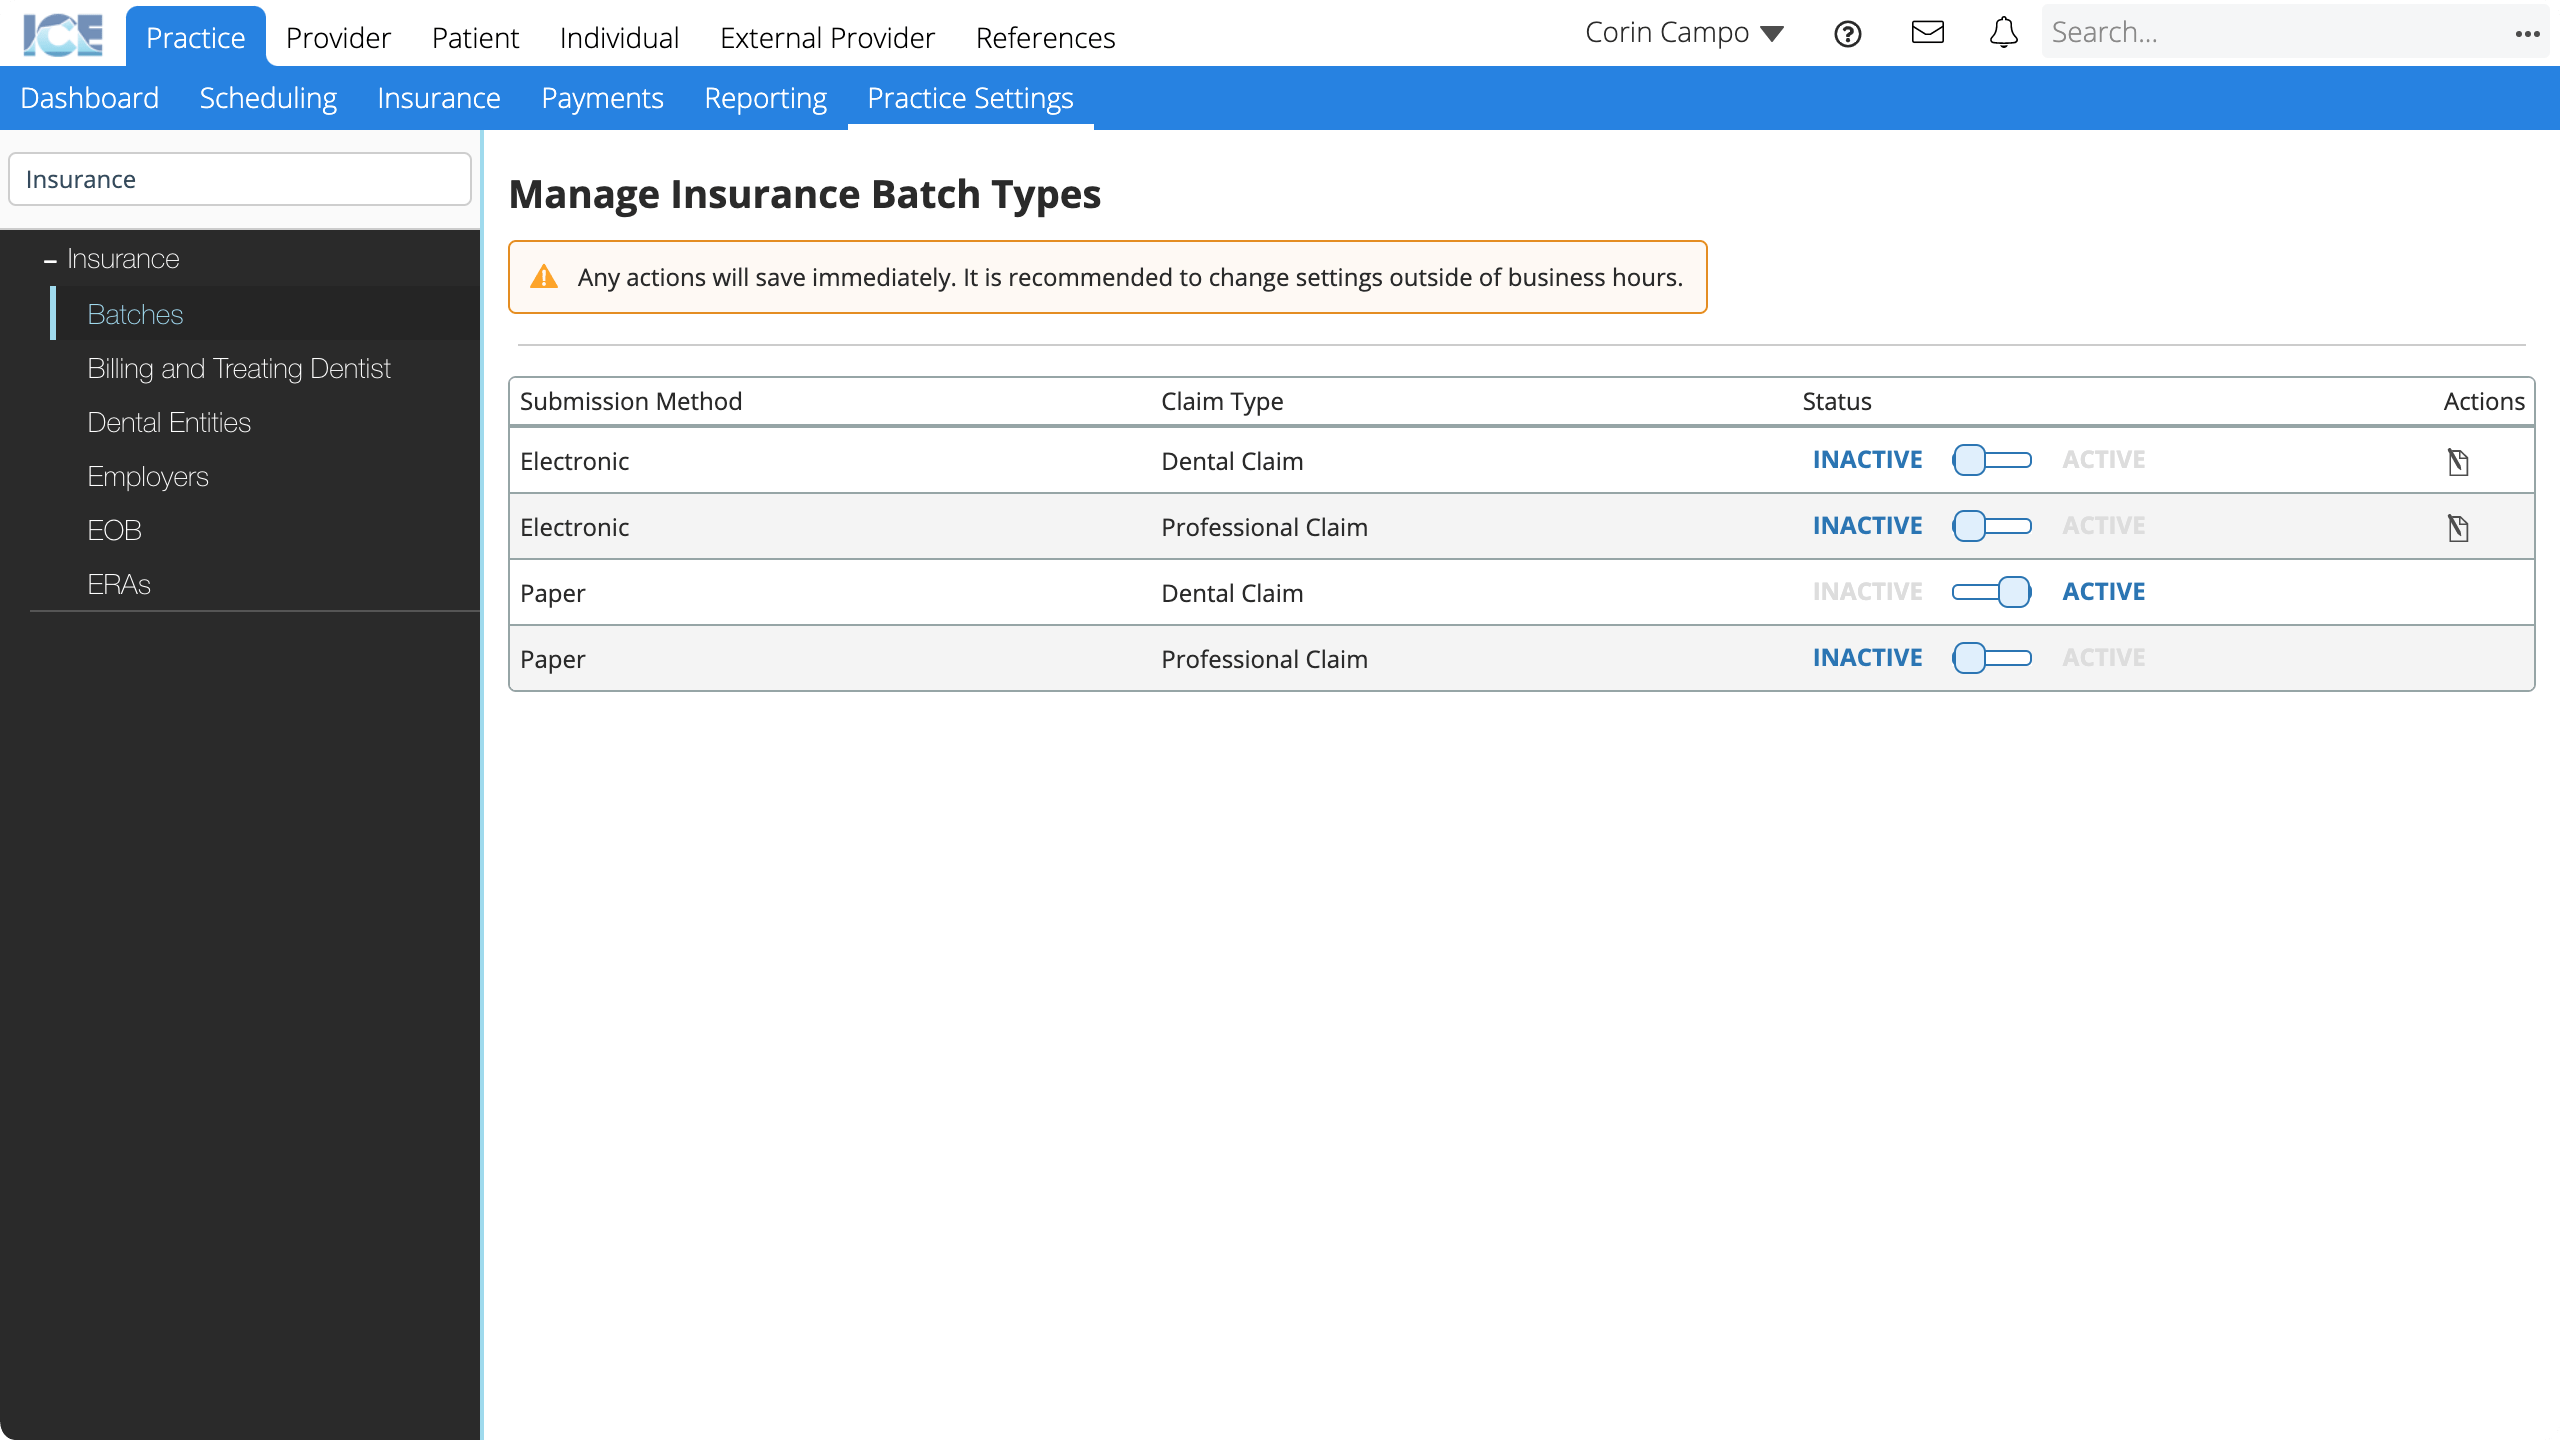
Configure the type of claim queues your practice uses. Buttons for each queue appear in Practice > Insurance > Batches under the Batch Claims heading.
- Go to Practice > Practice Settings > Insurance > Batches
- Toggle Inactive/Active for the submission methods and types of claim processed in your system
- Optional: Select
 under the Actions column of an electronic queue and toggle No/Yes to show data columns in the claim queue data grid.
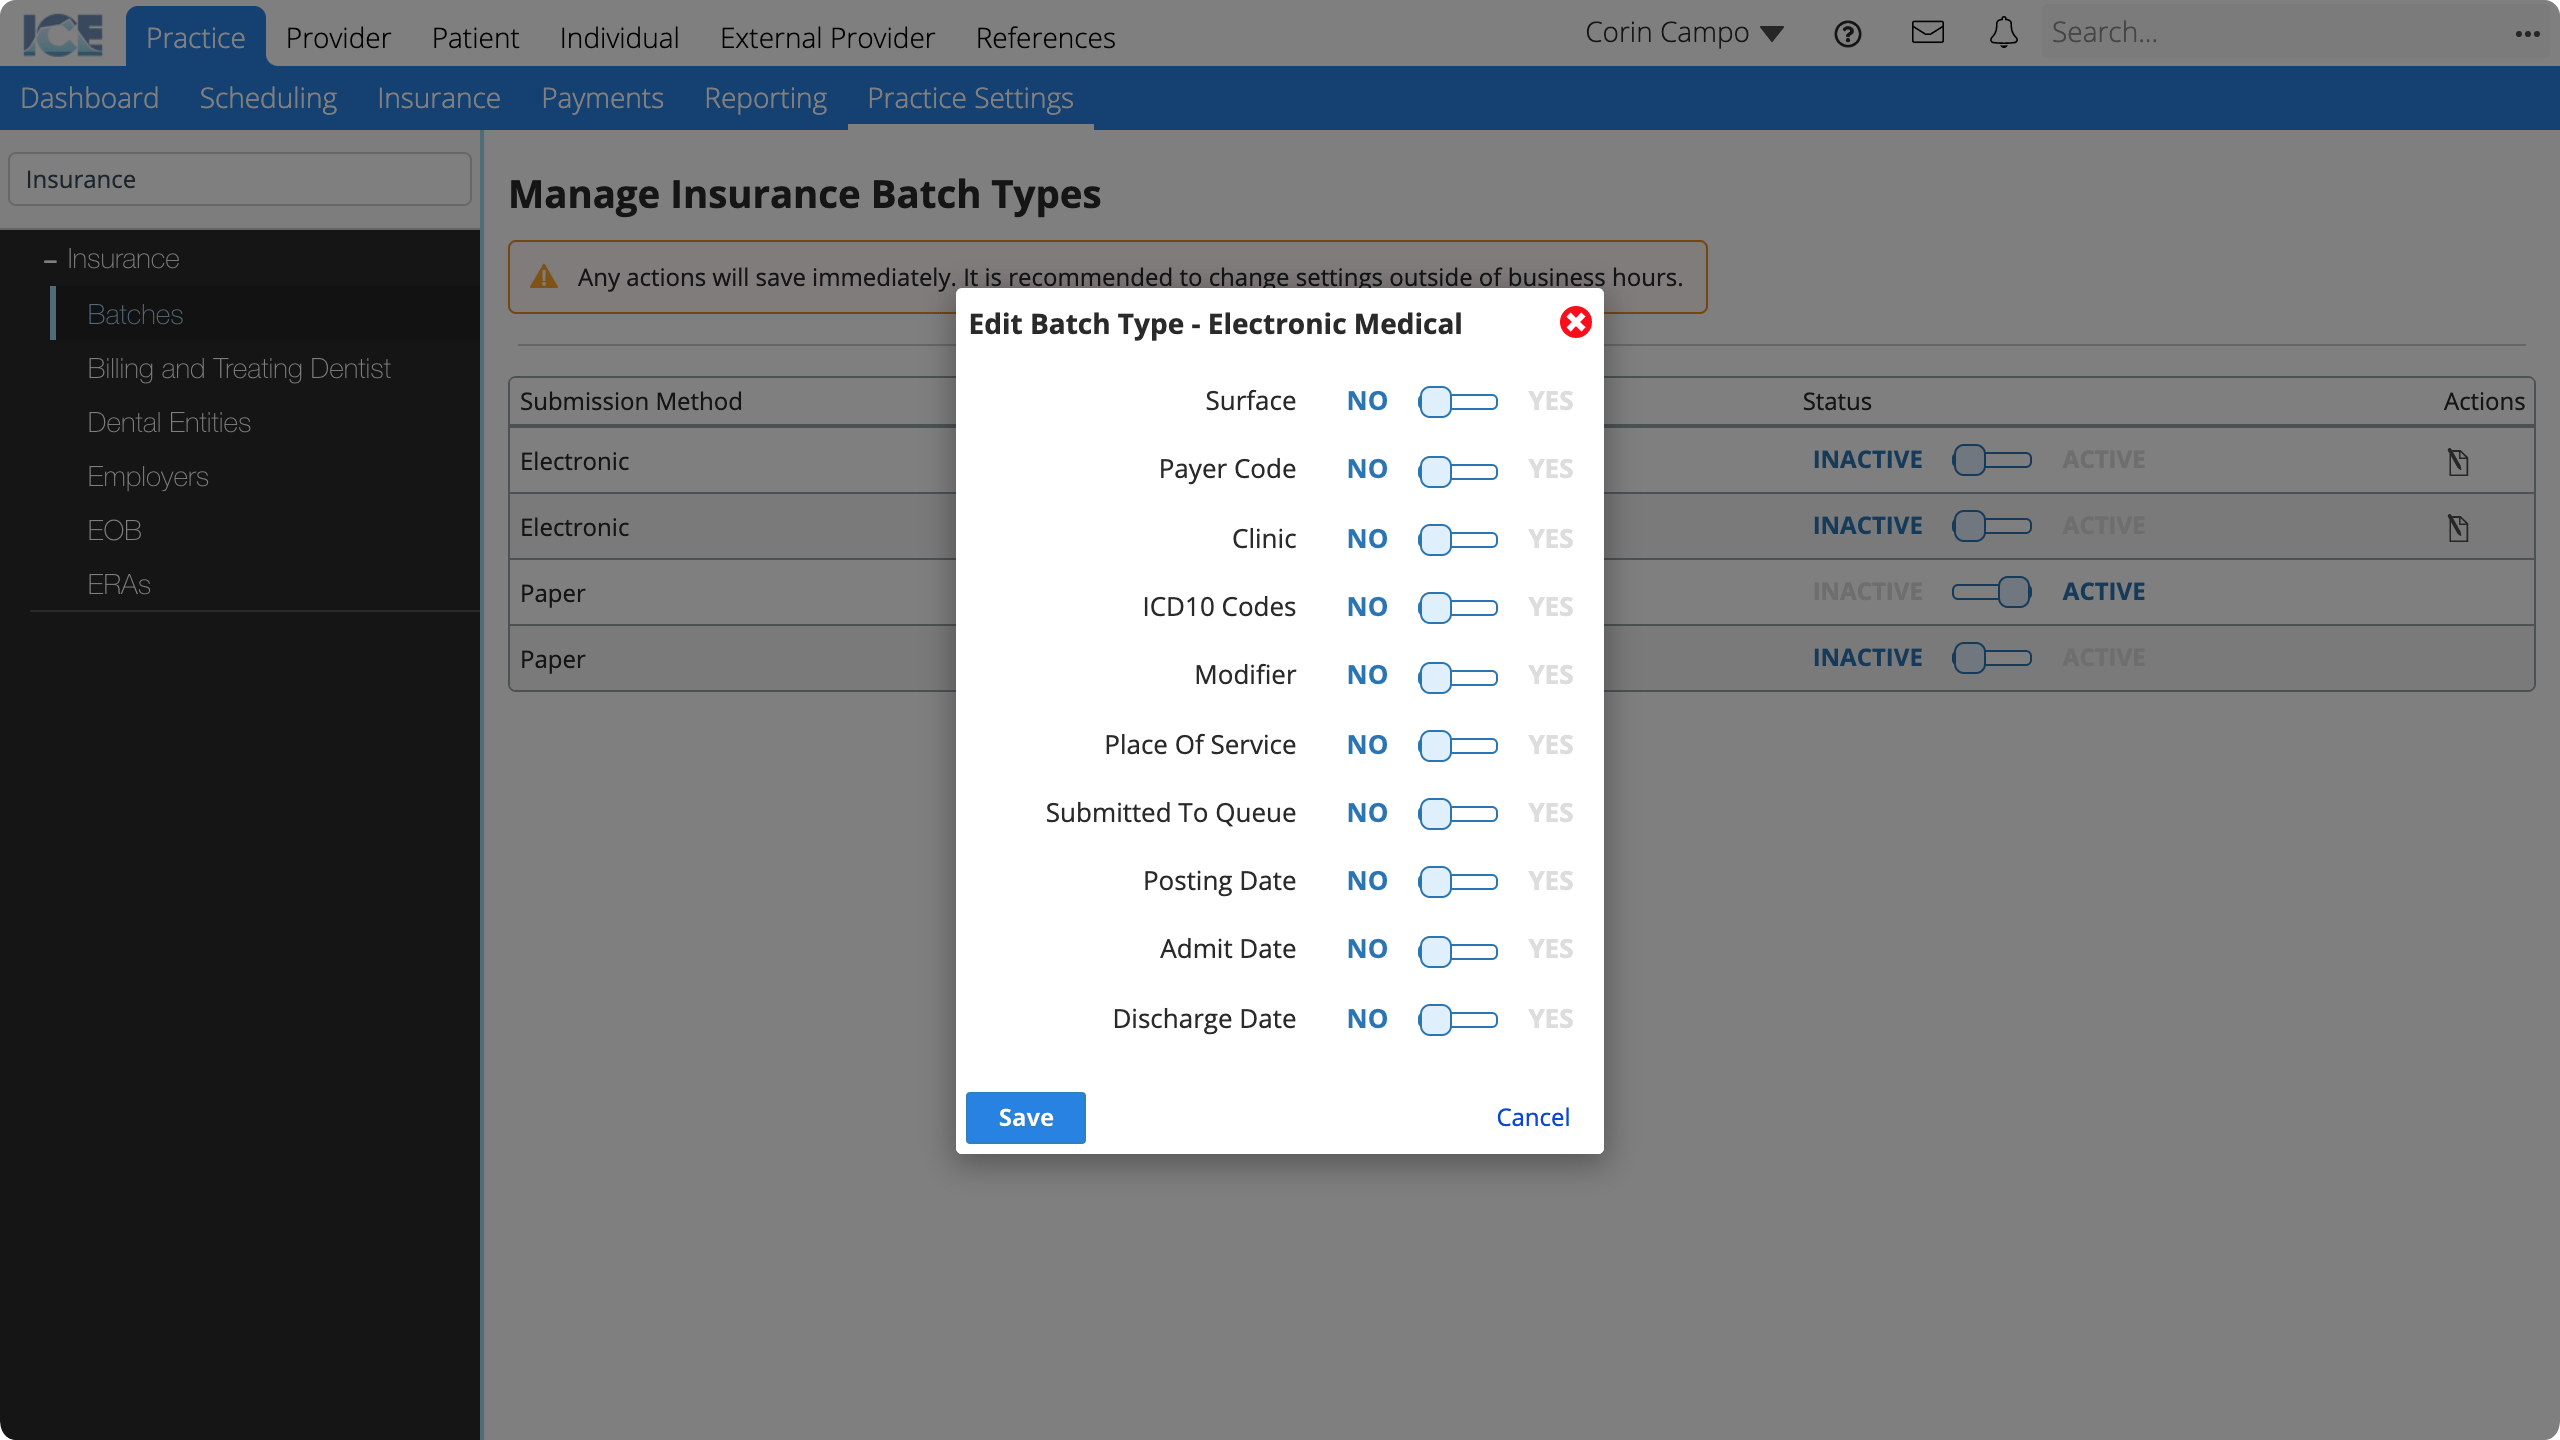
- Select Save
Billing and Treating Dentist
The table in Practice Settings > Insurance > Billing and Treating Dentist summarizes existing billing and treating dentists.
Insurance payers require a billing dentist or dental entity, and a treating dentist to process patient claims successfully.
- A billing dentist is the provider to whom insurance pays dental coverage and claims.
- A treating dentist is the provider who performs the service.
- A dental entity is the legal entity name of a dental practice to whom insurance pays dental coverage and claims.
To configure a provider as a billing or treating dentist:
- Go to Practice > Practice Settings > Providers & Resources > Provider Management
- Find the name of the provider you want to set up as a billing or treating dentist
- Select under their Actions column
- Enter the required information:
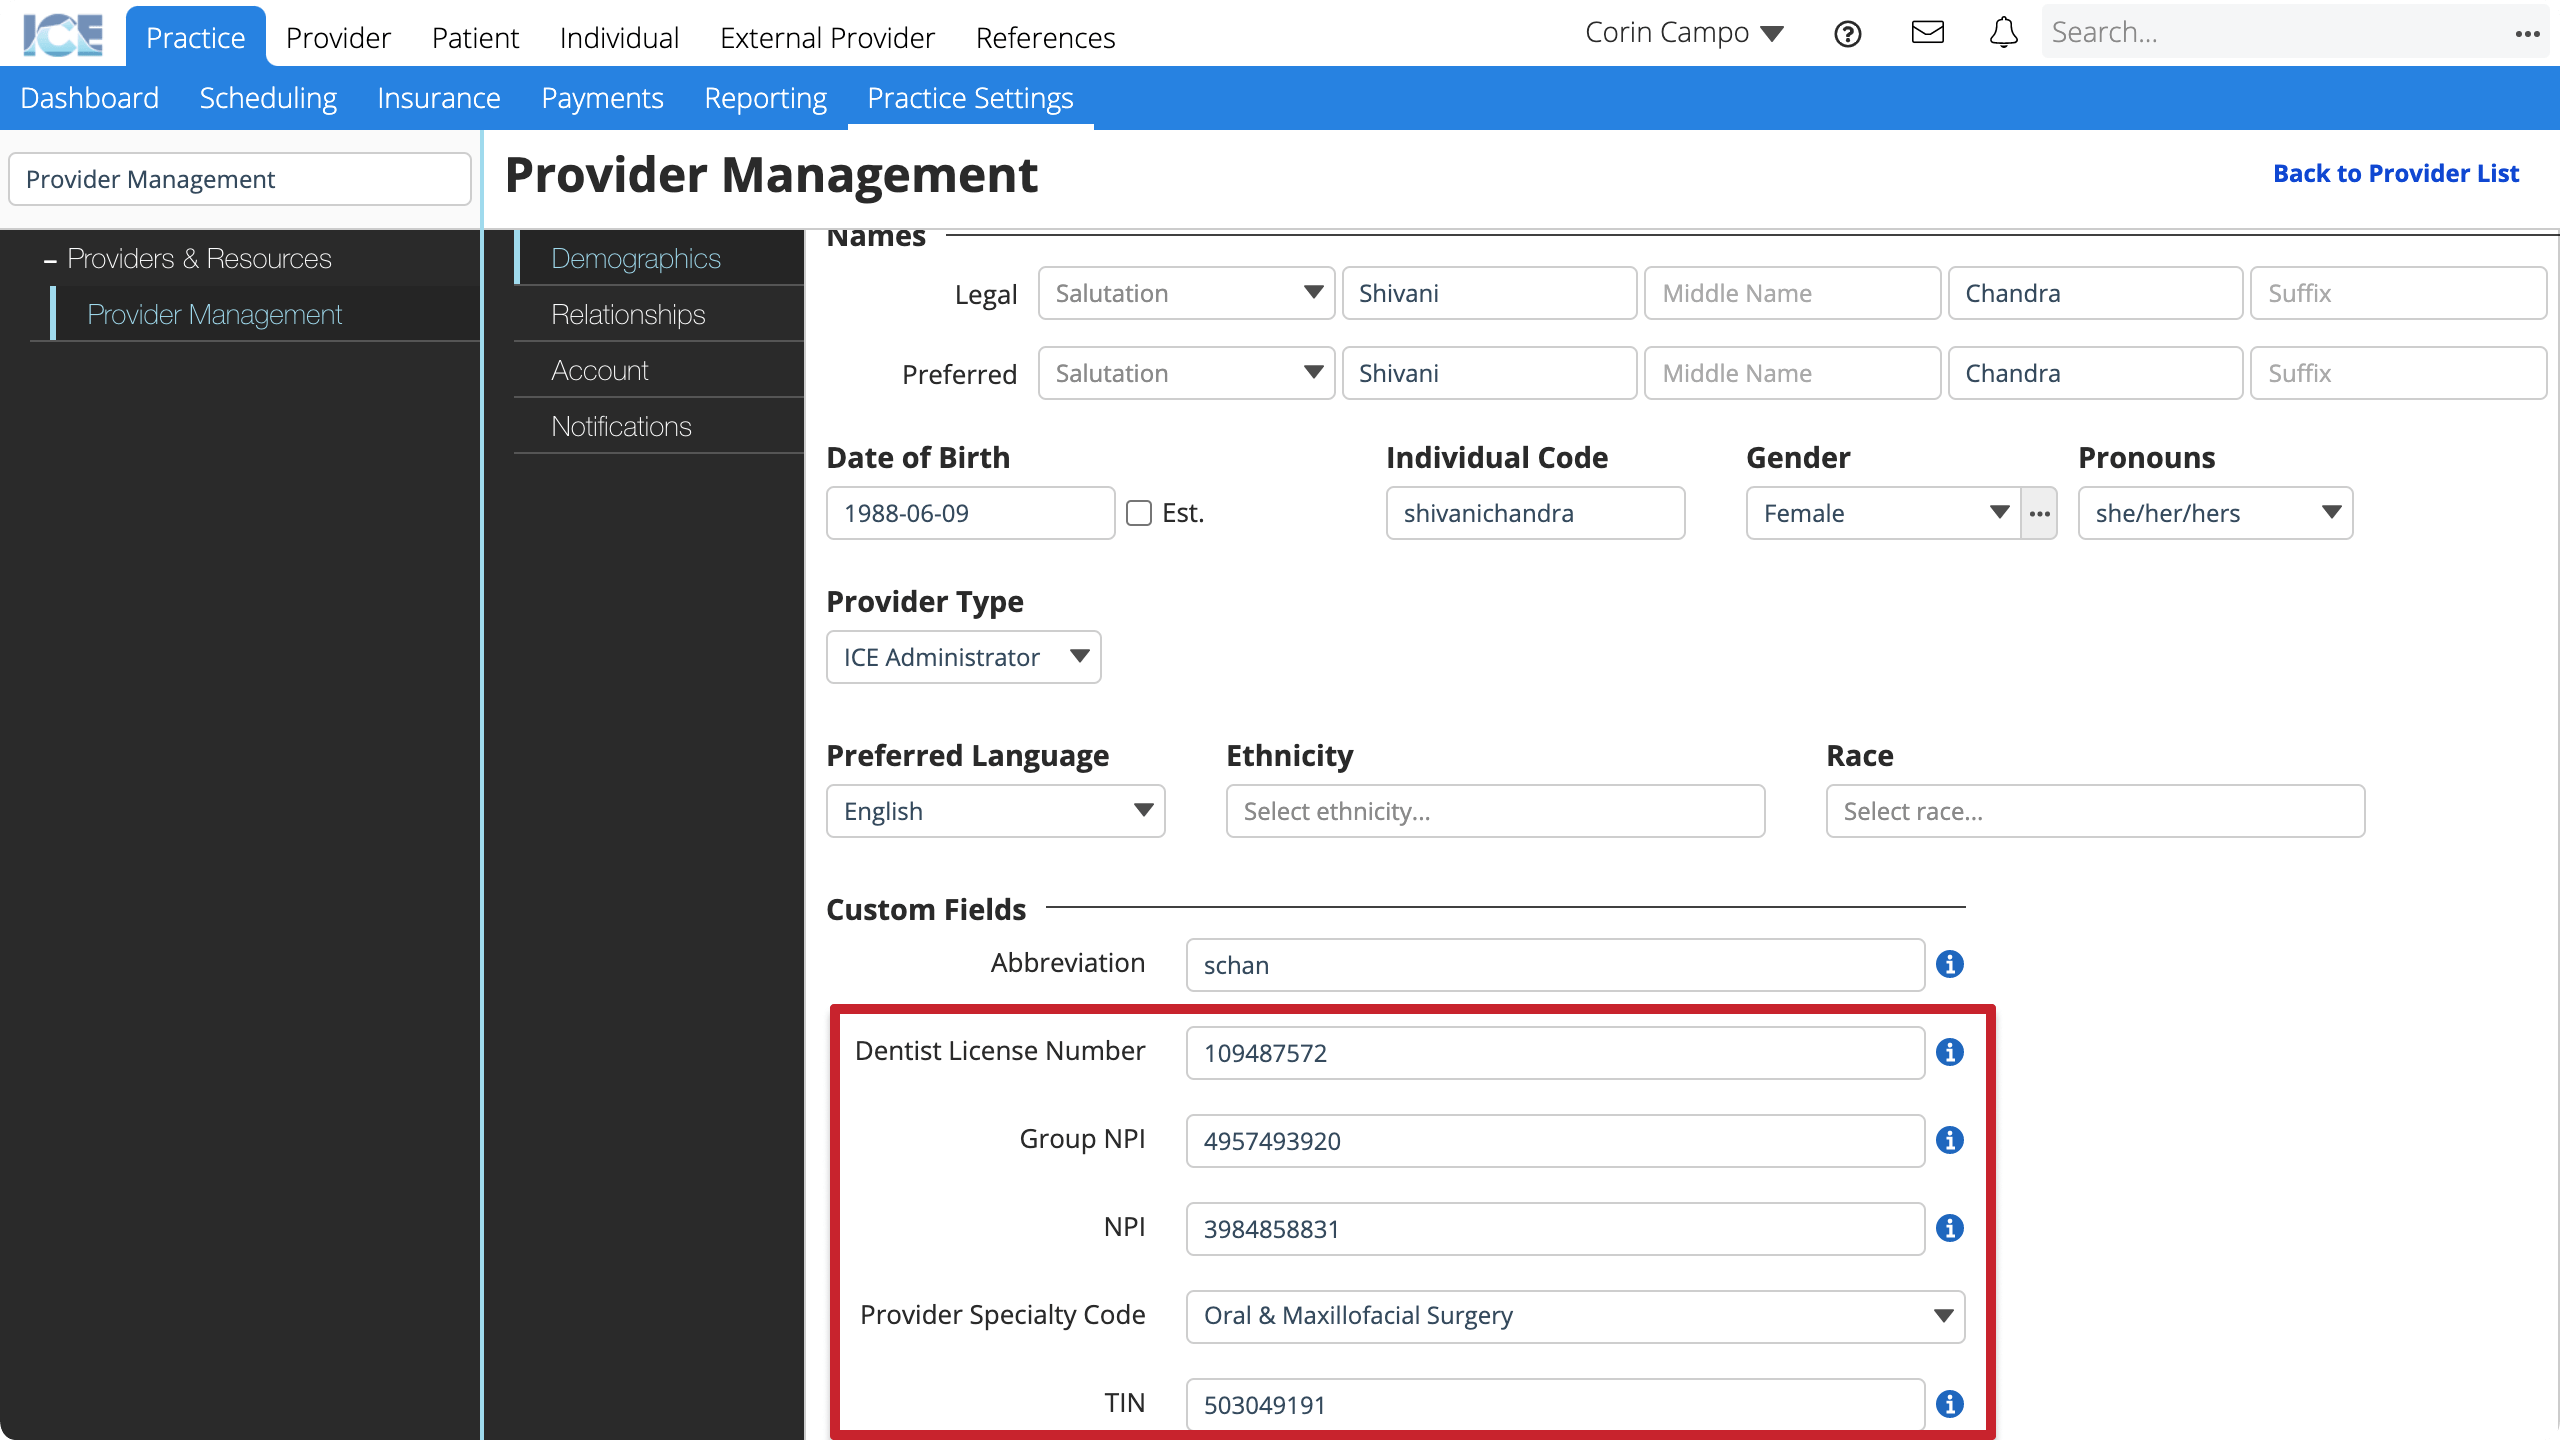
- Billing Dentist Requirements
- Billing Address: The provider or dental entity's address.
- Dentist License Number: The provider or dental entity's license number provided by a regulatory body or state to practice dentistry.
- Group NPI: The provider or dental entity's group national provider identifier (NPI).
- TIN: The provider or dental entity's tax identification number (TIN).
- Work Phone Number: The provider or dental entity's phone number.
- Treating Dentist Requirements
- Dentist License Number: The provider or dental entity's license number provided by a regulatory body or state to practice dentistry.
- Mailing Address: The provider or dental entity's address.
- NPI: The provider or dental entity's national provider identifier (NPI).
- Provider Specialty Code: The provider or dental entity's specialty code to practice in a specialized area.
- Work Phone Number: The provider or dental entity's phone number.
- Billing Dentist Requirements
- Select Account from the left panel
- Under Financials Details toggle Billing Dentist and/or Treating Dentist
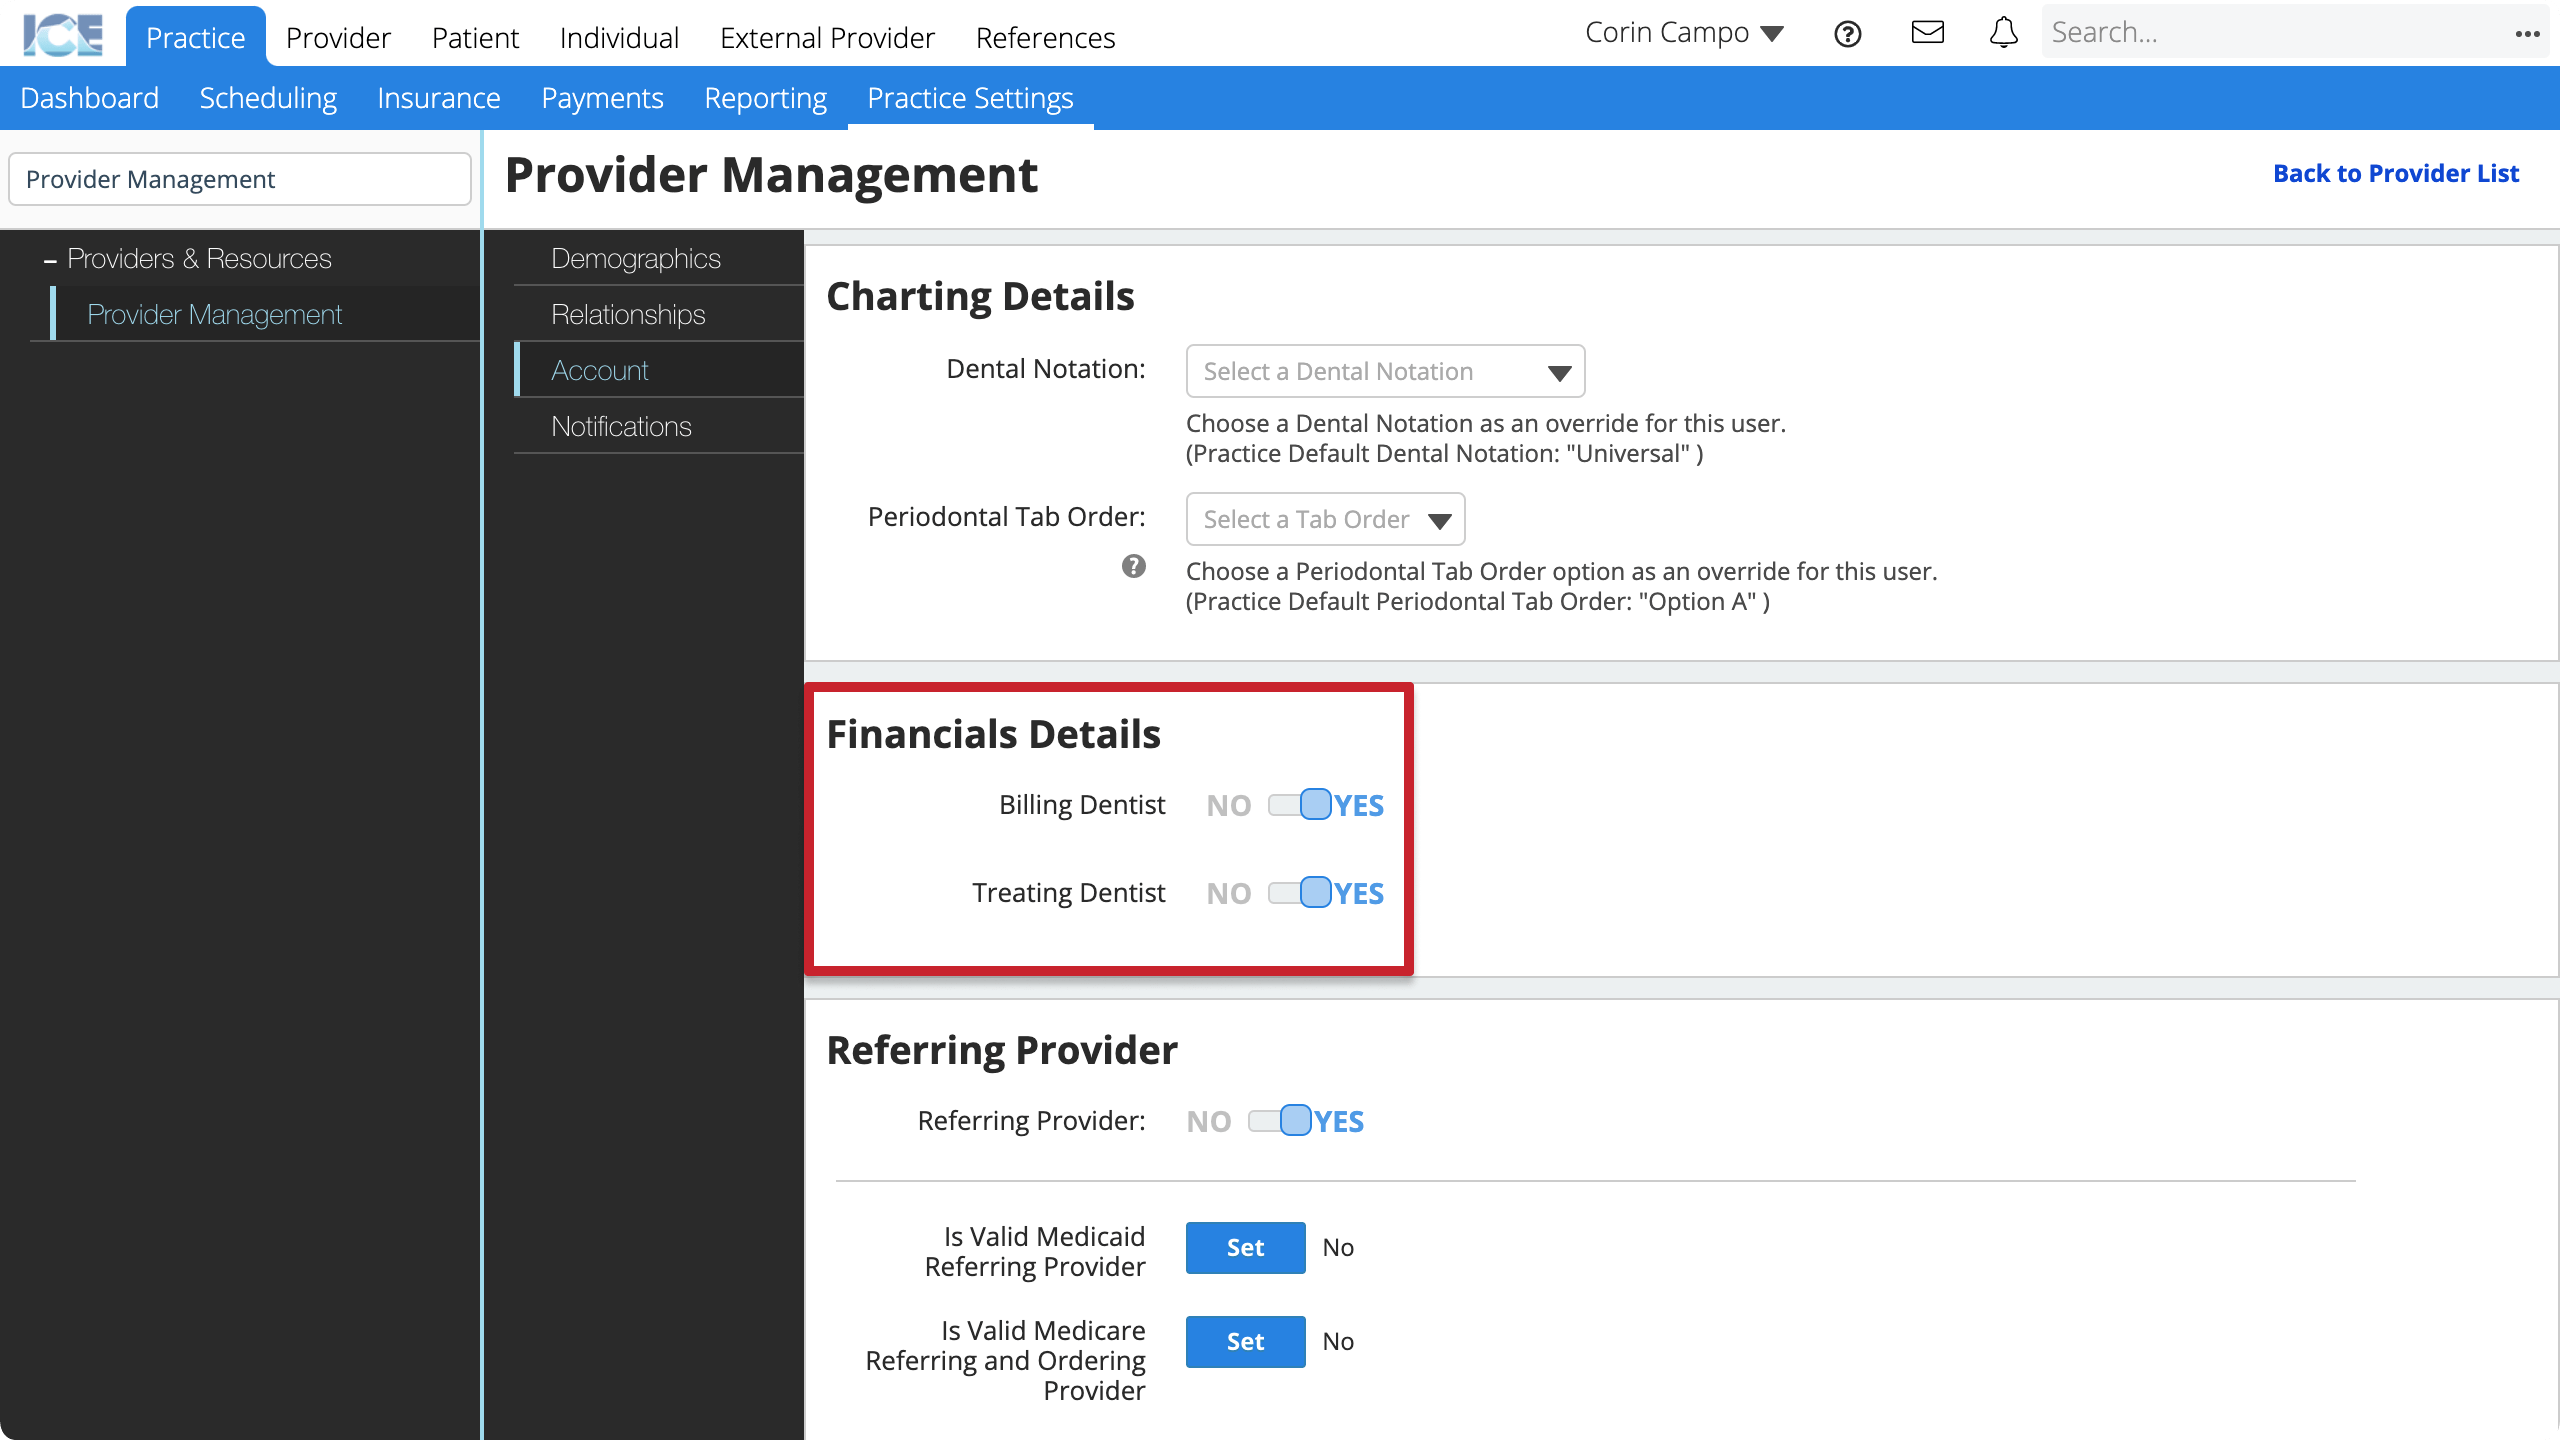
- A warning appears if the provider is missing required details.
- After you configure a billing or treating dentist, you must associate them with a clinic group under Practice Settings > Primary Information > Clinic Management before the system can generate claims
- To learn more, see Practice settings: clinic management.
After a provider is configured as a Billing and/or Treating Dentist. They appear in the summary table in Practice Settings > Insurance > Billing and Treating Dentist.
- To update their account details, select in the Actions column
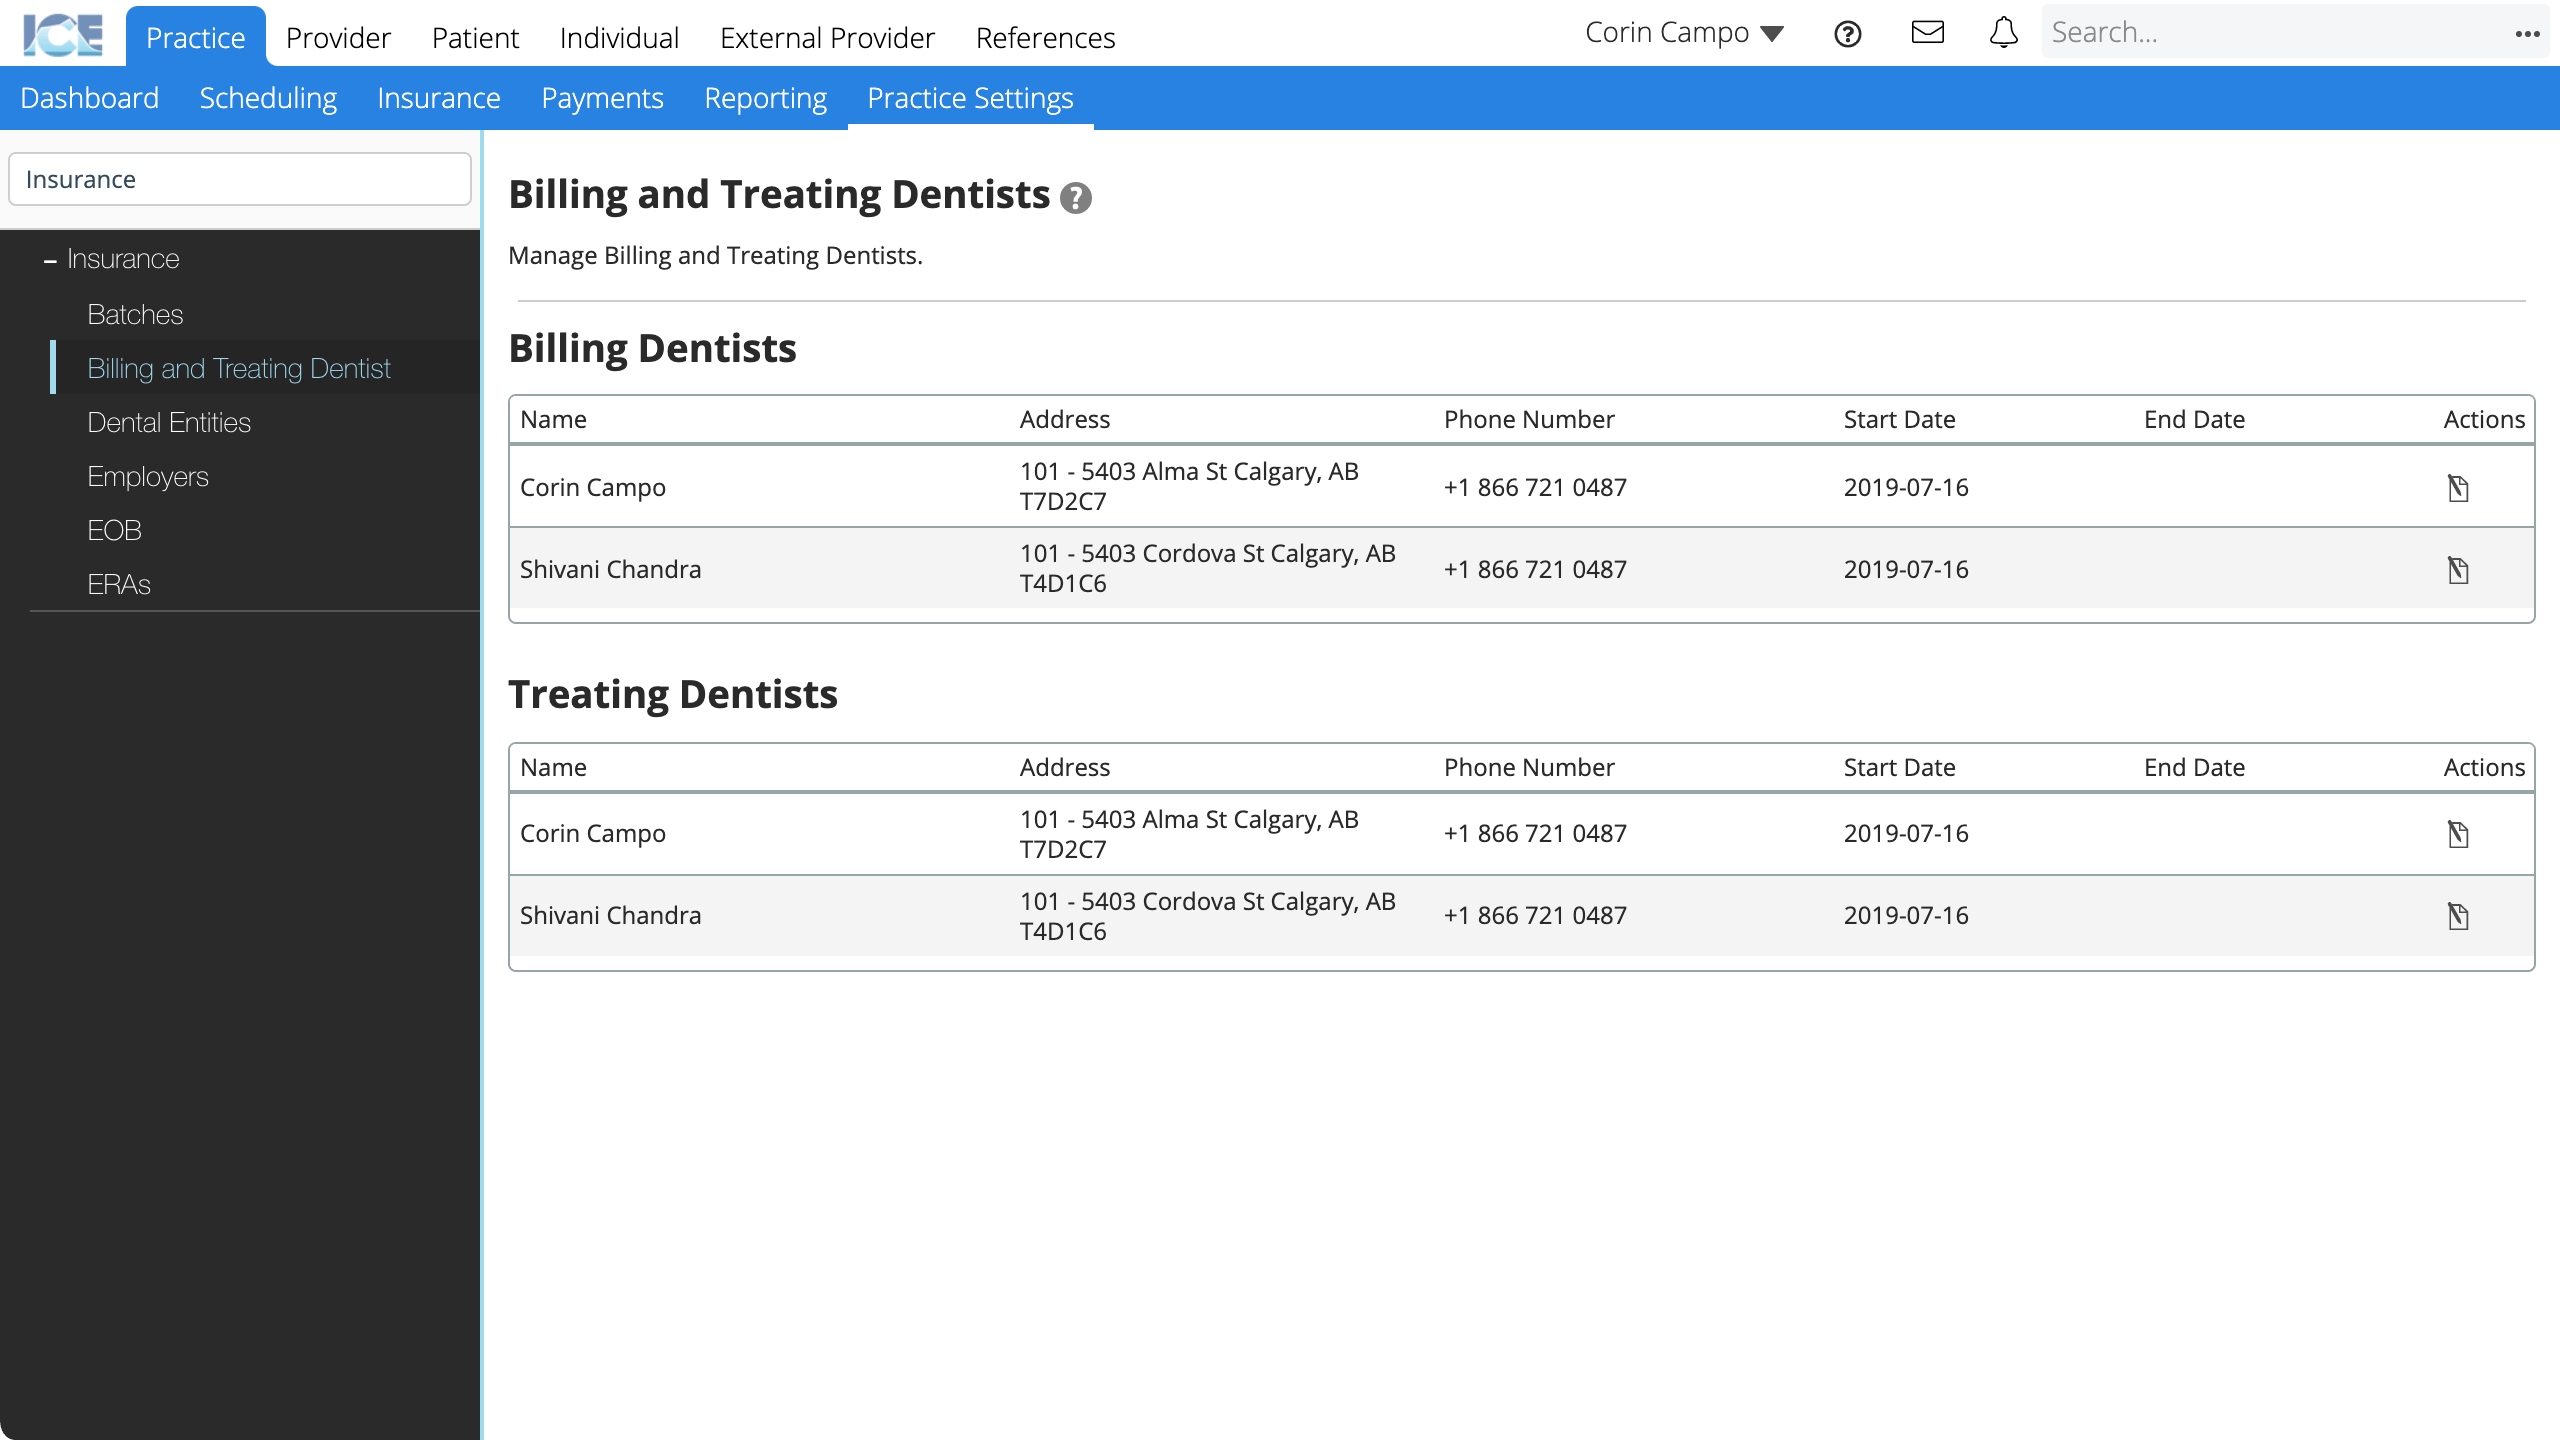
- The system fills the start and end dates when you toggle Billing Dentist and/or Treating Dentist in Provider Management > Account > Financial Details.
Dental Entities
You can configure dental entities for your practice billing workflows.
After you configure a dental entity, you must associate it with a clinic group under Practice Settings > Primary Information > Clinic Management.
- Go to Practice > Practice Settings > Insurance > Dental Entities
- Select Add Dental Entity
- Enter the required information:
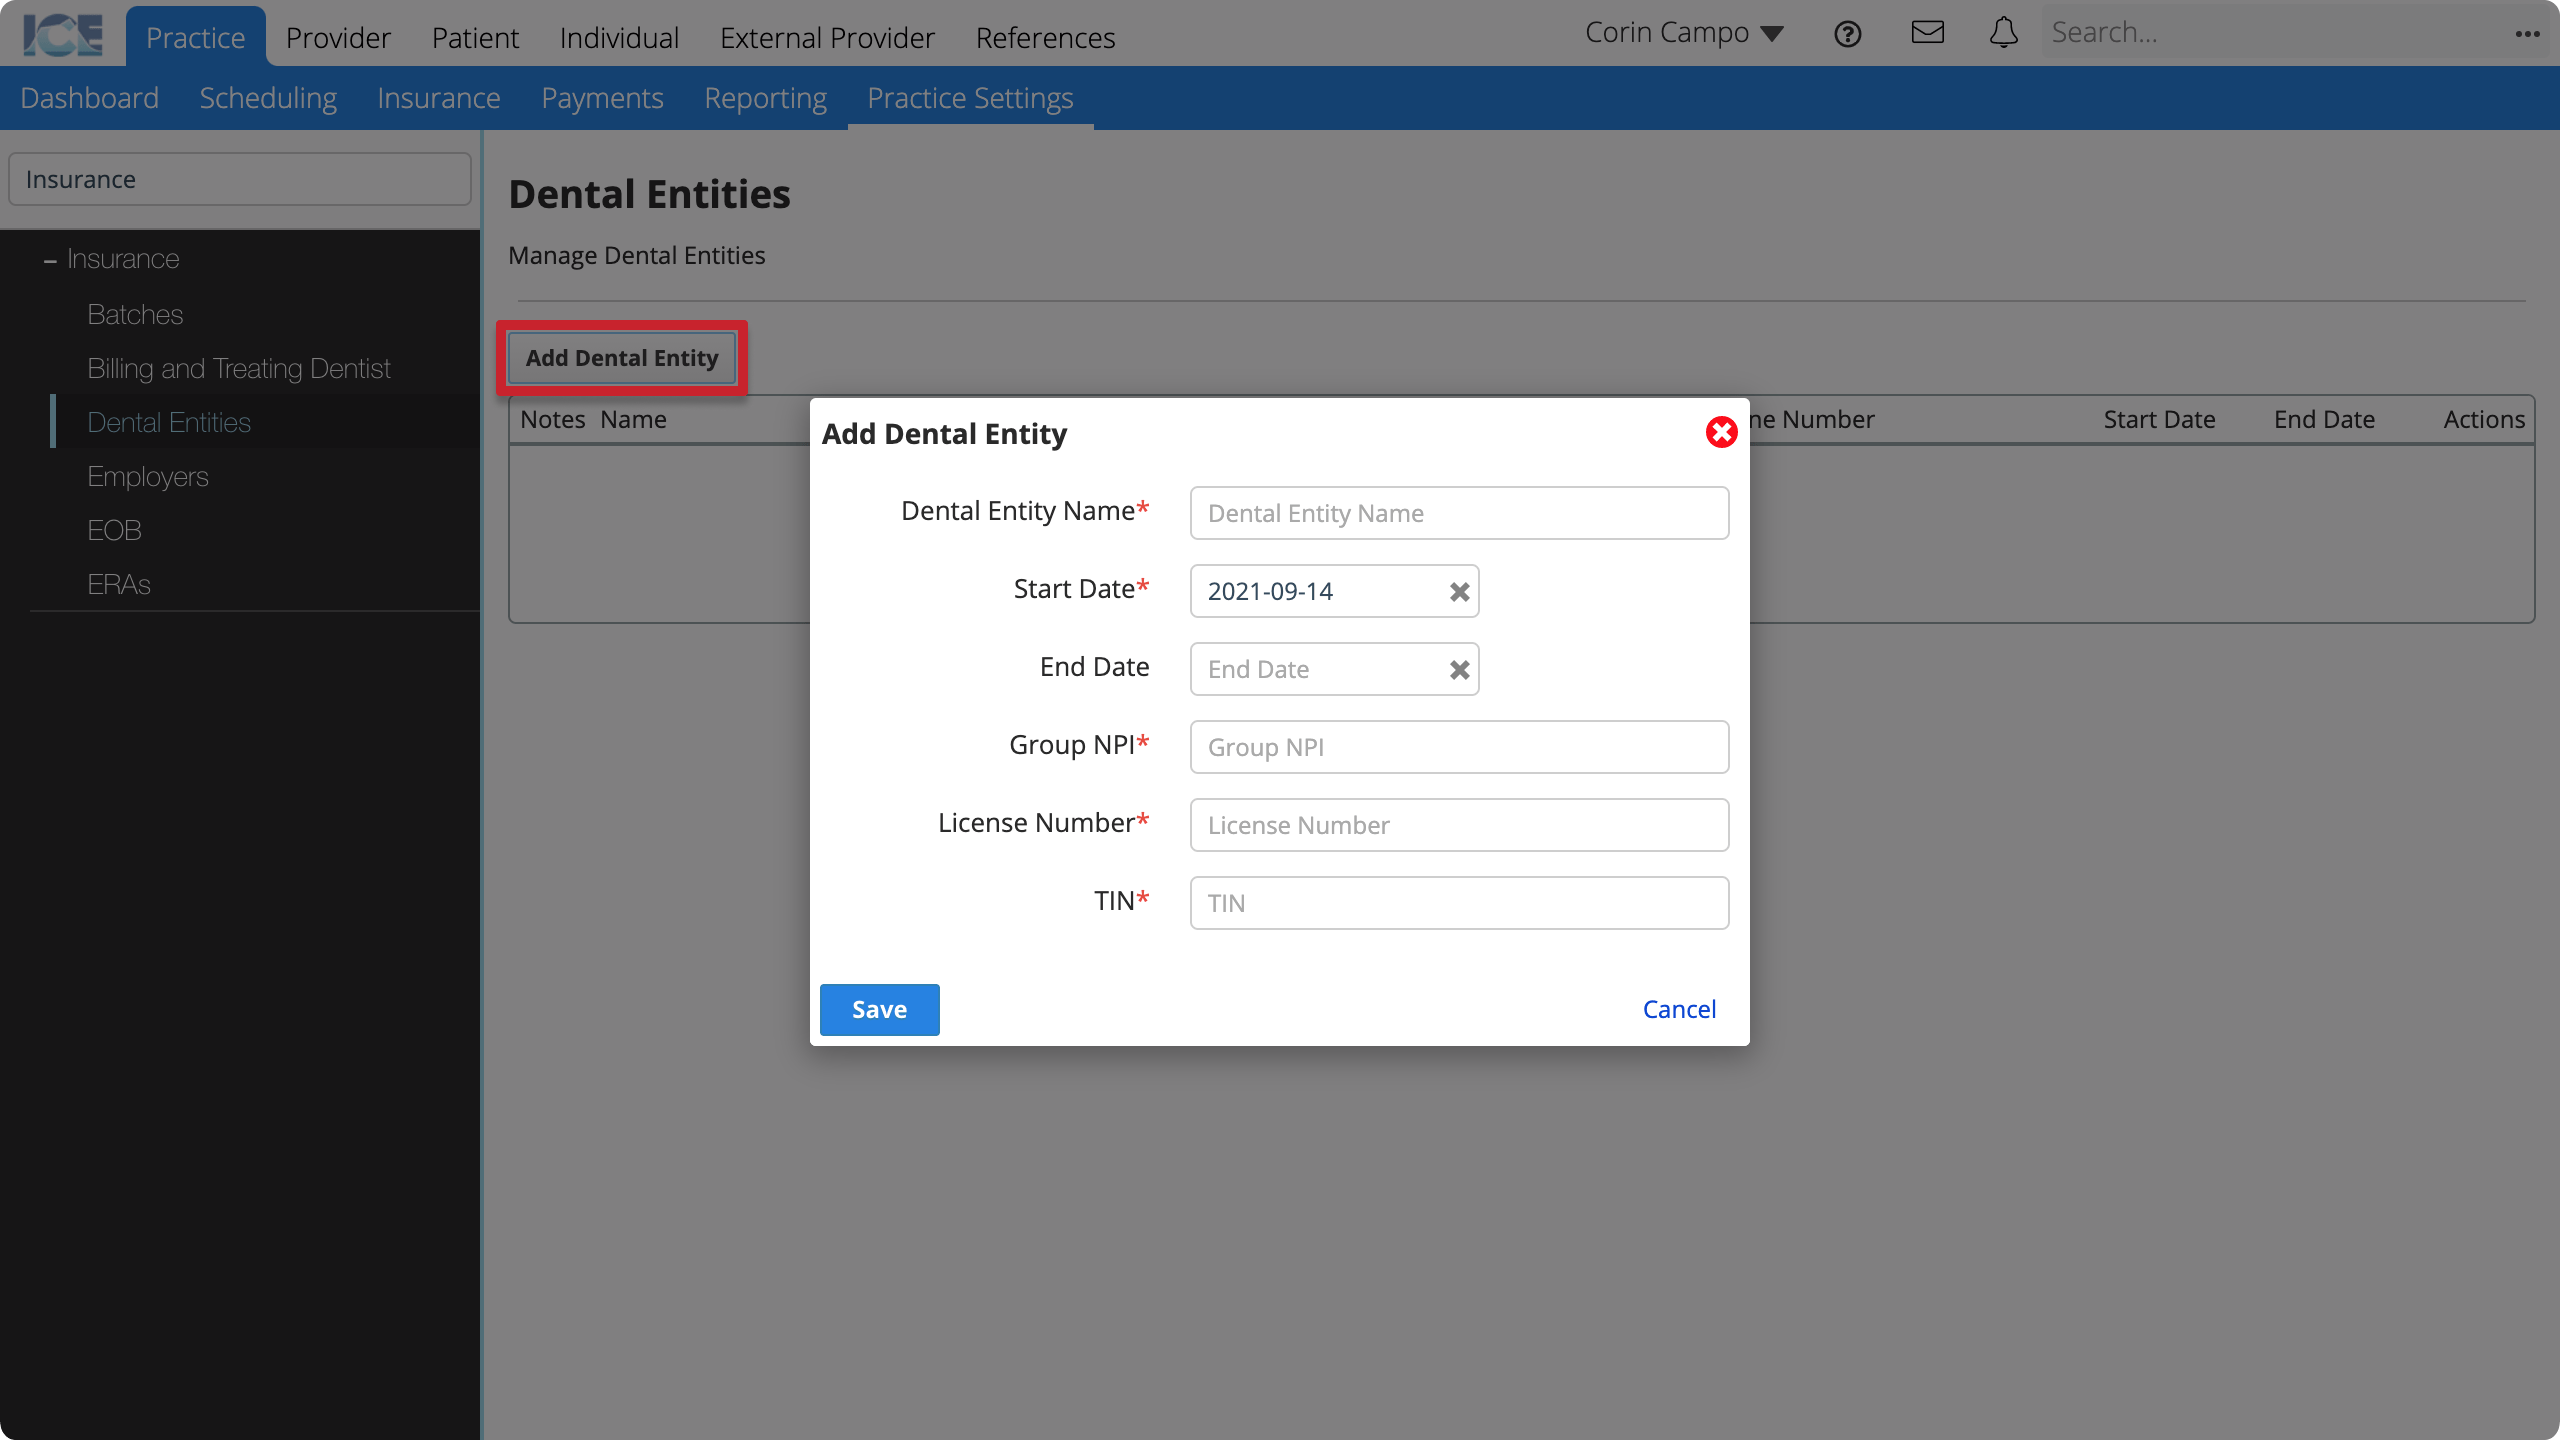
- Dental Entity Name: The dental entity's name.
- Start Date: The start date of activity.
- End Date: The final date of activity.
- Group NPI: The dental entity's group national provider identifier (NPI).
- License Number: The dental entity's license number provided by a regulatory body or state to practice dentistry.
- TIN: The dental entity's tax identification number (TIN).
- Select Save
- Enter the required contact information:
- Work Phone Number: The dental entity's phone number.
- Billing Address: The dental entity's billing address.
- The system saves your changes automatically
- After you configure a dental entity you must associate them with a clinic group under Practice Settings > Primary Information > Clinic Management
- To learn more, see Practice settings: clinic management.
Employers
Add, view, and edit employers that may be associated with insurance policies in the system.
- Go to Practice > Practice Settings > Insurance > Employers
- Select Add Employer
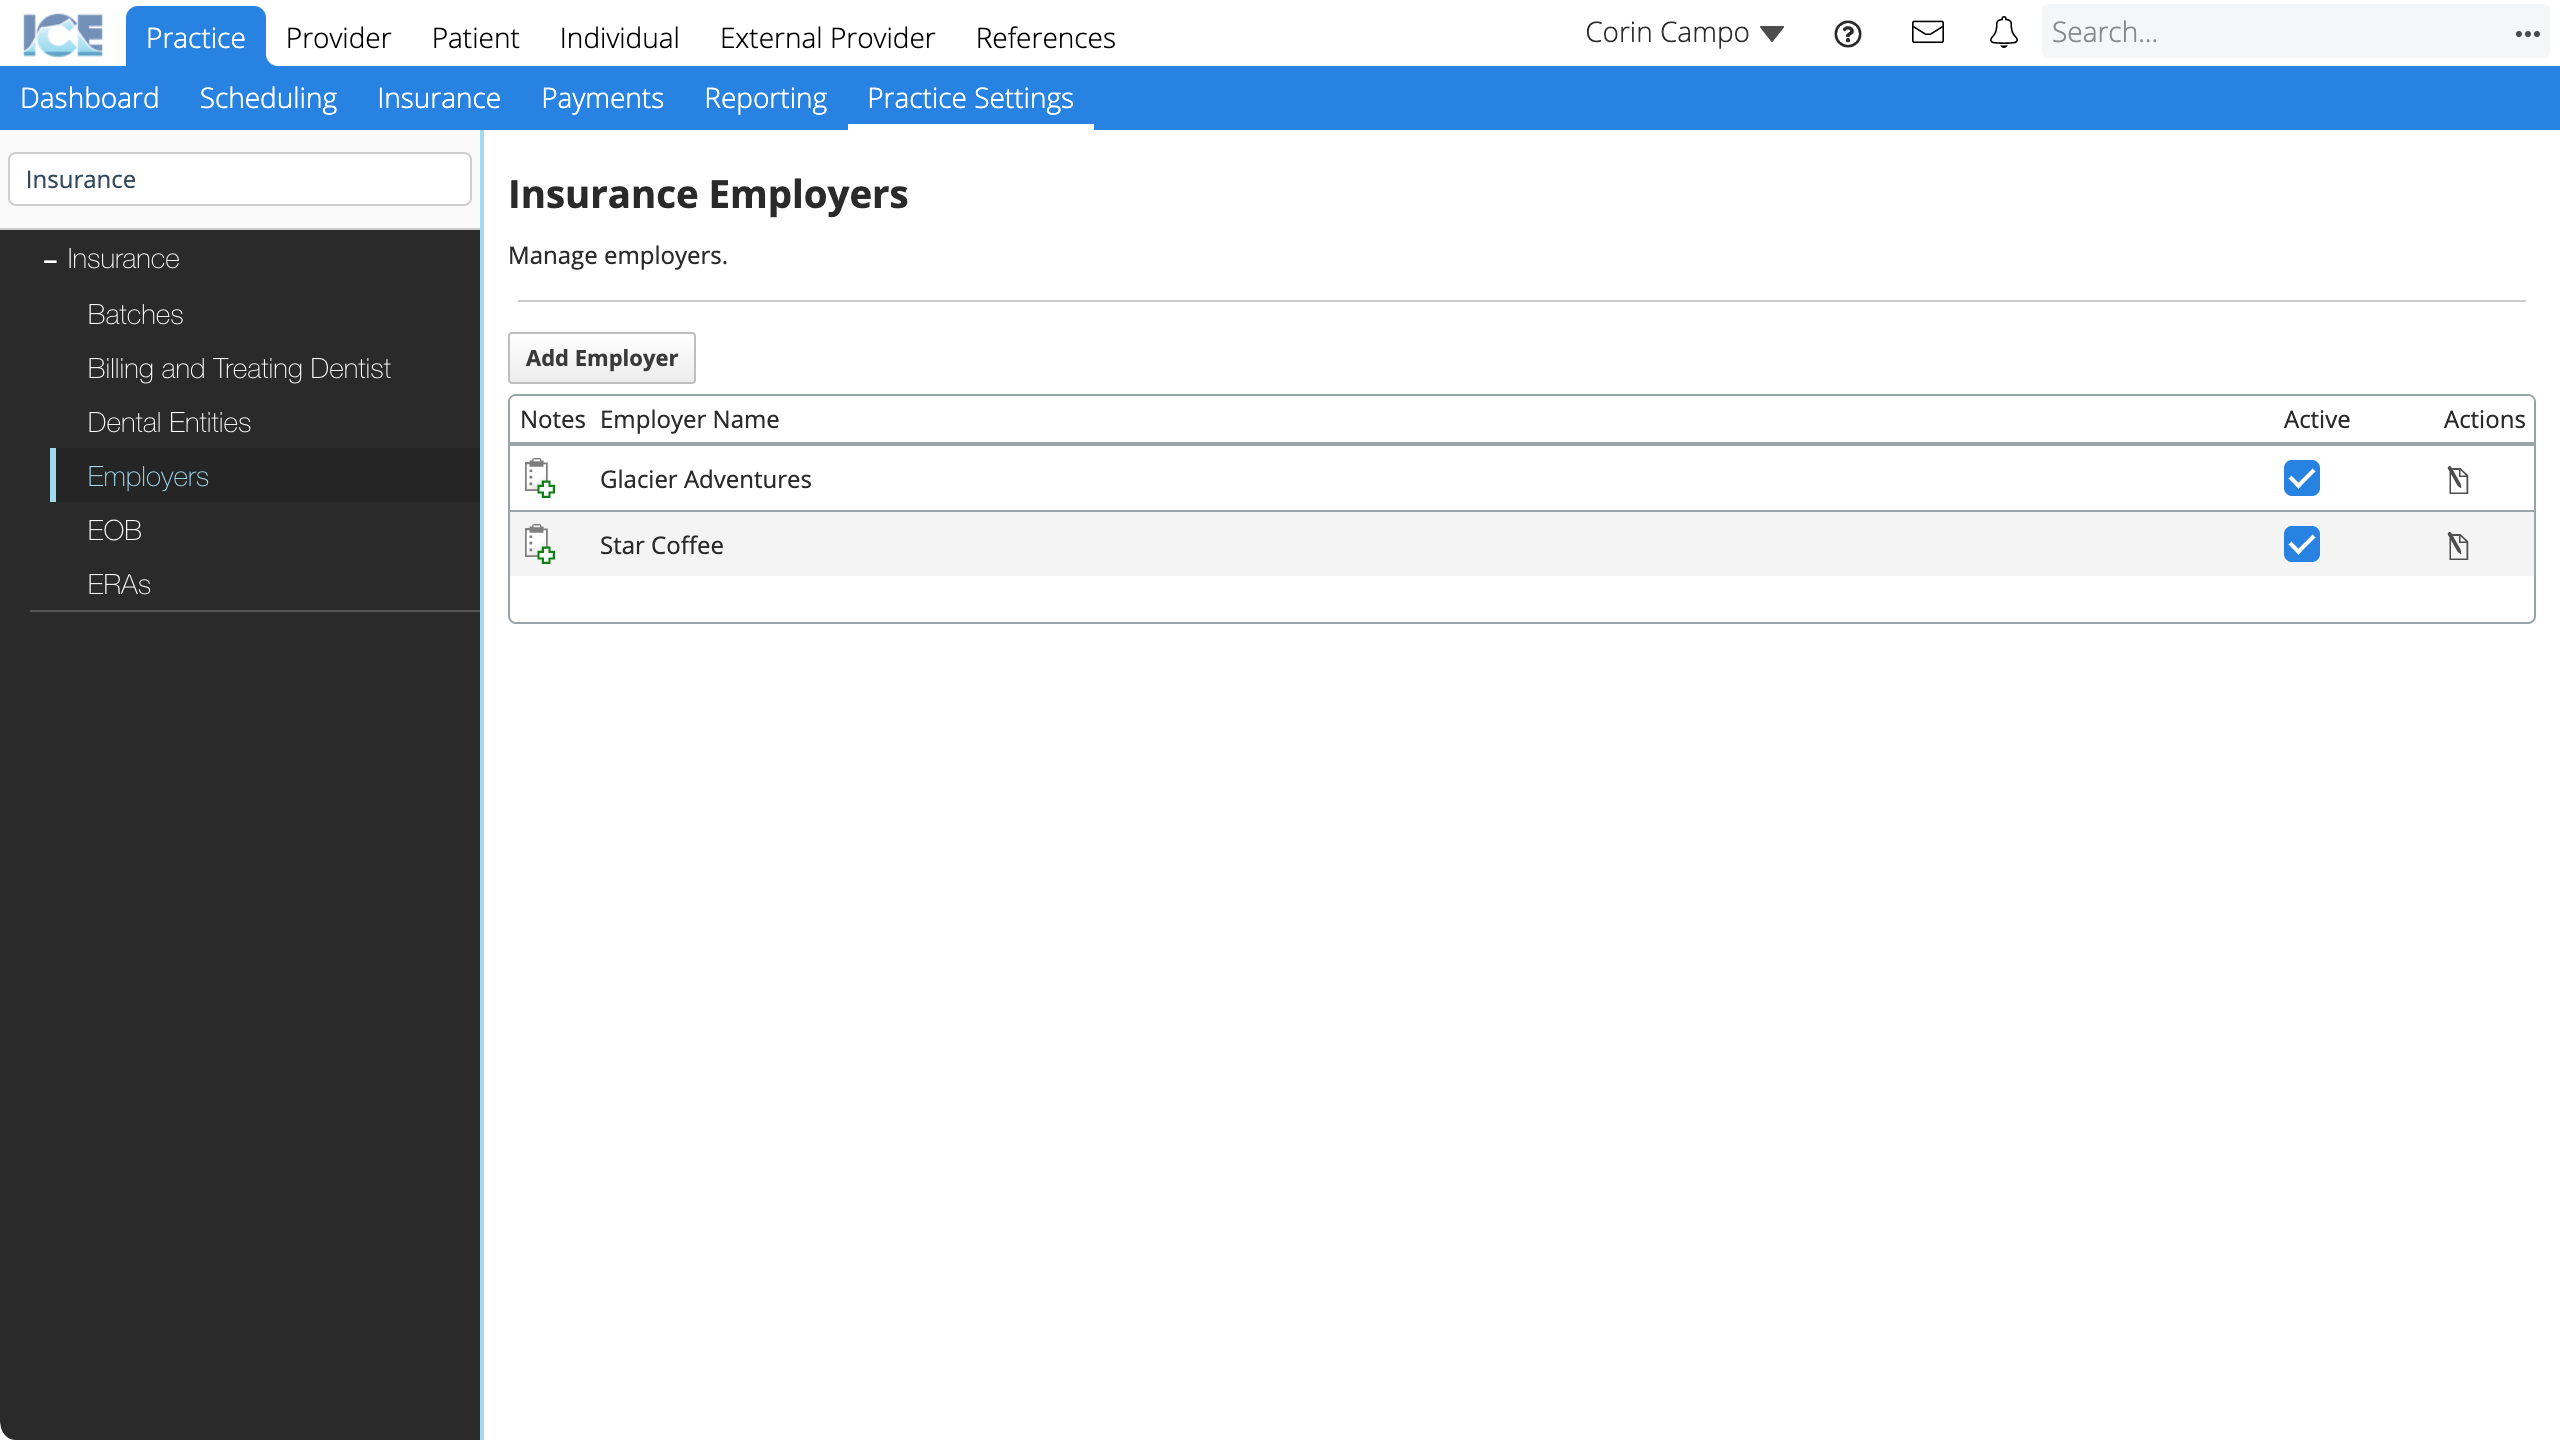
- Enter the employer's name
- Select Save
- Enter address, phone, and email contact methods
- The system saves your changes automatically
To edit an existing employer, select ![]() in the Actions column.
in the Actions column.
To prevent an existing employer from being associated with a policy, uncheck the Active checkbox. Inactive employers don't appear in search results when you connect an employer to a policy, but they appear in historical references.
To learn how to link an employer to an insurance policy, see Add an employer to a policy.
Explanation of Benefits (EOB)
Choose if you want these columns to appear in Practice > Payments > Batch Payments when allocating insurance payments and processing EOBs.
- Go to Practice > Practice Settings > Insurance > EOB
- Toggle if you want to show each of the available columns
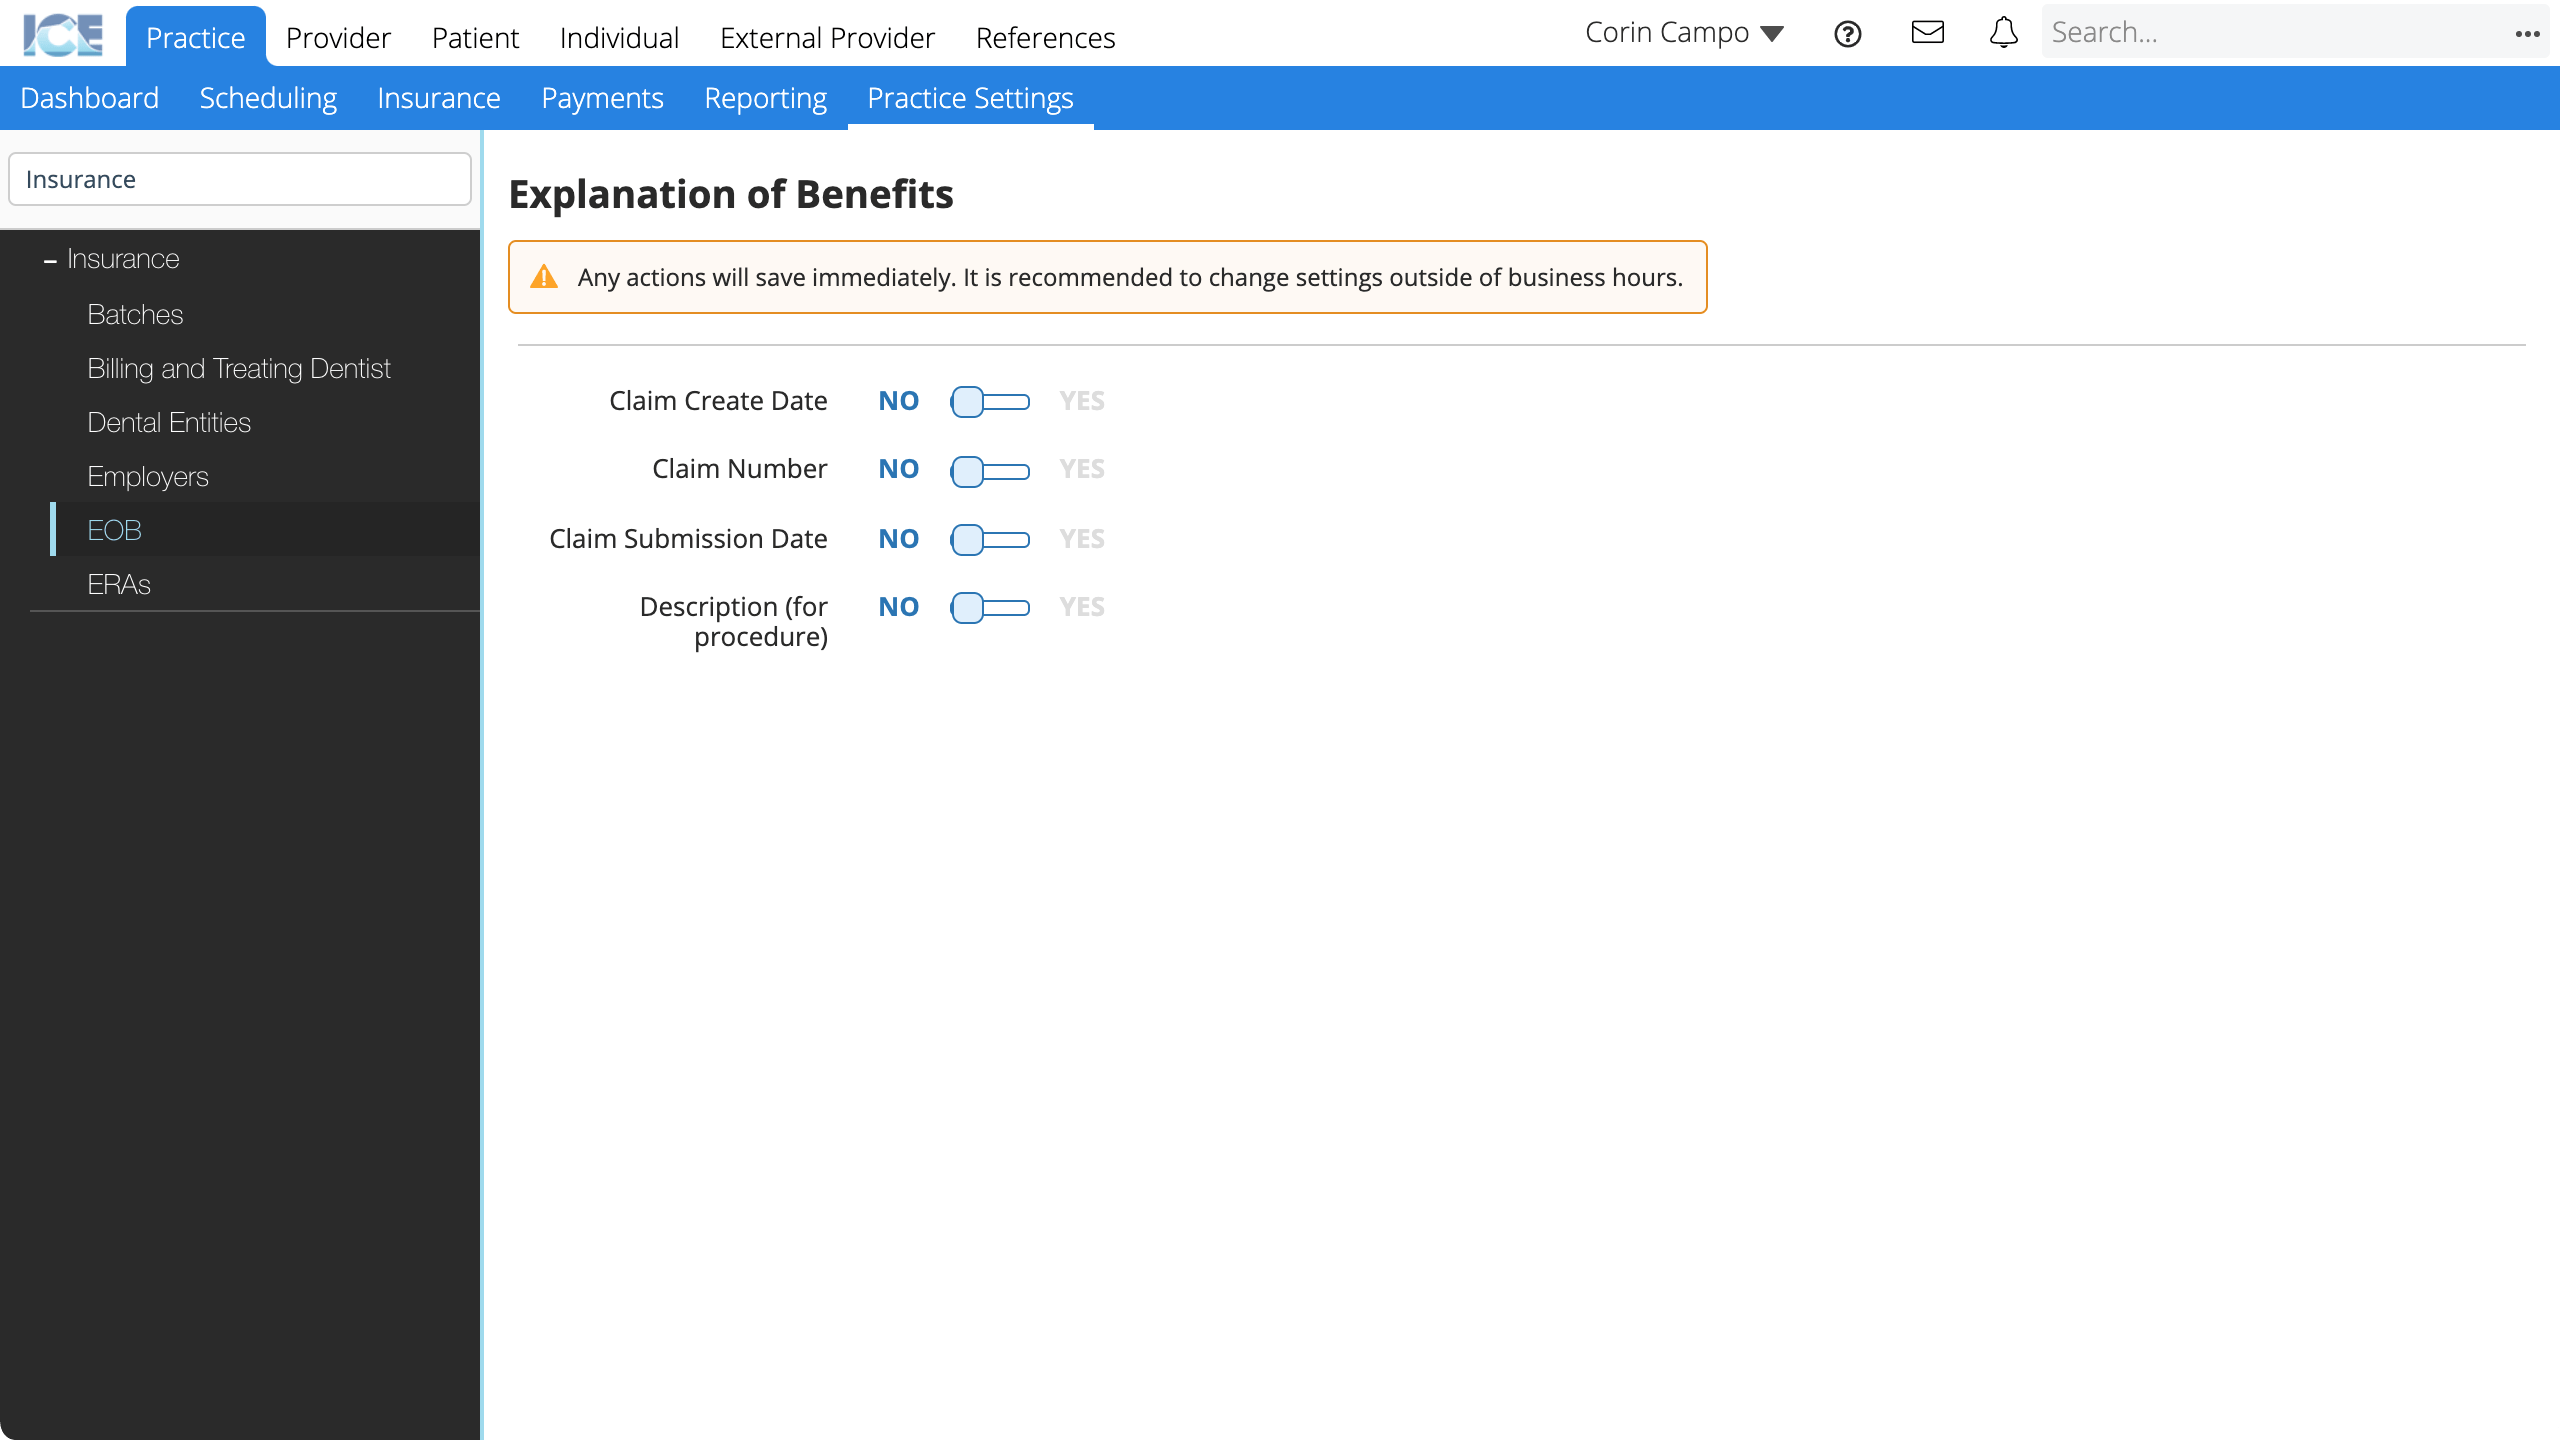
The system saves your changes automatically.
ERA Payment Method Codes (ERAs)
To reduce data processing times, you can match the standard ERA 835 payment method codes to your practice's payment methods configured in Practice Settings > Financials > Payment Methods.
When you add an ERA to a payment batch, the system auto-fills payment methods to match the choices you make here. If there is no match, the system leaves the field blank for you to update manually.
- Go to Practice > Practice Settings > Insurance > ERAs
- For each ERA 835 payment method code: Choose from the list of payment methods configured in your system
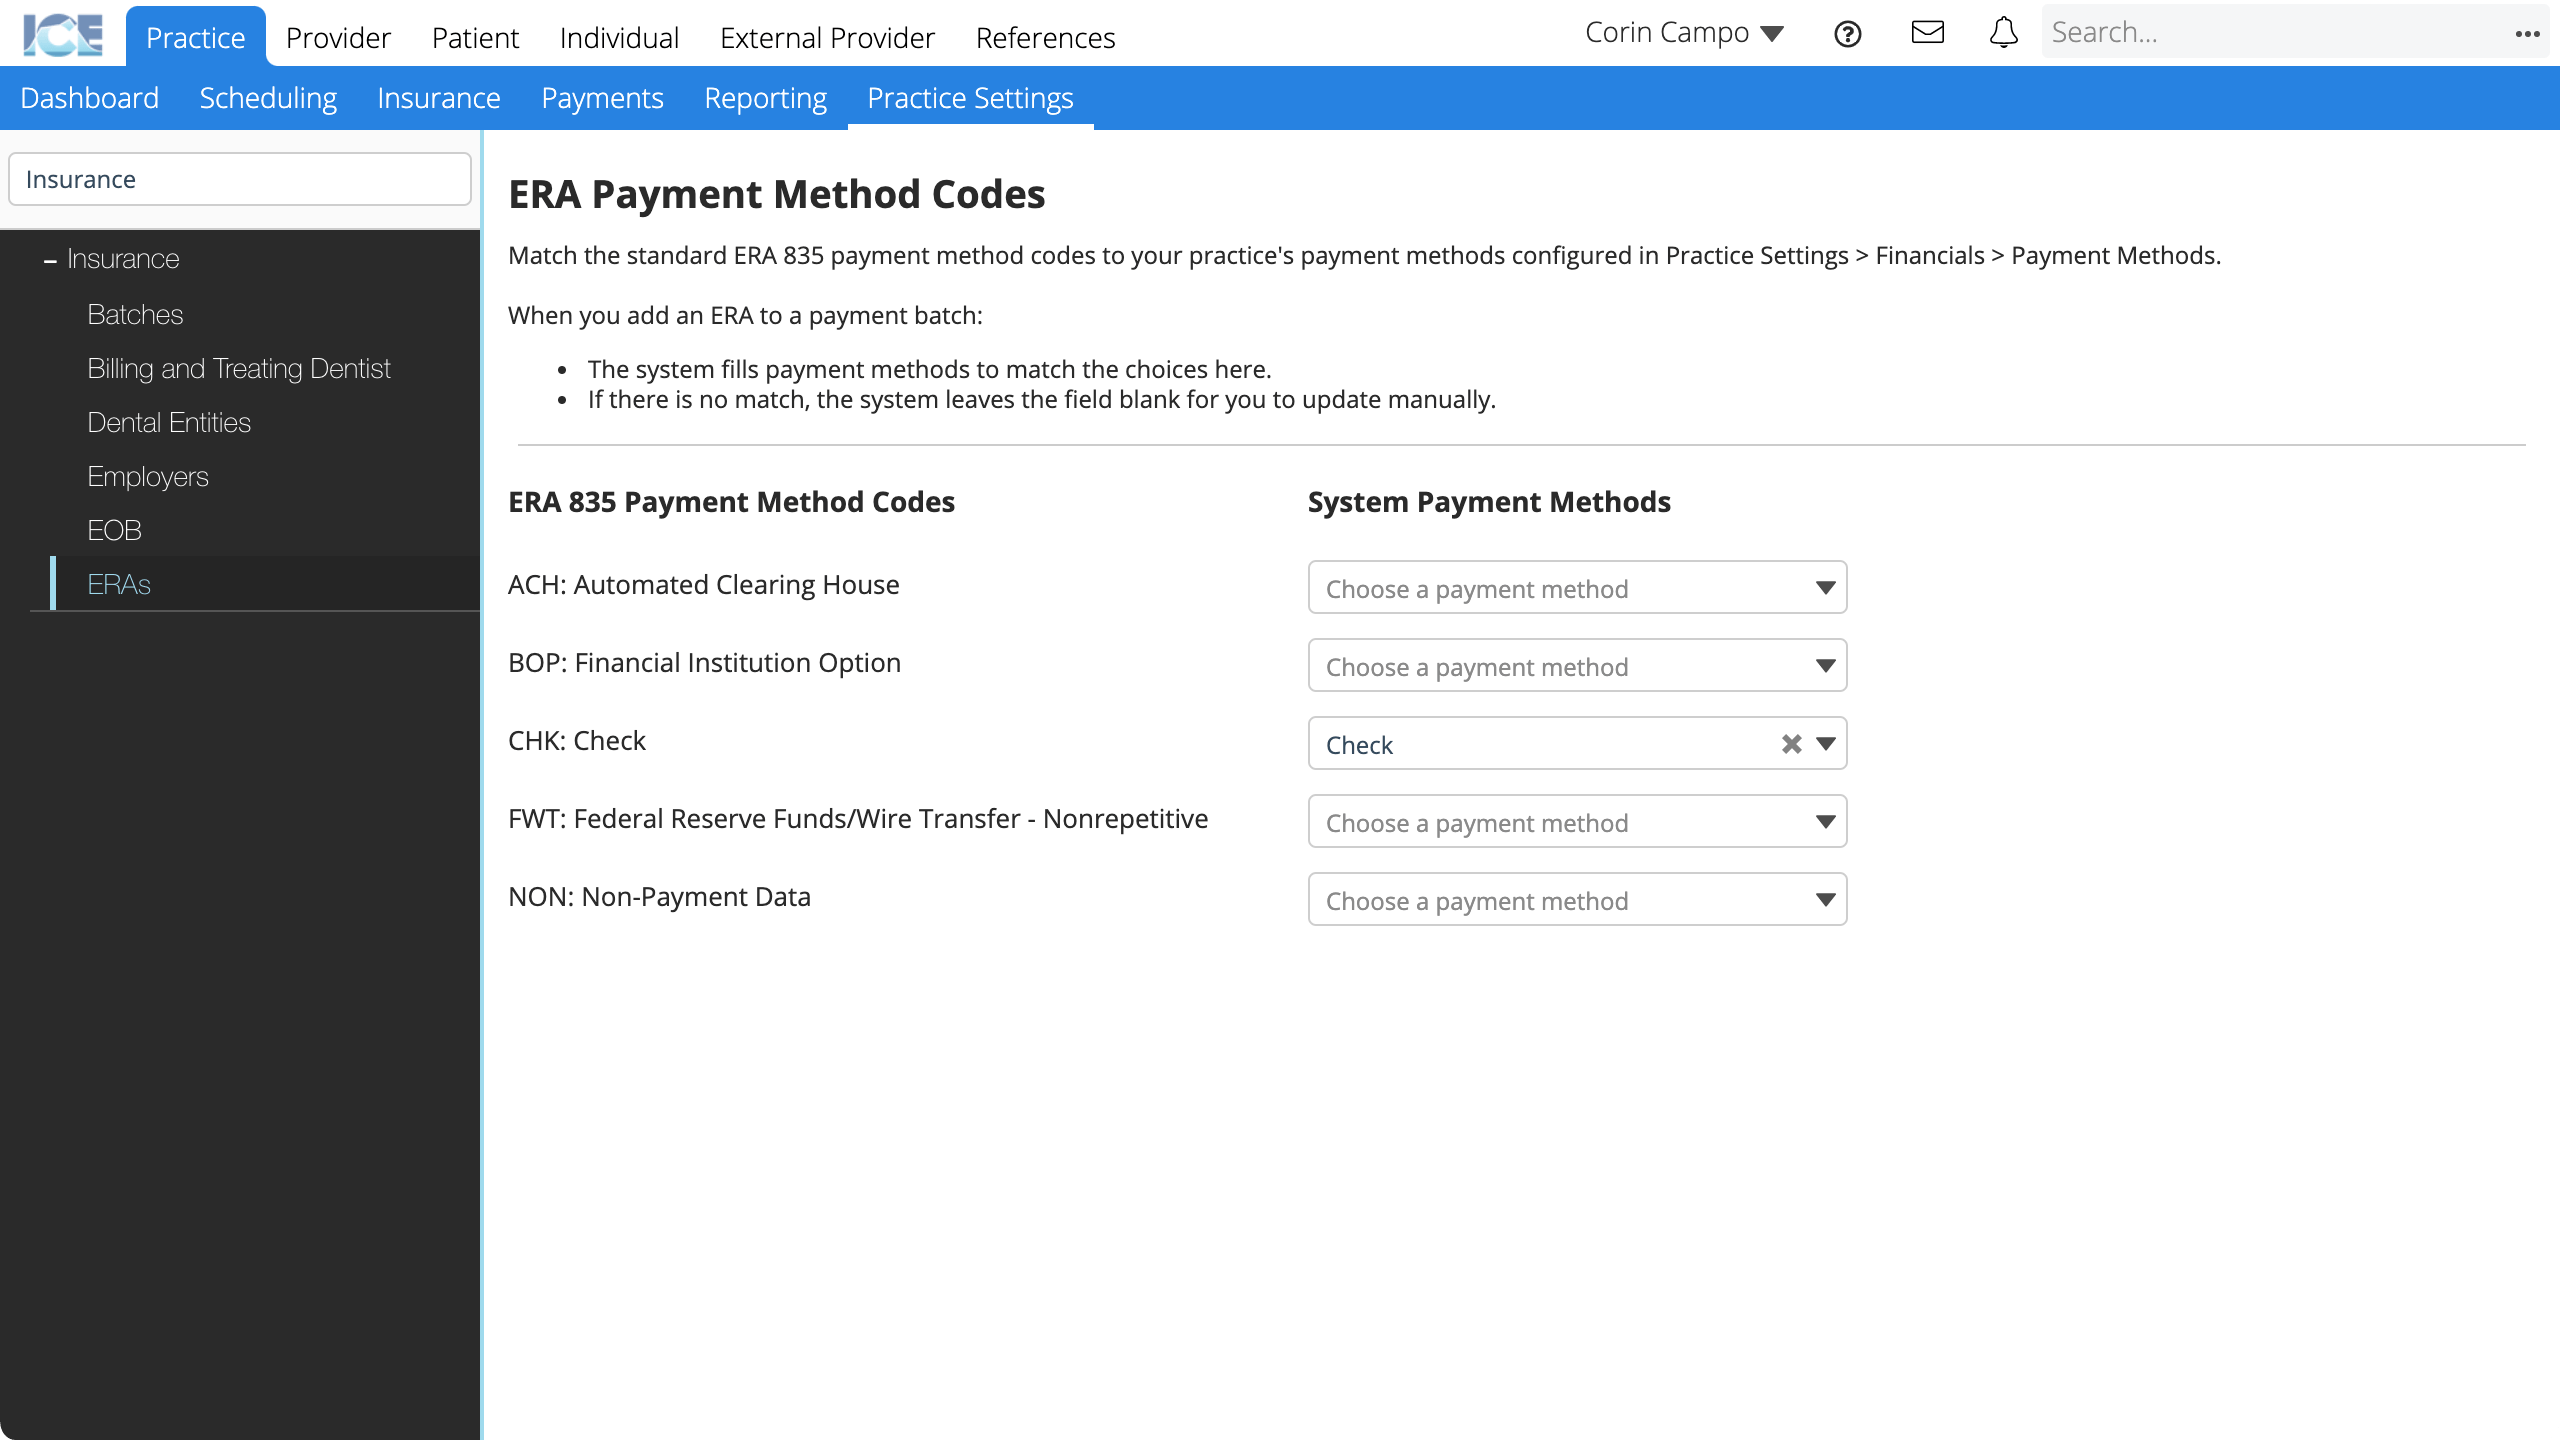
- The system saves your changes automatically
To remove a payment method match, select X beside the system payment method.