Personalize display settings in scheduling
In the scheduling provider settings you can customize how you see the schedule.
- Go to Provider > Scheduling
- Select
 in the top right corner
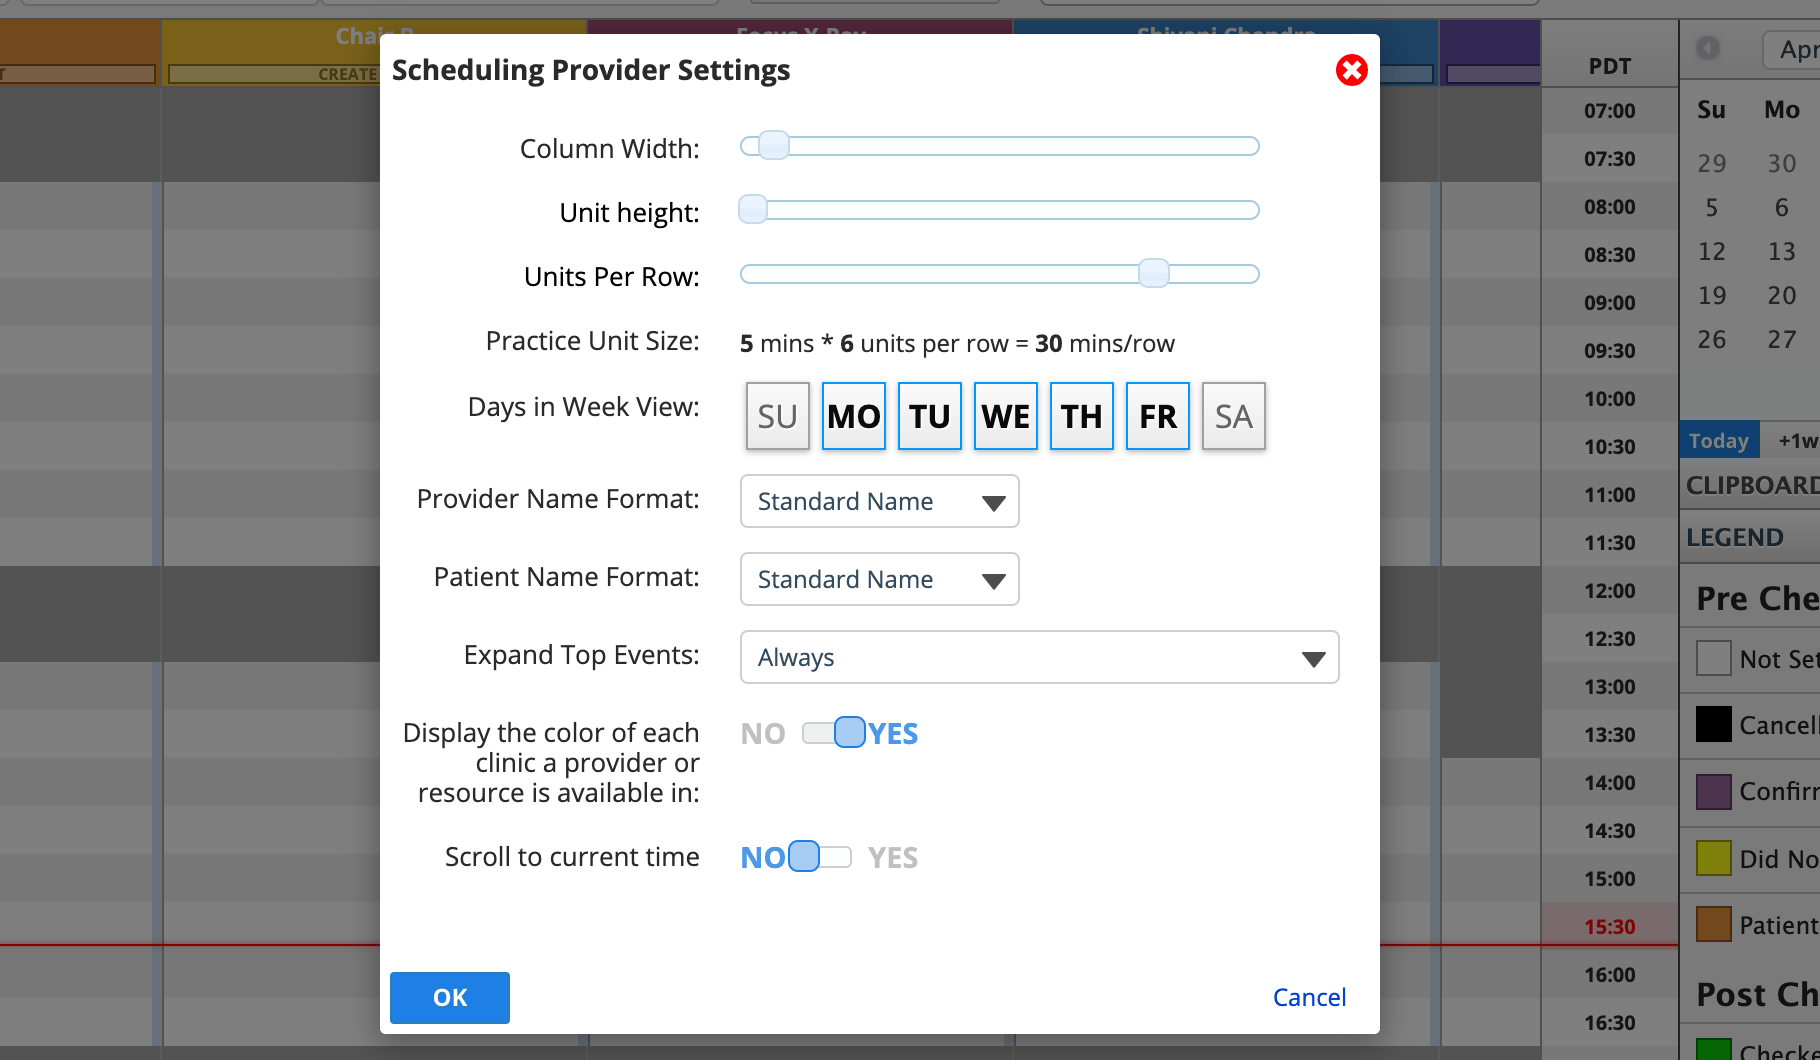
- From the Scheduling Provider Settings window you may modify:
- How wide your columns are
- How tall each unit and row are
- How many units are included in each row
- This controls the increments of time you see on the side of the schedule e.g., 60 min rows vs. 15 minute rows.
- You can still schedule appointments in other intervals.
- Which days of the week appear in the weekly view
- The provider name format.
- The patient name format.
- How to display events that appear at the top of the grid.
- Whether you see clinic colours on the schedule grid.
- Whether the schedule scrolls to the current time.
- Select OK to save your changes
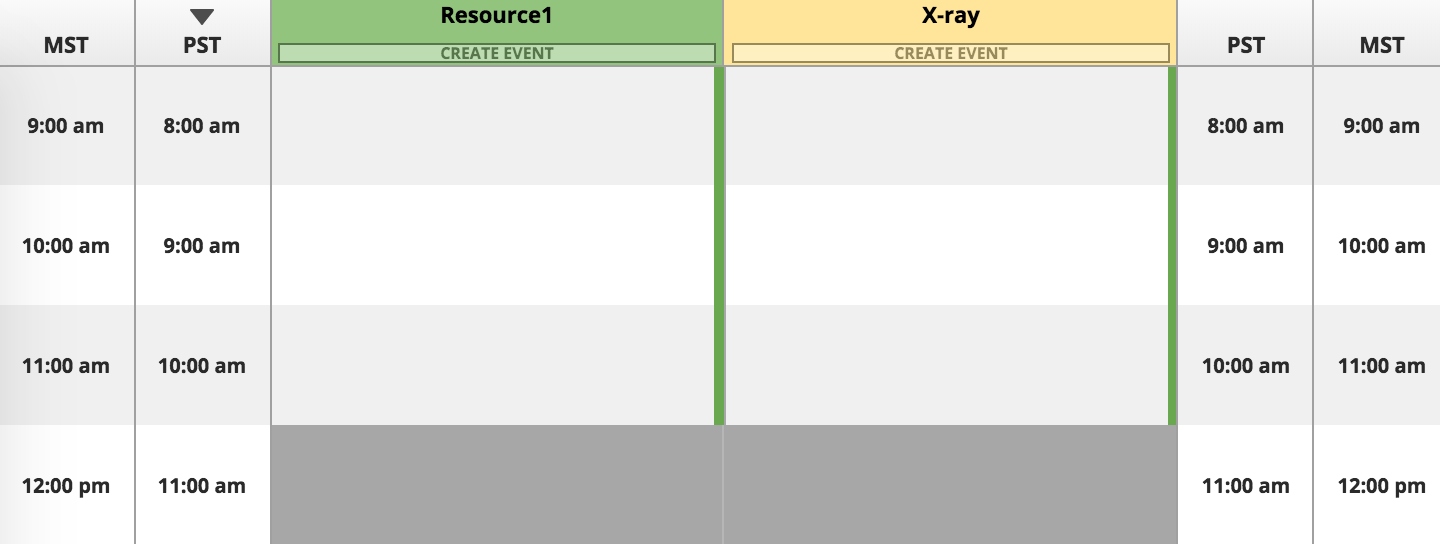
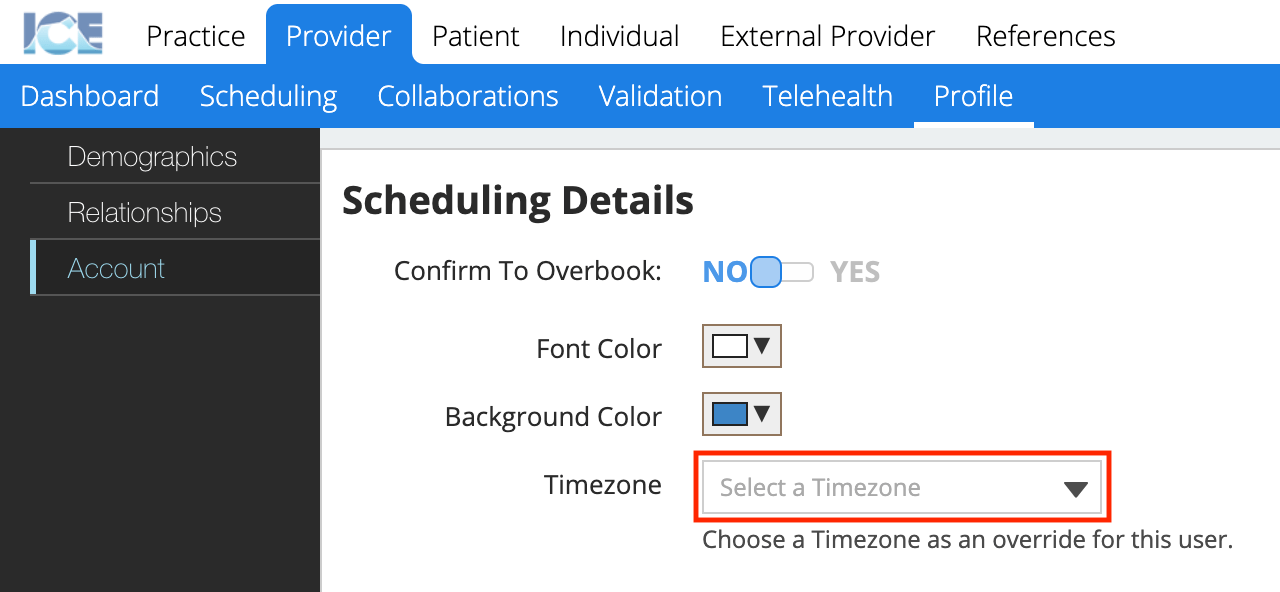
Work in a different time zone
You can display two timezone columns side-by-side on the schedule grid if you are working or travelling in a time zone different than the practice time zone.
- Go to Provider > Profile > Account > Scheduling Details
- Update your Provider Time Zone
The schedule will now:
- Display your provider time zone on the inside of the practice time zone columns
- Adjust your schedule grid to display primarily in your provider time zone
- Schedule appointments in your provider time zone