Apply availability templates
Apply an availability template to a provider or resource to make them available for scheduling in a specific clinic and time range.
You can only apply one availability template to a provider or resource for each date.
You can use the selection tools to apply an availability template to specific days or to multiple days based on criteria like day of the week, every 2nd, and every 3rd.
You have a chance to preview what the provider or resource's schedule looks like before committing to the availability. There is also a validation step to ensure there are no existing availability conflicts and that the availability matches clinic hours.
- Go to Practice > Practice Settings > Scheduling > Availability > Apply Availability
- Search and select the providers and/or resources you want to apply availability to
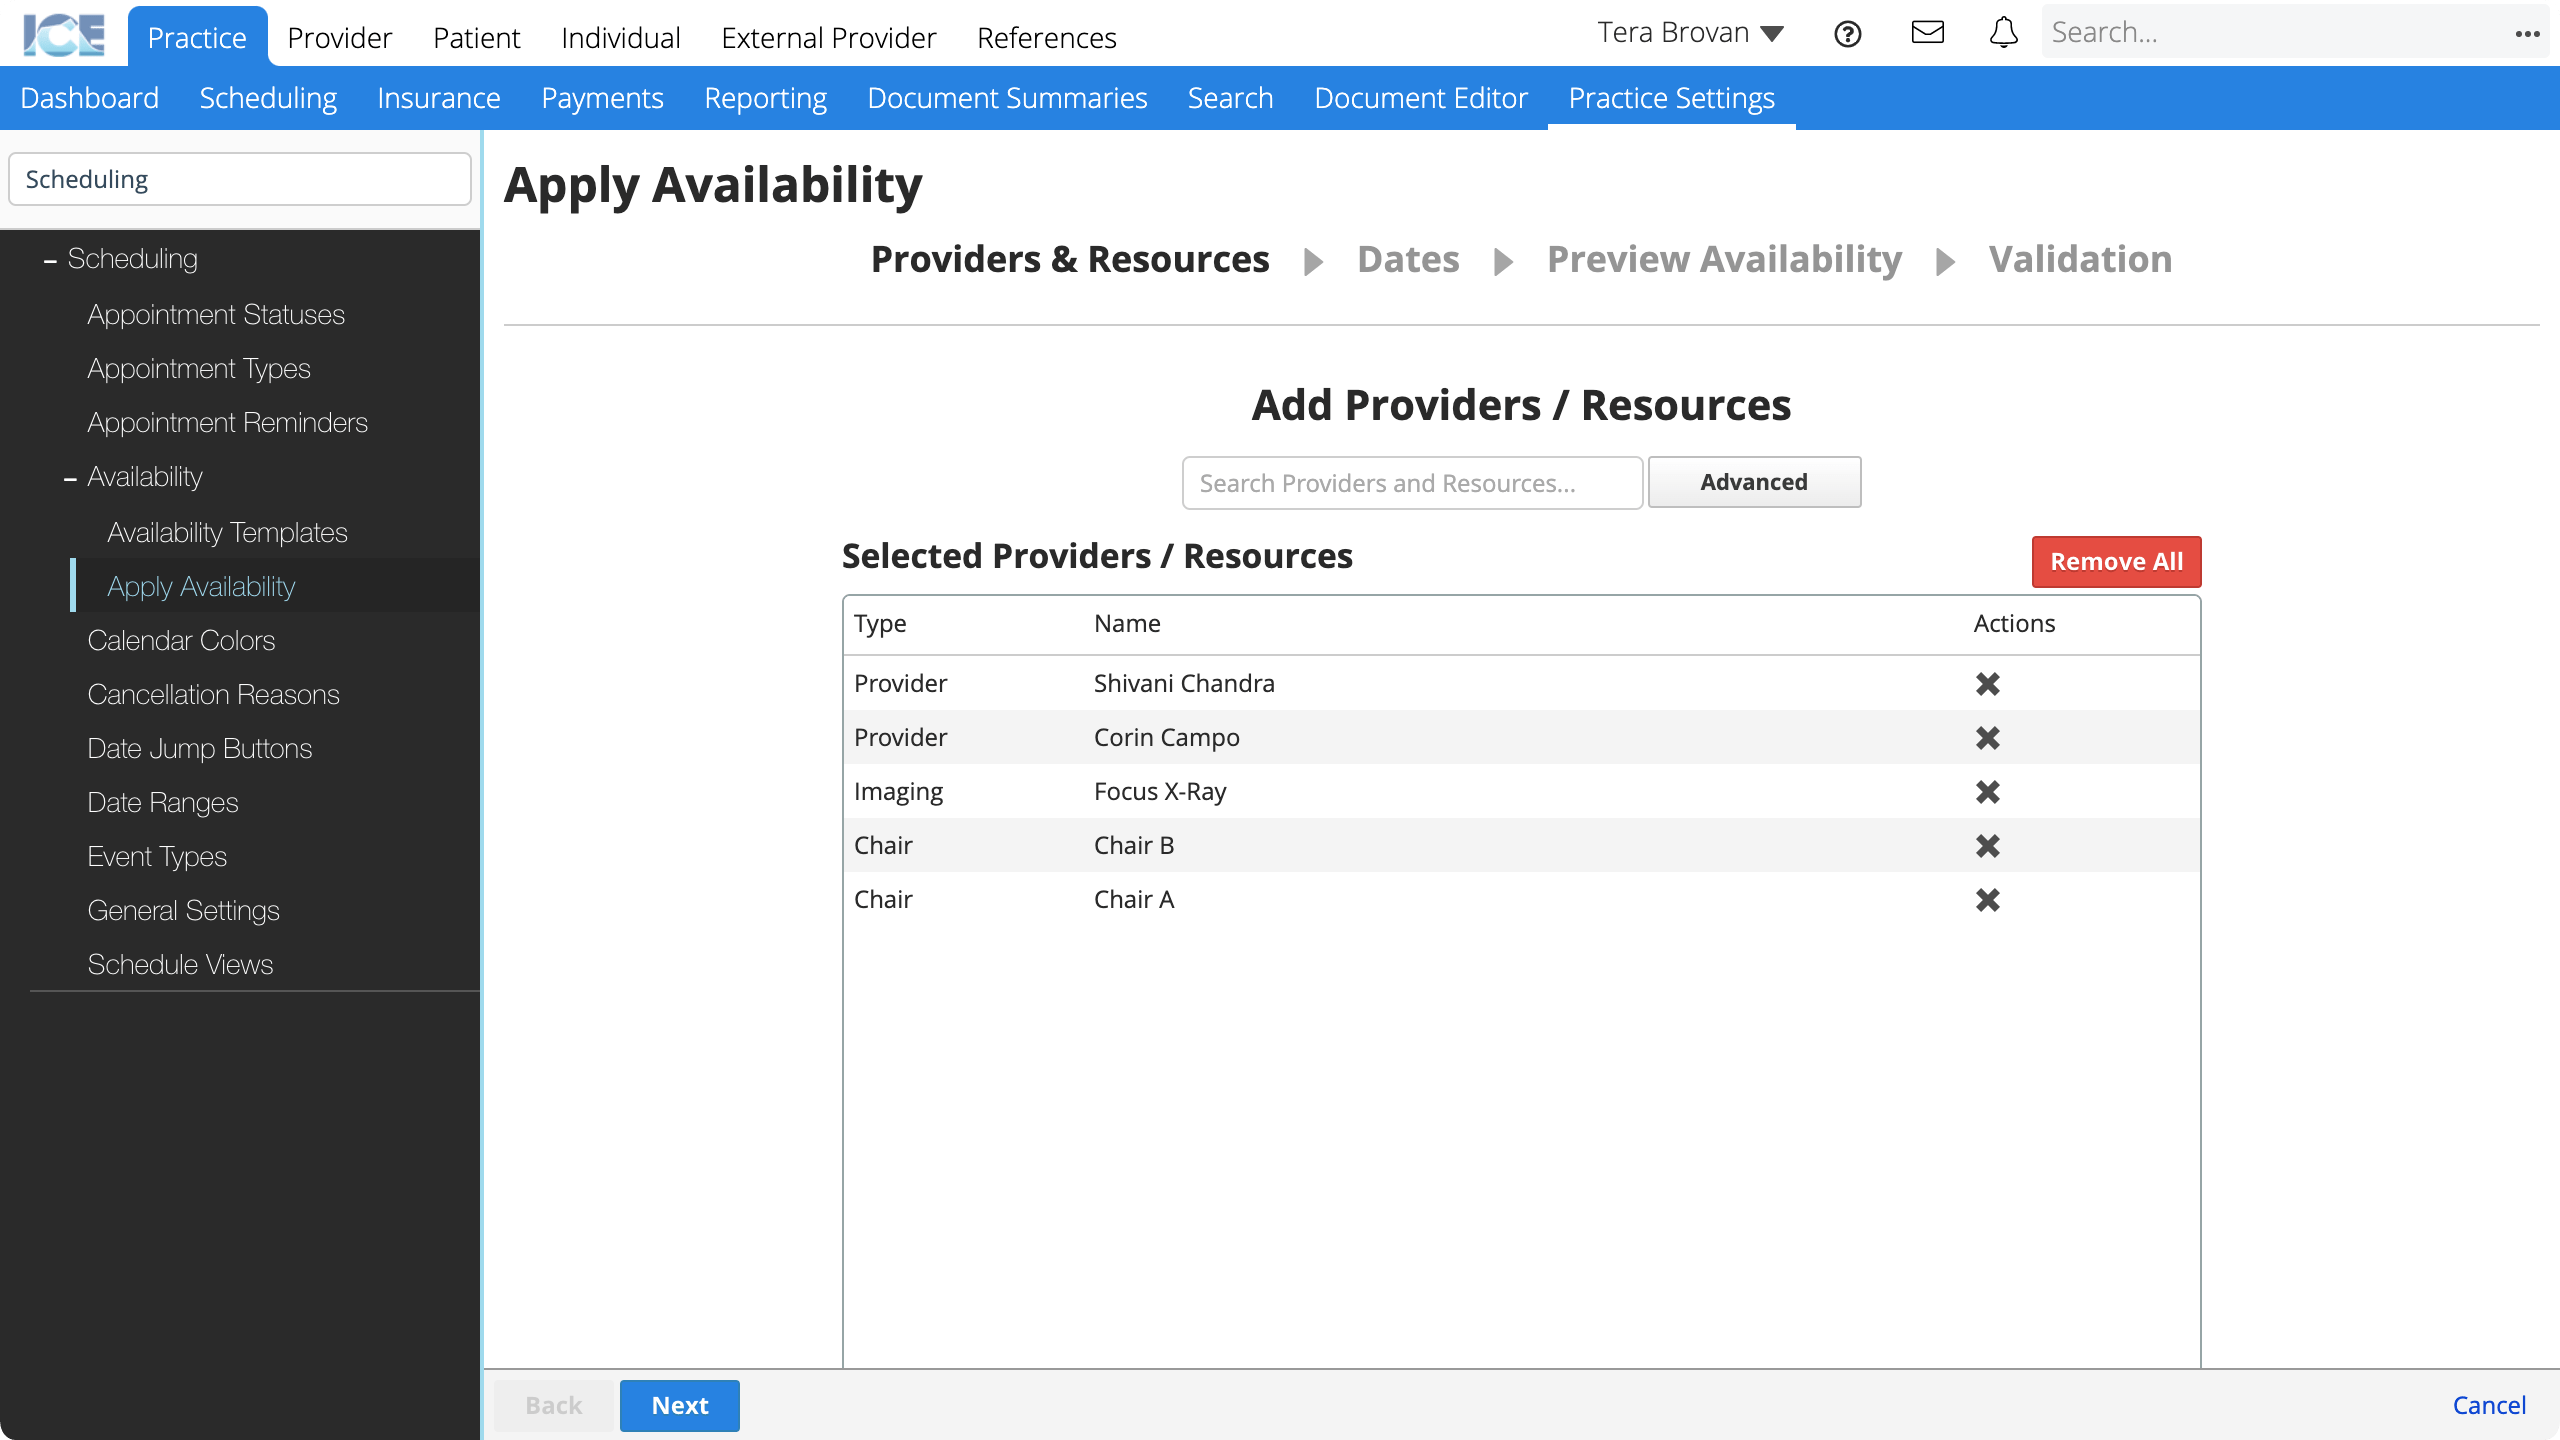
- Select Next
- Select individual days you want to edit
or
Use the Date Range and day filters to select multiple days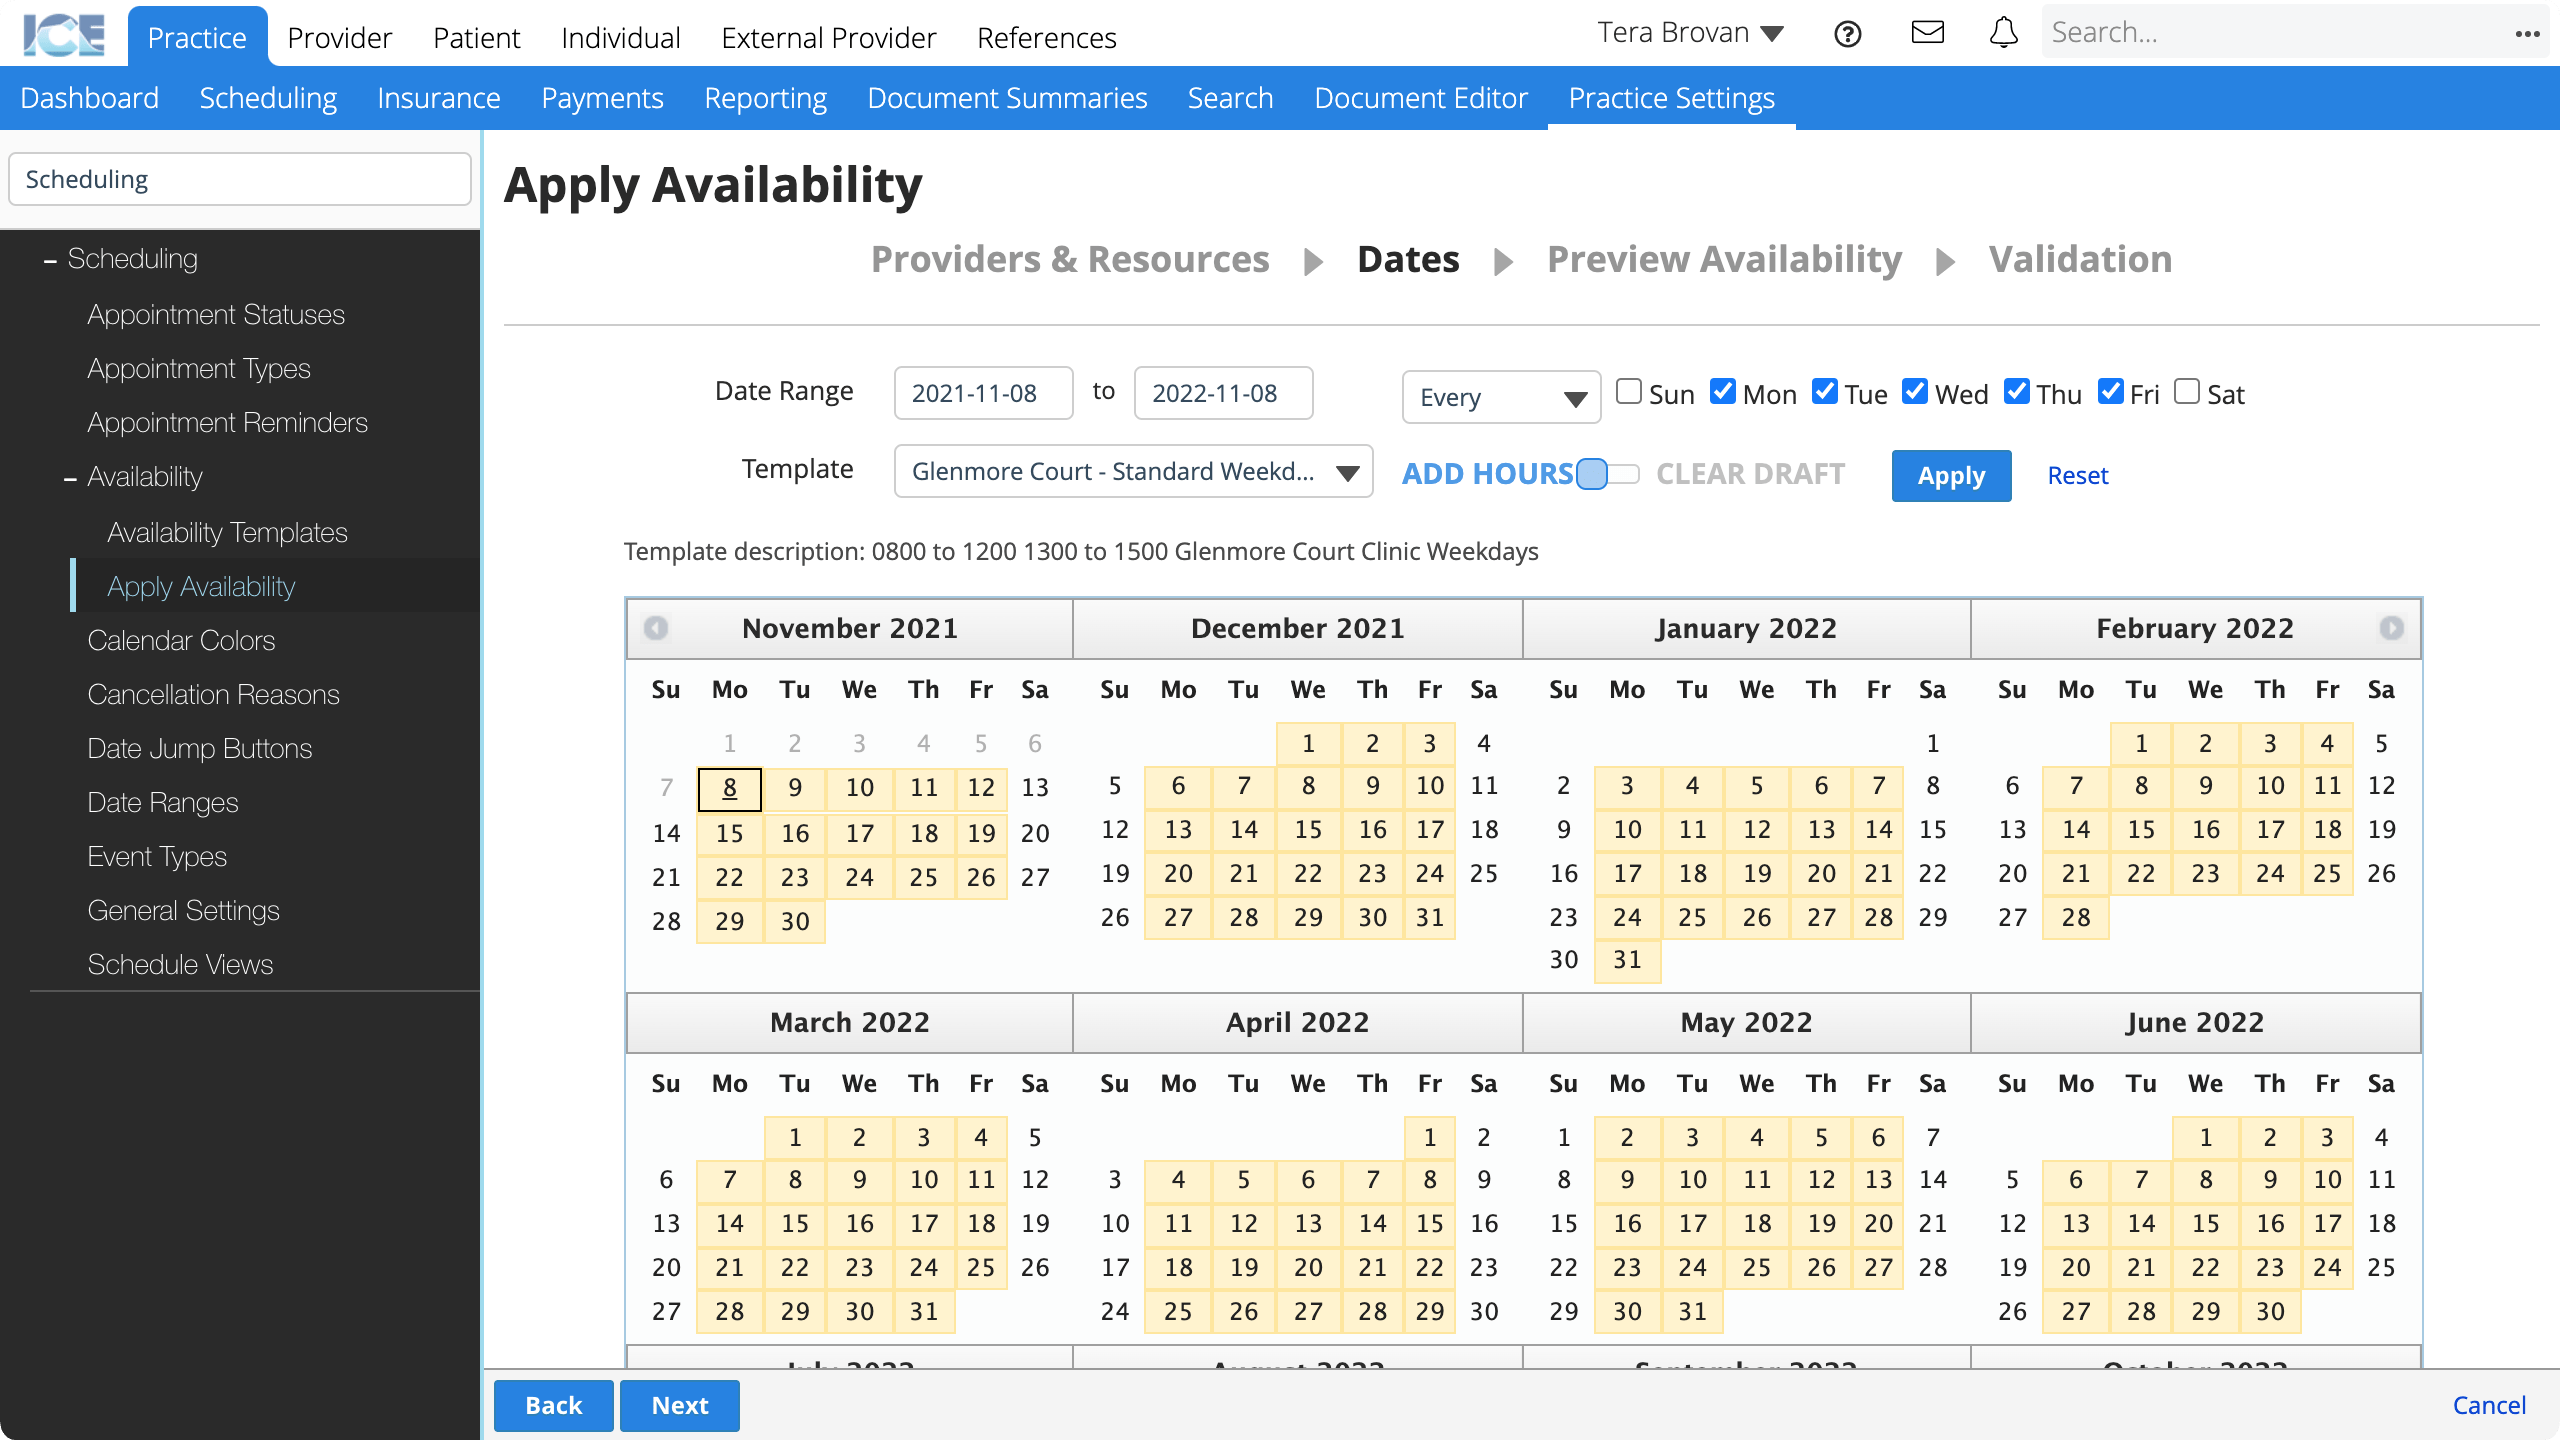
- Choose the availability template you want to apply from the Template drop-down menu
- Choose whether you want to:
- Add Hours
- Clear Draft
- Removes any availability you've applied to the selected dates during this session and reverts them to the previous availability.
- Select Apply to apply the availability template to the providers and resources you selected
- The calendar highlights days in yellow to show the days you applied availability to.
- To deselect the dates you selected with the day filters and date range, select Reset.
- Repeat steps 4-7 to apply other availability templates to the same providers and resources, or to make adjustments
- Select Next
- Use the mini calendar to review how the availability you applied looks on a schedule grid
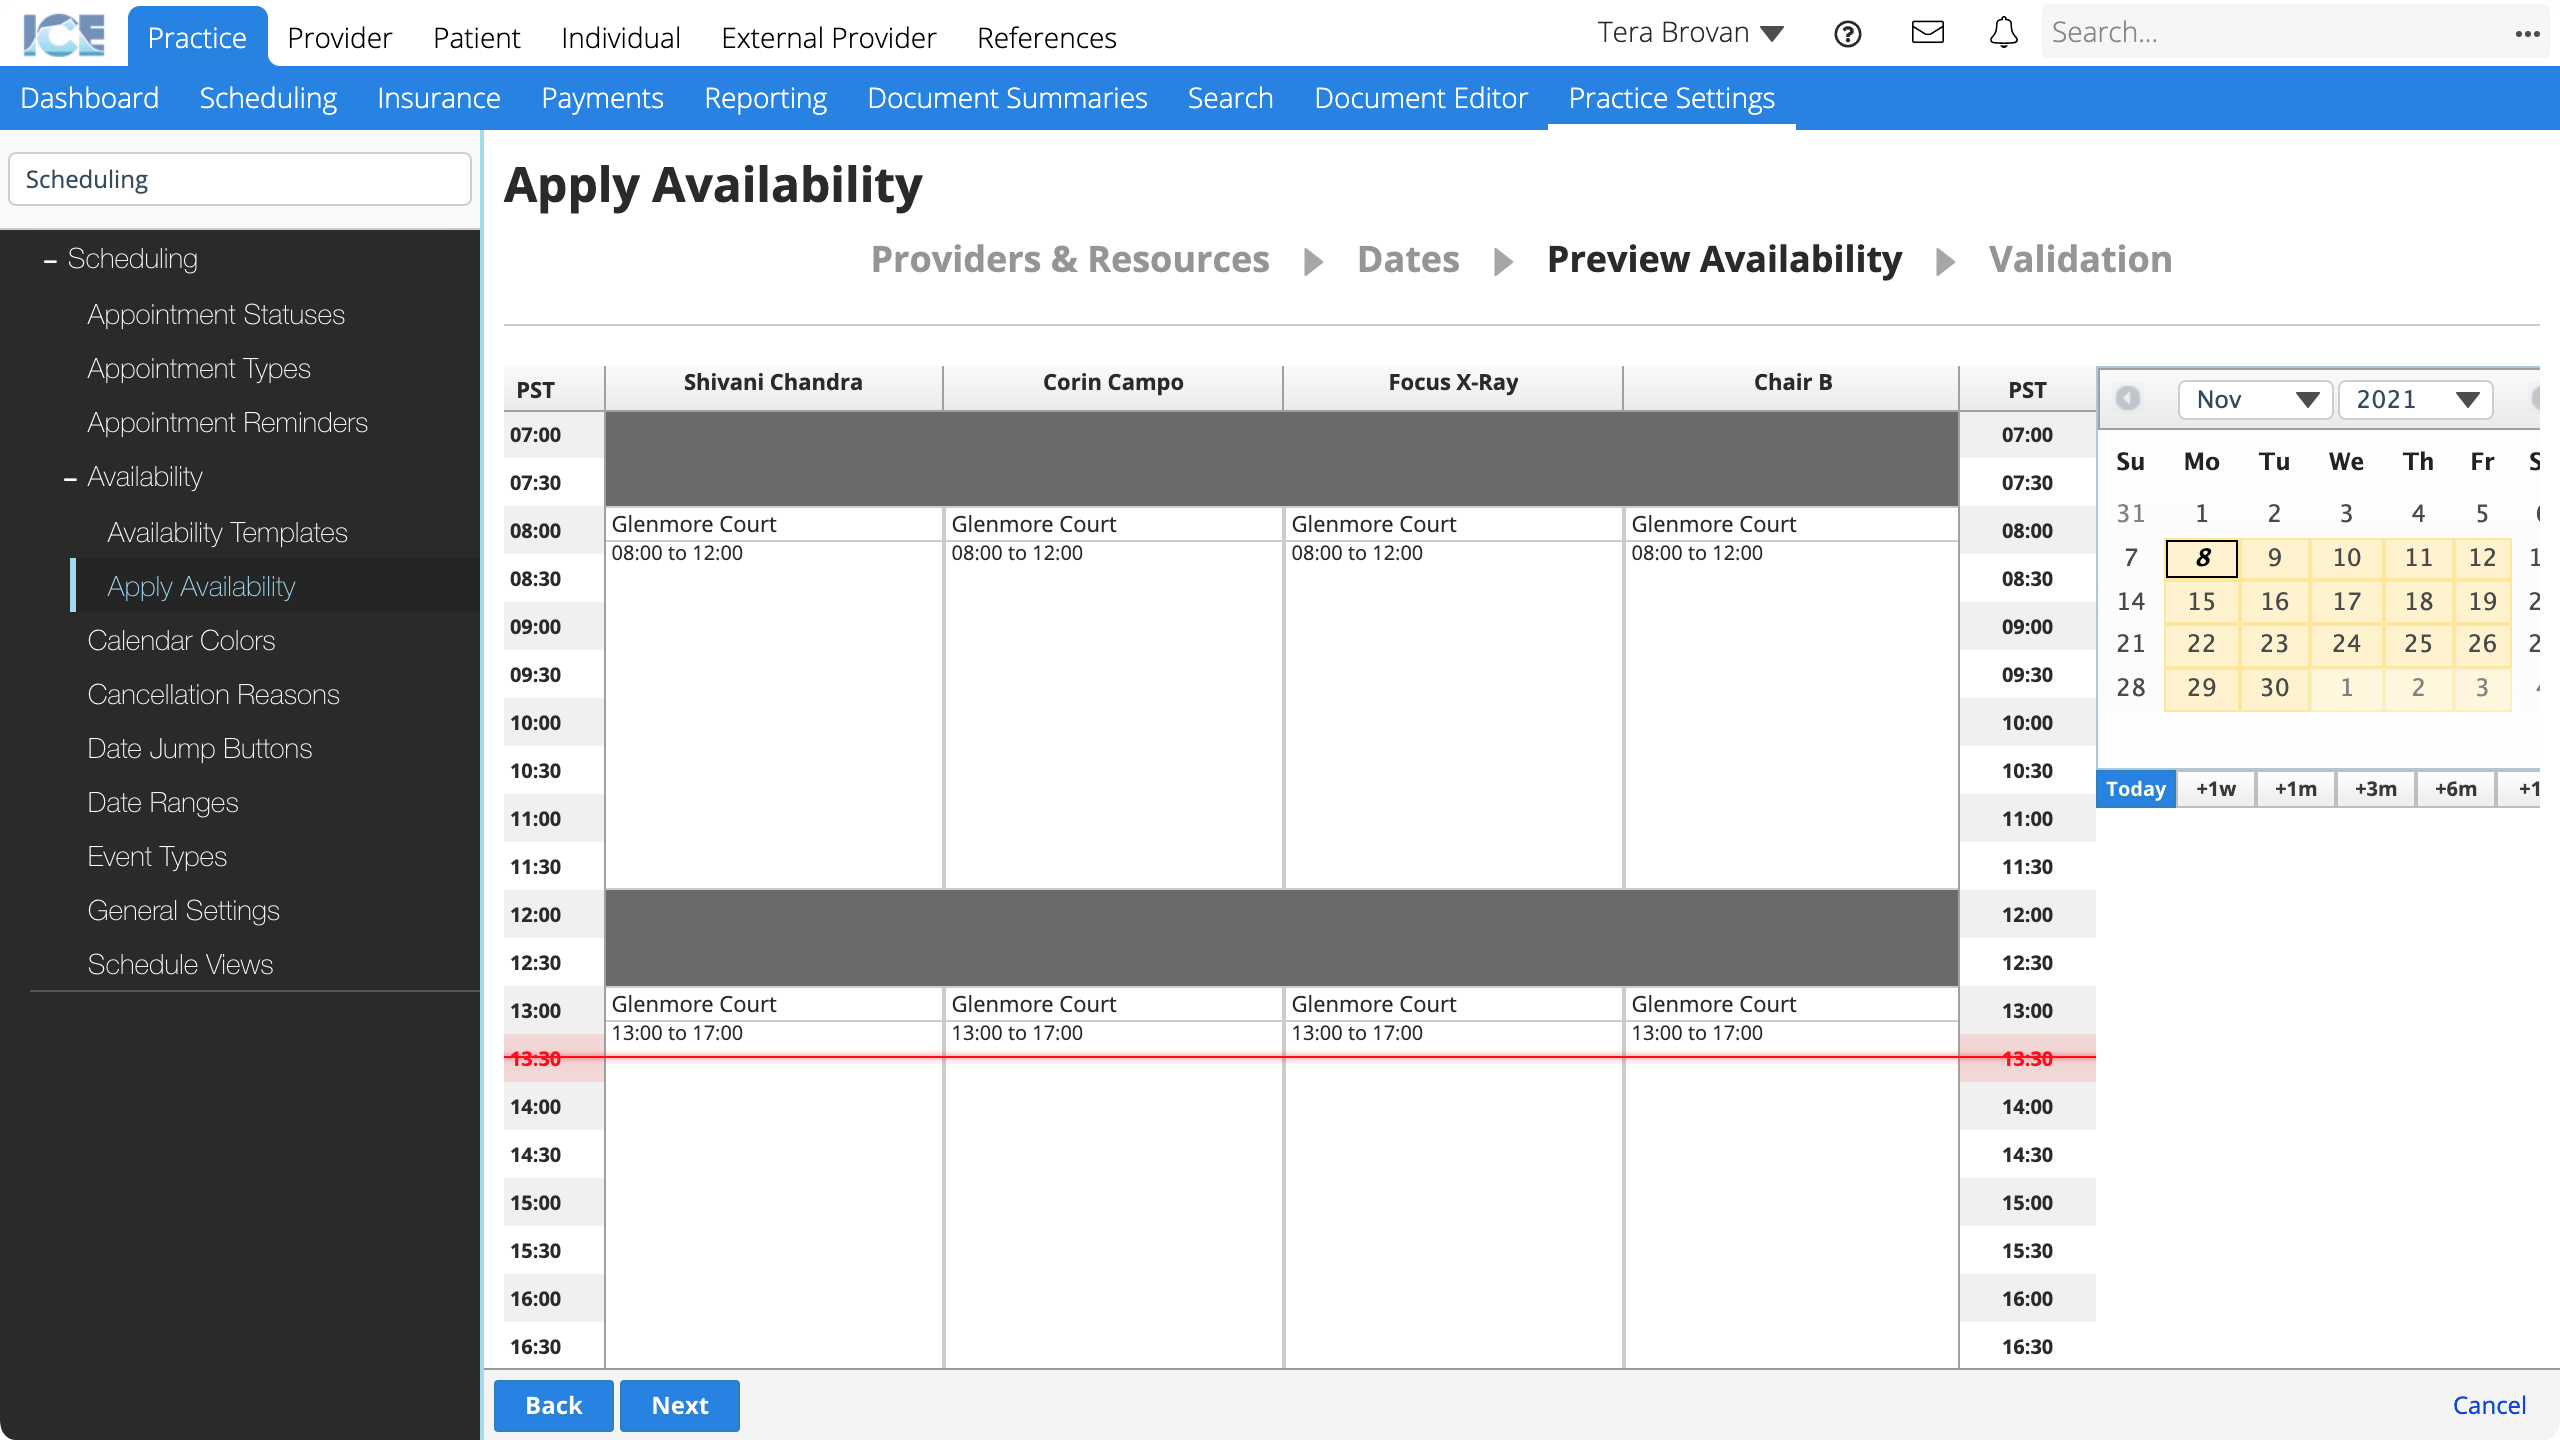
- Select Back to return to the Dates screen and make corrections.
- Select Next
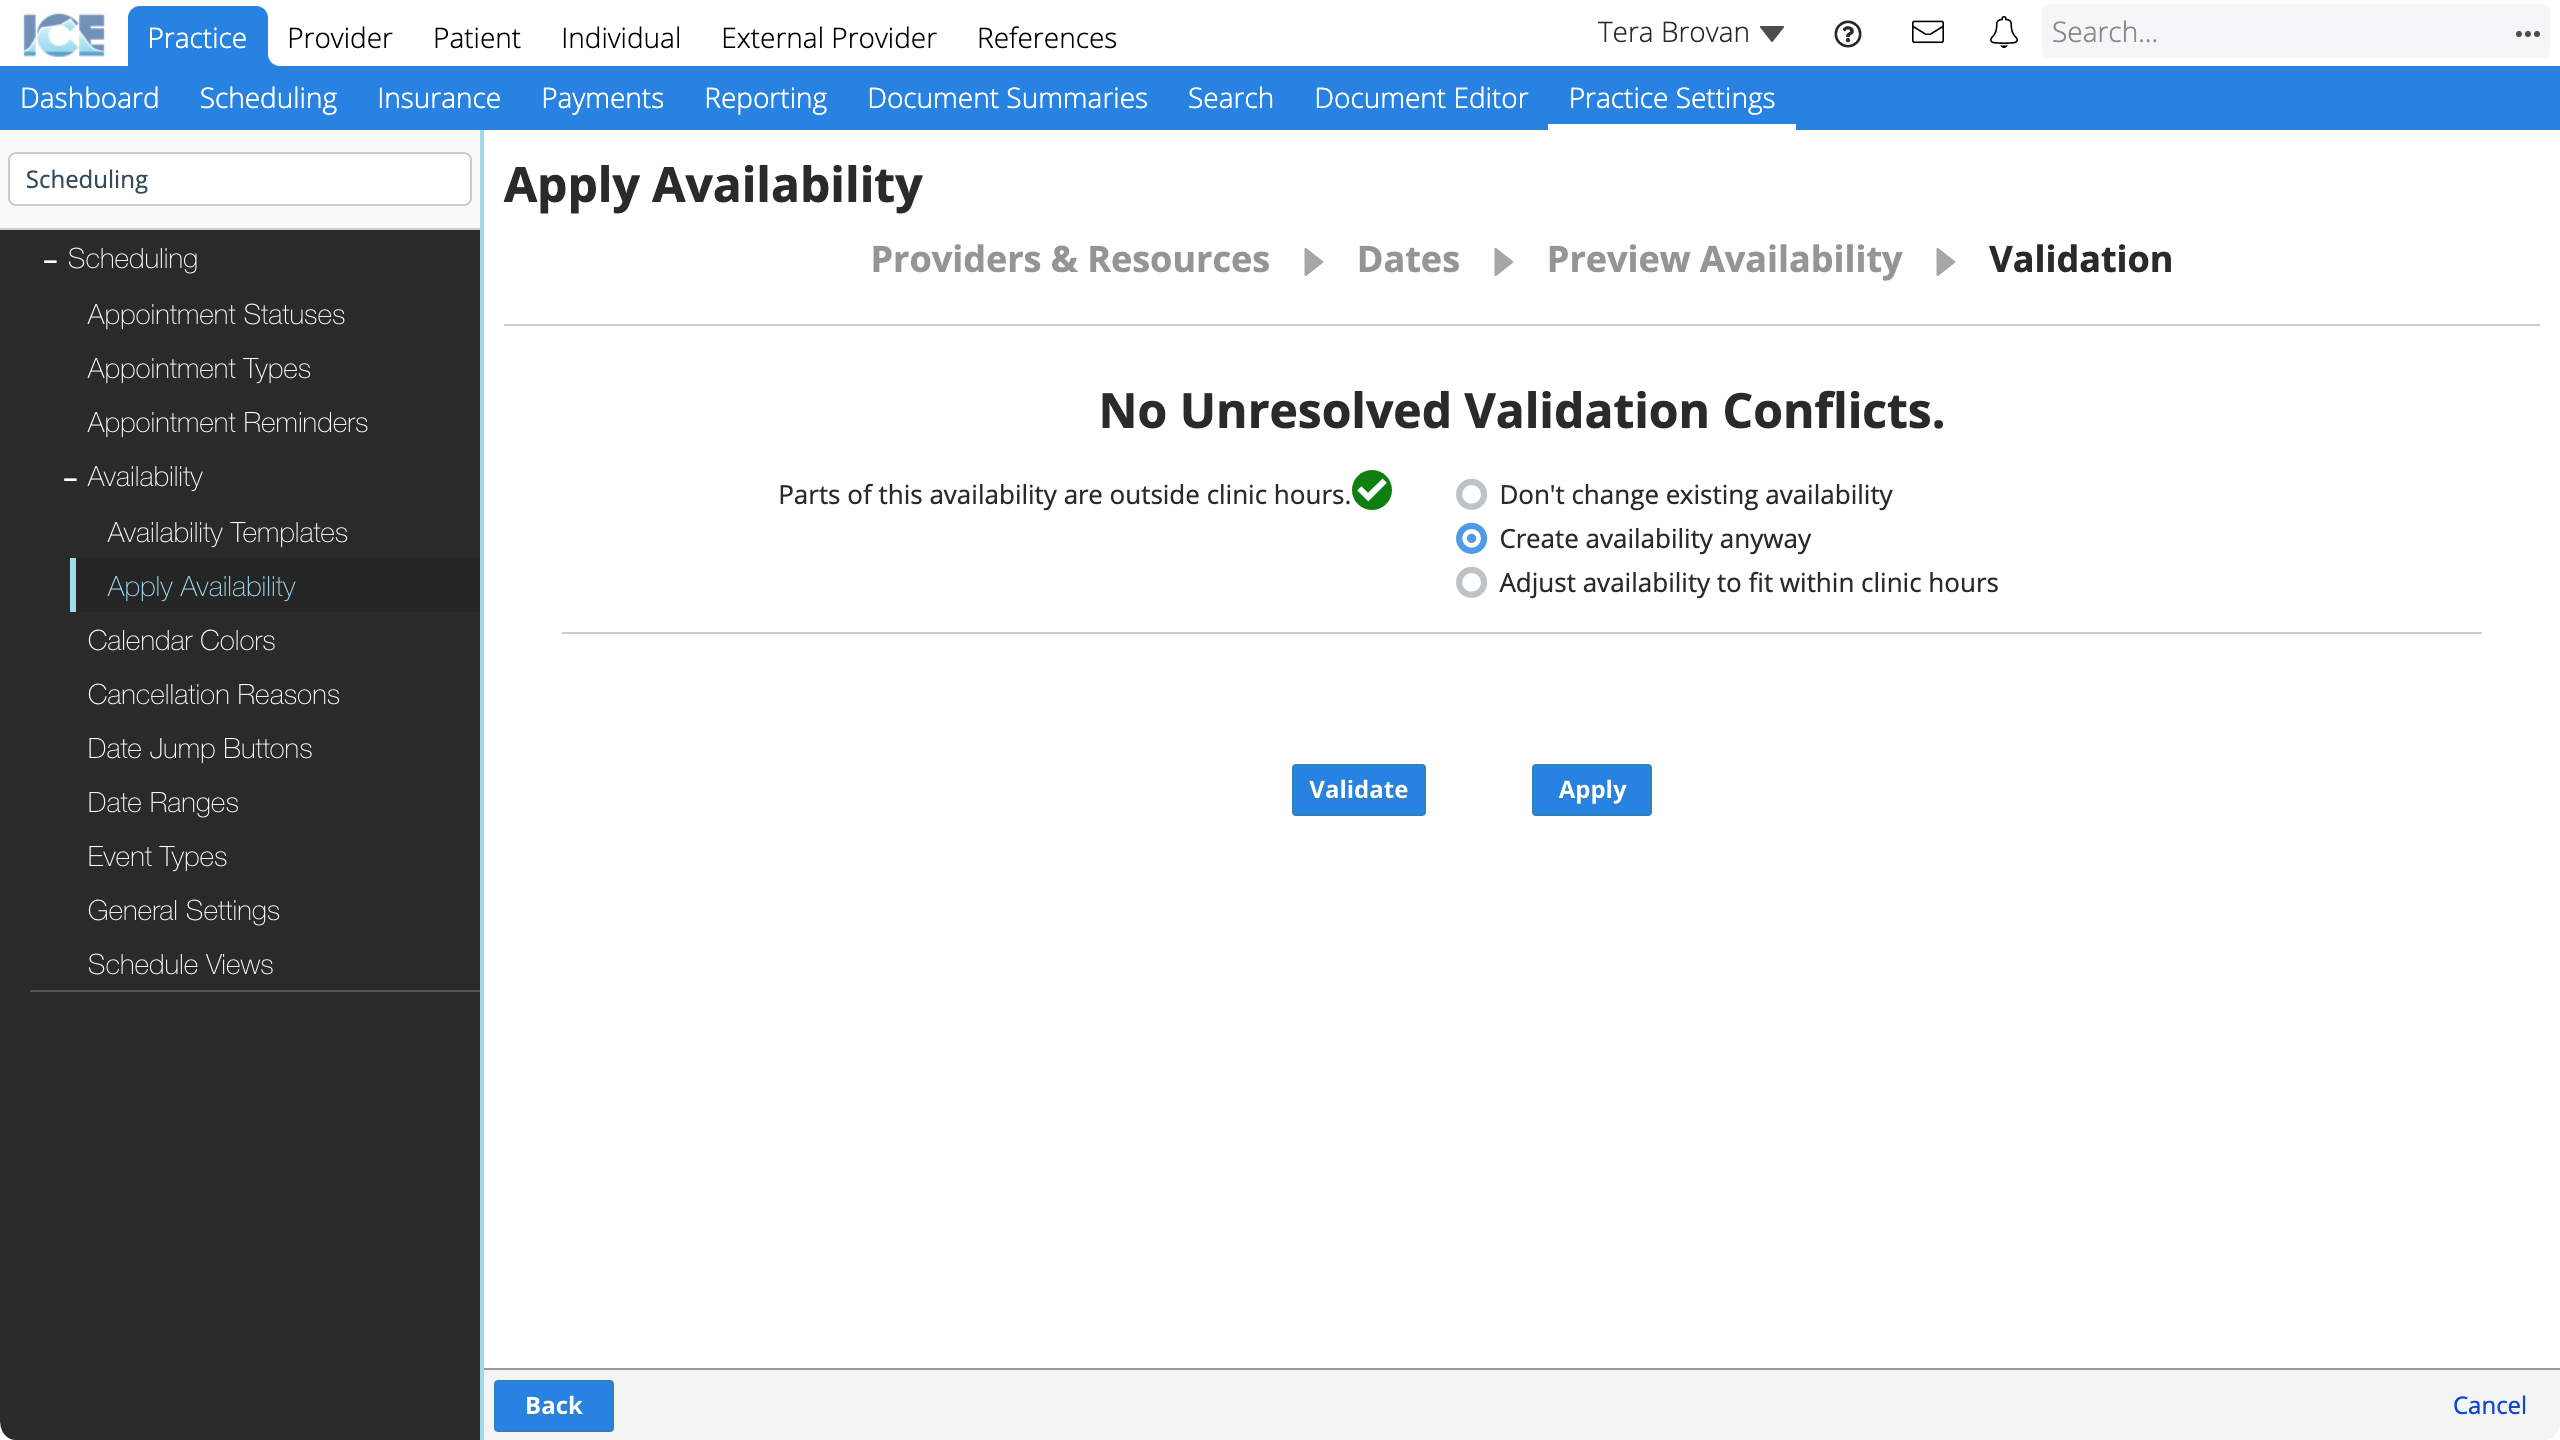
- Review any unresolved validation conflicts
- Return to the Dates screen to resolve issues
or
Choose a resolution for each of the validation messages - Select Validate to check for unresolved validation conflicts
- For a list of validation warnings and resolutions, see Resolve validation warnings below.
- After all validation conflicts are resolved select Apply to immediately configure availability for the providers/resources you selected.
Now the schedules of the providers/resources show as available based on the dates you selected and templates you applied.
Resolve validation warnings
The system validates that the availability you want to apply meets three criteria and gives you different options to resolve any issues.
| Validation Warnings | Possible Resolution |
|---|---|
| Provider/Resource has appointment(s) in a different clinic during this availability. | Don't change existing availability or Create availability anyway |
| Parts of this availability are outside clinic hours. | Don't change existing availability or Create availability anyway or Adjust availability to fit within clinic hours |
| Availability will be removed by these changes. | Don't remove existing availability or Overwrite existing availability |
If any of the system resolutions are inadequate, resolve the issue by either selecting Cancel to undo your draft work and start over, or by returning to the Dates screen to reapply availability templates.
Remove availability
You cannot remove availability from a provider/resource after configuring it.
Instead, you can:
- Overwrite the availability by applying a more limited availability template.
or - Create an Unavailable event on the schedule to cover the available time range.
To learn more about creating an event, see Create an event.
Availability and time zones
The system sets the time zone for an availability template when you apply it to specific days.
The Practice Time Zone is used if you do not have a different Provider Time Zone set for yourself. There is no "clinic time zone" setting.
If you need to apply availability templates to a provider or resource in a time zone different than your Provider or Practice time zone:
- Temporarily set your provider time zone to the one of interest
- Apply availability templates to the providers or resources in that time zone
- Set your provider time zone back to what it was
To learn more about changing your Provider Time Zone, see Personalize display settings in scheduling.