Upload files
You can upload files to a Files panel with drag and drop, or by browsing the files on your computer.
Each individual file can not exceed 512 MB.
- Go to Practice > Dashboard or Provider > Dashboard
- Drag a file from your computer and drop it on the Files panel
or - Select
 on the Files panel
 - Select Upload
- Select Choose File to find the file you want to upload
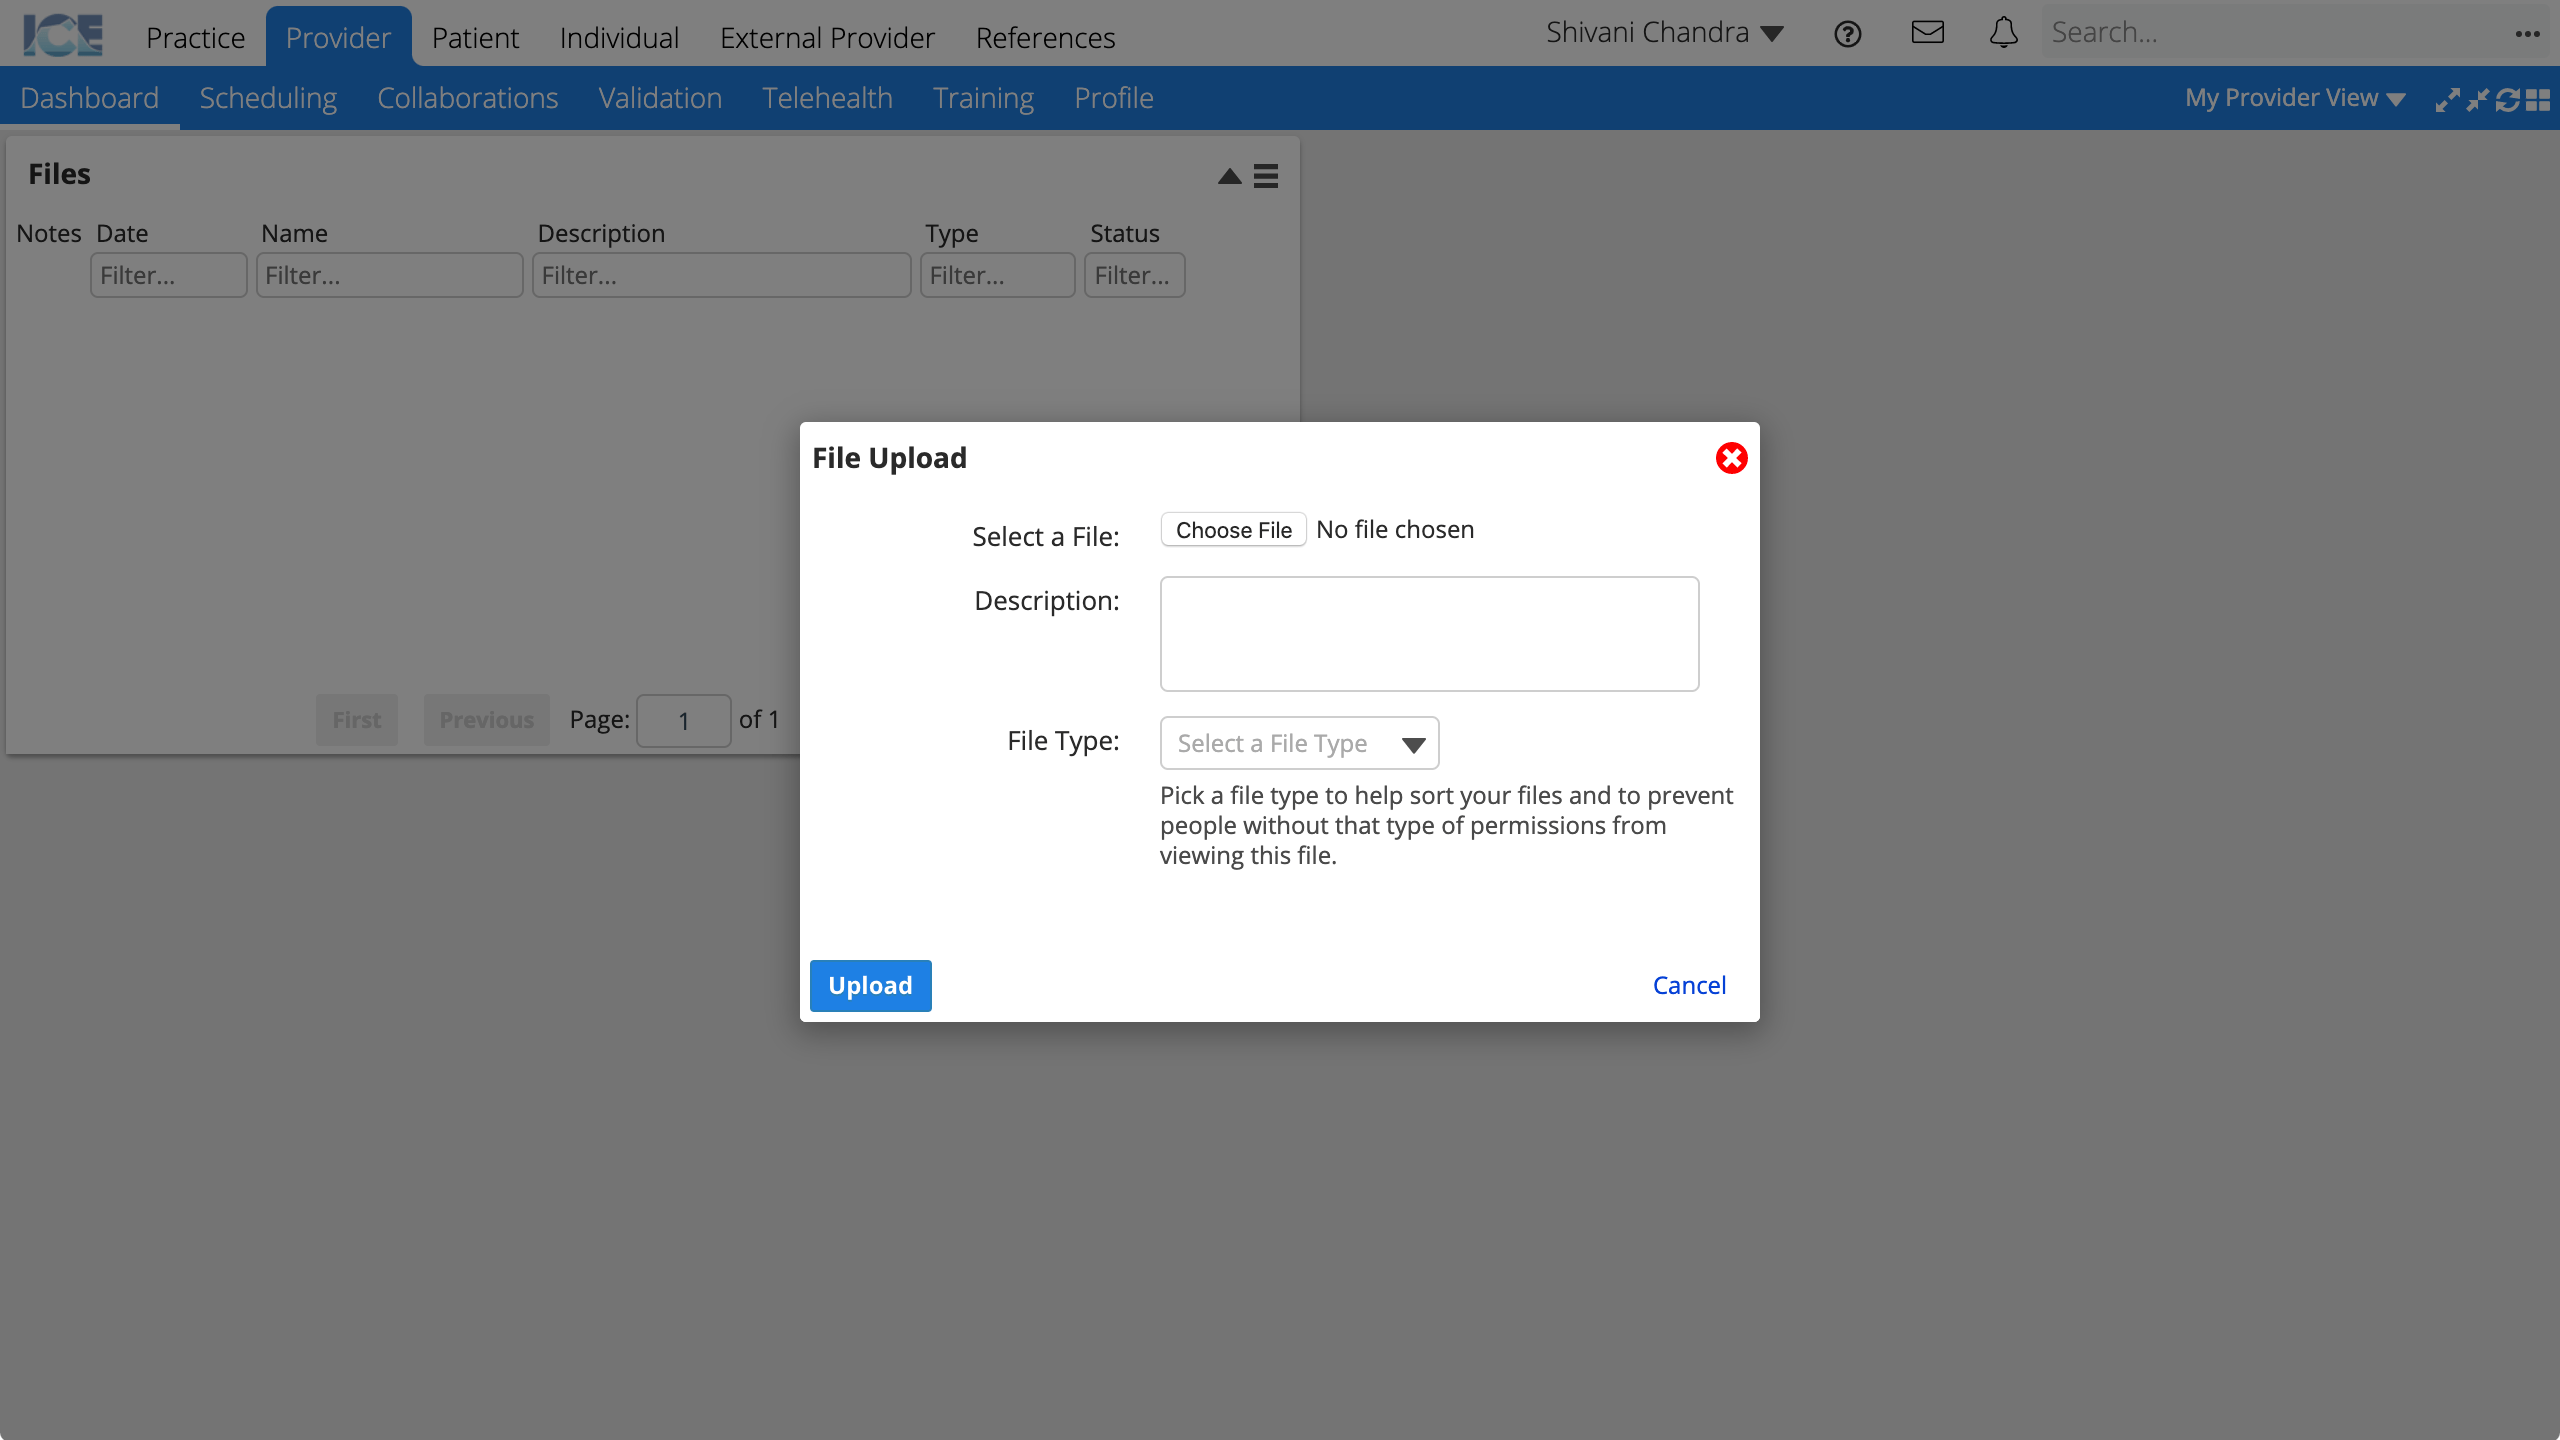
- Optional: Add a Description of the file
- Optional: Select a File Type from the drop-down menu
- File types are tied to permissions. If a person does not have permissions to access a certain feature, such as Financials, they cannot access files types related to that feature.
- File types include:
- Charting
- Financials
- Documents
- Imaging
- Scheduling
- Select Upload
- The file appears in the Files panel.
- If you chose a file type that you don't have permissions for, the file is hidden from you after upload.
- To add a note to a file select
 to the left of the file.
Pick a Files panel
The Practice, Provider, and Patient dashboards each have their own separate Files panel.
Always confirm the Files panel you are using is appropriate for the file you want to view or upload.
- Patient and Practice files are available to people with permissions to view, print, download, or upload.
- Provider files are specific to your login to view, print, download, or upload.