Edit a payment schedule
After a payment plan schedule is active, you can still edit the dates or amounts of individual scheduled charges.
Only future scheduled charges can be changed here. Charges that have already been posted can be changed by using adjustments.
As you edit the scheduled charges, the Scheduled Amount total will increase or decrease and turn red. Before you can save your changes, you must make sure the changes balance out to the original scheduled amount.
Example Scenario
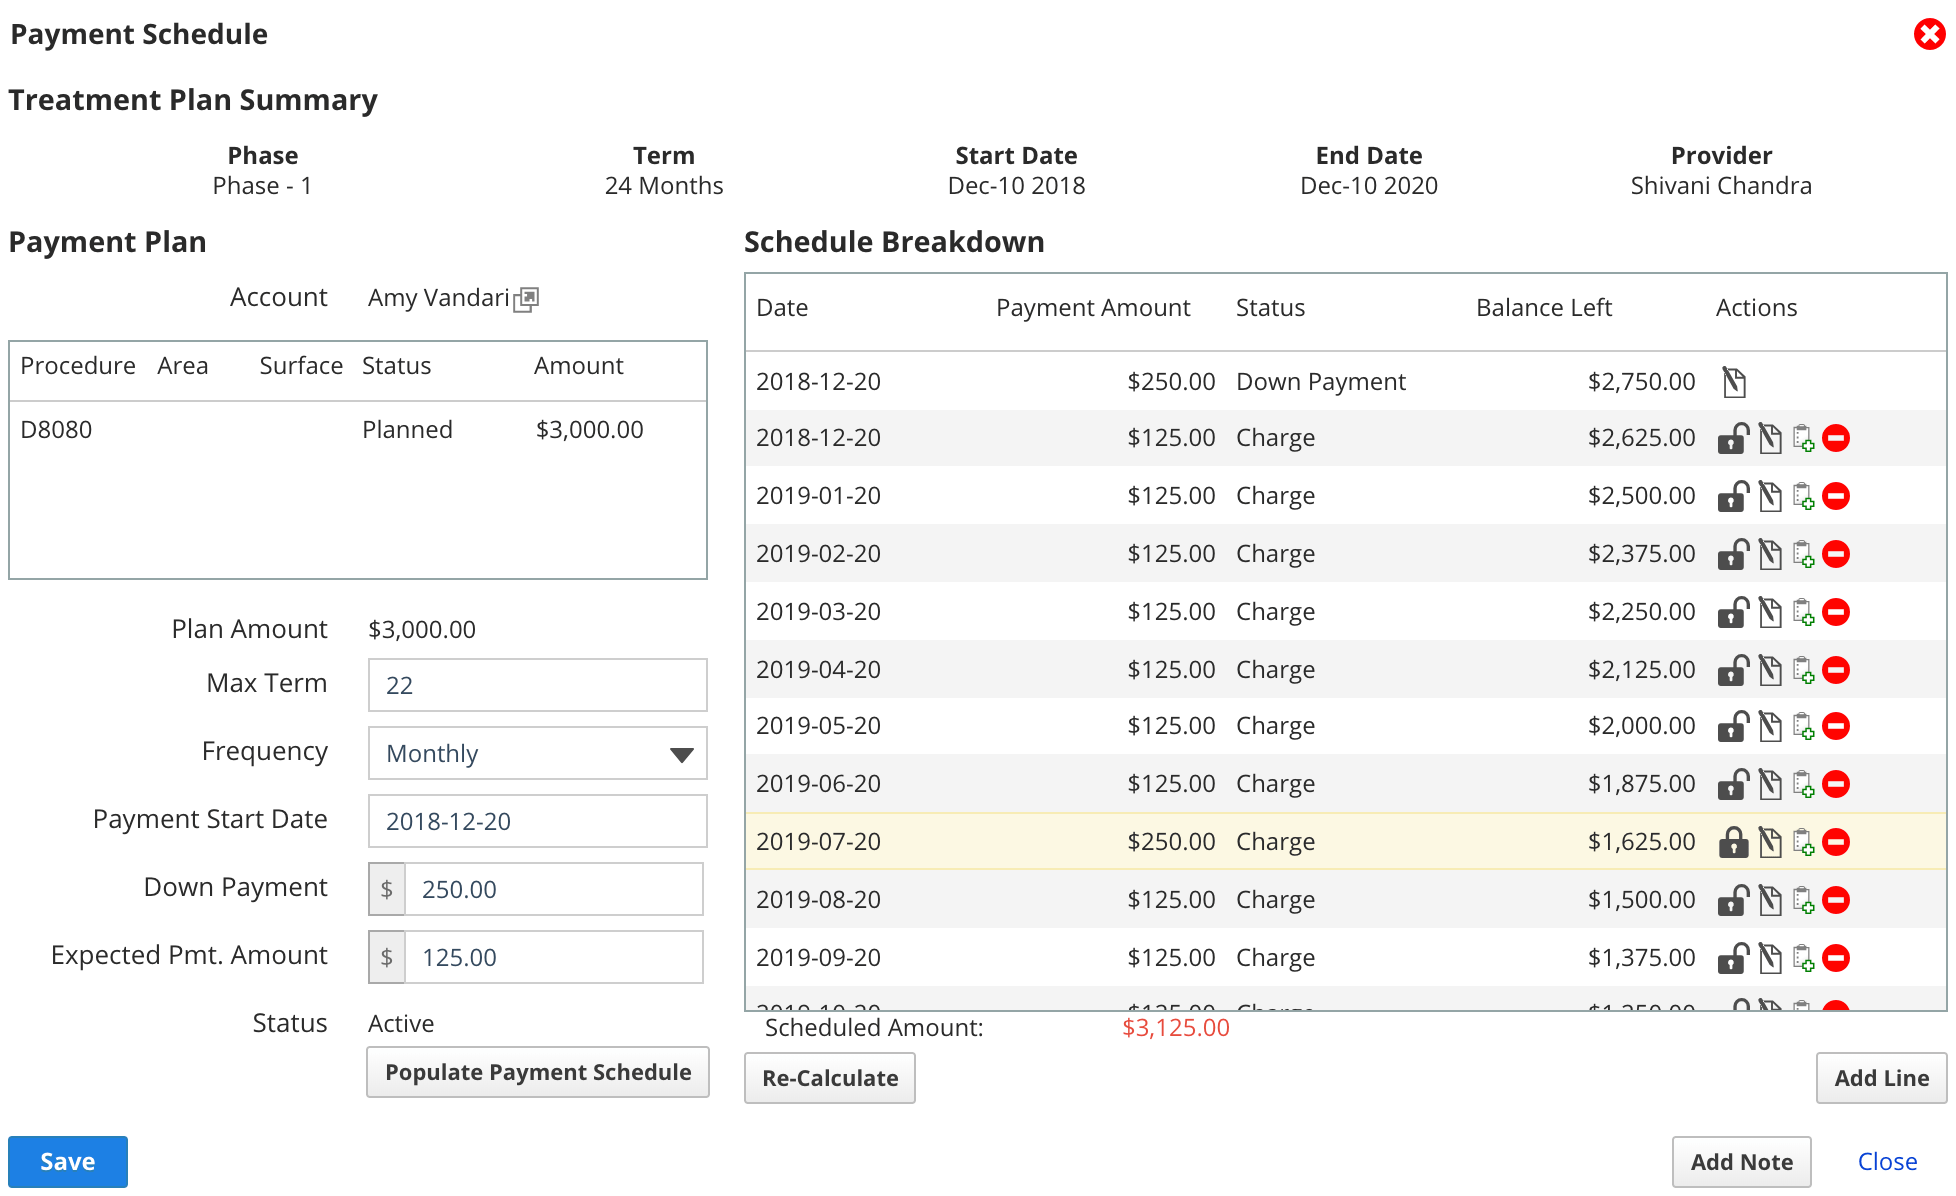
Amy has a payment schedule of $3000.00 over 22 months and just received a bonus at work. She wants to double her next monthly payment that normally is $125.00.
You can edit her payment schedule and:
- Increase the value of the upcoming July charge to $250.00.
After you update the July charge, the Scheduled Amount total of all the charges is $3125.00. So to re-balance the schedule you can:
- Remove the very last $125.00 charge scheduled one year from now, by deleting that line.
or - Reduce the amounts of the remaining payments to $119.05 a month, by selecting Re-Calculate.
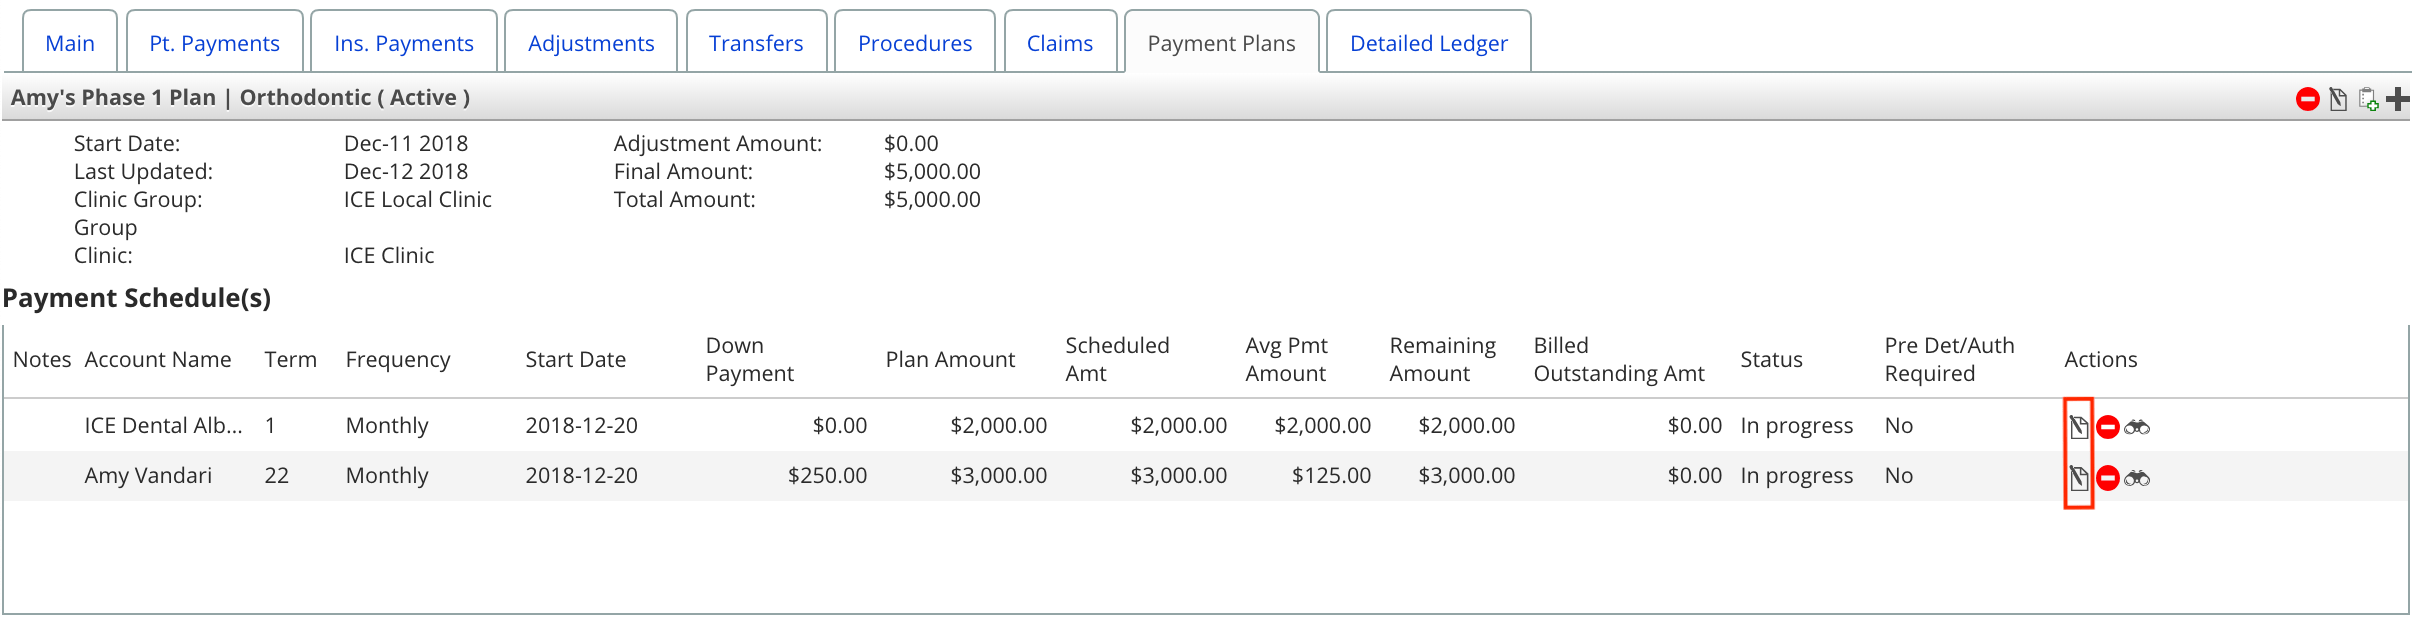
- Select
 for the schedule you want to edit
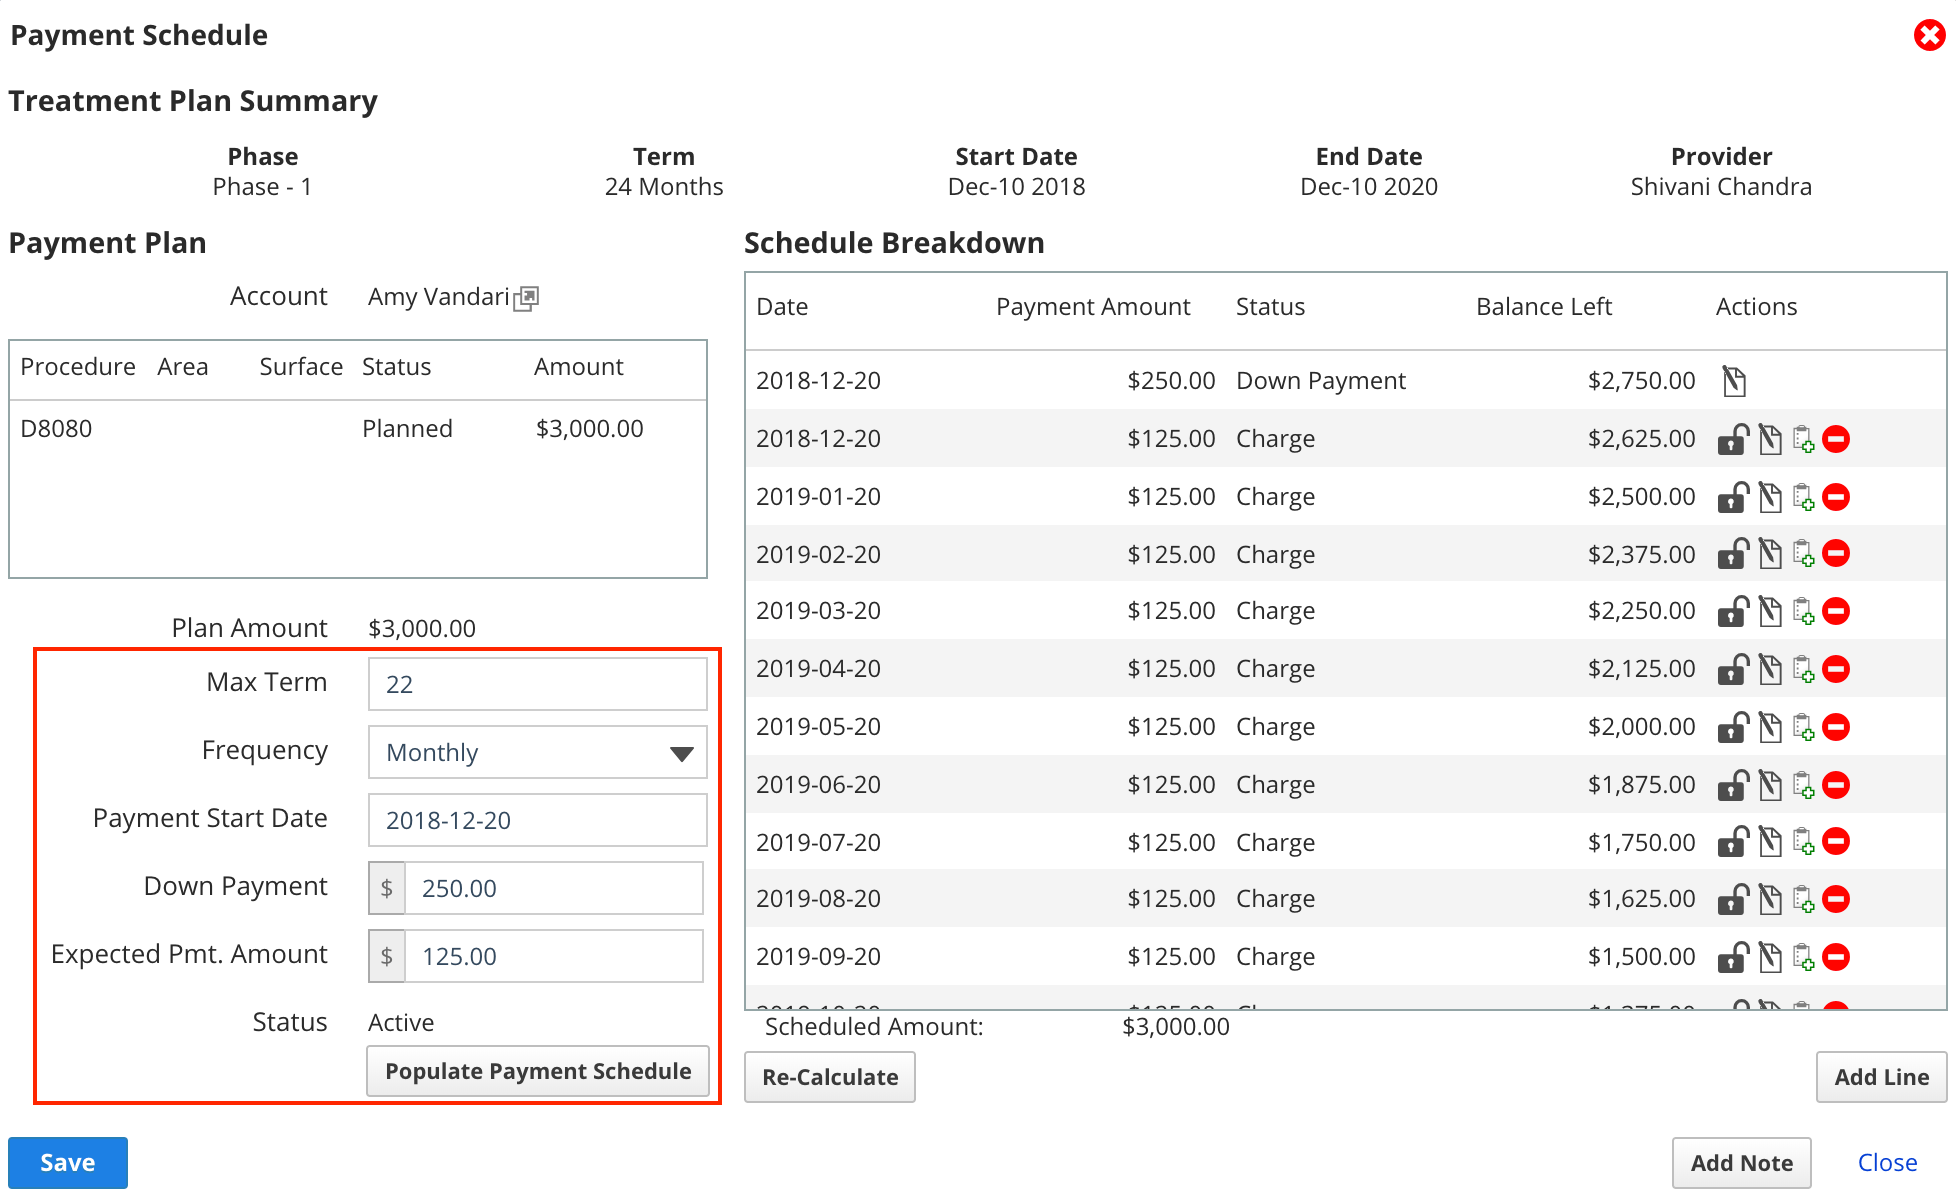
- In the Payment Schedule window, you can make changes using four methods:
- Edit the details used to populate the payment schedule:
- Update any of the:
- Term
- Frequency
- Payment Start Date
- Down Payment
- Estimated Pmt. Amount
- Select Populate Payment Schedule to apply the new conditions to the Schedule Breakdown.
- Update any of the:
- Edit the details of individual charges
- Select for a specific line
- Update the Payment Date or Payment Amount
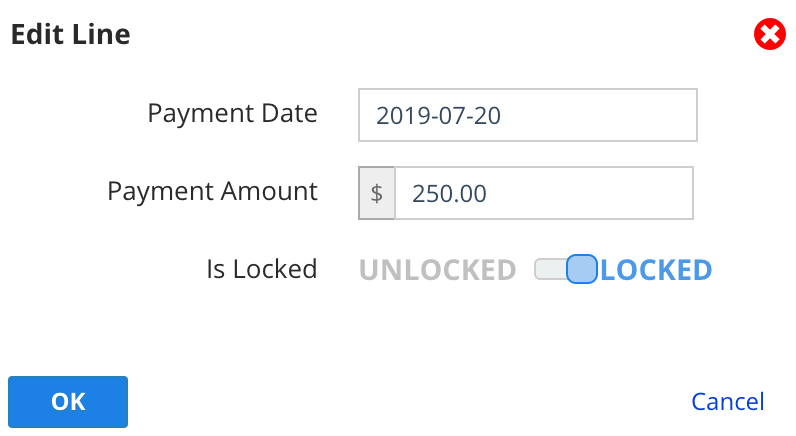
- Select OK to confirm your changes
- Select
- Select
 to remove a single charge line
 - Select Add Line to add a new charge line with a custom date and payment amount.
- Edit the details used to populate the payment schedule:
- Any individual lines that you customize are automatically locked and display a

- Locked means that this line will be ignored if you select Re-Calculate to automatically update the remaining scheduled charges.
- To unlock a line that you want to be included in the Re-Calculate process, select .
- Once you've made your changes, the Scheduled Amount total will likely be red because it no longer matches the original scheduled amount.
- Before you can save your changes, you must make sure the changes balance out to the original scheduled amount.
- Before you can save your changes, you must make sure the changes balance out to the original scheduled amount.
- To balance the Scheduled Amount you can:
- Repeat any of the actions in step 2 until the Scheduled Amount is balanced.
or - Select Re-Calculate
- This will evenly update the amounts of all remaining, unlocked charge lines, so that they add up to the original scheduled amount.

- This will evenly update the amounts of all remaining, unlocked charge lines, so that they add up to the original scheduled amount.
- Repeat any of the actions in step 2 until the Scheduled Amount is balanced.
- Once the Scheduled Amount is balanced, select Save