Activate a payment plan
Activating a payment plan enables the scheduled charges to auto-generate on an account and allows account holders to make payments towards their plan.
To activate a payment plan you must:
- Activate the payment plan summary
- Activate the payment schedule(s)
Orthodontic payment plans can only be activated if the orthodontic treatment plan is active. To learn more, see Orthodontic charting overview.
Activate the payment plan summary
You must activate the payment plan summary before you can activate an associated payment schedule.
Once a non-orthodontic payment plan summary is activated, the outstanding balance in the summary is transferred from the currently owing and aging Patient Balance to the payment plan. However, the full cost is still calculated in the Patient Complete Balance.
Once an orthodontic payment plan summary is activated, the patient or insurance balances do not change until the schedules are activated.
- Select
 to the right of the payment plan
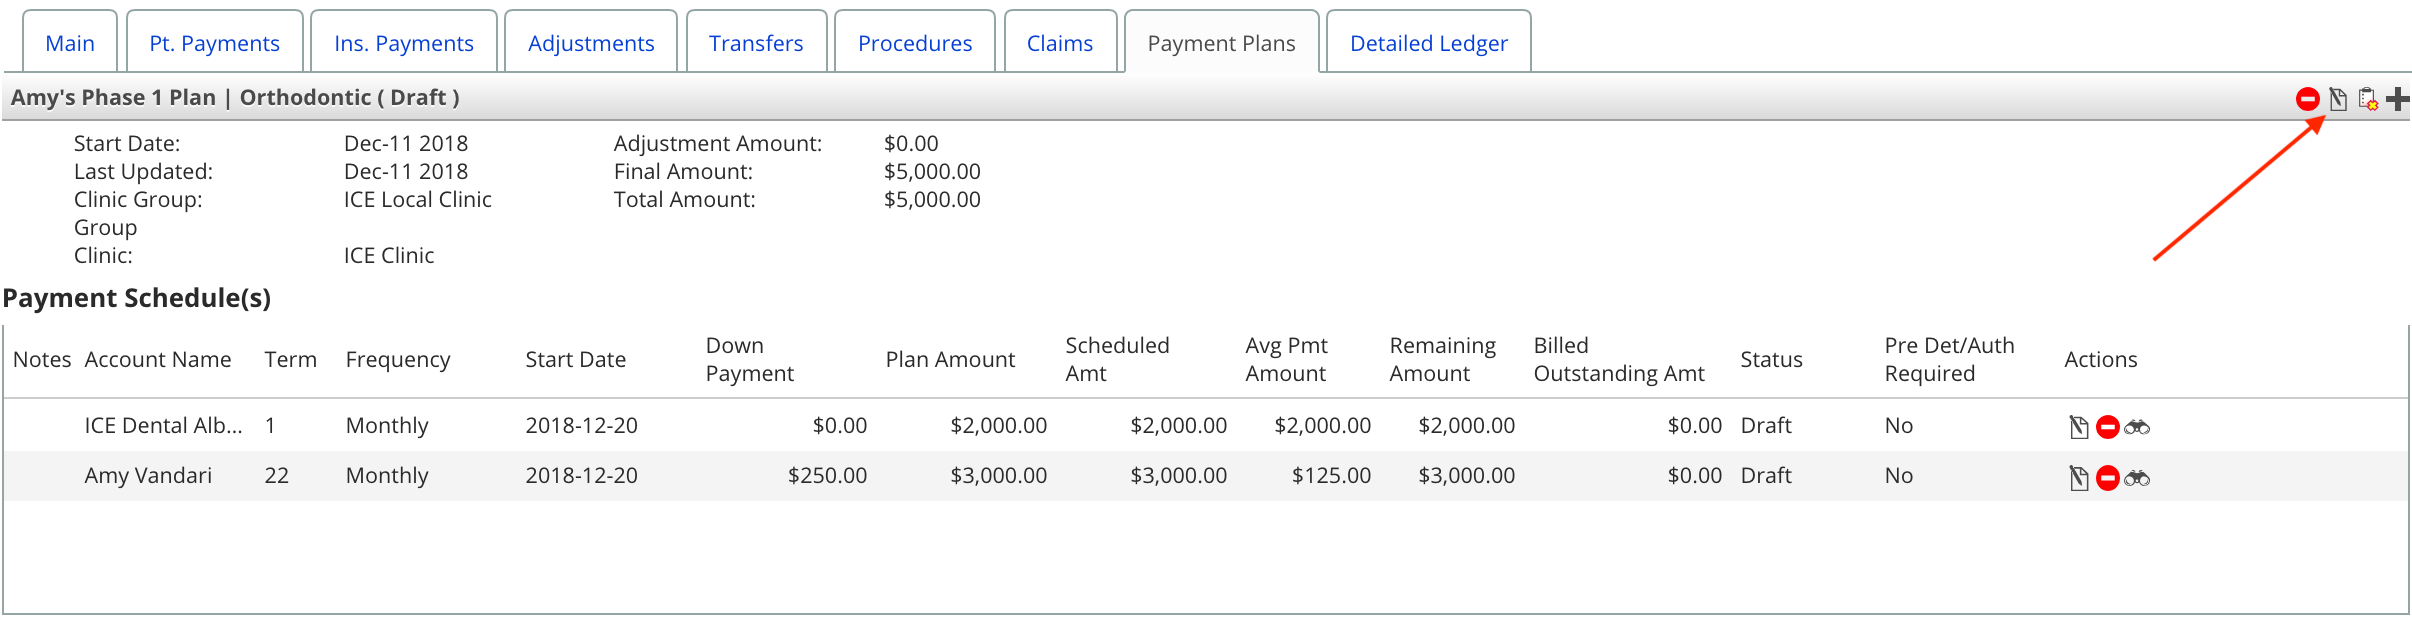
- Toggle the status to Active
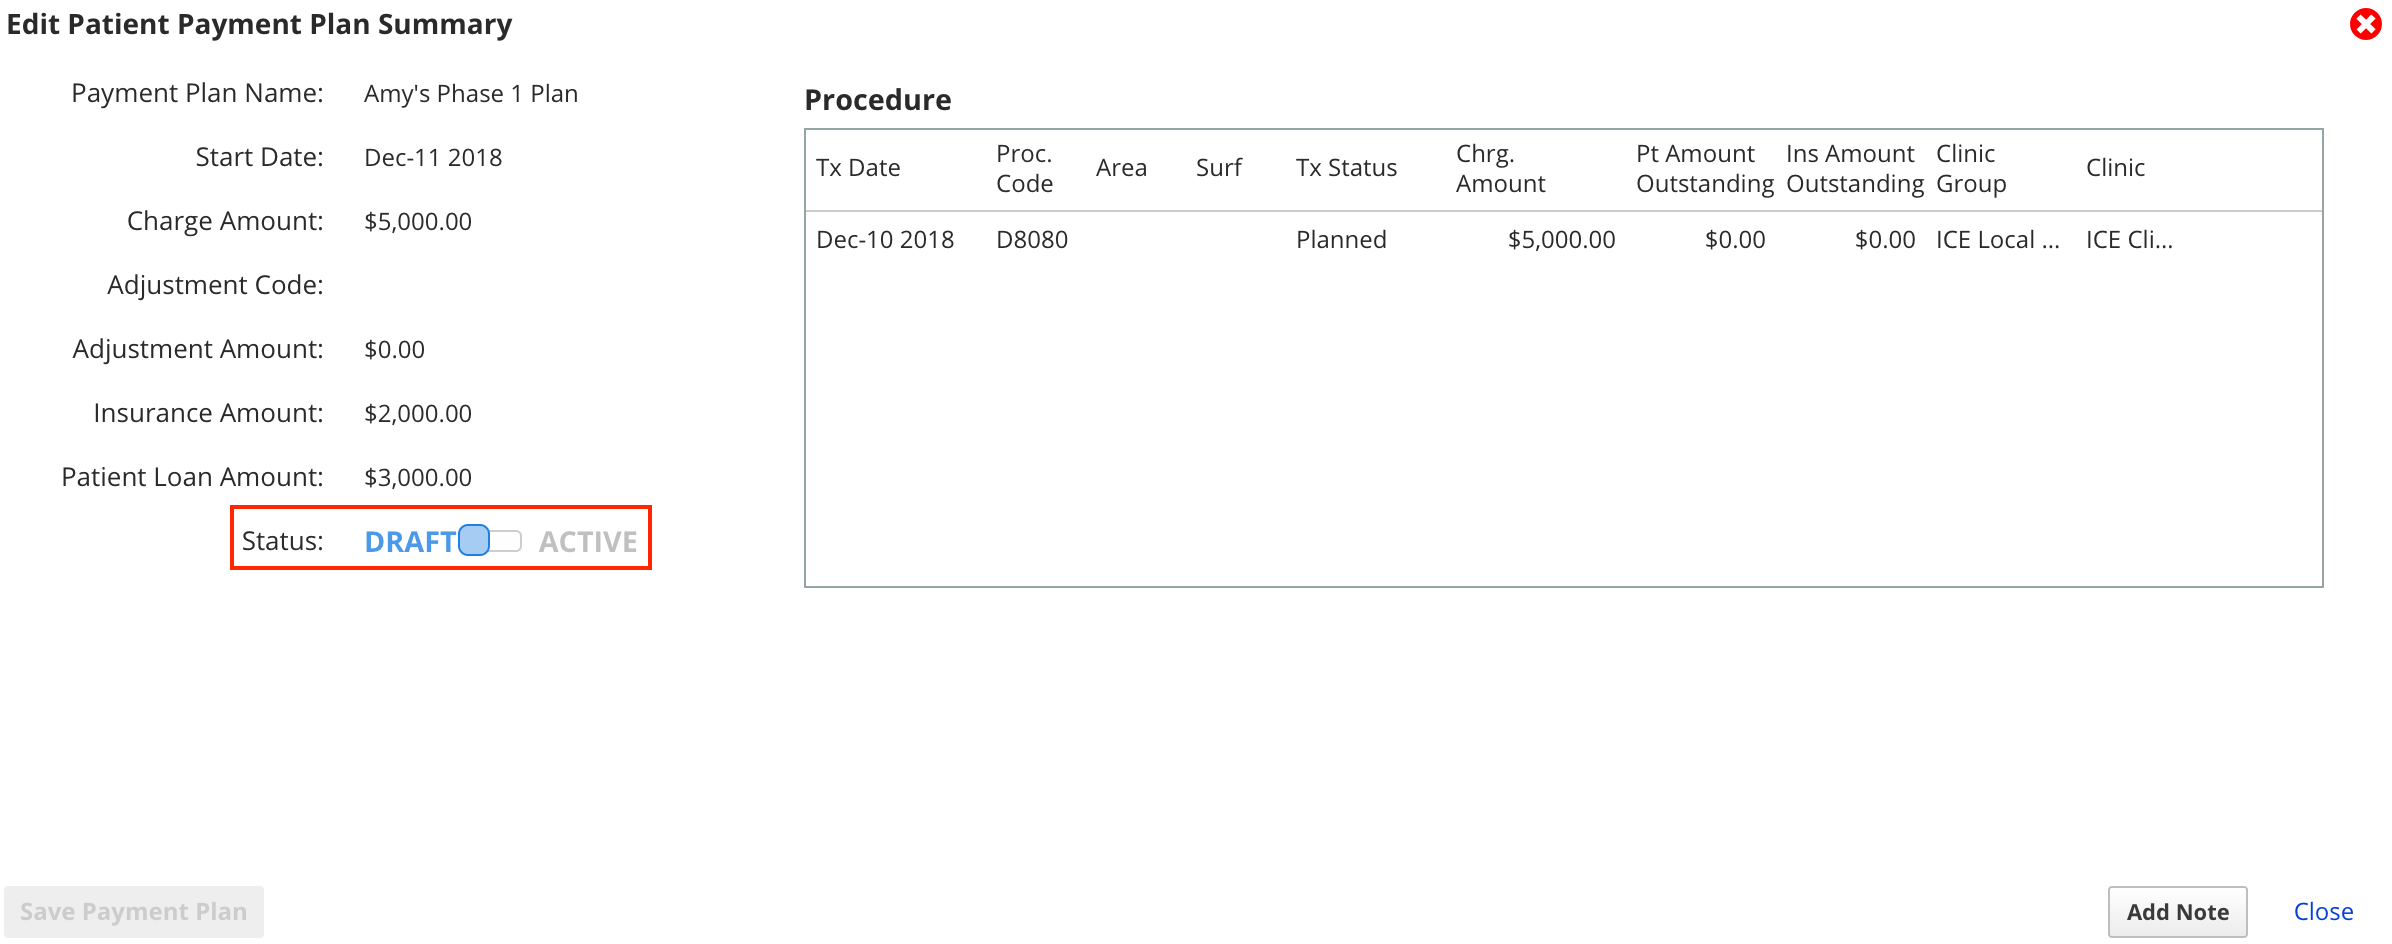
- Select Save Payment Plan
- Selecting Save Payment Plan will:
- Adjust the charges that were added to the plan from the patient's current balance to the payment plan balance. These adjustments are visible in the Main and Detailed Ledger tabs.**


- Adjust the charges that were added to the plan from the patient's current balance to the payment plan balance. These adjustments are visible in the Main and Detailed Ledger tabs.**
- Selecting Save Payment Plan will:
Activate the payment schedule(s)
You can only activate a payment schedule if the payment plan summary is active.
Once the payment schedule is activated, new charges will be posted to the account based on the schedule.
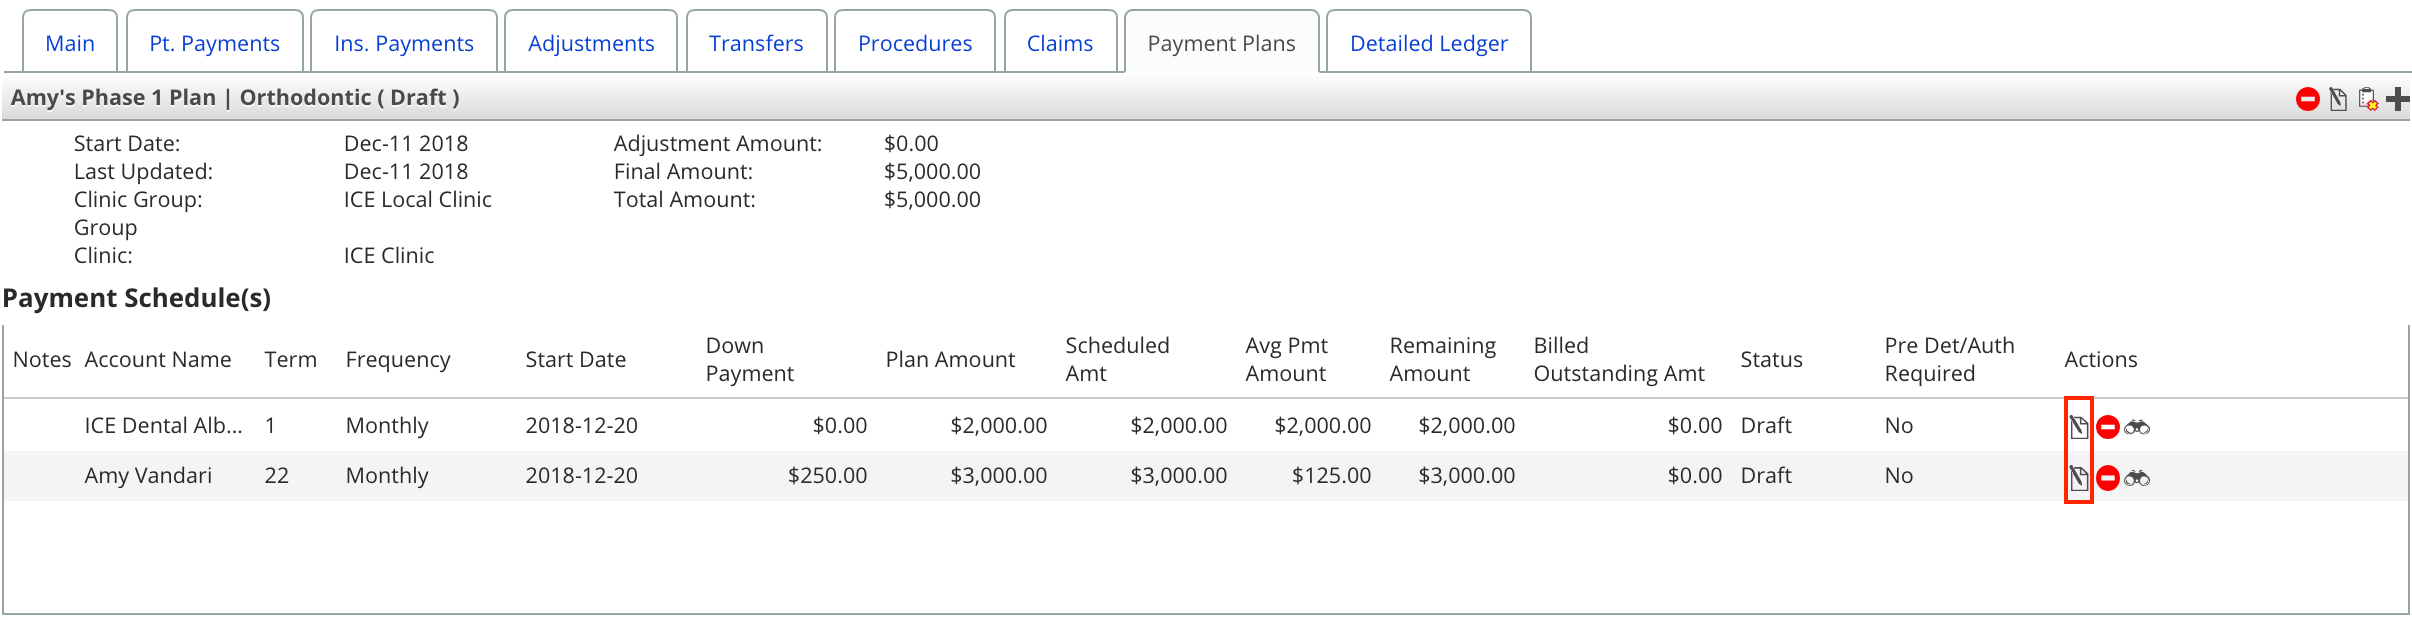
- Select to the right of the payment schedule you want to activate
- Toggle the status to Active
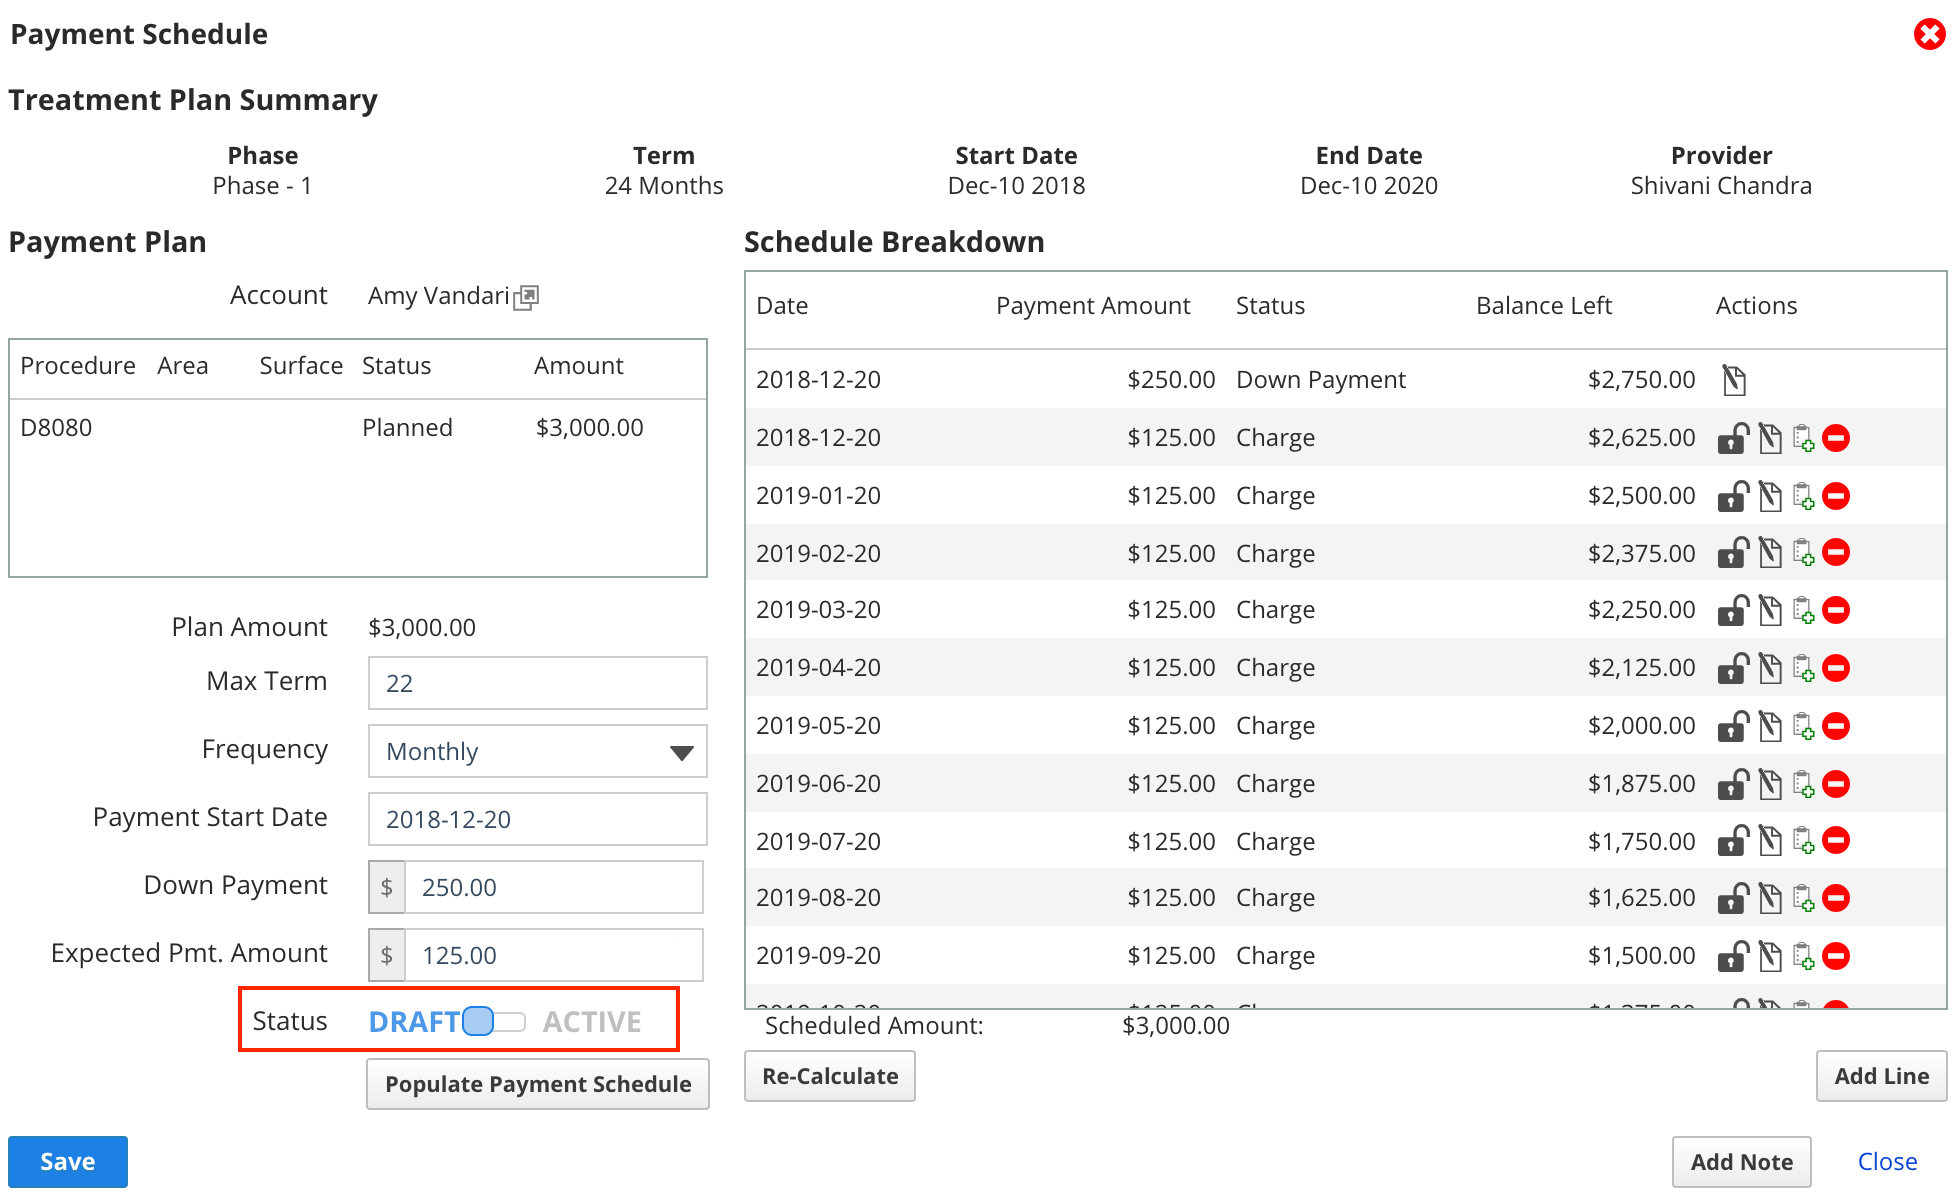
- Select Save
- Selecting Save will:
- Automatically post charges based off the payment plan schedule dates and amounts.
- Add an entry in the Future Payment Plans section displayed in the patient summary.

- Selecting Save will: