Create a payment schedule
After you create a new payment plan summary, you need to create a payment schedule for your new payment plan.
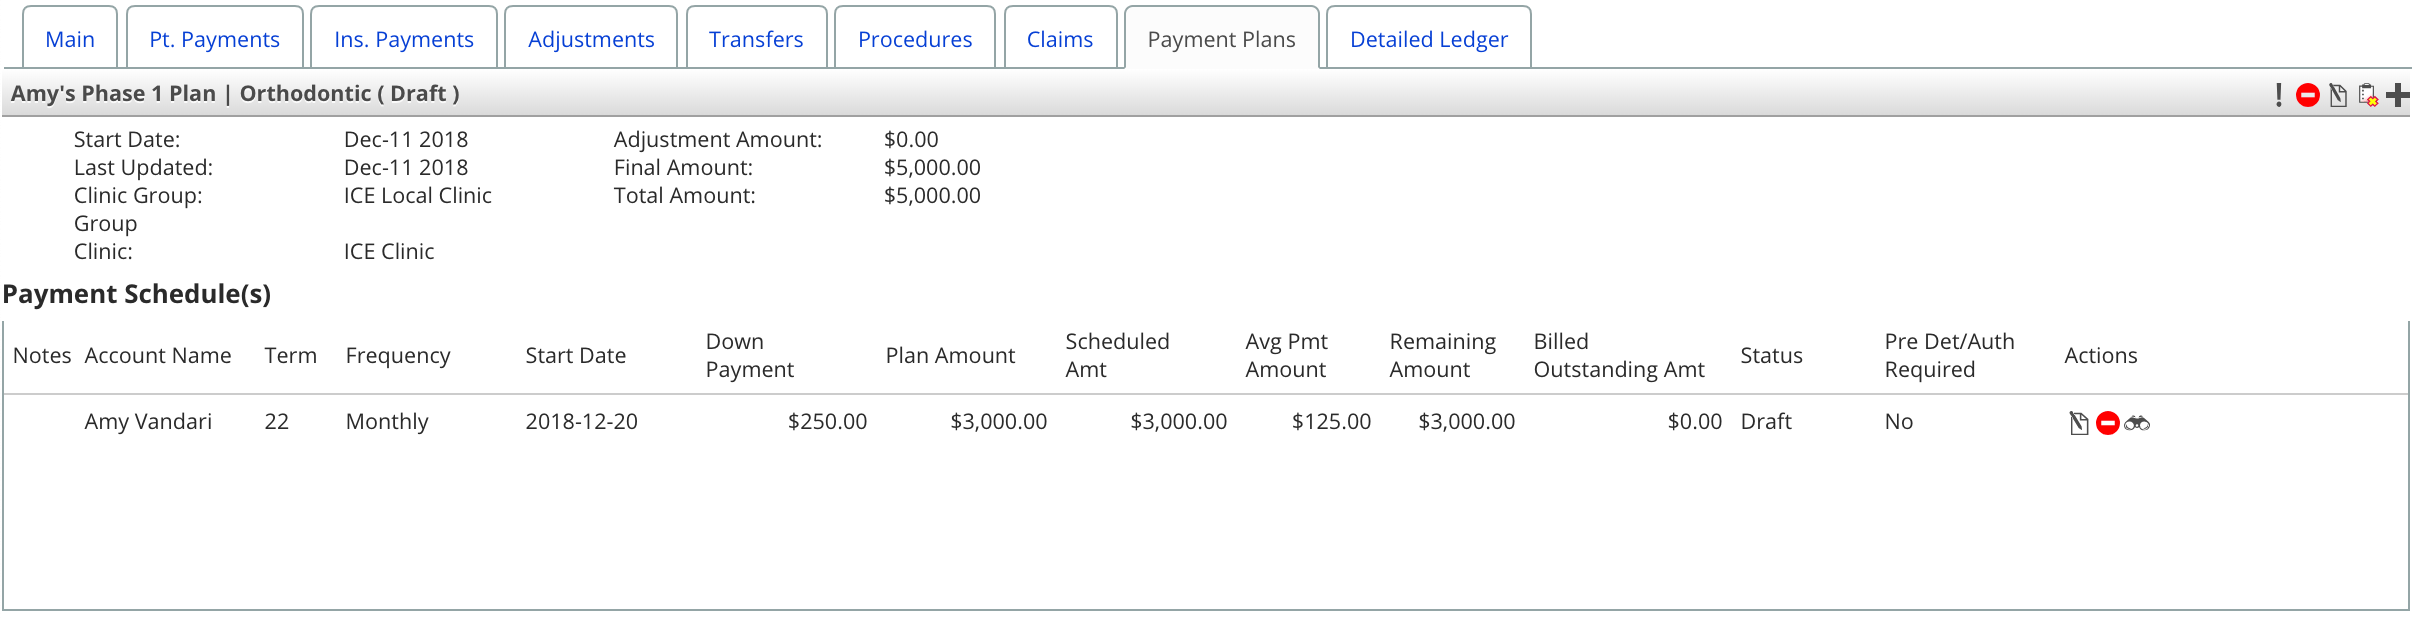
The payment schedule defines how many charges are in your payment plan, the amount of each charge, and when they will appear on the payer's record.
Each charge created from an active payment schedule ages from the date the charge is created, not from the date the plan was created.
You can create multiple draft schedules, in order to confirm an approach that works best for you and your patient. Once you activate a draft payment schedule, the other drafts are automatically discarded.
The workflow for creating payment schedules is the same for orthodontic and non-orthodontic payment schedules. The only differences are:
- Non-orthodontic payment schedules can only be created for patient accounts.
- Orthodontic payment schedules can be created for patient or insurance accounts.
- If the total treatment cost is split between insurance and patient, then you create one payment schedule for the patient, and another schedule for insurance.
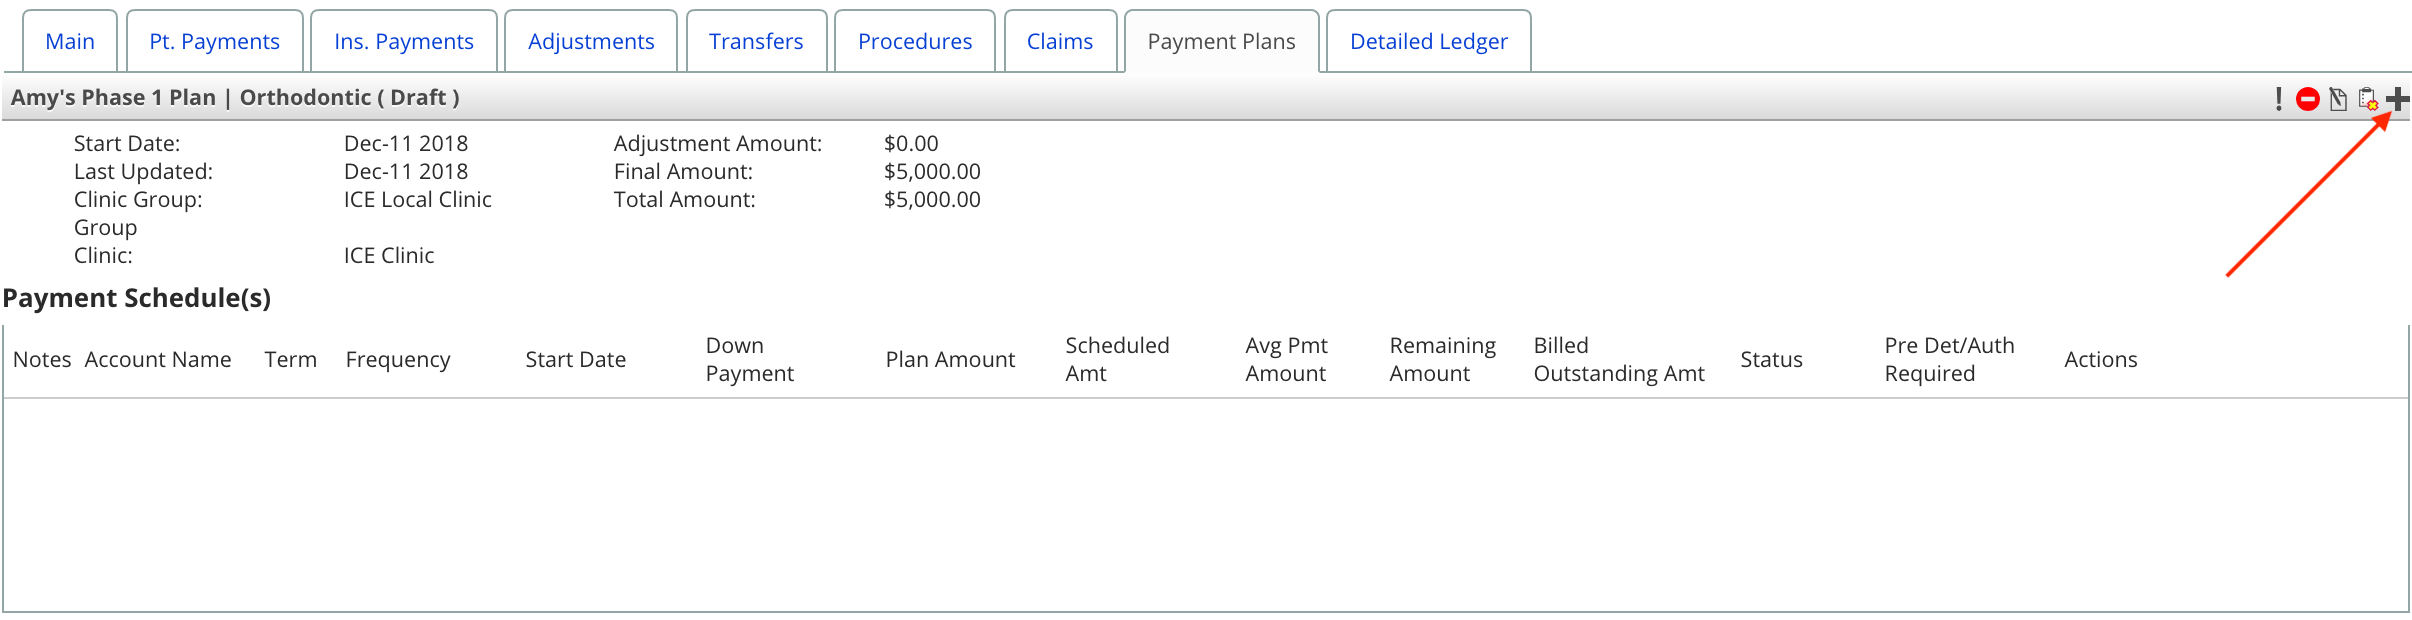
- Orthodontic payment schedules display a special summary of the ortho treatment plan at the top of the window for easy reference.
For this article, the screenshots are from an orthodontic payment schedule example.
- Select + to the right of the Payment Plan name
- Confirm the account the payment schedule is for
- The available options reflect the patient and insurance accounts tied to the payment plan.
- Non-orthodontic payment plans will only show one option.
- Orthodontic payment plans can show multiple accounts. Each account needs its own payment schedule.
- For example, one patient account and two insurance accounts so that you can create separate schedules for each.
- Choose a term and frequency
- For example, to schedule monthly payments for one year, pick a term of 12 with a frequency of monthly.
- Choose the date when the first scheduled payment will be generated
- Optional: Enter a down payment value to create an initial charge separate from the term and frequency schedule.

- Select Populate Payment Schedule to auto-fill the schedule breakdown on the right, based on your selections in steps 3-5
- Repeat steps 3-6 to adjust the payment schedule.
- To learn about editing the date or amount of individual scheduled charges, see Edit a payment schedule.
- Select Save
- The new schedule now appears in the Payment Schedule(s) table below the payment plan summary
After you create your first payment schedule, you can:
- Create other draft schedules with different terms and frequencies to discuss with your patient.
- Create payment schedules for the other account(s) responsible for the remaining split amount on the payment plan summary.
- Activate your payment plan summary and schedule(s) so that the payment plan charges will generate. To learn more, see Activate a payment plan.
If your payment plan is split between one or more accounts, and one account does not have a payment schedule, you will see a ! beside the action buttons.

- Select the ! to create a new payment schedule for an account.