Manage payments in a batch
After adding a payment to a batch you have the following options depending on whether the payment was made by the patient or insurance.
These options are available from Practice > Payments > Batch Payments and then selecting Payments on the batch you want to inspect.
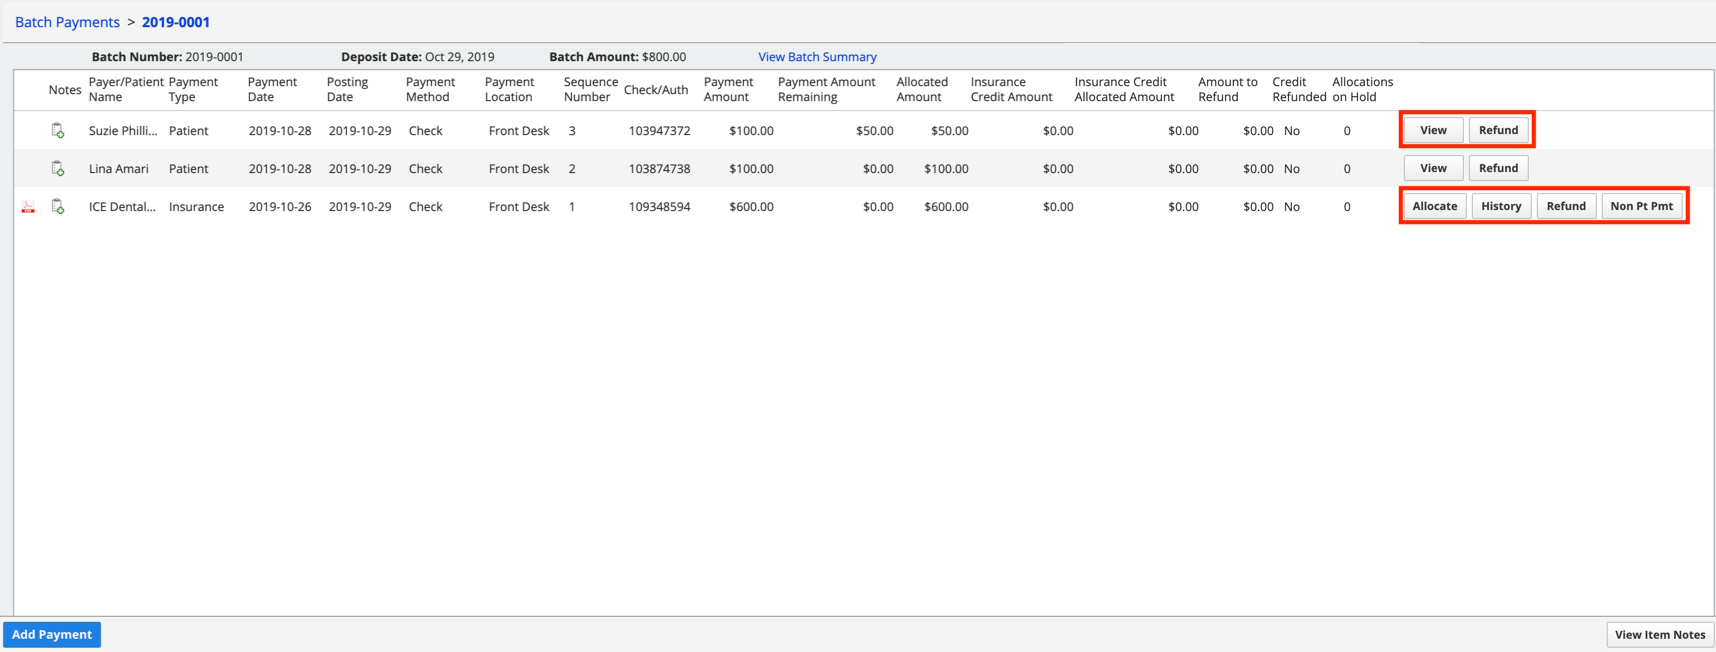
Patient payment options
- View: Review the payment details to see how it was allocated.
- You can reallocate the patient payment from here as well.
- To learn more, see Reallocate a patient payment.
- Refund: Display the patient refund screen
- You can refund the amount of the payment that is unallocated.
- To learn more, see Process a patient refund.
Insurance payment options
- Allocate: Allocate all or a portion of the insurance payment to charges submitted for an insurance payer address.
- To learn more, see Allocate an insurance payment in a batch.
- History: View the history of how the payment has been allocated or adjusted.
- If you have only added the payment to a batch, but not allocated or adjusted it, the history table will be empty.
- If you have allocated and/or adjusted the payment, you can use the history screen to:
- View and update any allocations left on hold.
- Review how the payment was allocated and/or adjusted.
- Edit how the amount was allocated and/or adjusted if there was an error. To learn more, see Reallocate a patient payment.
- Refund: Process a refund to the insurance carrier.
- Before you can process an insurance refund, an insurance payment, in whole or in part, must have been recorded as an insurance credit during the allocation process.
- To learn more, see Process an insurance refund.
- Non Pt Pmt: Allocate an insurance payment to an administrative charge for the insurance payer address.
- For example, insurance payer interest payments, HMO payments, or physician adjustment payments.
- To create non-patient payments, your practice must have at least one insurance administrative charge type configured.
- To learn more, see Pay a non-patient insurance charge.