Add payments to a batch
Once you have created a batch, you can add details about each payment included in that batch.
Payments can be from insurance or patients.
The steps to add insurance and patient payments are very similar, the main differences are that:
- Insurance payments are manually allocated to charges after they are added, and include an option to attach an EOB. Insurance payments can use any credit that an insurance payer has from a previous overpayment to form part of the payment that is added.
- Patient payments are automatically allocated to the patient's oldest charges on a first in, first out basis as soon as they are added, and include an option to attach a Check Stub. You can edit the automatic allocation after entering the payment.
To learn more about allocating insurance payments and re-allocating patient payments in a batch, see Allocate an insurance payment in a batch and Reallocate a patient payment.
Add a patient or insurance payment to a batch
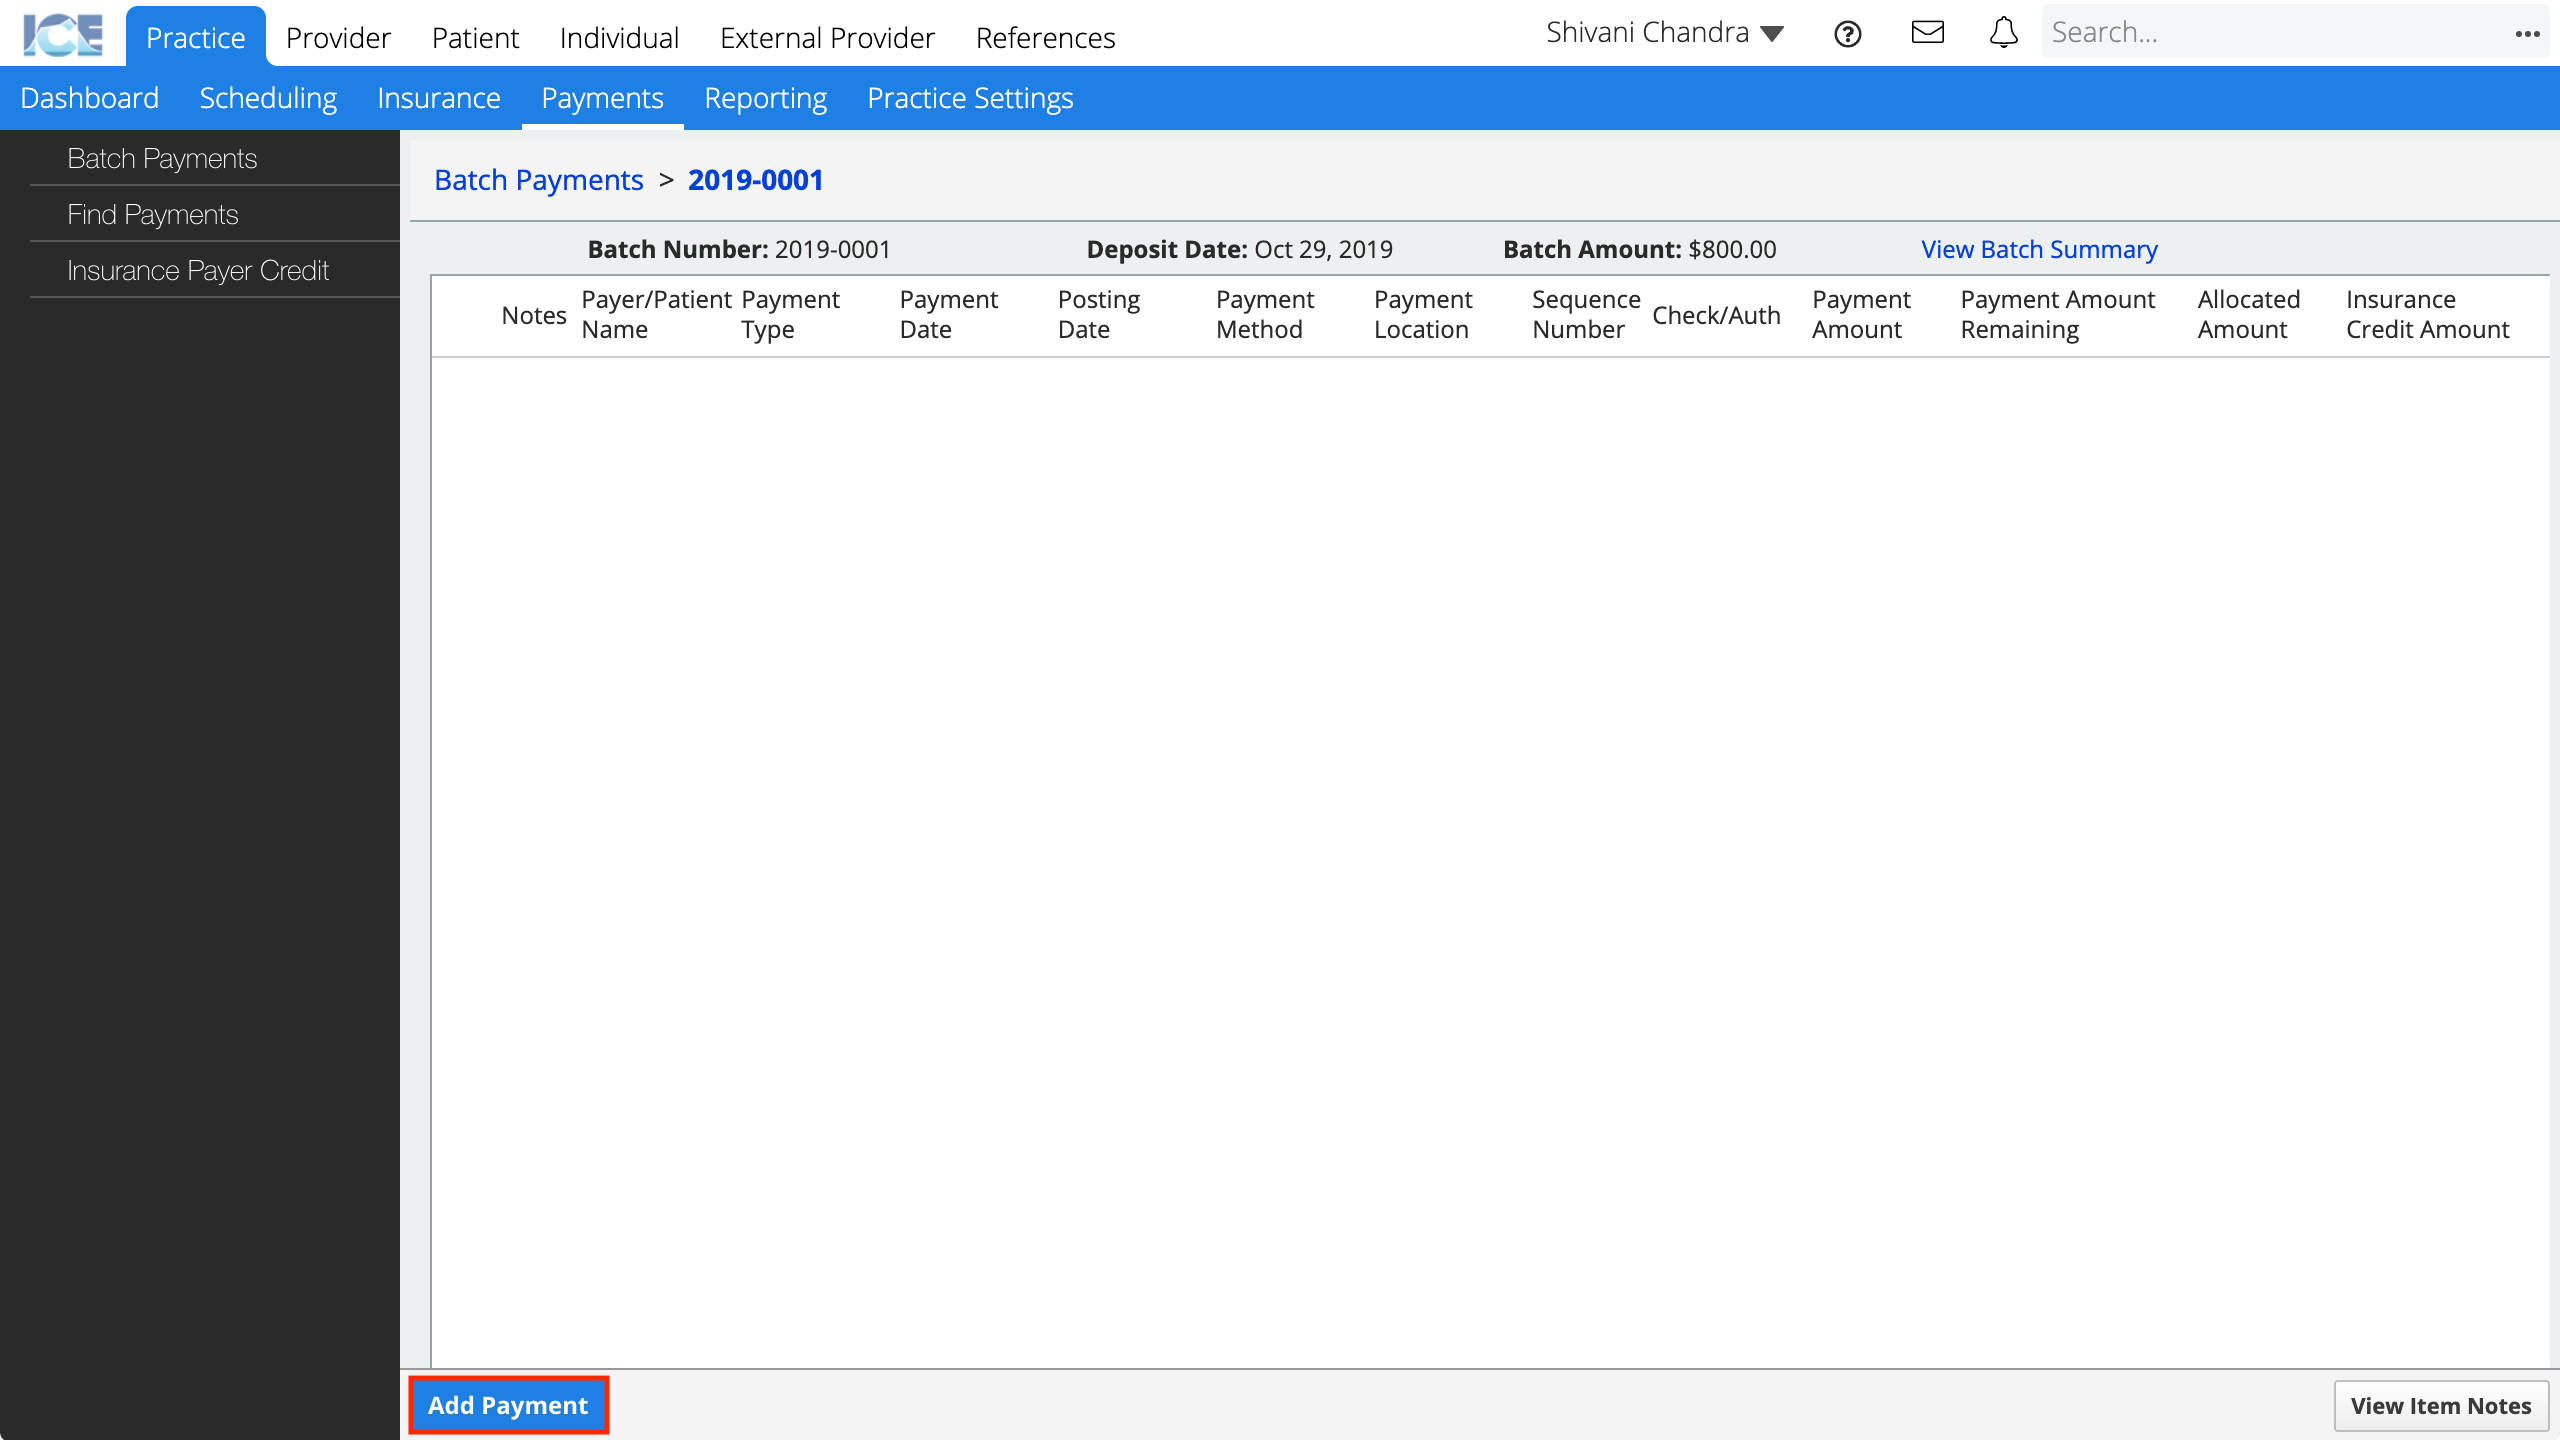
If you attached a batch summary to this batch when you created it, select View Batch Summary above the table to reference it while entering payments.
- Go to Practice > Payments > Batch Payments
- Select Payments on the batch payment entry that includes this payment
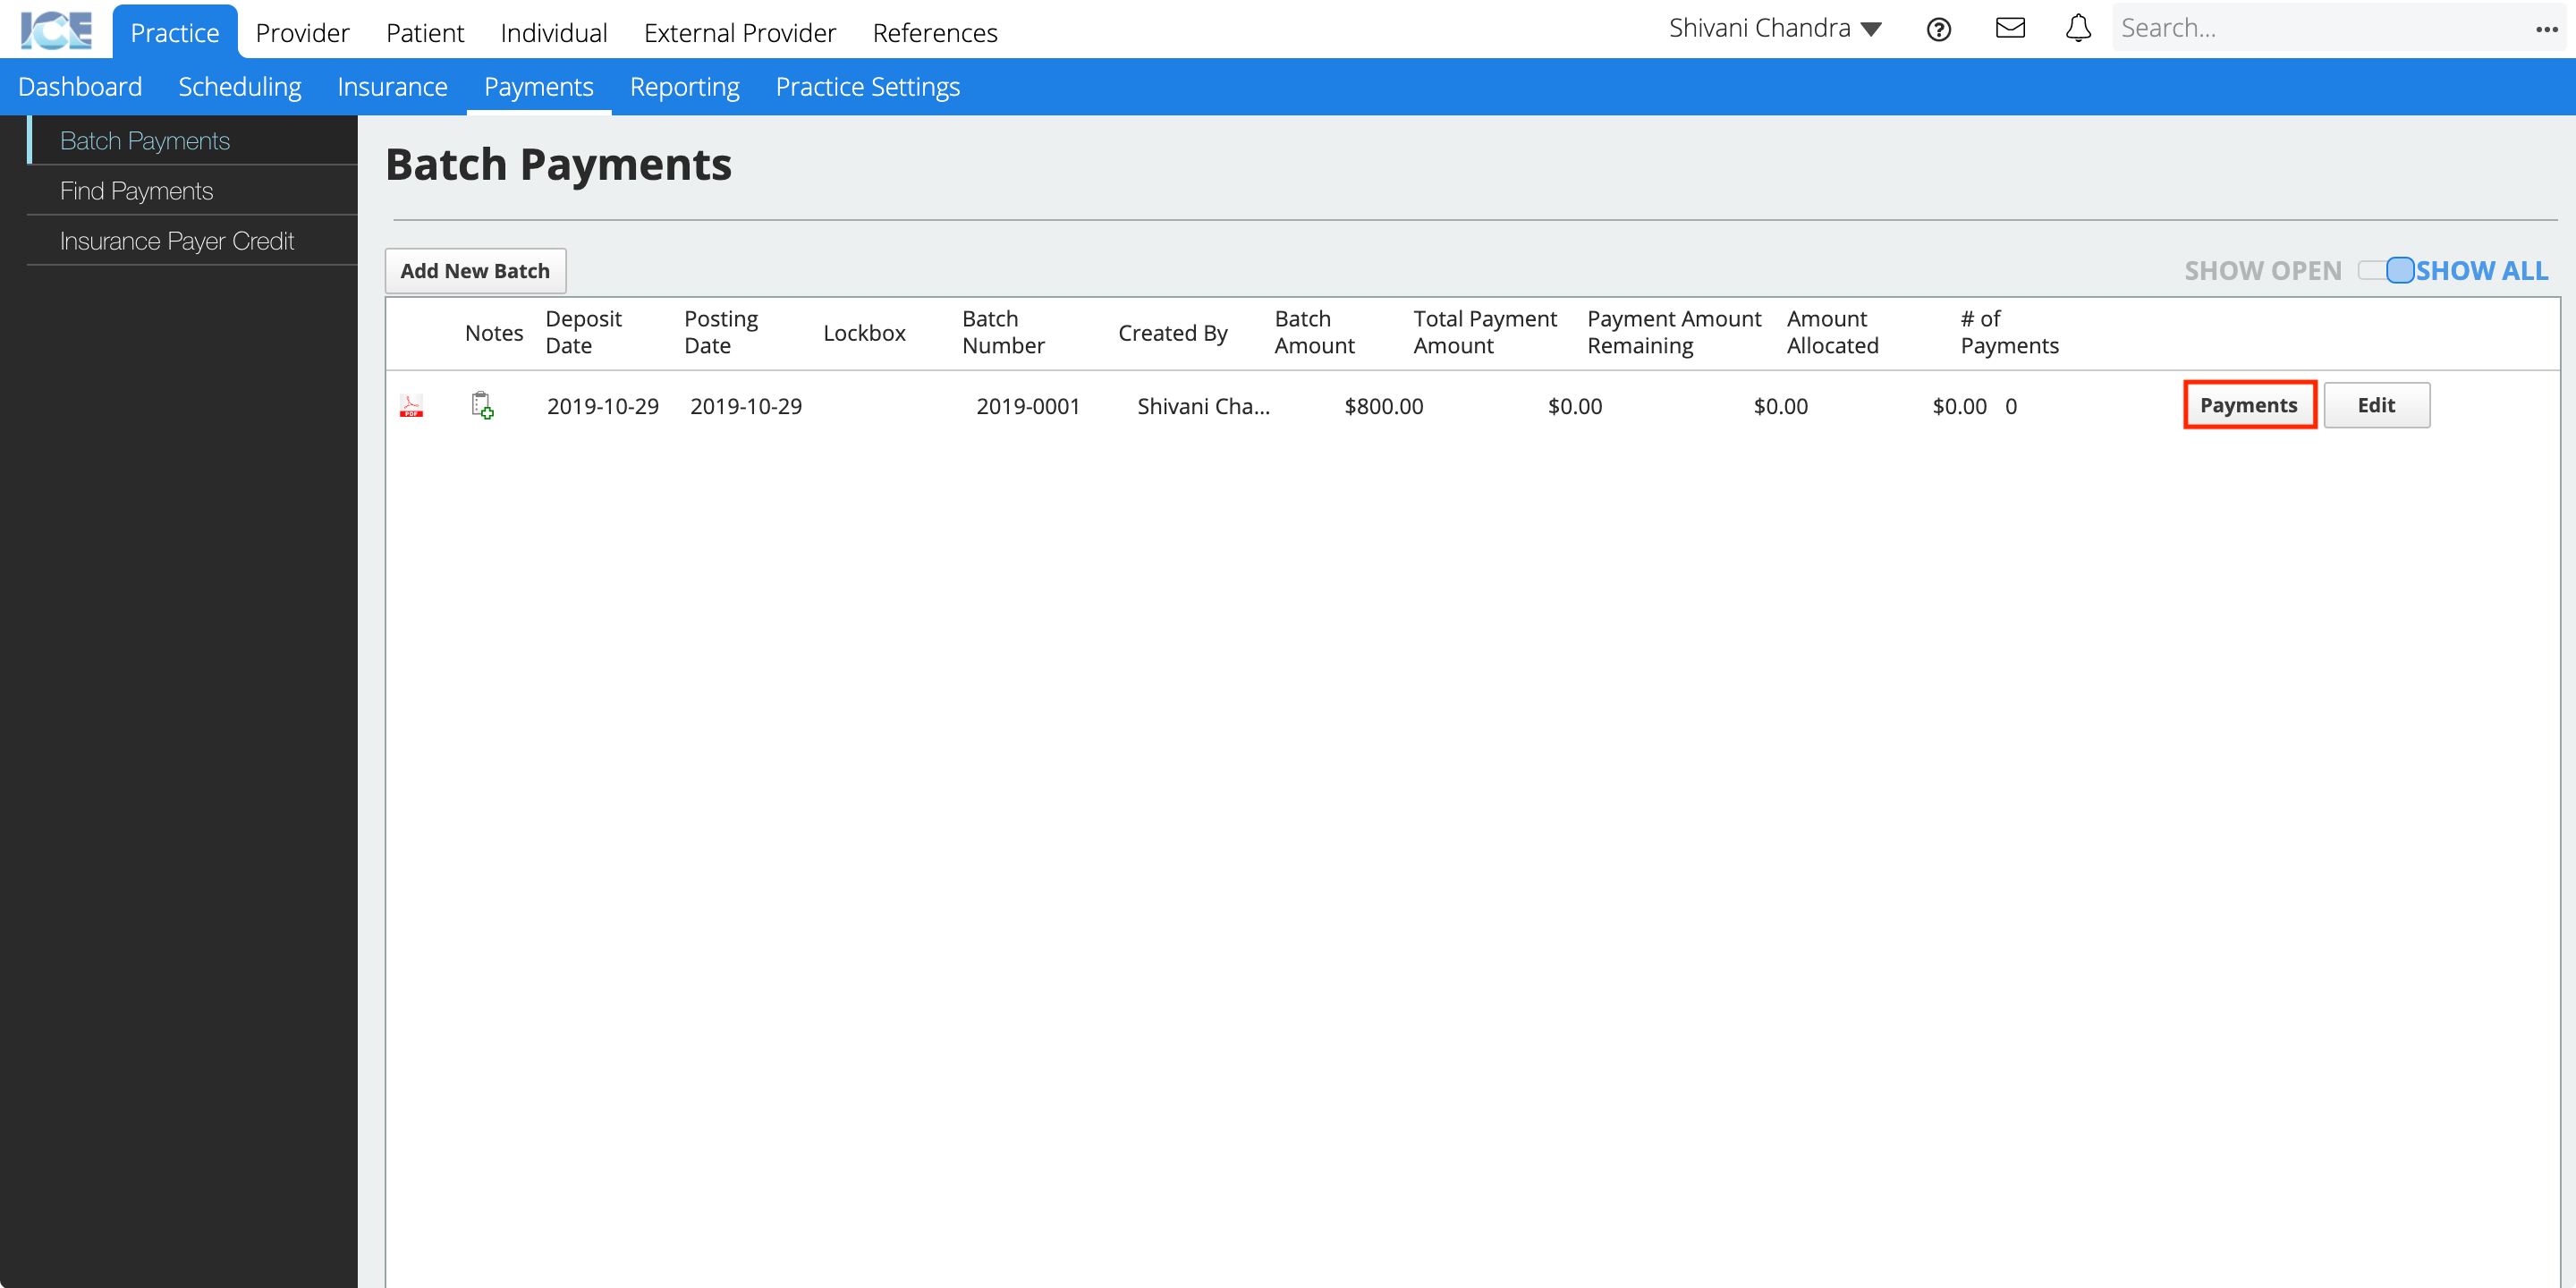
- Select Add Payment
- Choose the clinic group receiving the payment
- Select whether this payment is from a patient or insurance
- Search and select the patient or insurance payer address that made the payment
- If you enter a patient payment, it will be automatically allocated to the patient's oldest charges as soon as you save it.
- Confirm the sequence of this payment within the batch
- The sequence is auto-filled as you enter payments. You can change it, but it must be unique within the batch.
- Enter the date that the payment was received
- Enter the amount of the payment
- Enter the location where the payment was entered
- Enter the payment method
- Optional: Enter the check or authorization number
- If you have an explanation of benefits (EOB) for an insurance payment, or a check stub for a patient patient, attach them to the payment by selecting the Attach or Scan buttons
- Attach lets you upload and attach a file.
- Scan lets you scan and attach a file.
- These files are also visible from the patient's financial record when viewing the details of the payment.
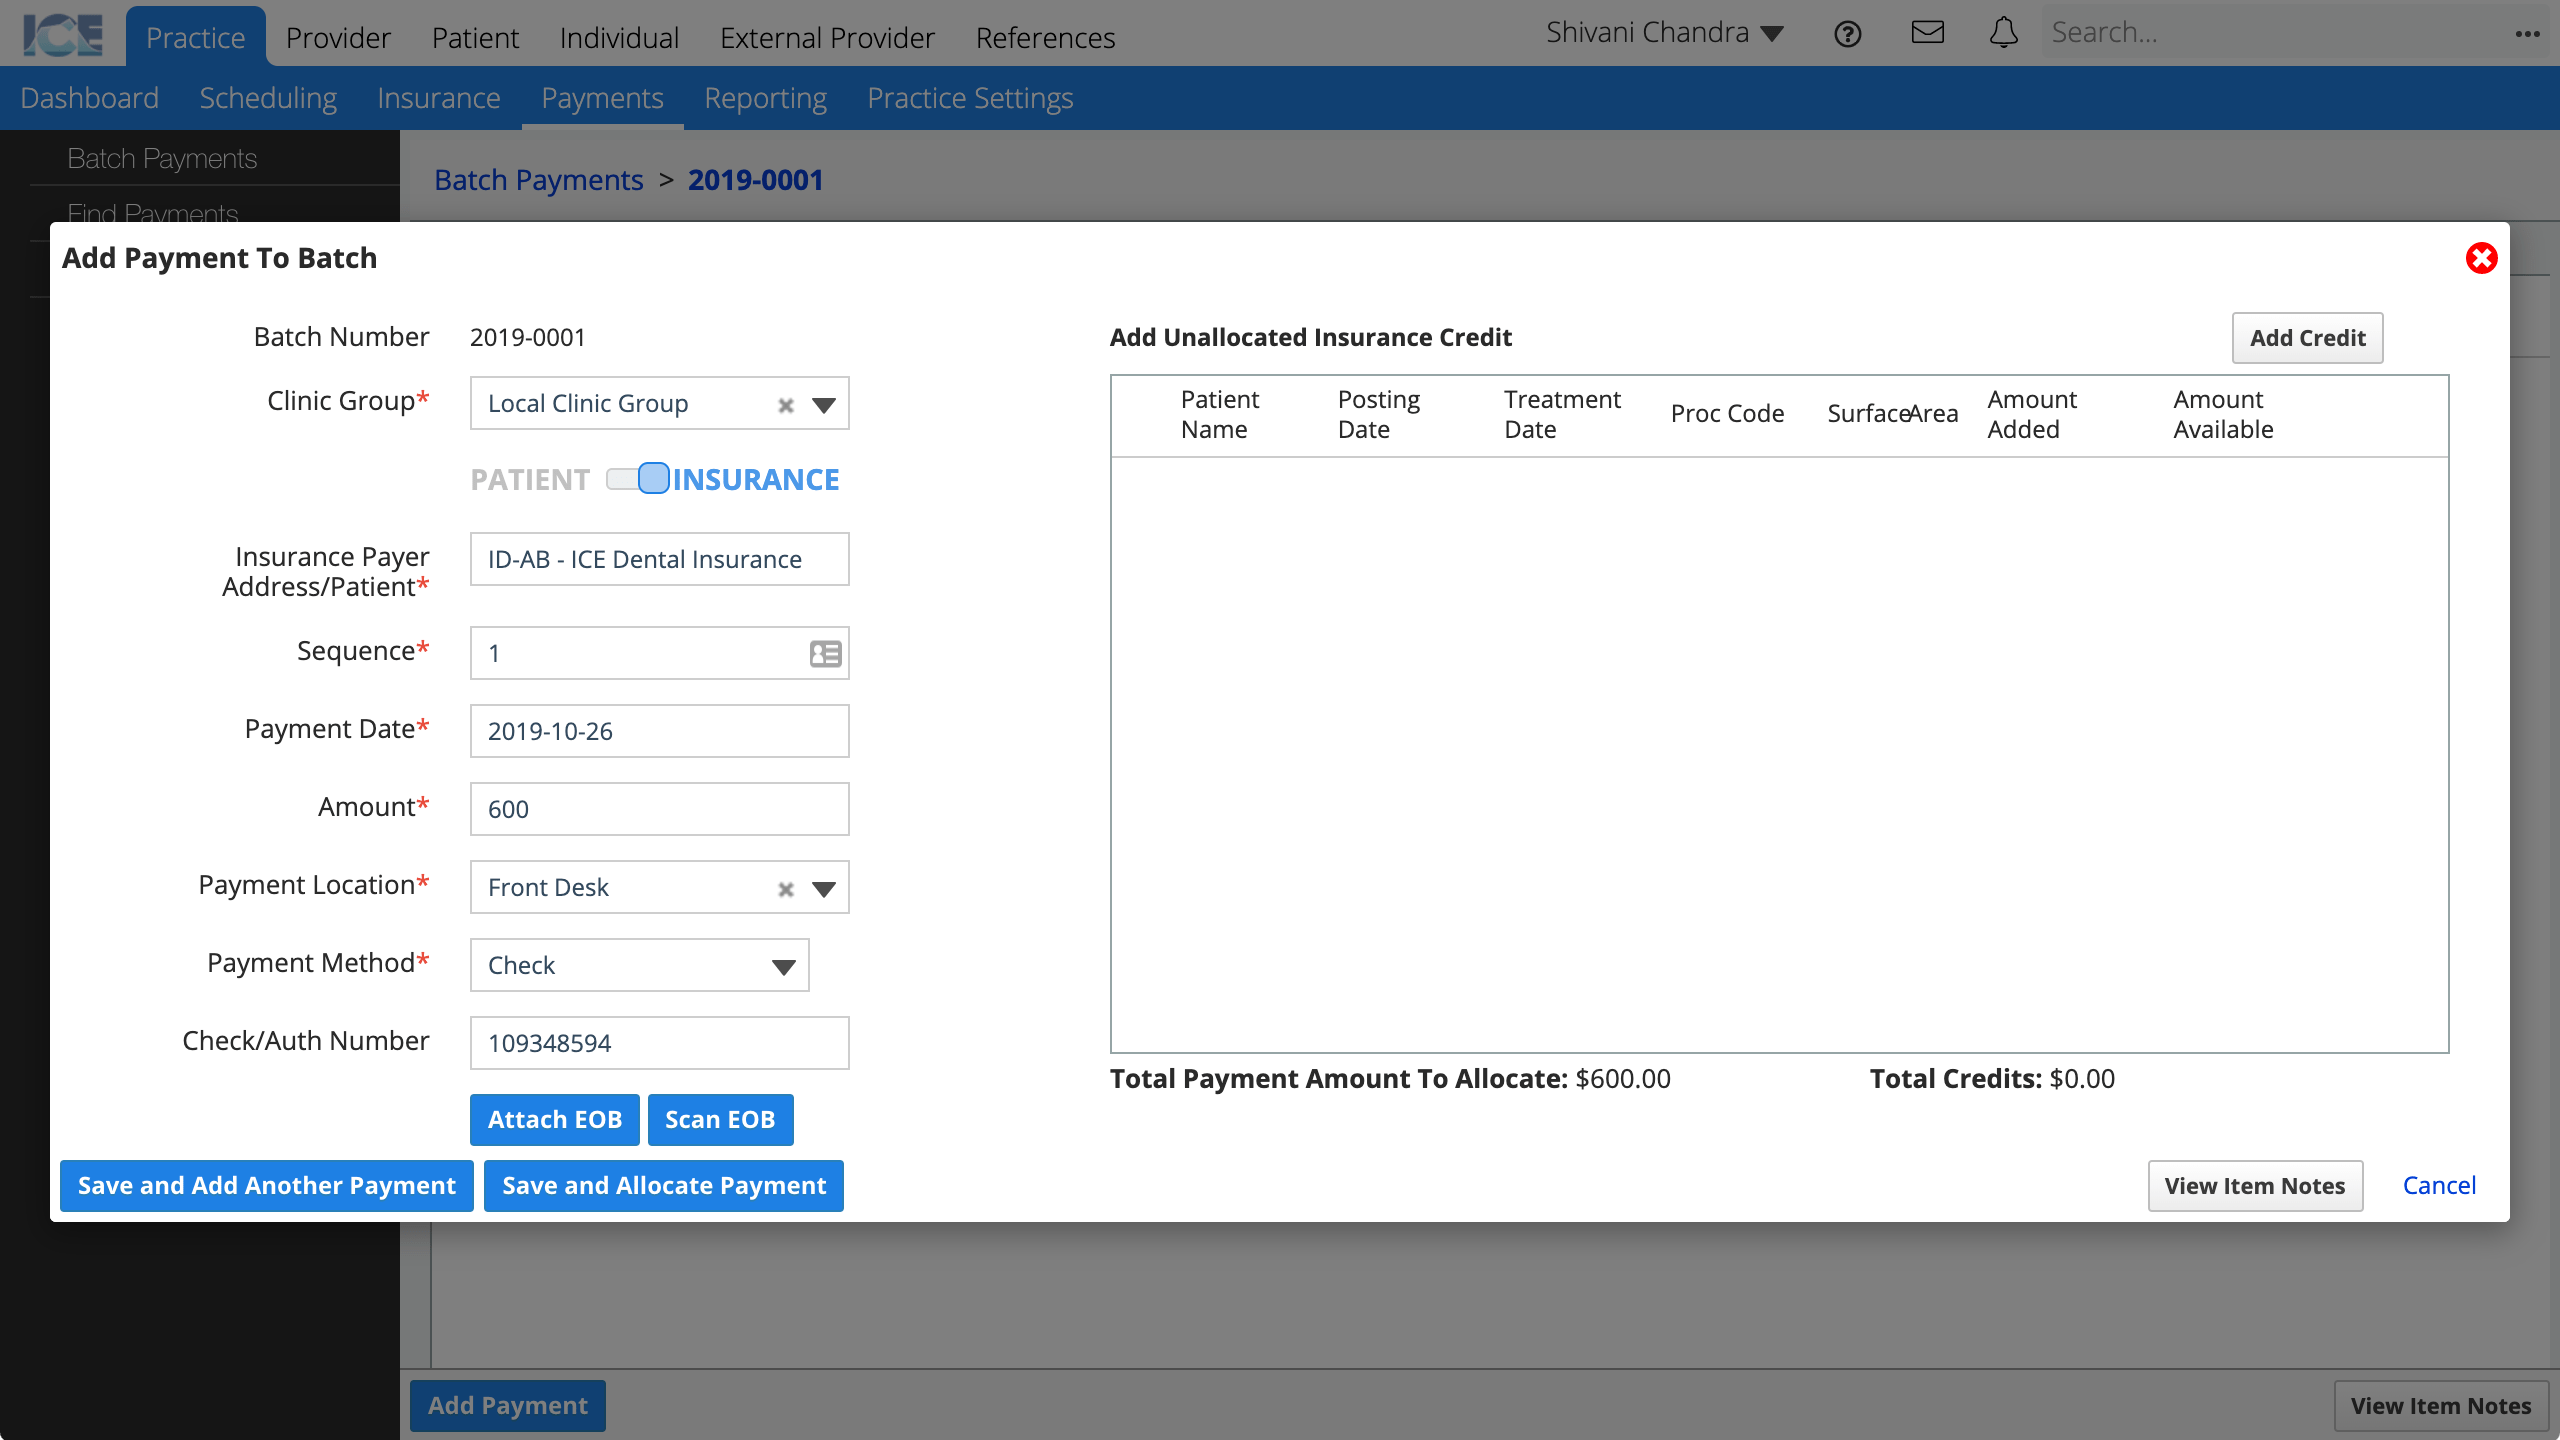
- Once you've confirmed that the details are accurate:
- Select Save and Add Another Payment and repeat steps 4-14 for a new payment.
or - Select Save and Allocate Payment to move to the allocation step for this payment. To learn more, see Allocate an insurance payment in a batch.
- Select Save and Add Another Payment and repeat steps 4-14 for a new payment.
Use insurance credit as part of a payment in a batch
If the insurance payer address has a credit available for a future EOB, you can use it as part of a payment added to the batch.
The details of when and for which patient the credit should be used for are often included in the insurance carrier's EOB.
For example, an EOB for a $2000 payment may reference a previously generated credit of $20 from an overpayment and so the check from insurance will only be $1980.
You cannot add an insurance credit to a batch on its own, it must be included as part of an insurance payment.
- Go to Practice > Payments > Batch Payments
- Select Payments on the batch payment entry where you want to add payments
- Select Add Payment
- Choose the clinic group receiving the payment
- Select that this payment is from insurance
- Search and select the insurance payer address that has the credit
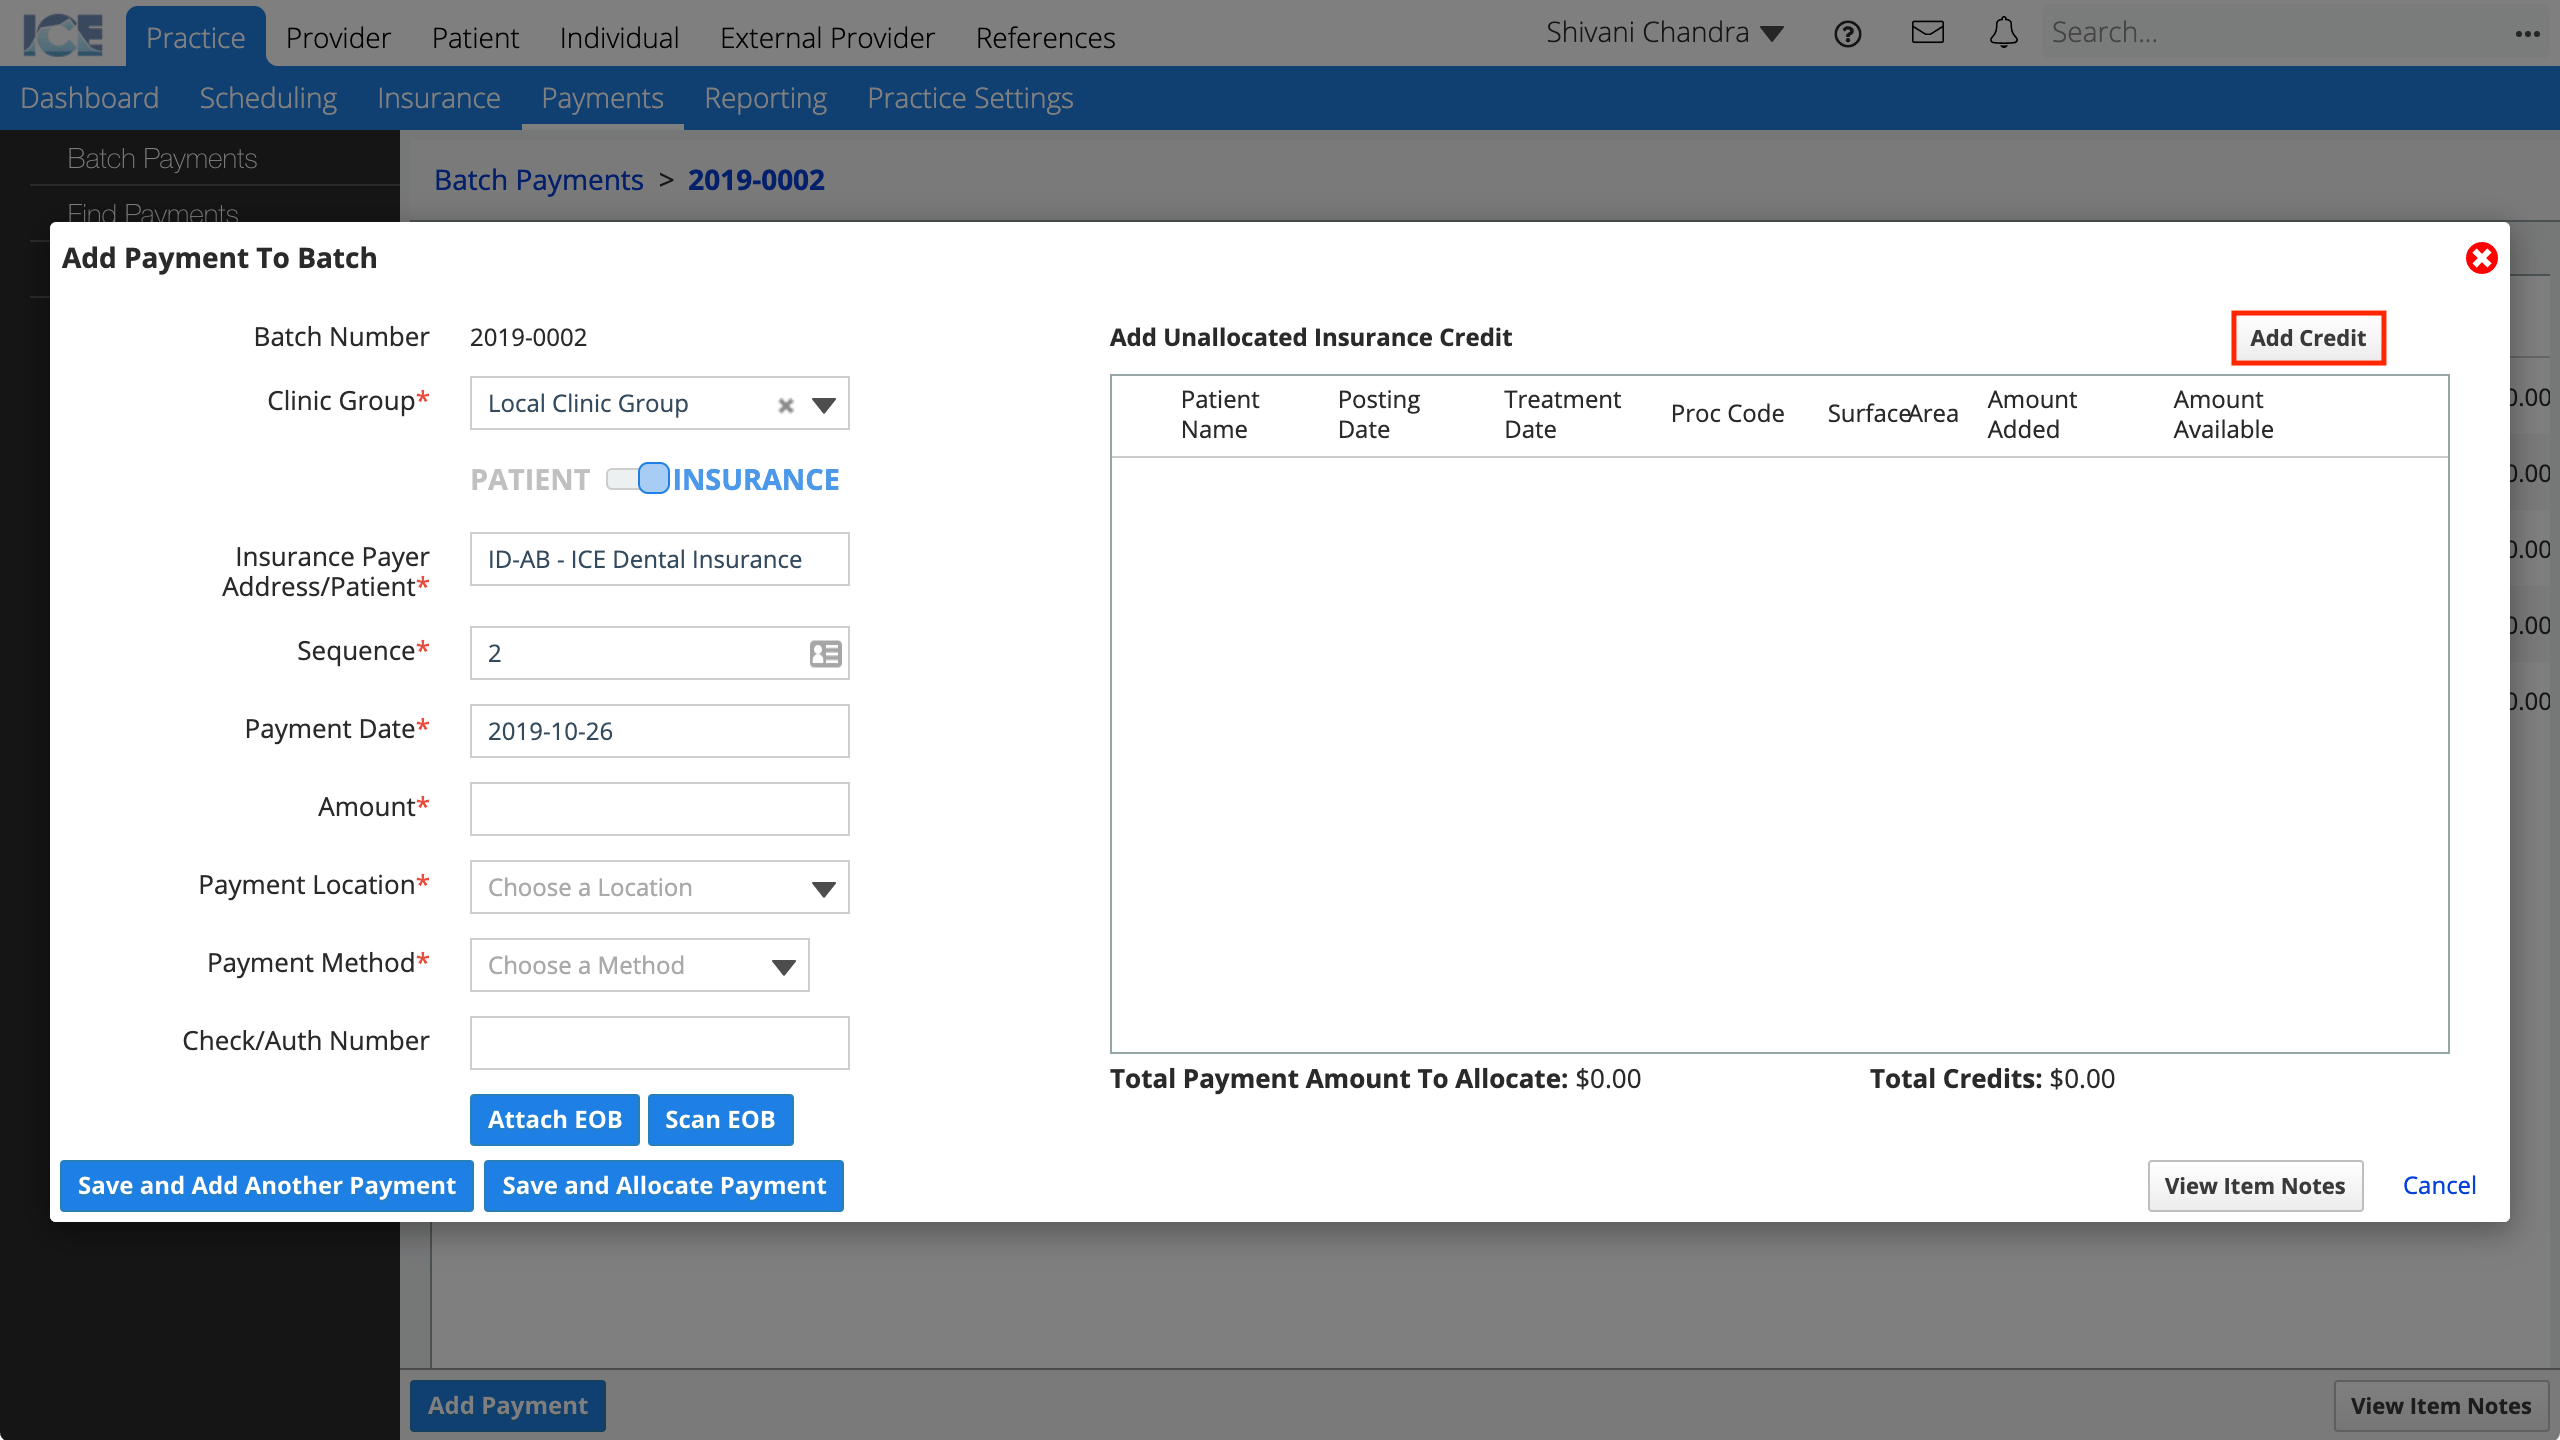
- Select Add Credit on the payment screen
- Search for the credit by entering details about the credit and selecting Search
- The EOB should include the patient name, date, and amount details to help you find the credit.
- Select the checkbox for each credit you want to add
- For each credit selected, enter the amount of each you want to use in the Credit Amt to Add column
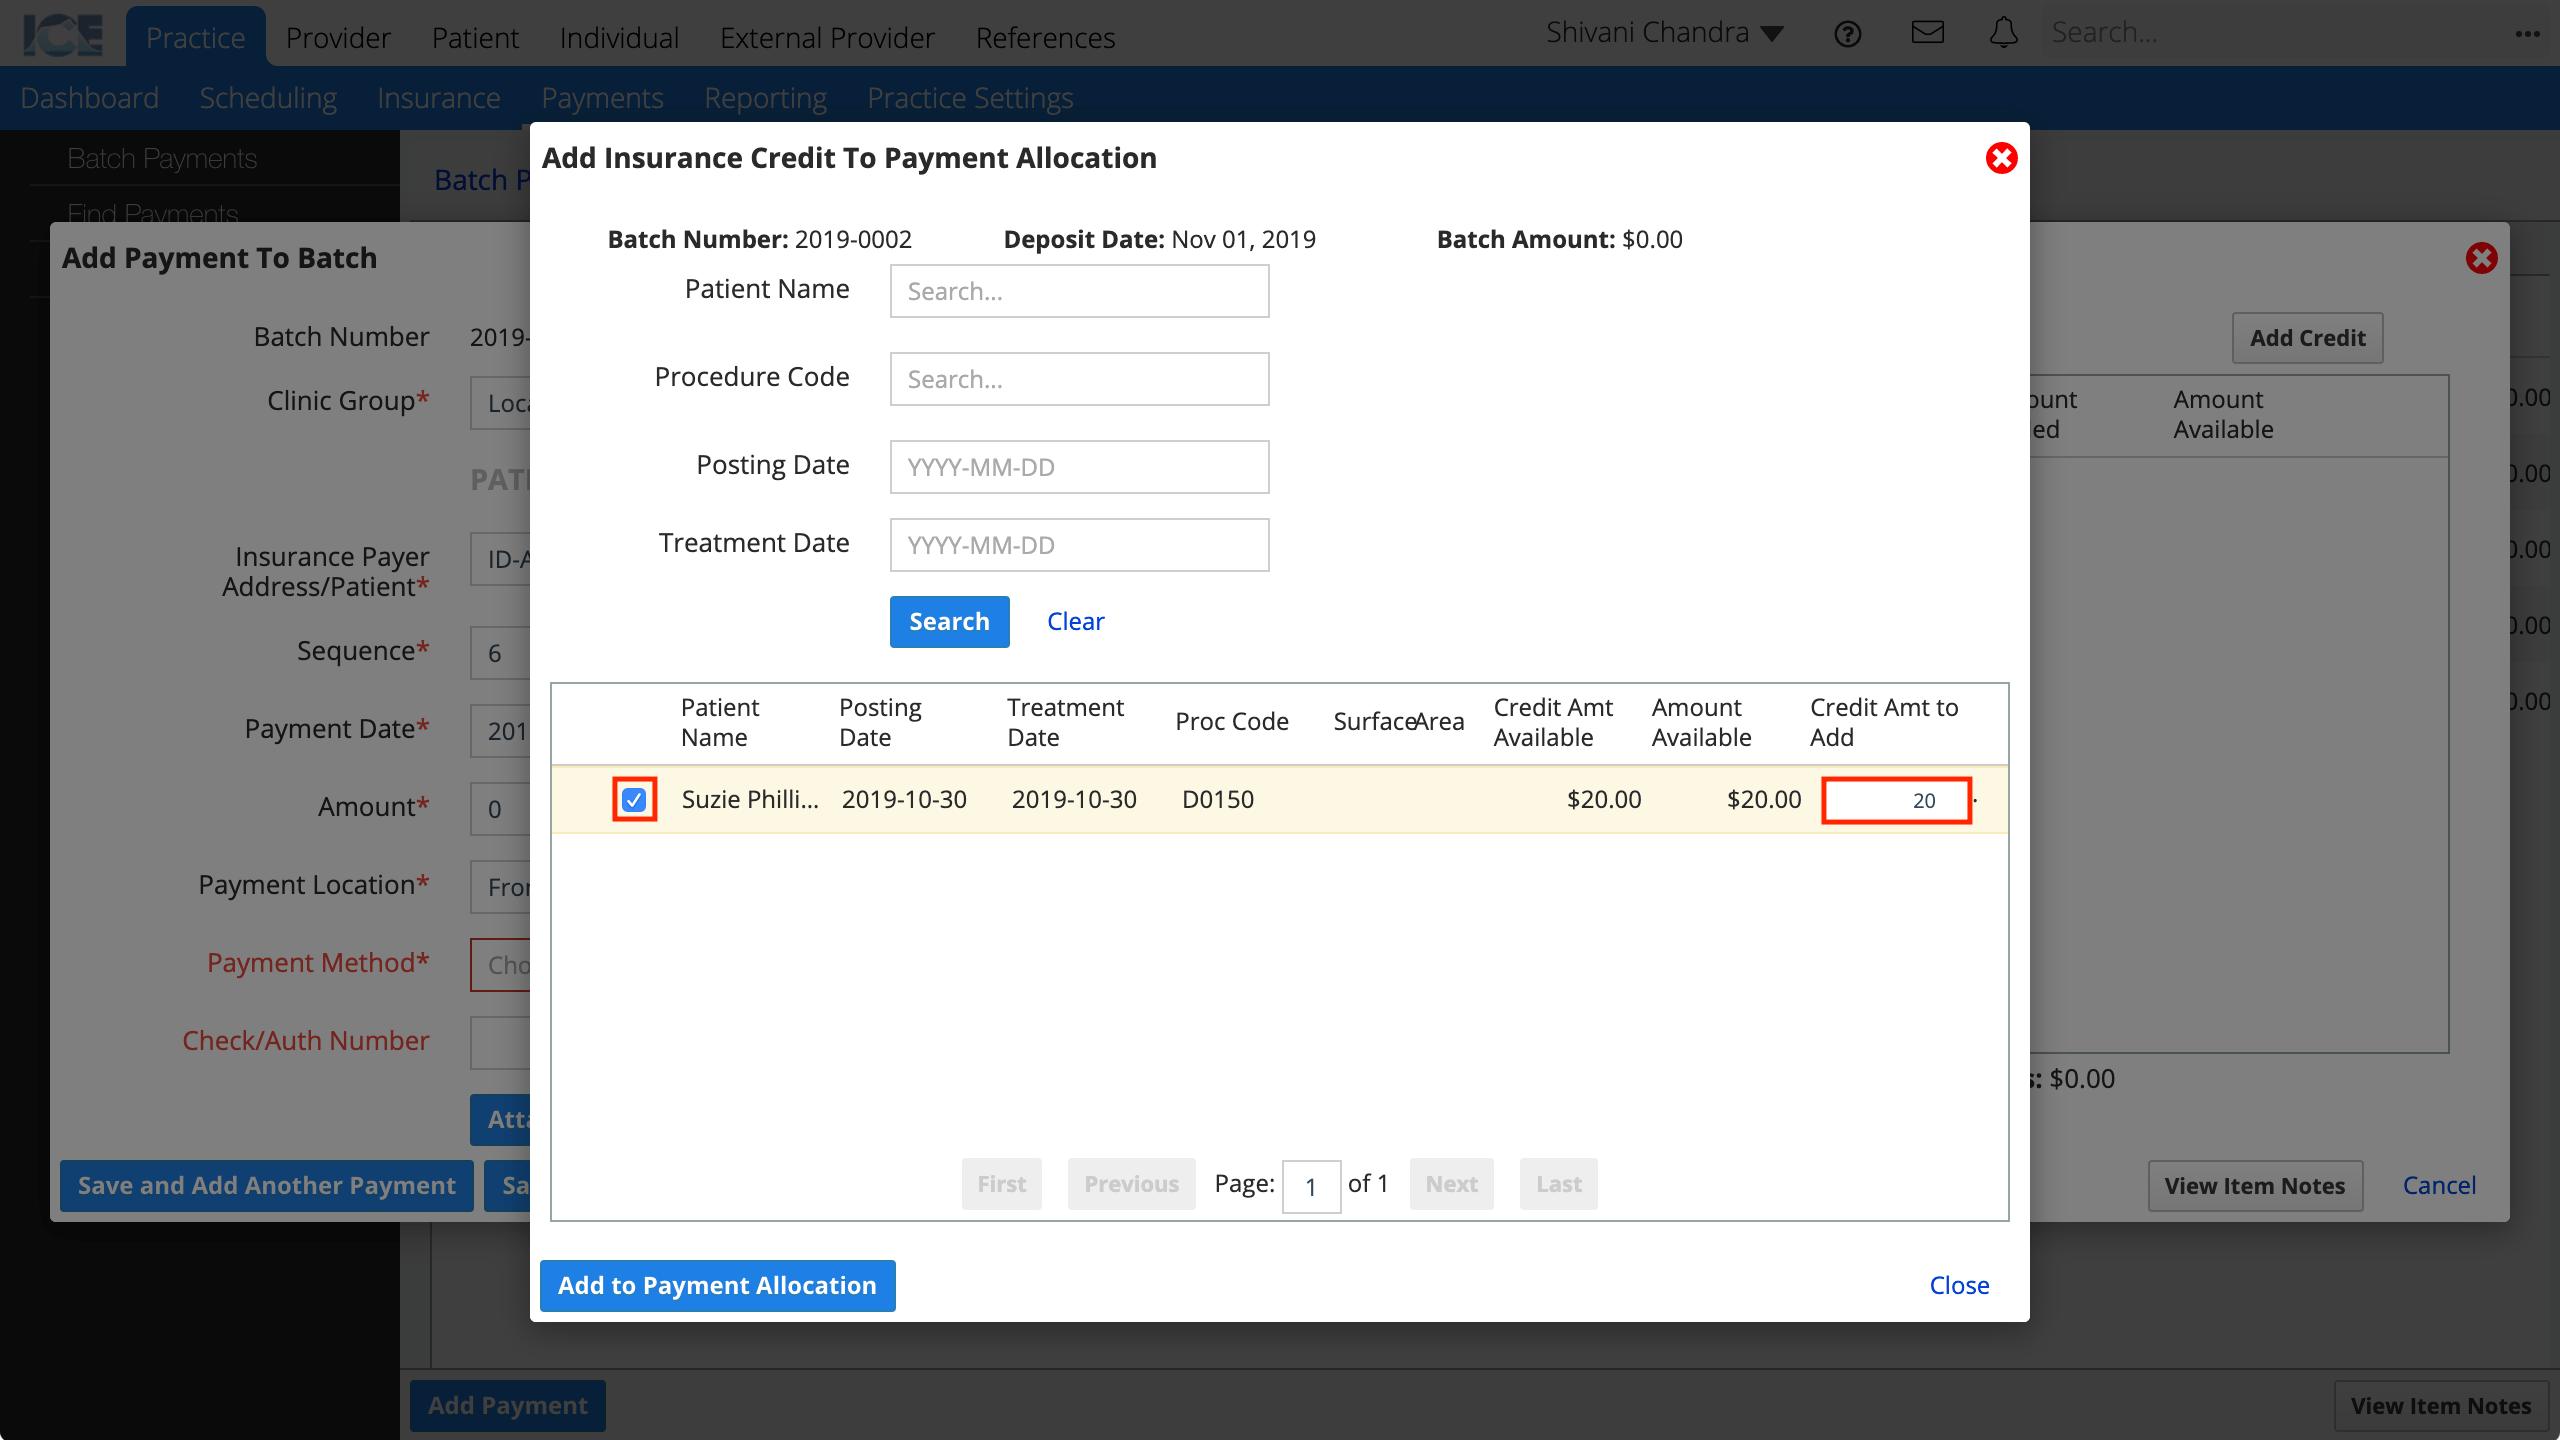
- Select Add to Payment Allocation
- The credit amount appears in the Add Unallocated Insurance Credit table with a total at the bottom.
- Complete the remaining fields for the payment:
- Payment Date
- Amount
- Payment Location
- Payment Method
- If you have an explanation of benefits (EOB) from insurance attach it to the credit payment by selecting the Attach or Scan buttons
- Attach lets you upload and attach a file.
- Scan lets you scan and attach a file.
- These files are also visible from the patient's financial record when viewing the details of an insurance or patient payment allocation.

- Once you've confirmed that the details are accurate:
- Select Save and Add Another Payment to add another payment to the batch.
or - Select Save and Allocate Payment to move to the allocation step for this payment. To learn more, see Allocate an insurance payment in a batch.
- Select Save and Add Another Payment to add another payment to the batch.