Configuraciones de la Clínica: gráficos
Acceder a la configuración de la clínica de los gráficos
- Vaya a Practice > Practice Settings > Charting
Exclusiones de códigos
Puede configurar los códigos de un rango para que no requieran una revalidación o un nuevo consentimiento cuando se modifique un tratamiento en el mismo sitio dentro de ese rango.
- Por ejemplo, si se registra un código D2140 (1 amalgama superficial) en 3O, se recibe el consentimiento y se necesita cambiar el código a D2150 (2 amalgamas superficiales) en 3MO.
- Una regla de exclusión del código D2140-D2150 significa que el sistema no exigirá un nuevo consentimiento de tratamiento cuando actualice el código de procedimiento y las superficies en el diente 3.
Las exclusiones de re-consentimiento sólo se aplican a los consentimientos de tratamiento, no a los consentimientos informados.
- Vaya a Practice > Practice Settings > Charting > Code Exclusions.
- Seleccione Agregar exclusiones de código
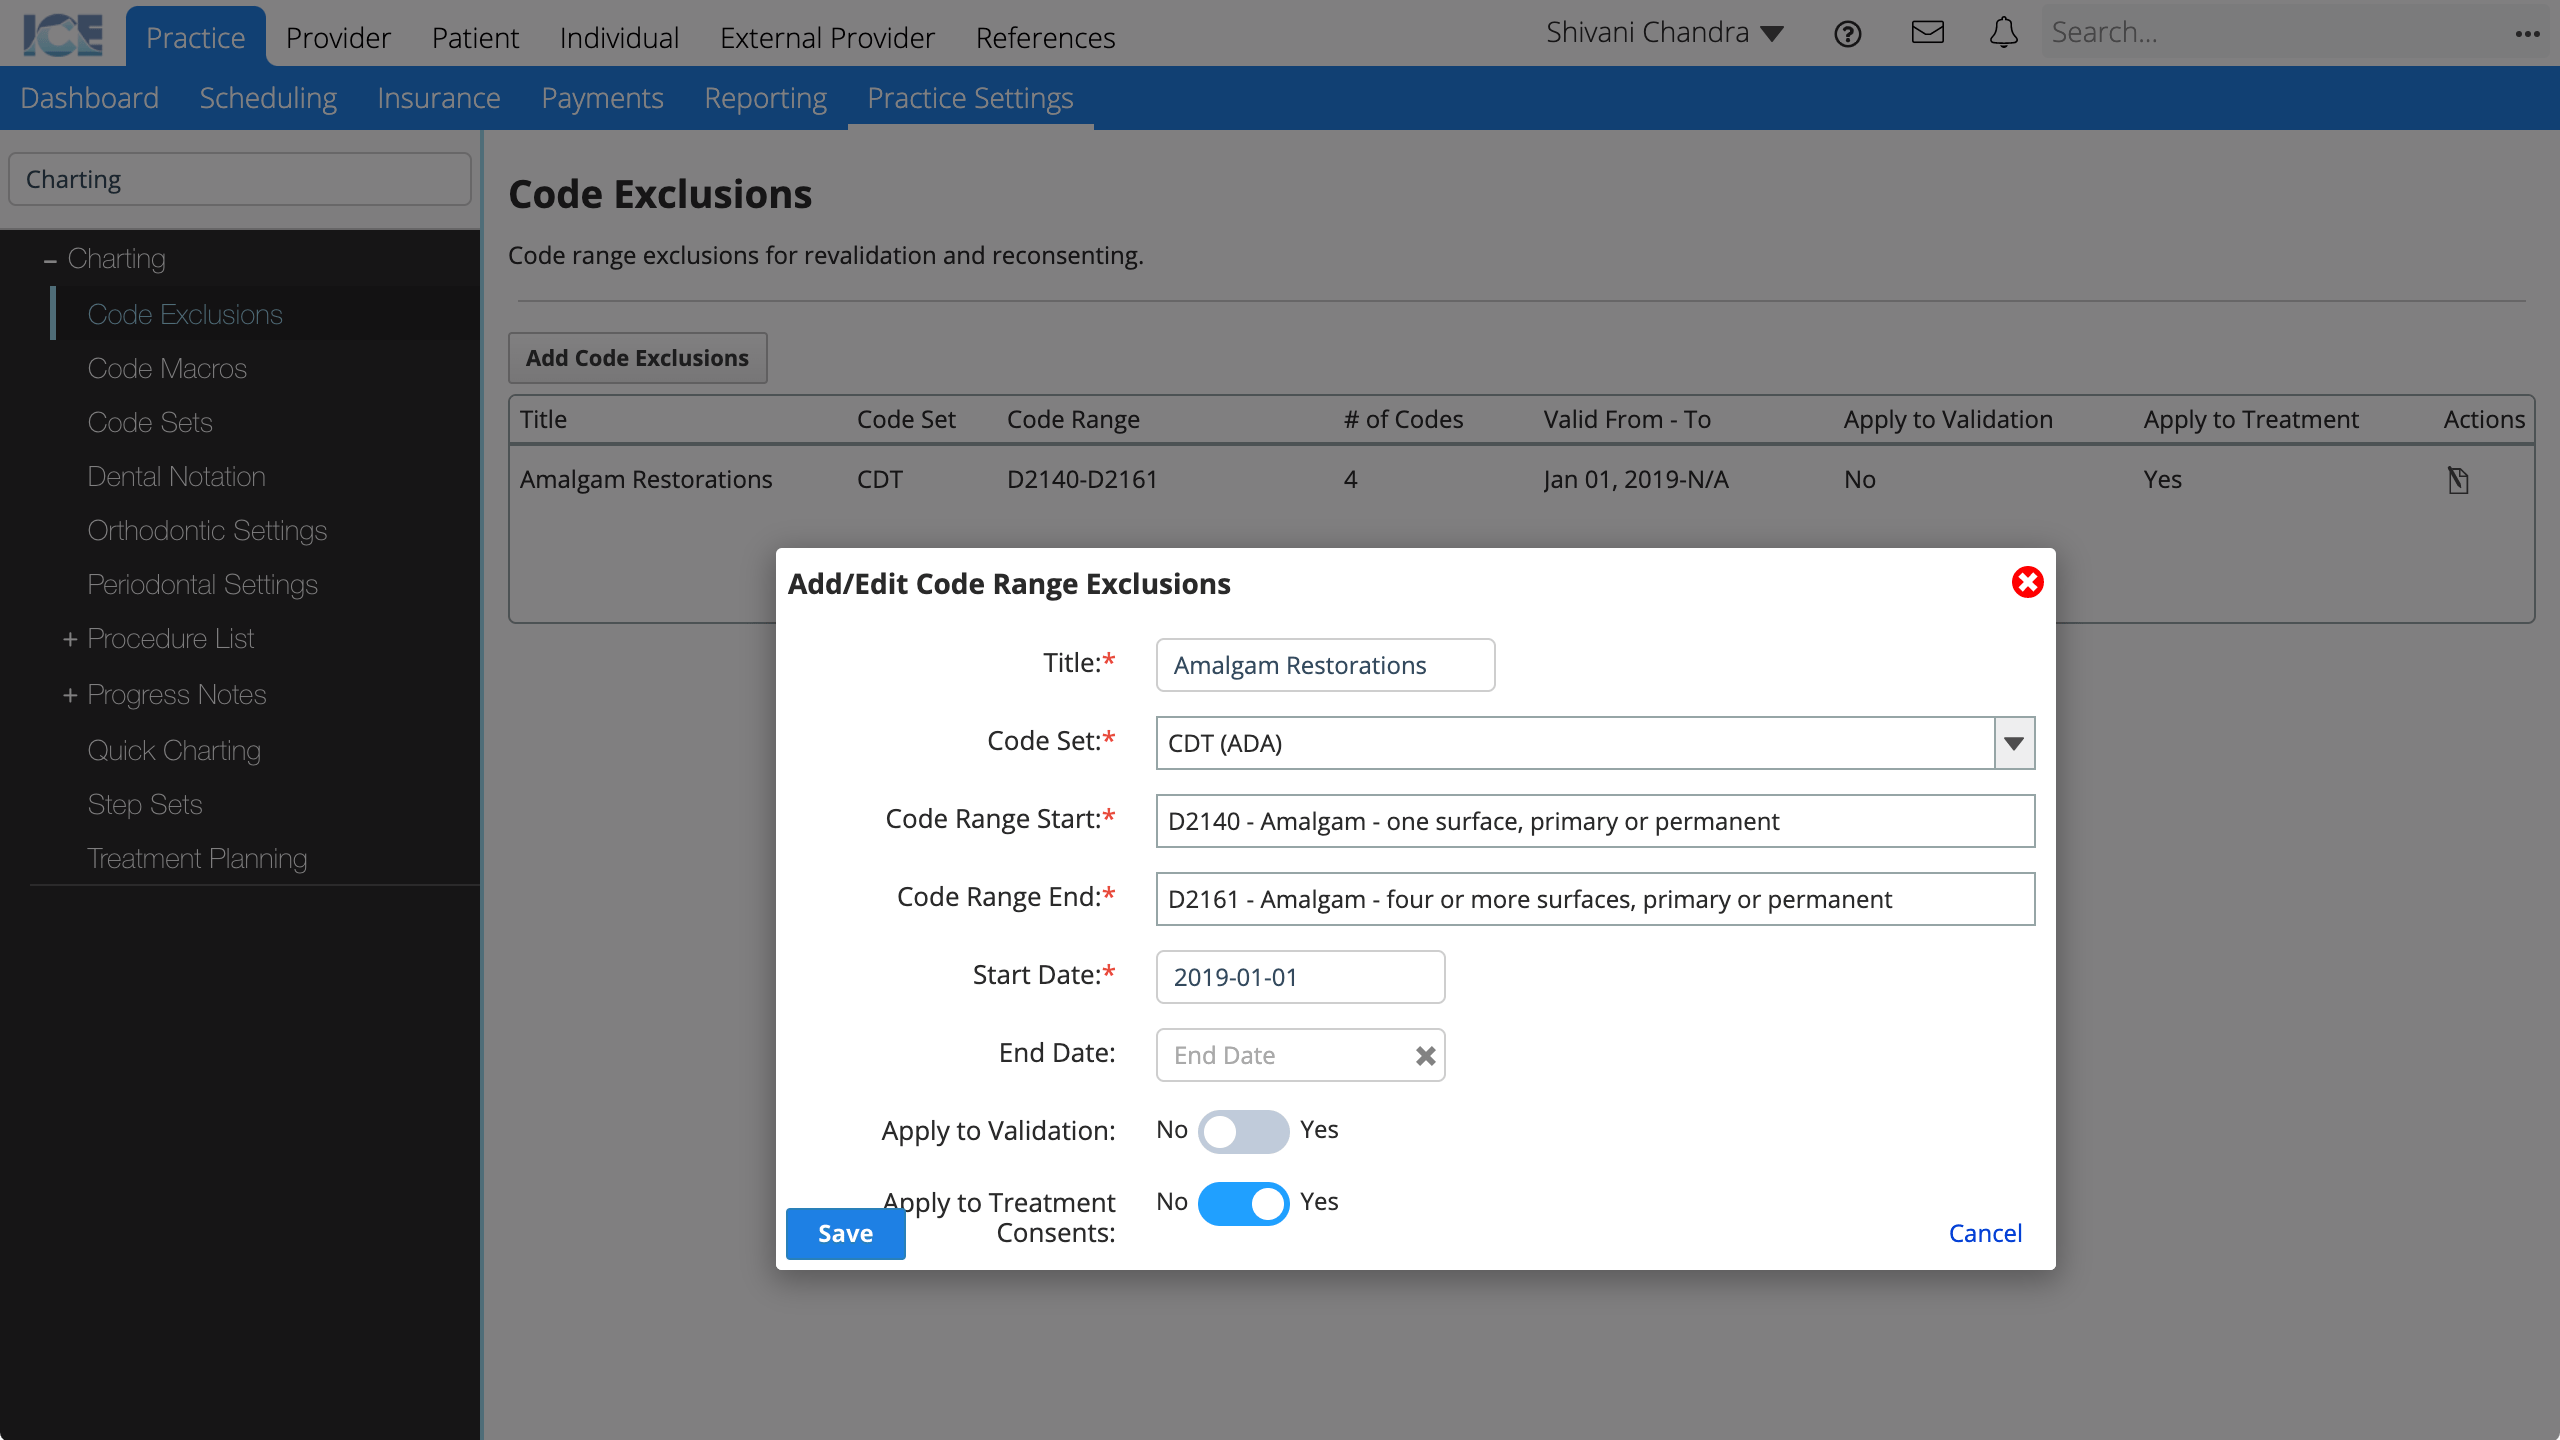
- Completar los campos requeridos
- Título: El título que aparece en la tabla de Exclusiones de Código en la Configuración de la .Clínica
- Conjunto de códigos: ¿Qué conjunto de códigos tiene los códigos excluidos?
- Inicio del rango de códigos: ¿Qué código es el primero en el rango de exclusión?
- Fin del rango de códigos: ¿Qué código es el último en el rango de exclusión?
- Fecha de inicio: Después de esta fecha la exclusión se aplica a todos los códigos que coinciden.
- Fecha de finalización: Después de esta fecha la exclusión ya no se aplica, pero aparece para las entradas históricas.
- Aplicar a la validación: ¿Esta exclusión es para revalidación?
- Aplicar a los consentimientos de tratamiento: ¿Esta exclusión es para la revalidación de los consentimientos de tratamiento?
- Seleccione Guardar.
Para saber cómo configurar qué códigos requieren consentimiento, consulte "Editar requisitos de consentimiento y diagnóstico de códigos de procedimiento".
Macros de código
Una macro de código es una forma de añadir varios códigos de procedimiento relacionados a un paciente de una sola vez, eligiendo un solo macro de código.
Las macros de código aparecen en la búsqueda de procedimientos. En los resultados de la búsqueda muestran el Código de Visualización y la Descripción de la macro definidos en la Configuración de la Clínica.
- Vaya a Práctica > Configuración de la Práctica > Cartografía > Macros de código.
- Seleccione Agregar macro de código.
- Introduzca un código de visualización y una descripción
- Seleccione Agregar procedimiento a la macro.
- A la derecha, busque y seleccione un código de procedimiento para añadirlo a la macro
- Opcional: Seleccione un diente/área por defecto
- Repita los pasos 4-6 para añadir códigos adicionales a la macro
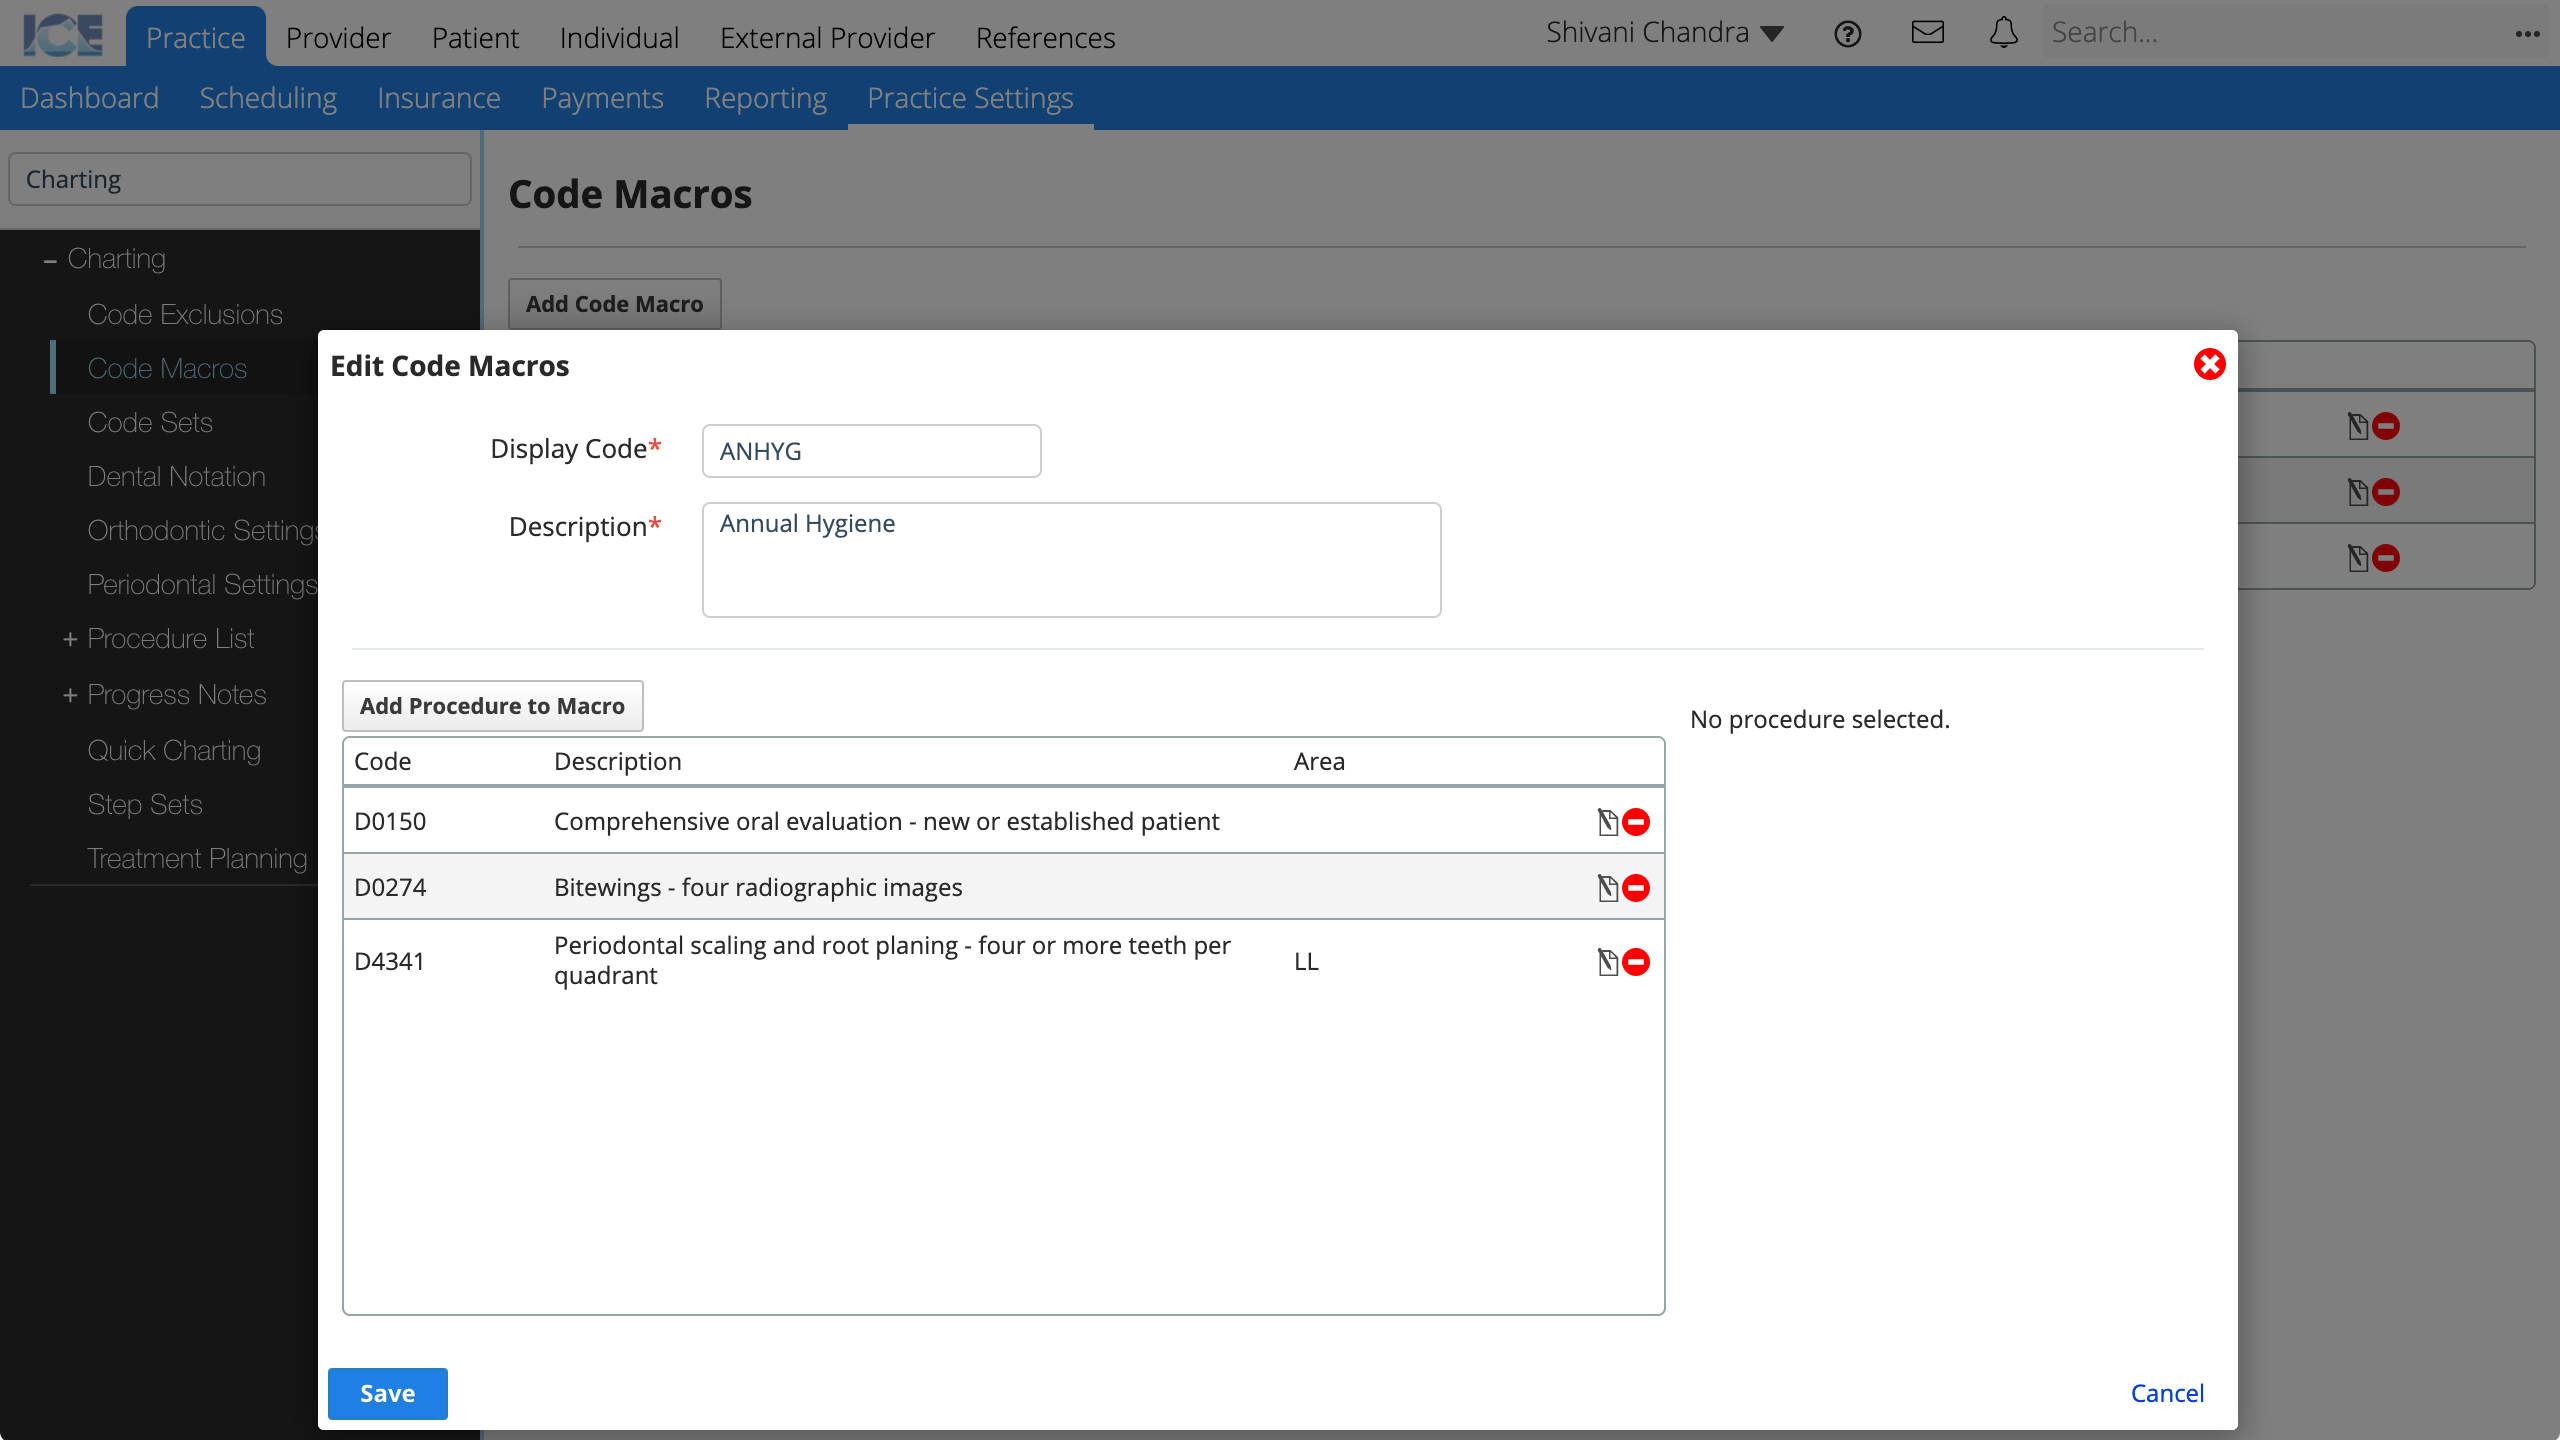
- Para eliminar un procedimiento de la macro, seleccione

- Para editar los detalles de un procedimiento en la macro, seleccione

- Seleccione Guardar para guardar sus cambios.
Para editar una macro de código existente, seleccione ![]() en la tabla principal de Macros de código.
en la tabla principal de Macros de código.
Conjuntos de códigos
Elija cuál de los conjuntos de códigos predeterminados de ICE Health Systems va a utilizar en su consultorio/clínica.
Una consulta también puede crear conjuntos de códigos personalizados para crear sus propios códigos de hallazgo o procedimiento.
Estos códigos personalizados se pueden asignar a los códigos existentes con el fin de hacer uso de la representación visual del código existente en el odontograma o para fines de facturación de seguros.
| Conjuntos de códigos predeterminados | Tipo | Descripción |
|---|---|---|
| Clasificación de caries (CAR) | Hallazgos | Permite la identificación especial de caries por consistencia y excelencia en la investigación. Cuando la clasificación de caries está habilitada, otros códigos de caries en el conjunto SNO-DDS se ocultan para garantizar que se seleccionen los códigos de caries adecuados. |
| SNO DDS (SNO) | Hallazgos | Una terminología de diagnóstico dental estandarizada que ha sido desarrollada por expertos en el campo dental. Cada término seleccionable tiene códigos ICD-10 asociados que respaldarán los procesos de investigación y reclamos de seguros. |
| ICD-10-CM (ICD) | Hallazgos | Los códigos de clasificación médica de la Clasificación Estadística Internacional de Enfermedades y Problemas de Salud Relacionados. |
| CDT ADA (CDT) | Procedimientos | Los códigos de procedimiento de la Asociación Dental Americana. |
Seleccione conjuntos de códigos para usar en su clínica
Seleccione los conjuntos de códigos que le gustaría utilizar en su clínica.
- Los conjuntos de códigos primarios se incluyen en los resultados de la búsqueda simple y avanzada.
- Los conjuntos de códigos secundarios sólo se incluyen en los resultados de la búsqueda avanzada.
Los resultados de la búsqueda se agrupan por conjunto de códigos. Utilice las flechas para reordenar los conjuntos de códigos aquí. Esto define qué conjuntos aparecen en la parte superior de los resultados.
- Vaya a Práctica > Configuración de la Práctica > Gráficos > Conjuntos de códigos
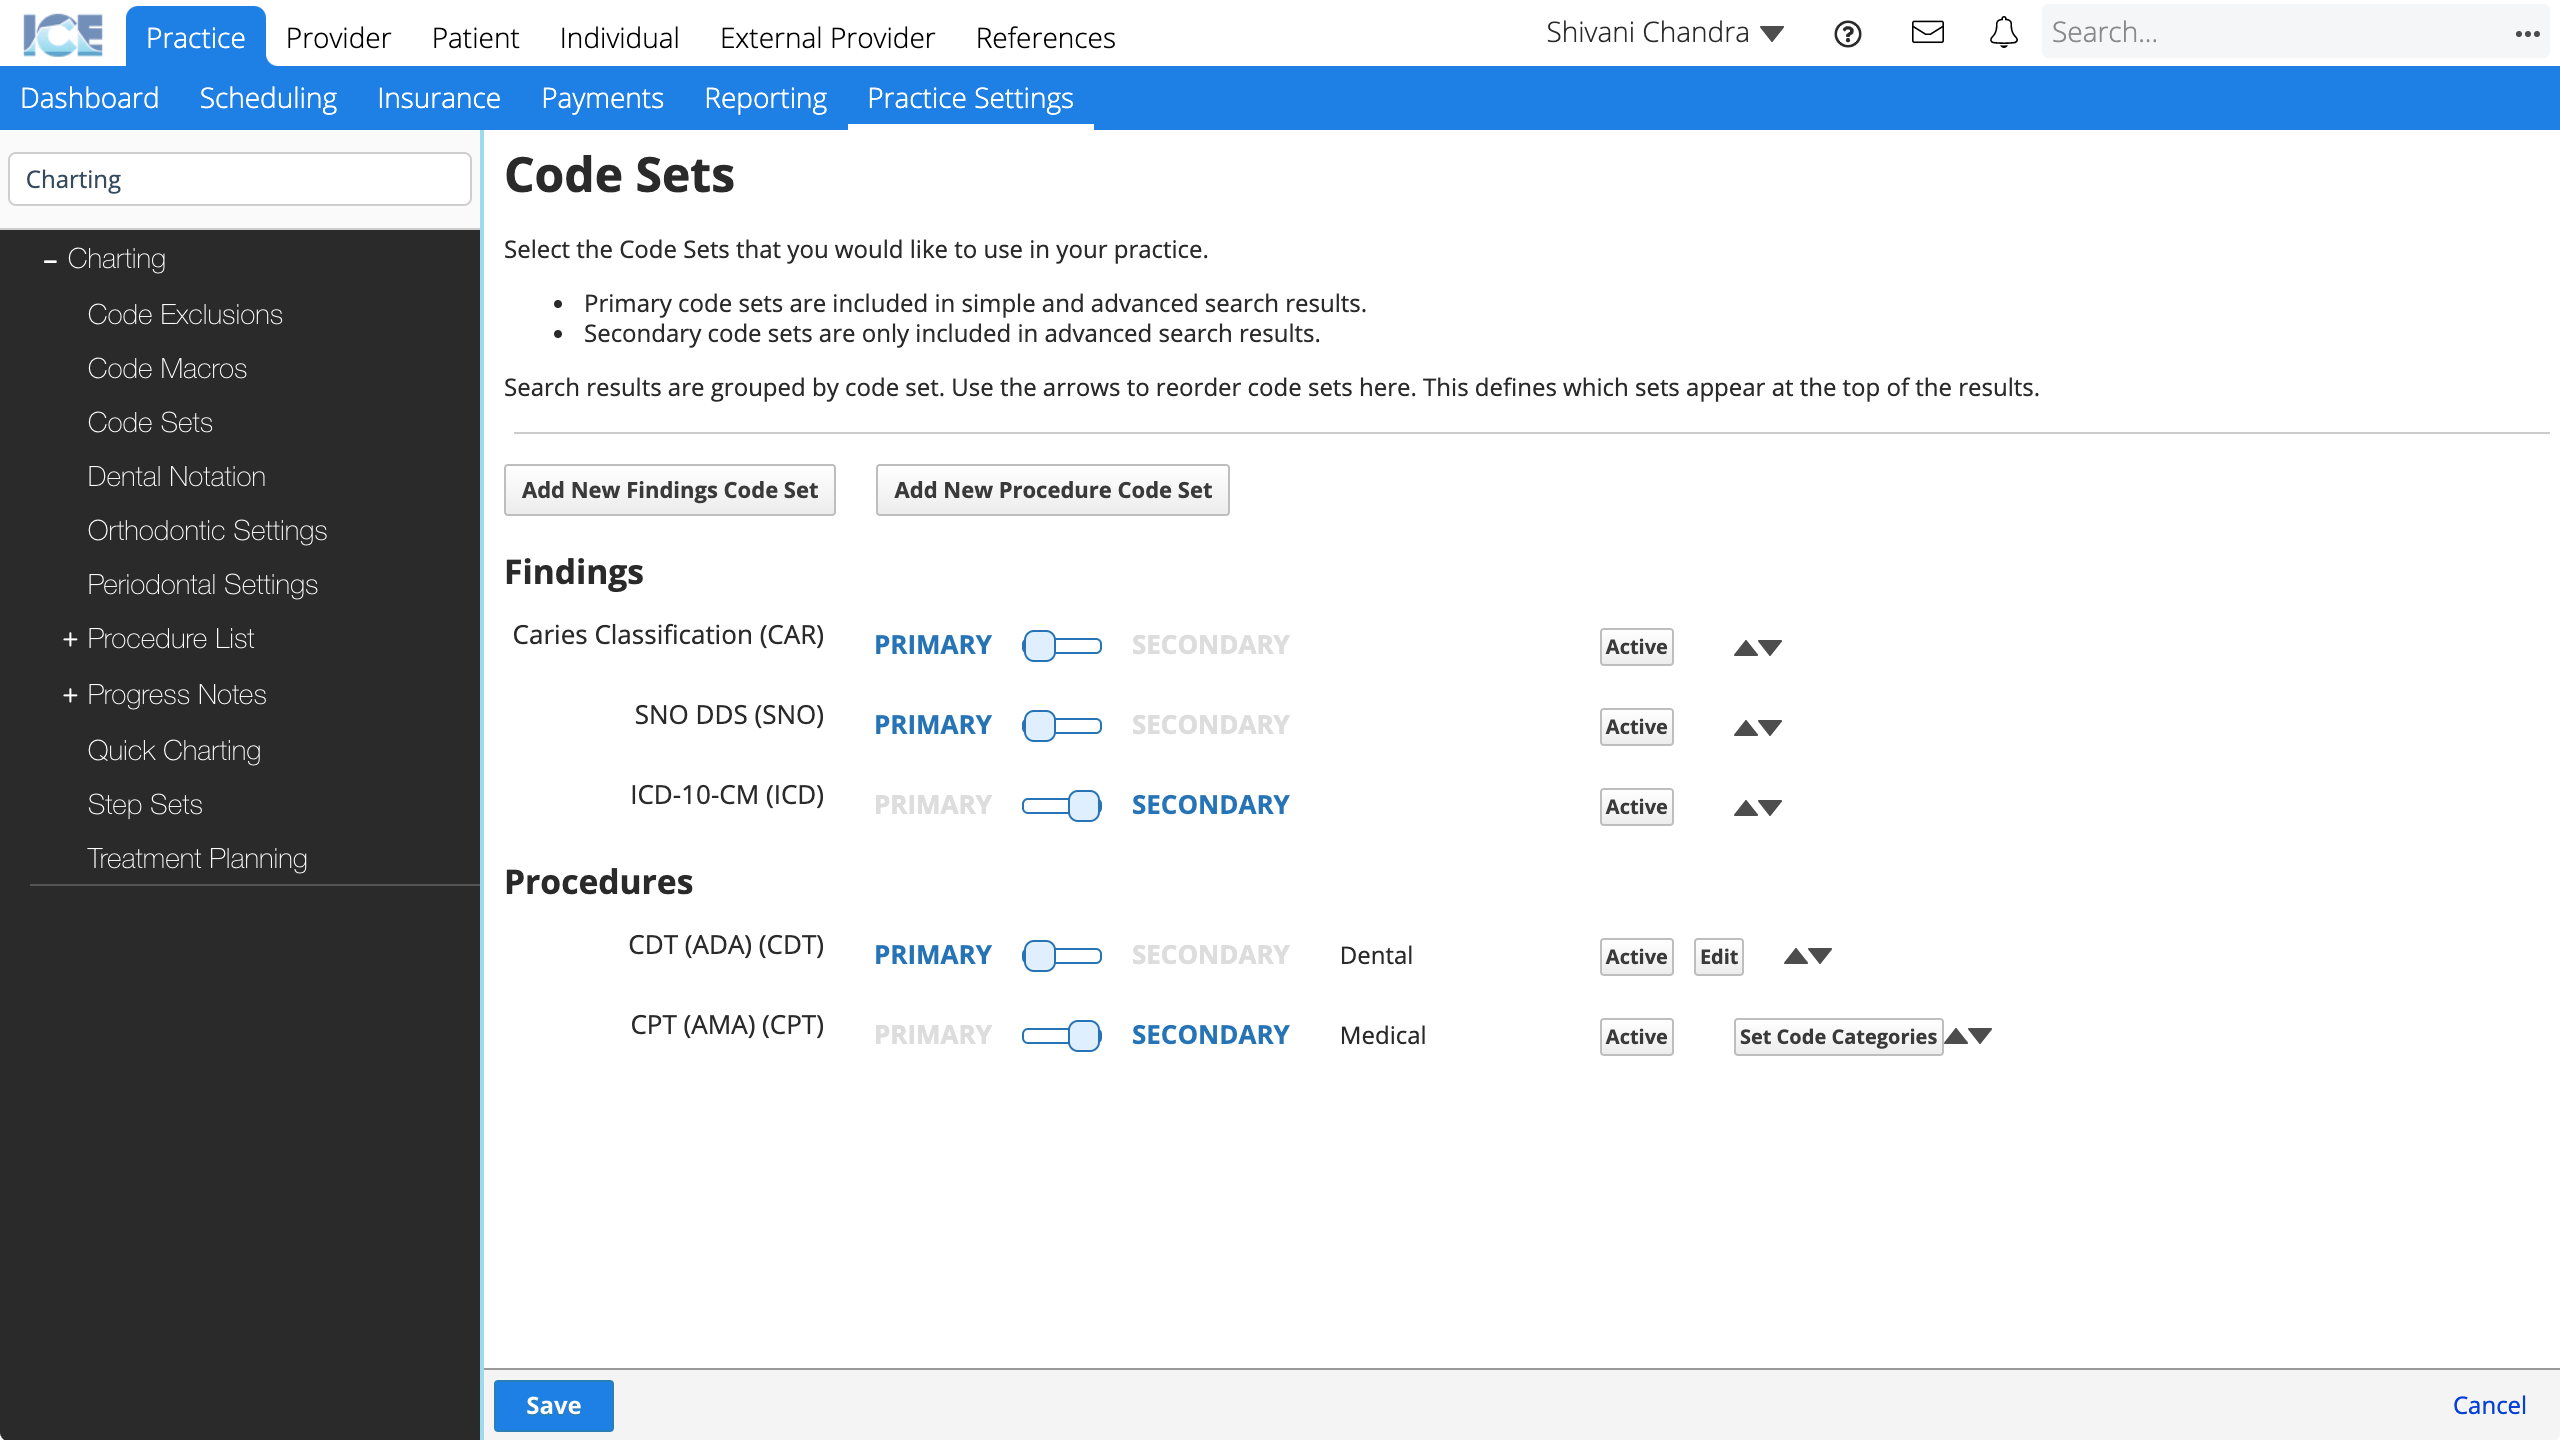
- Cambie los conjuntos de códigos que desea utilizar en su consulta a Activo.
- Seleccione

 para reordenar los conjuntos de códigos
 - Alterne los conjuntos que desea que sean Primarios
- Seleccione Guardar para guardar los cambios
- Seleccione Cancelar para descartar sus cambios.
Editar los requisitos de diagnóstico y consentimiento del código de procedimiento
Configure qué procedimientos en un conjunto de códigos requieren:
- Un formulario de consentimiento de tratamiento completo.
- Un formulario de consentimiento informado completo.
- Un código de diagnóstico asociado.
Si un procedimiento requiere consentimiento o un código de diagnóstico, la ventana emergente de requisitos en el gráfico mostrará un signo de exclamación ! en rojo. hasta que se cumplan todos los requisitos.
Para obtener más información sobre los requisitos en la planificación del tratamiento, consulte Navegar por la planificación del tratamiento.
- Seleccione Editar a la derecha del conjunto de códigos que contiene el procedimiento que desea configurar
- Busque el procedimiento en la lista
- Utilice el comando Buscar del navegador como ayuda.
- Seleccione o deseleccione las casillas de verificación disponibles
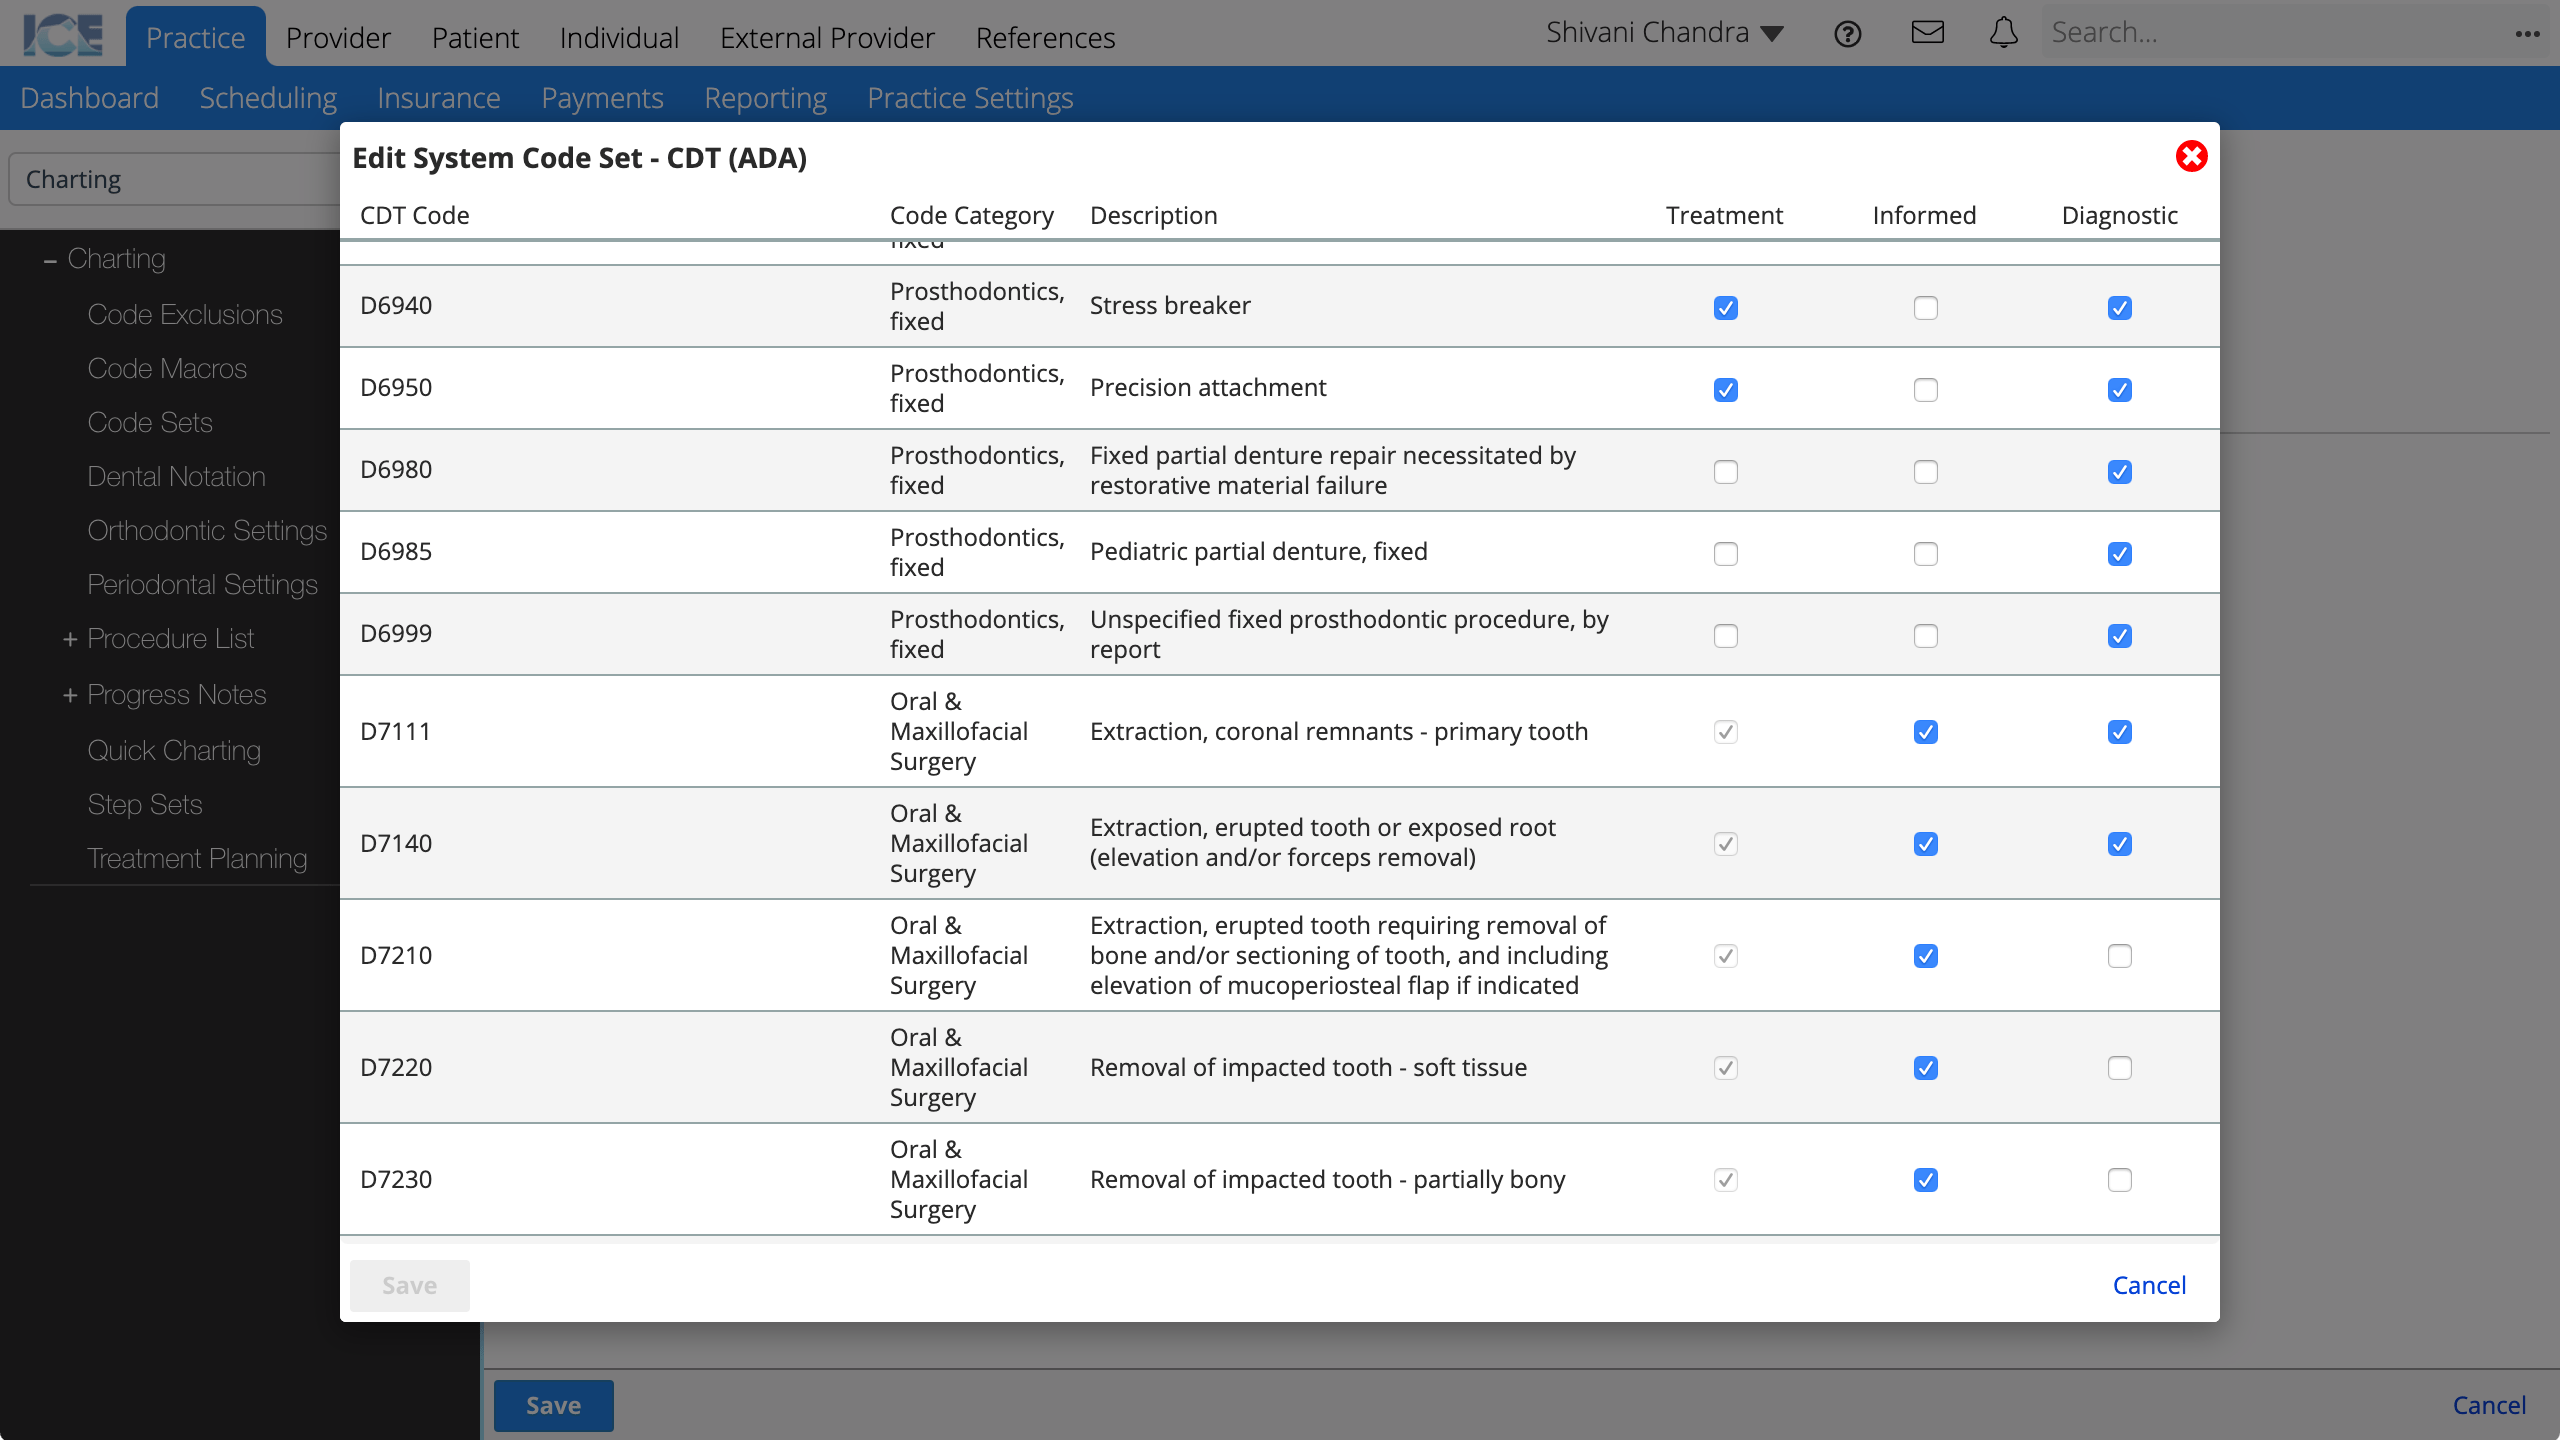
- Tratamiento: Si se selecciona, este tratamiento requiere un consentimiento de tratamiento.
- Informado: Si se selecciona, este tratamiento requiere un consentimiento informado. * Diagnóstico: si se selecciona, este tratamiento debe asociarse con un código de diagnóstico en la planificación del tratamiento.
- Seleccione Guardar para guardar los cambios
- Seleccione Cancelar para descartar sus cambios.
Add a New Custom Code Set
Create a new code set that will allow custom codes to be used when entering either findings or procedures.
- Depending on whether your custom codes will be used for Findings or Procedures select:
Add New Findings Code Set
or
Add New Procedure Code Set - Add a Code Set Name and a three letter or number abbreviation

- Procedure code sets only: Toggle the Type to either dental or medical
- Select Save
Add New Custom Code to a Custom Code Set
After you create a custom code set you can add custom codes to it.
Custom Codes can optionally be mapped to an existing code. This is done in order to define how the custom code is displayed on the odontogram or for insurance billing purposes.
- Go to Practice > Practice Settings > Charting > Code Sets
- Select Edit to the right of the custom code set where you want to add a code
- Select Add New Custom Code

- Confirm whether or not you want to map to an existing code
- Choose not to map the your new custom code to an existing code by toggling Type to No Mapping.
- If you're mapping to an existing code, search for the code using the Mapped Code field
- Enter a Code and Description that will appear in Charting and Financials for your custom code
- Choose a Start Date
- Choose an End Date if this code set is no longer in use
- Select OK
- Repeat as necessary in order to add additional codes
- Once you're finished adding custom codes, select Save
- Please note that custom codes cannot be deleted once they're added. However, in order to make an individual code inactive you can set an end date for it.
Any custom CDT code that does link to a regular CDT code will inherit the same requirements for treatment consent, informed consent and diagnostic code.
Any custom CDT code that does not link to a CDT code can define its own requirements for treatment consent, informed consent and diagnostic code.
Delete Code Sets
A code set can only be deleted if no custom codes have been added to it.
- Go to Practice > Practice Settings > Charting > Code Sets
- Select Delete to the right of the code set
- Select Save
Dental Notation
Change your practice's default dental notation.
Individual providers can customize which notation they use in their Provider > Profile > Account settings.
- Go to Practice > Practice Settings > Charting > Dental Notation
- Select your preferred dental notation from the drop-down menu
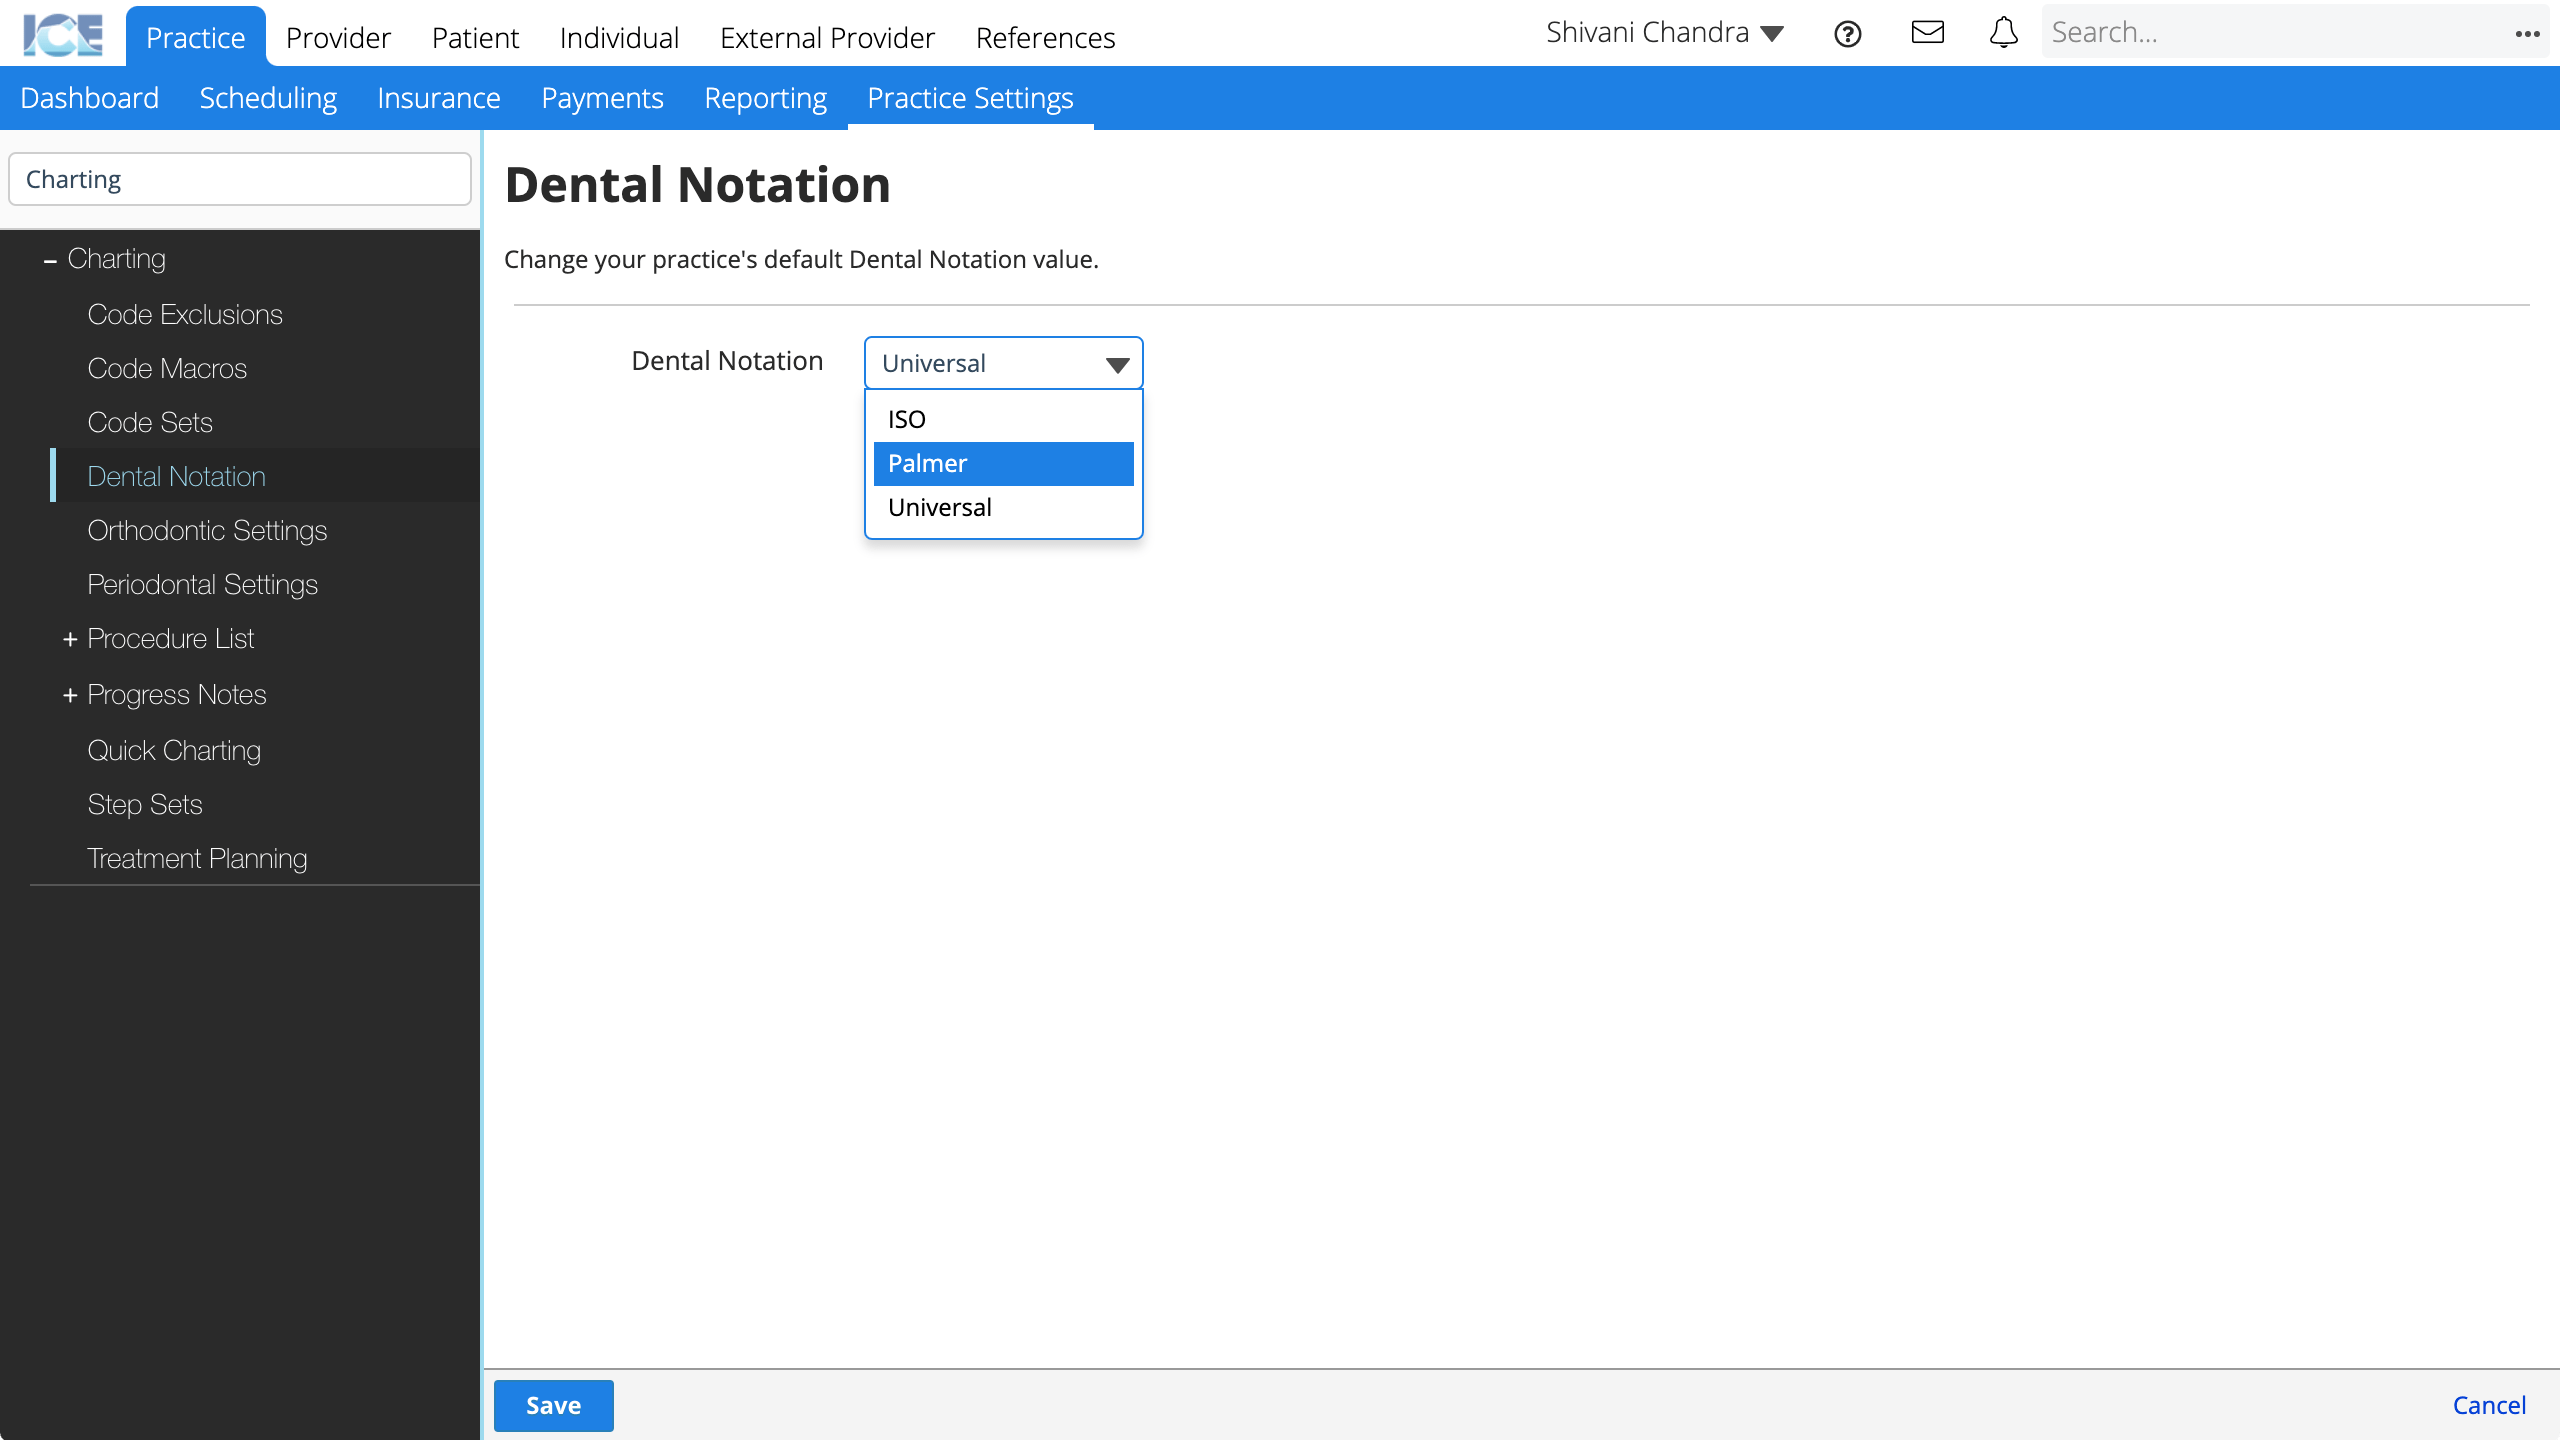
- Select Save
Orthodontic Settings
Once a new treatment phase has been added and saved, you can use it when creating an orthodontic treatment plan.
- Go to Practice > Practice Settings > Charting > Orthodontic Settings
- Choose Add Treatment Phase
- Complete the required fields
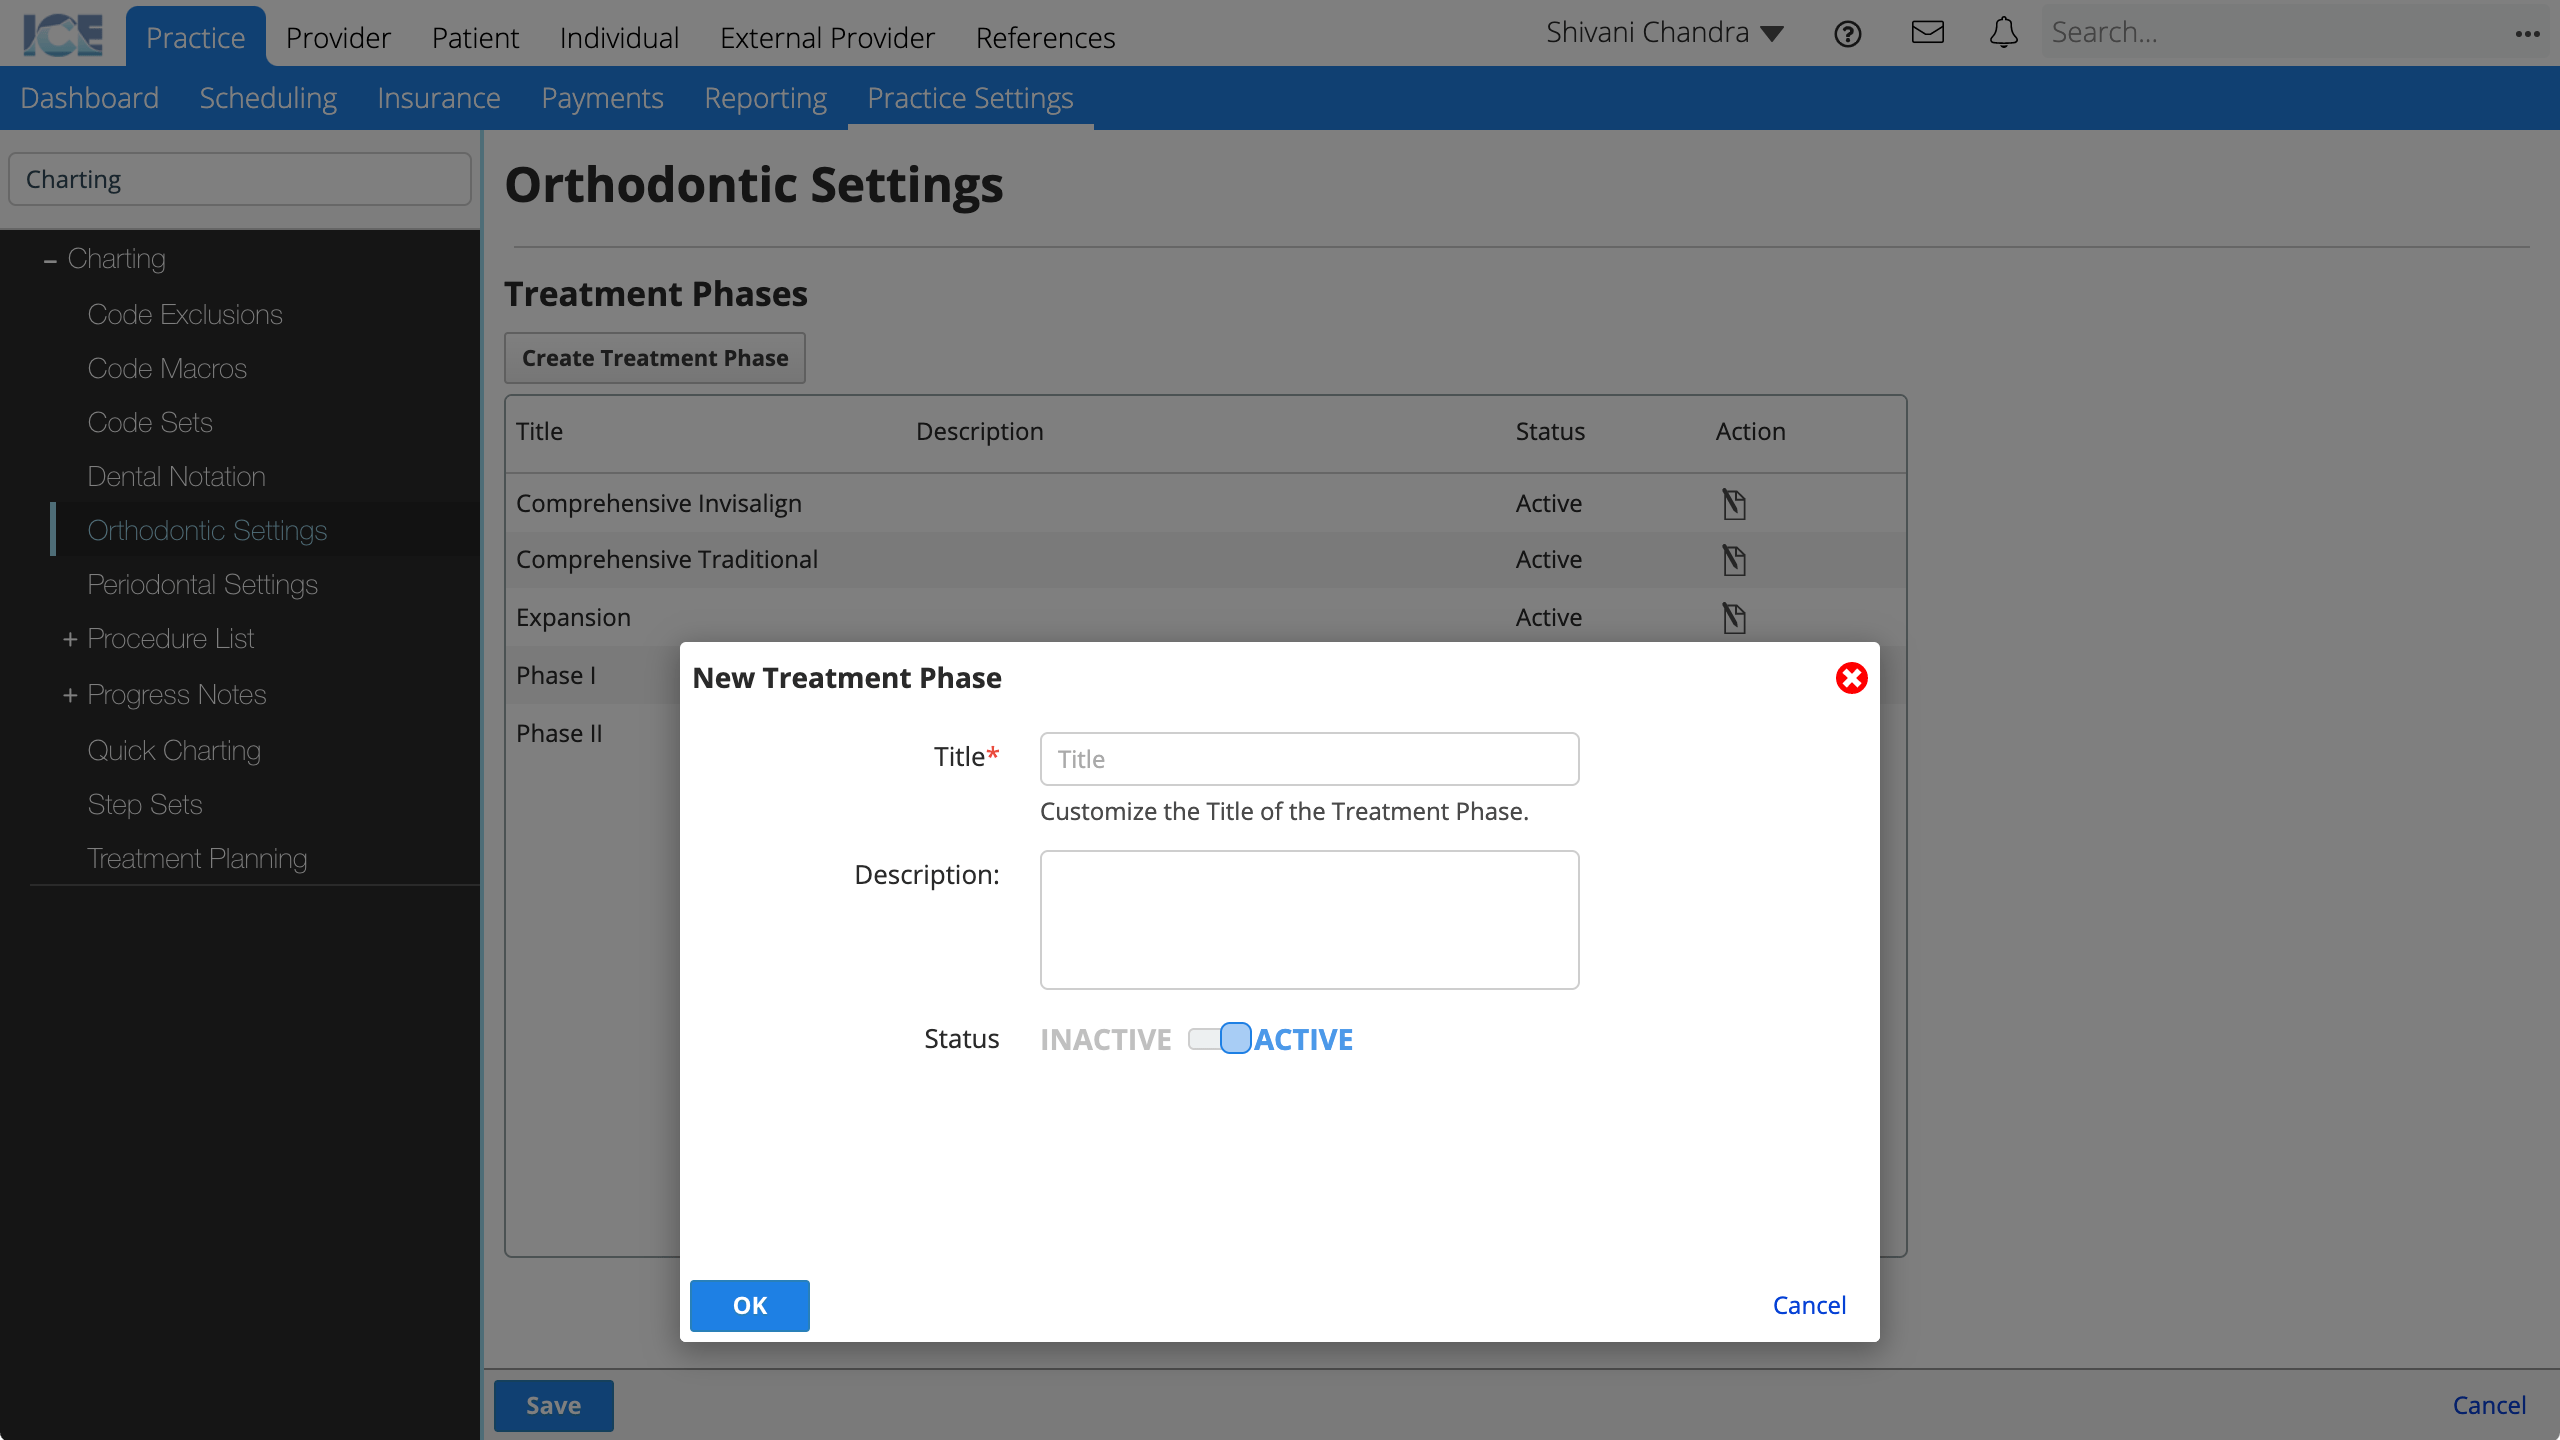
- Title: The name that appears in the treatment phase drop-down menu when creating an orthodontic treatment plan.
- Description: A longer description that only appears here in Practice Settings.
- Status: Active phases appear for use in the system. Inactive phases cannot be used, but appear in historical references.
- Choose OK to create the new treatment phase
- Repeat as necessary
- Select Save to save your changes
To edit an existing phase, select ![]() in the Action column.
in the Action column.
Periodontal Settings
You can define the default periodontal tab order for your practice and define a threshold for when pocket depth values turn red.
To customize the periodontal tab order for an individual provider, go to that provider's account profile.
- Go to Practice > Practice Settings > Charting > Periodontal Settings
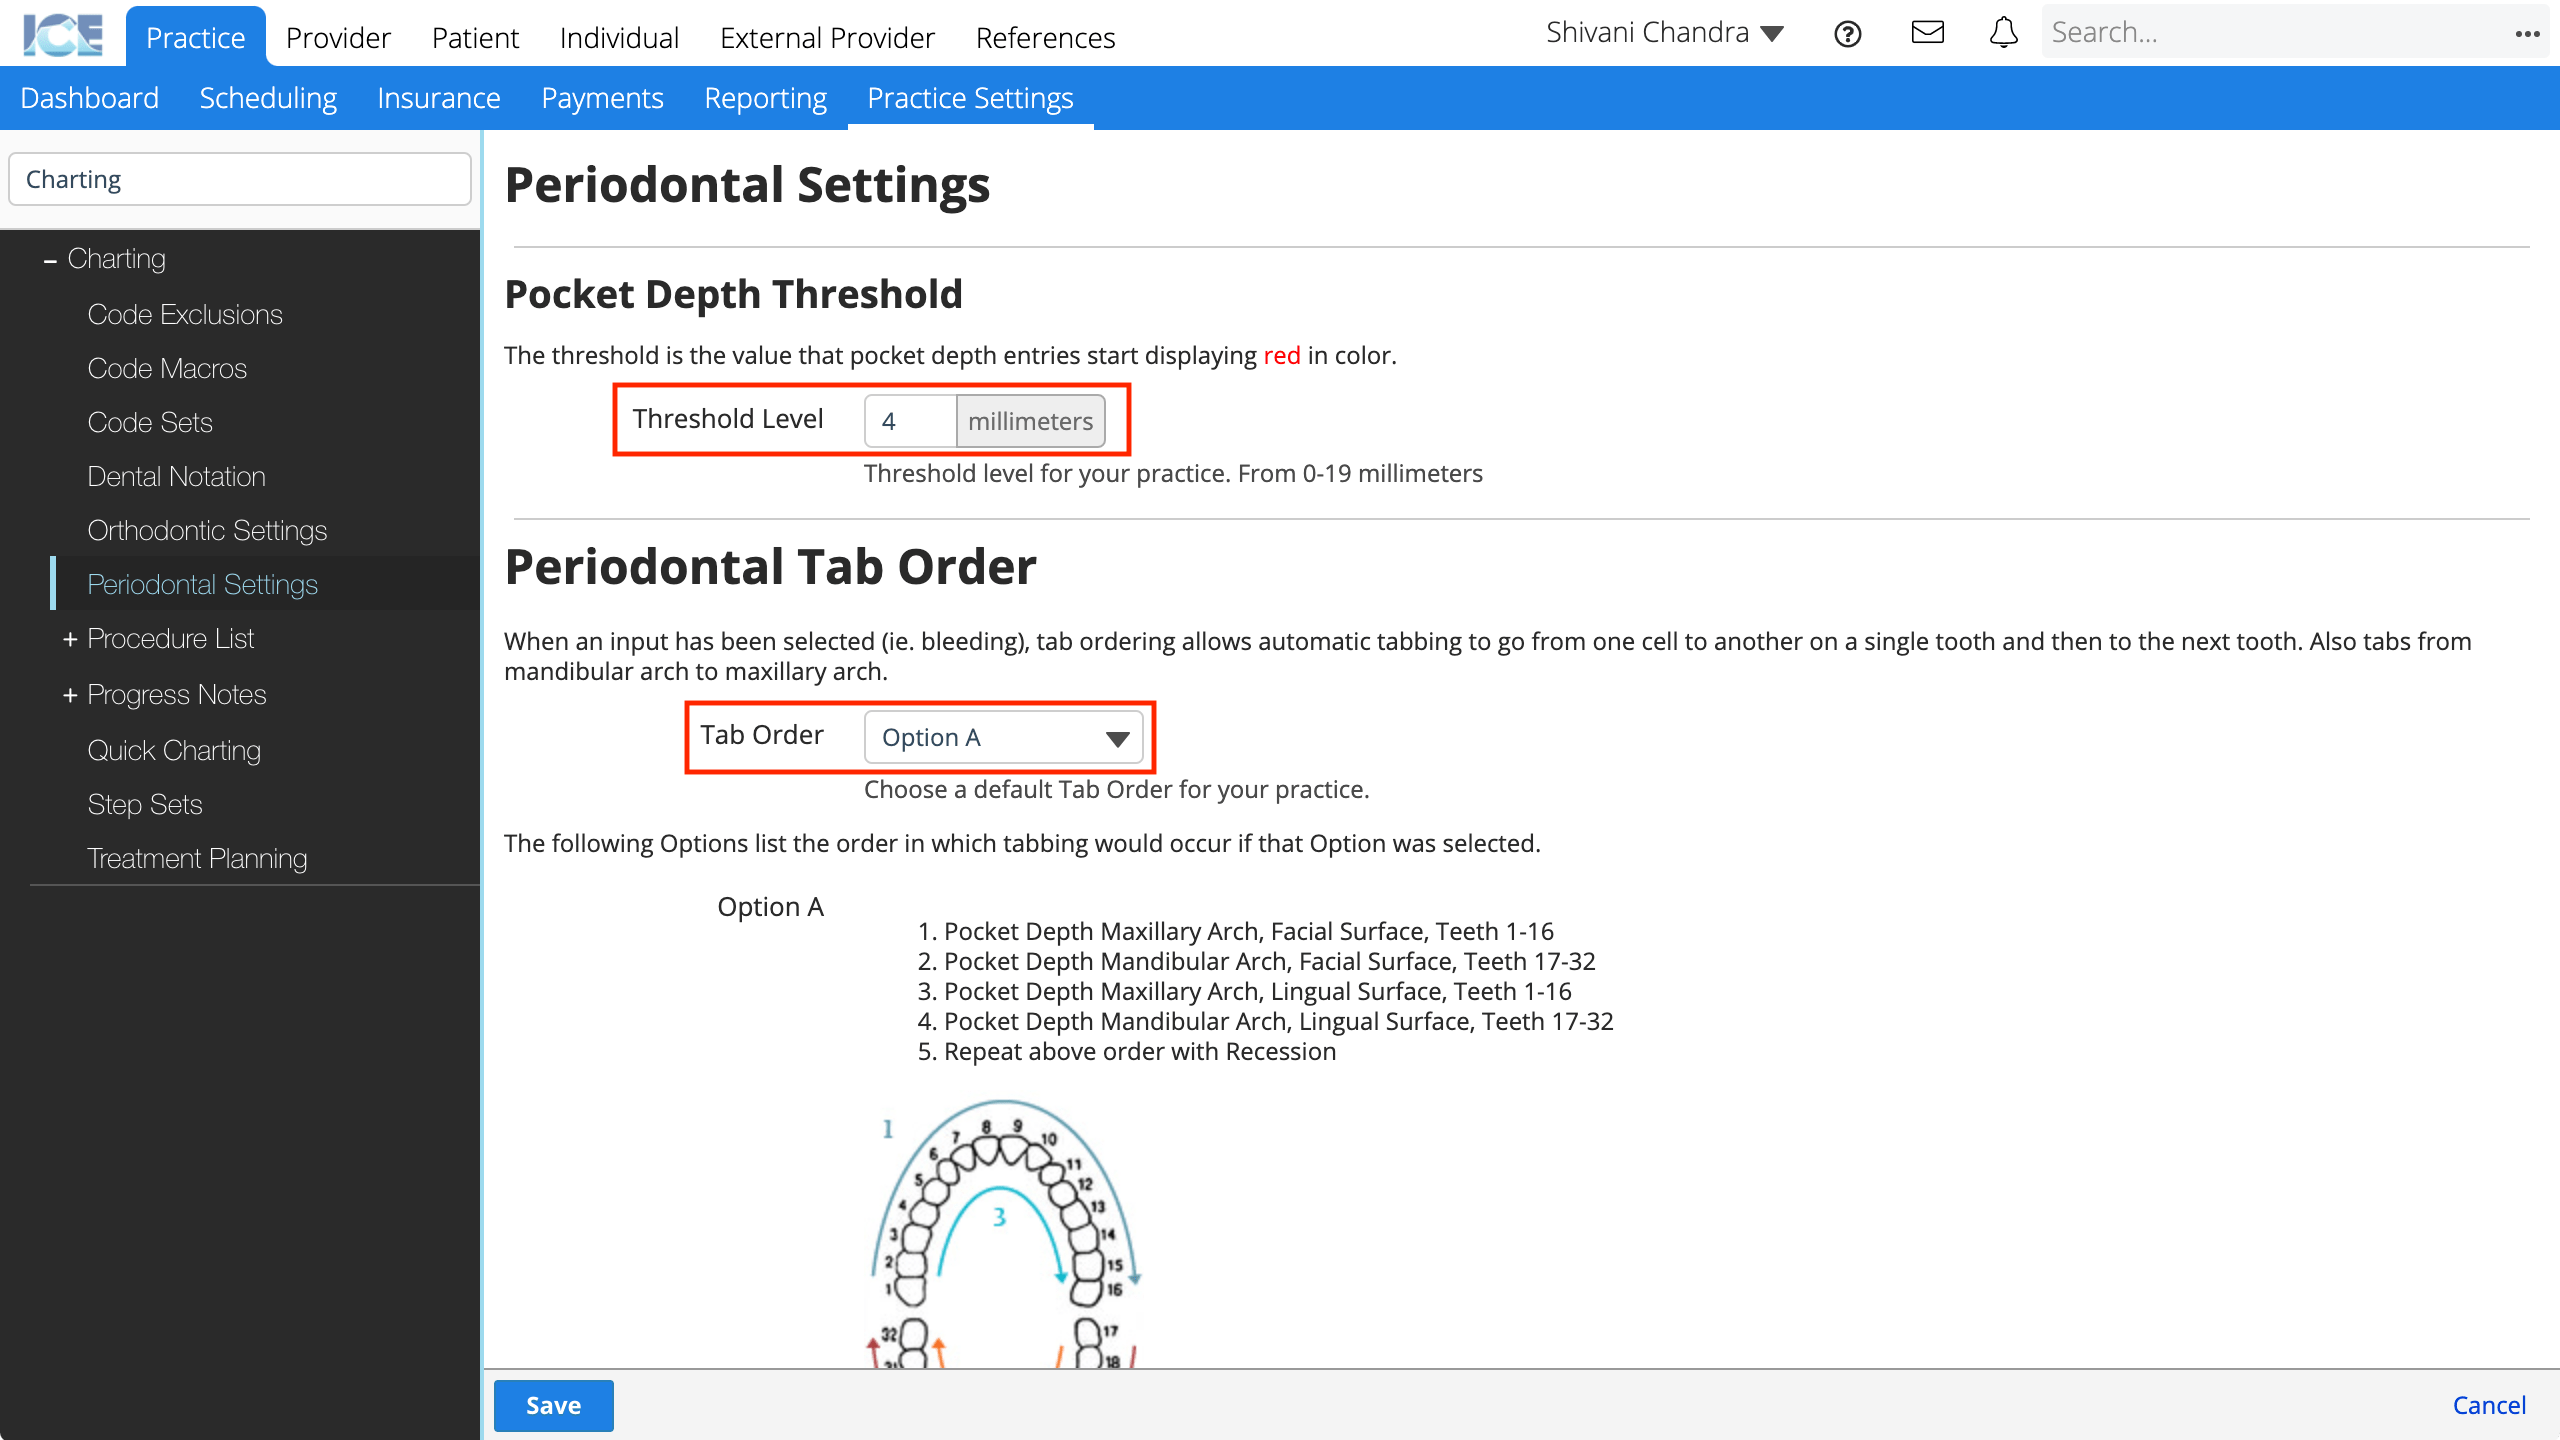
- Update the Threshold Level value
- The default pocket depth threshold is 4. The threshold is the value that pocket depth entries start displaying in red.
- Select a Tab Order option from the drop-down menu
- Scroll down the page to view descriptions of each tab order.
- Select Save to save your changes
- Select Cancel to discard your changes.
Orthodontic Procedure List
These values define what orthodontic data you can enter in a patient's orthodontic procedure list.
- Go to Practice > Practice Settings > Charting > Procedure List > Orthodontic Procedure List
- From here, you can edit, manage and reorder the options in the Orthodontic Procedure List
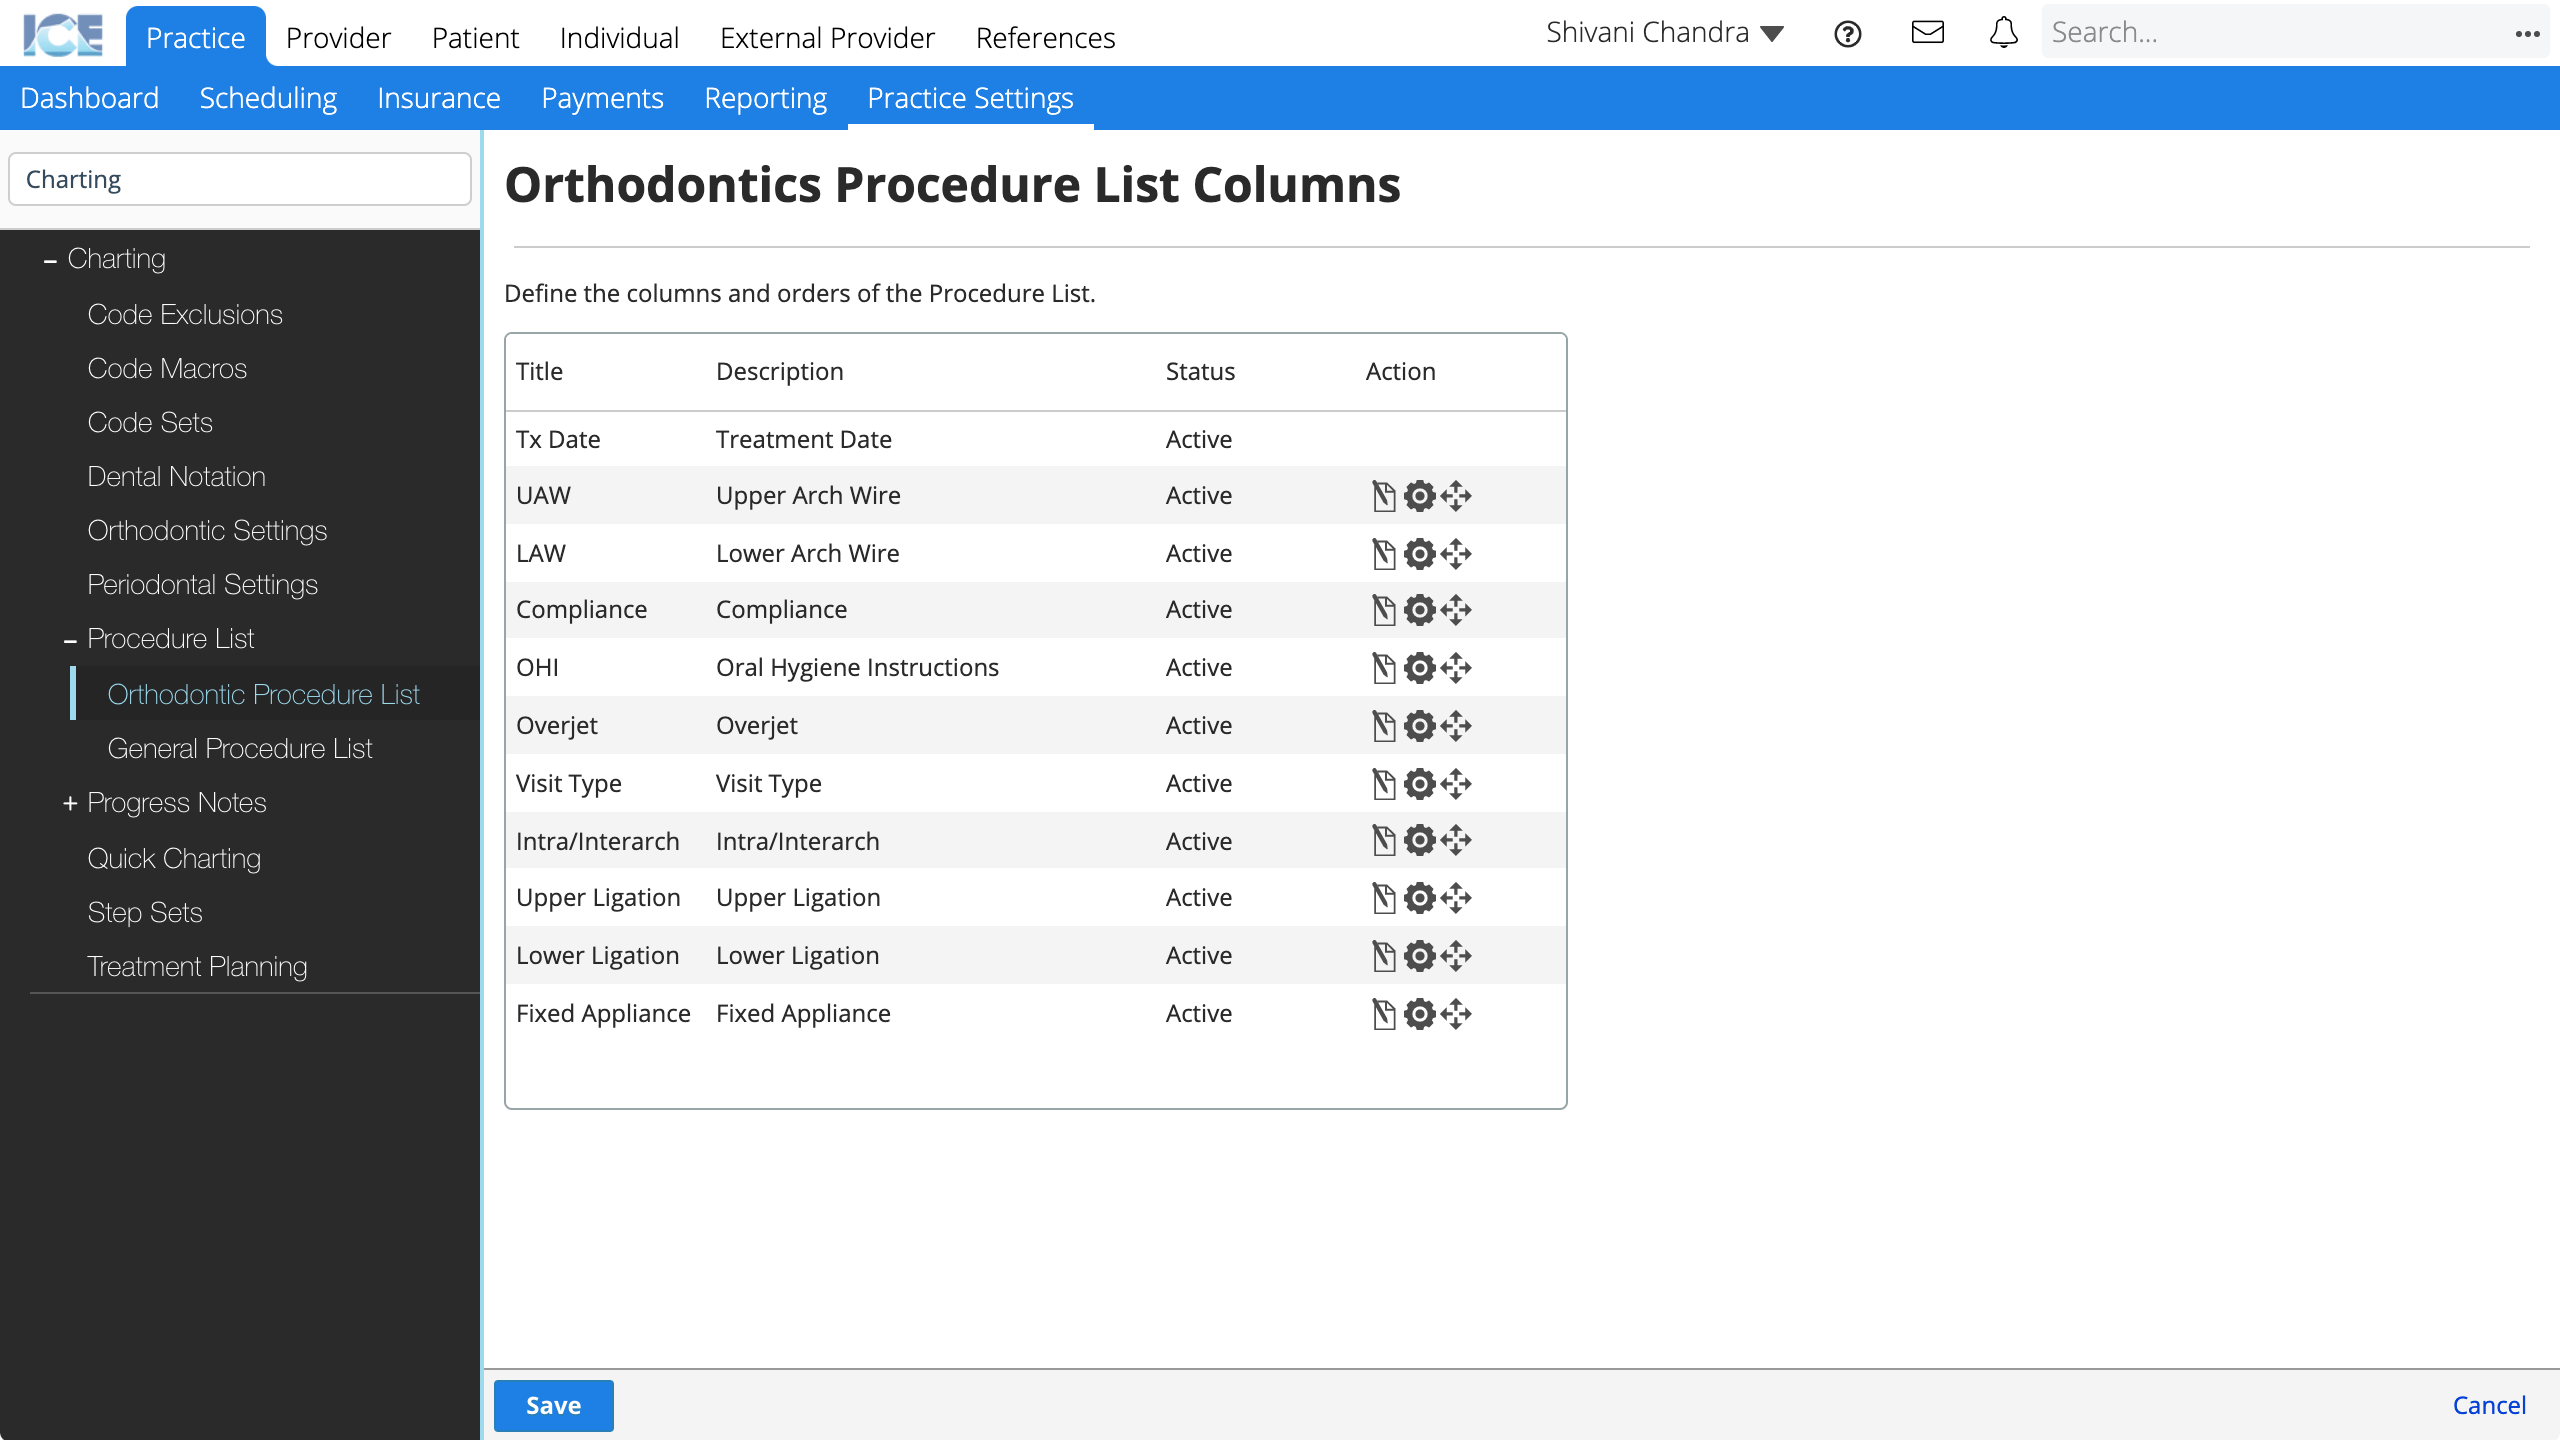
- To edit an existing column, select
- You can update:
- Name
- Description
- Status
- You can update:
- To manage the values for each column, select

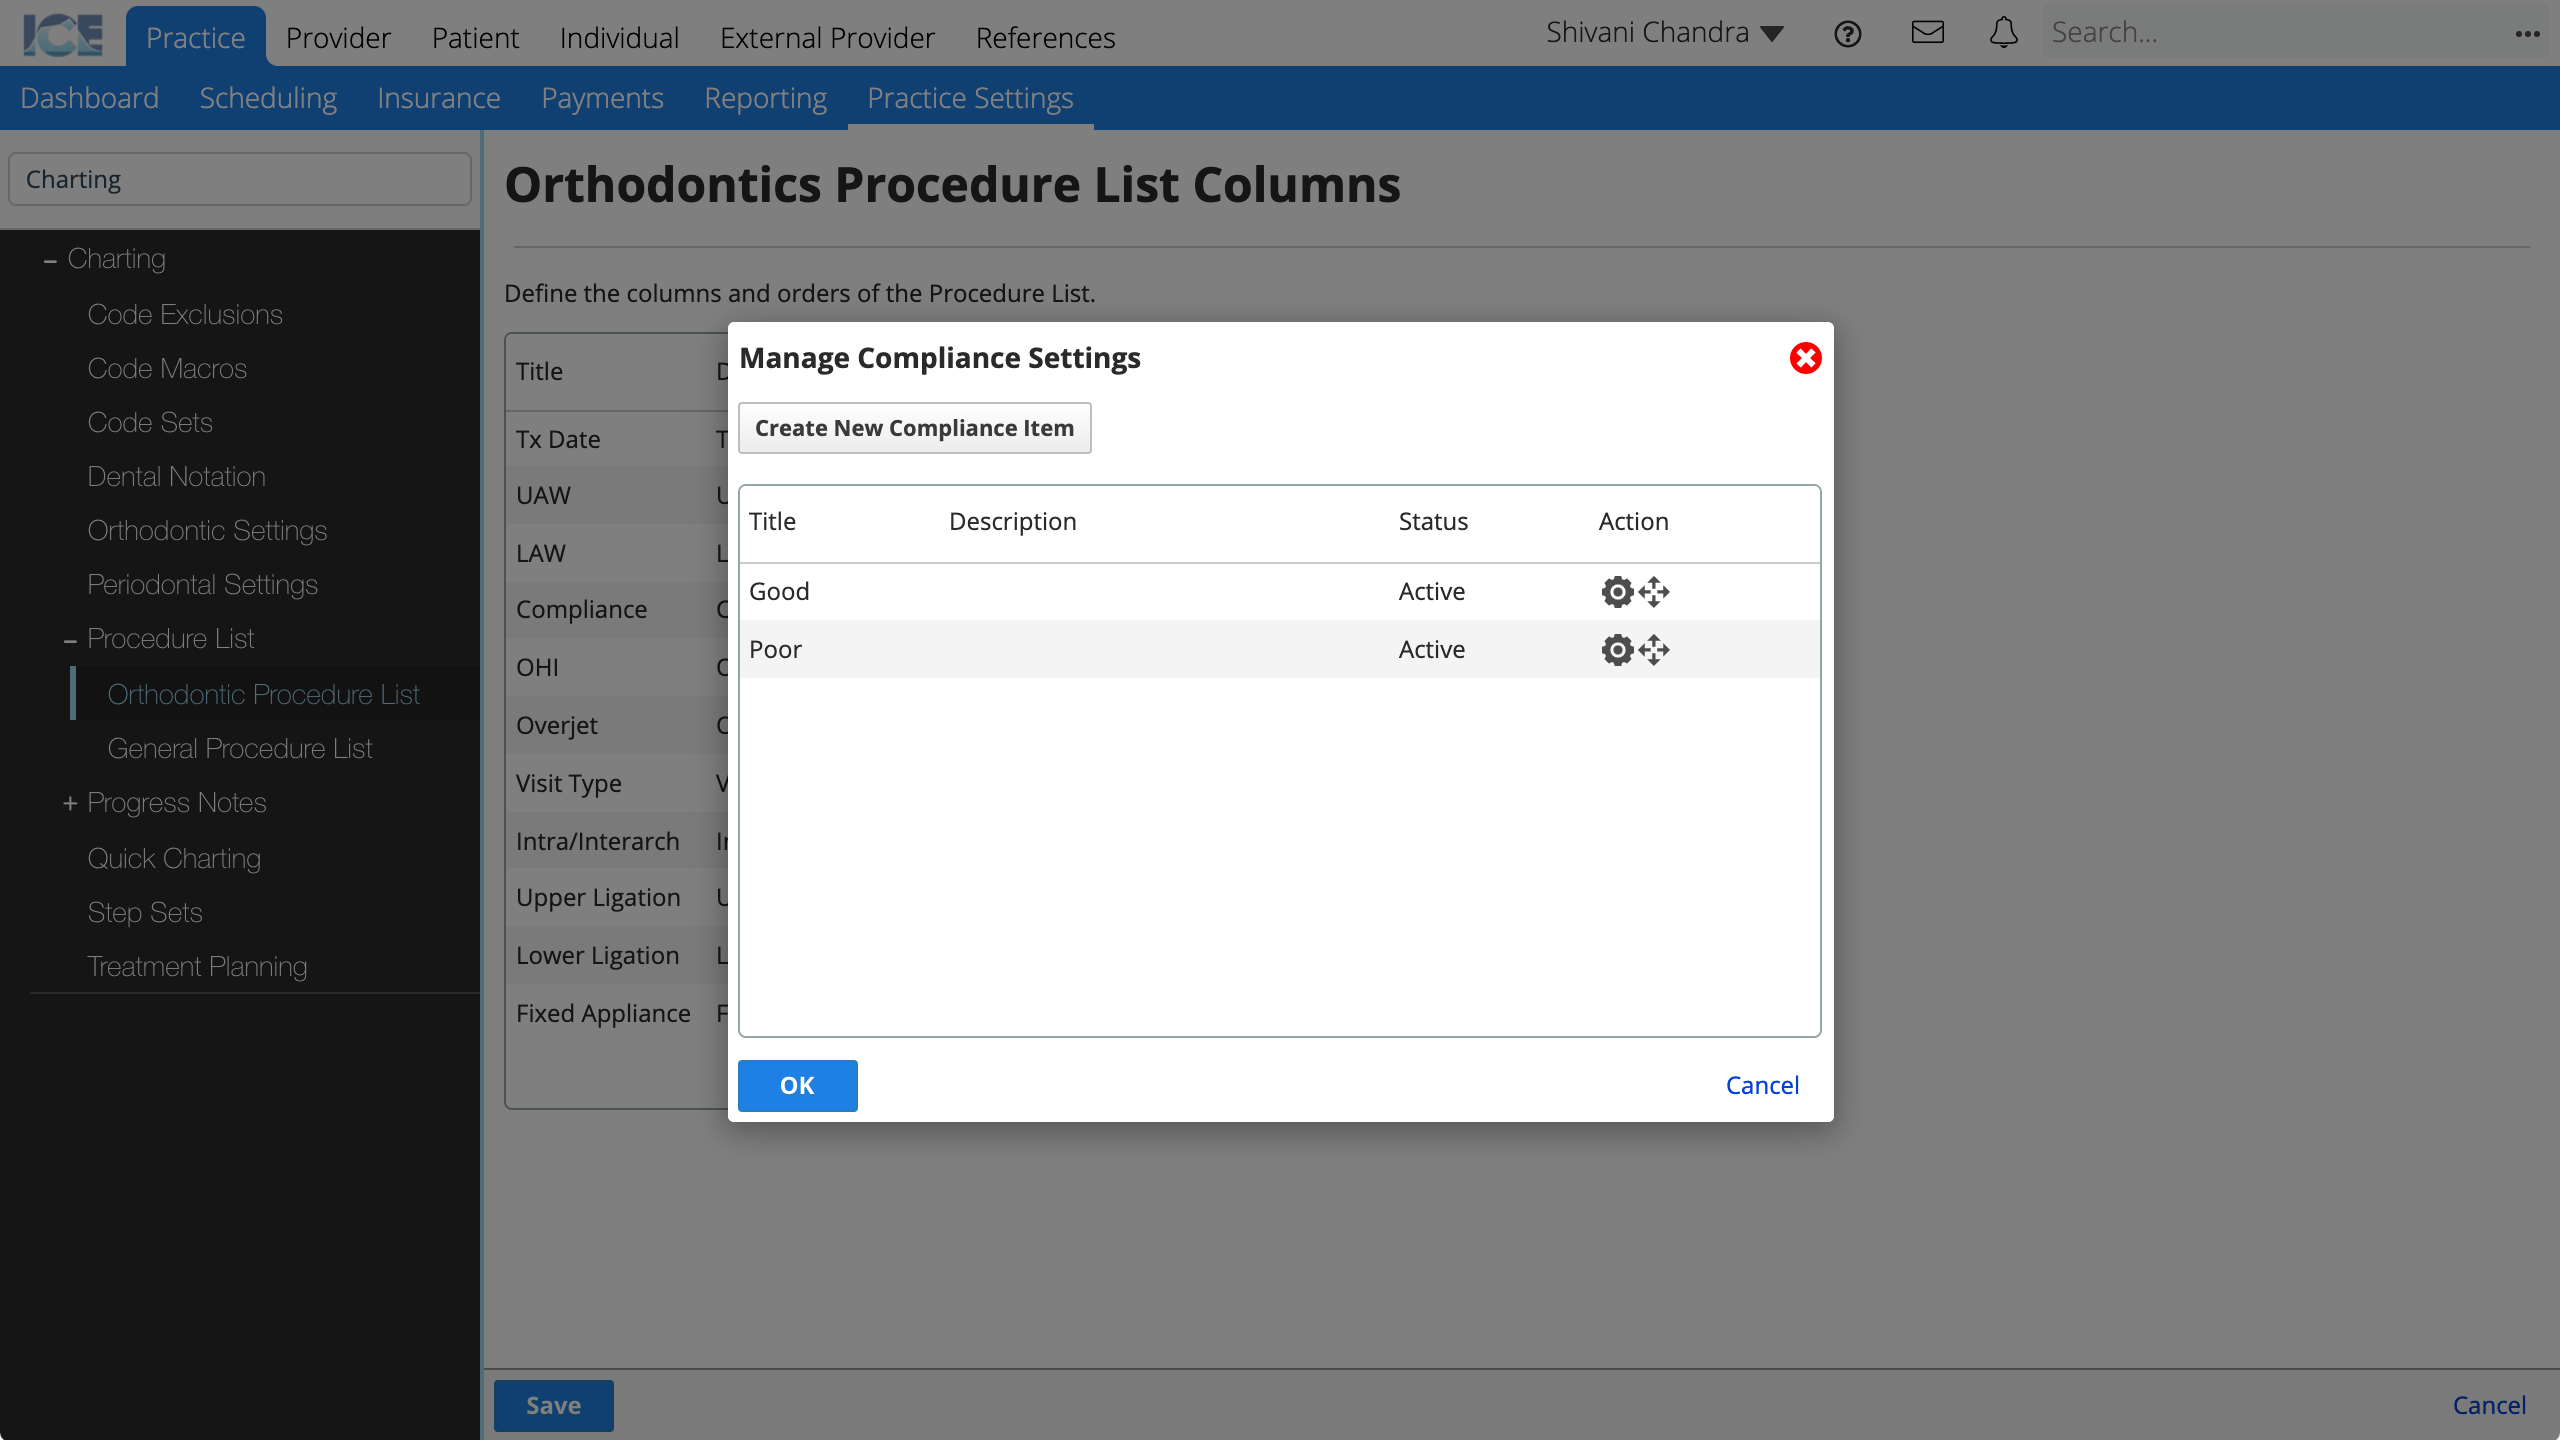
- Select Create New Item to add a new value or choice for the column
or - Select to edit the description and status of an existing value for the column
- Select Create New Item to add a new value or choice for the column
- To reorder the columns and options, drag

- Repeat as necessary
- Select Save to save your changes
- Select Cancel to discard your changes.
General Procedure List
Define the columns included in the General Procedure List.
- Go to Practice > Practice Settings > Charting > Procedure List > General Procedure List
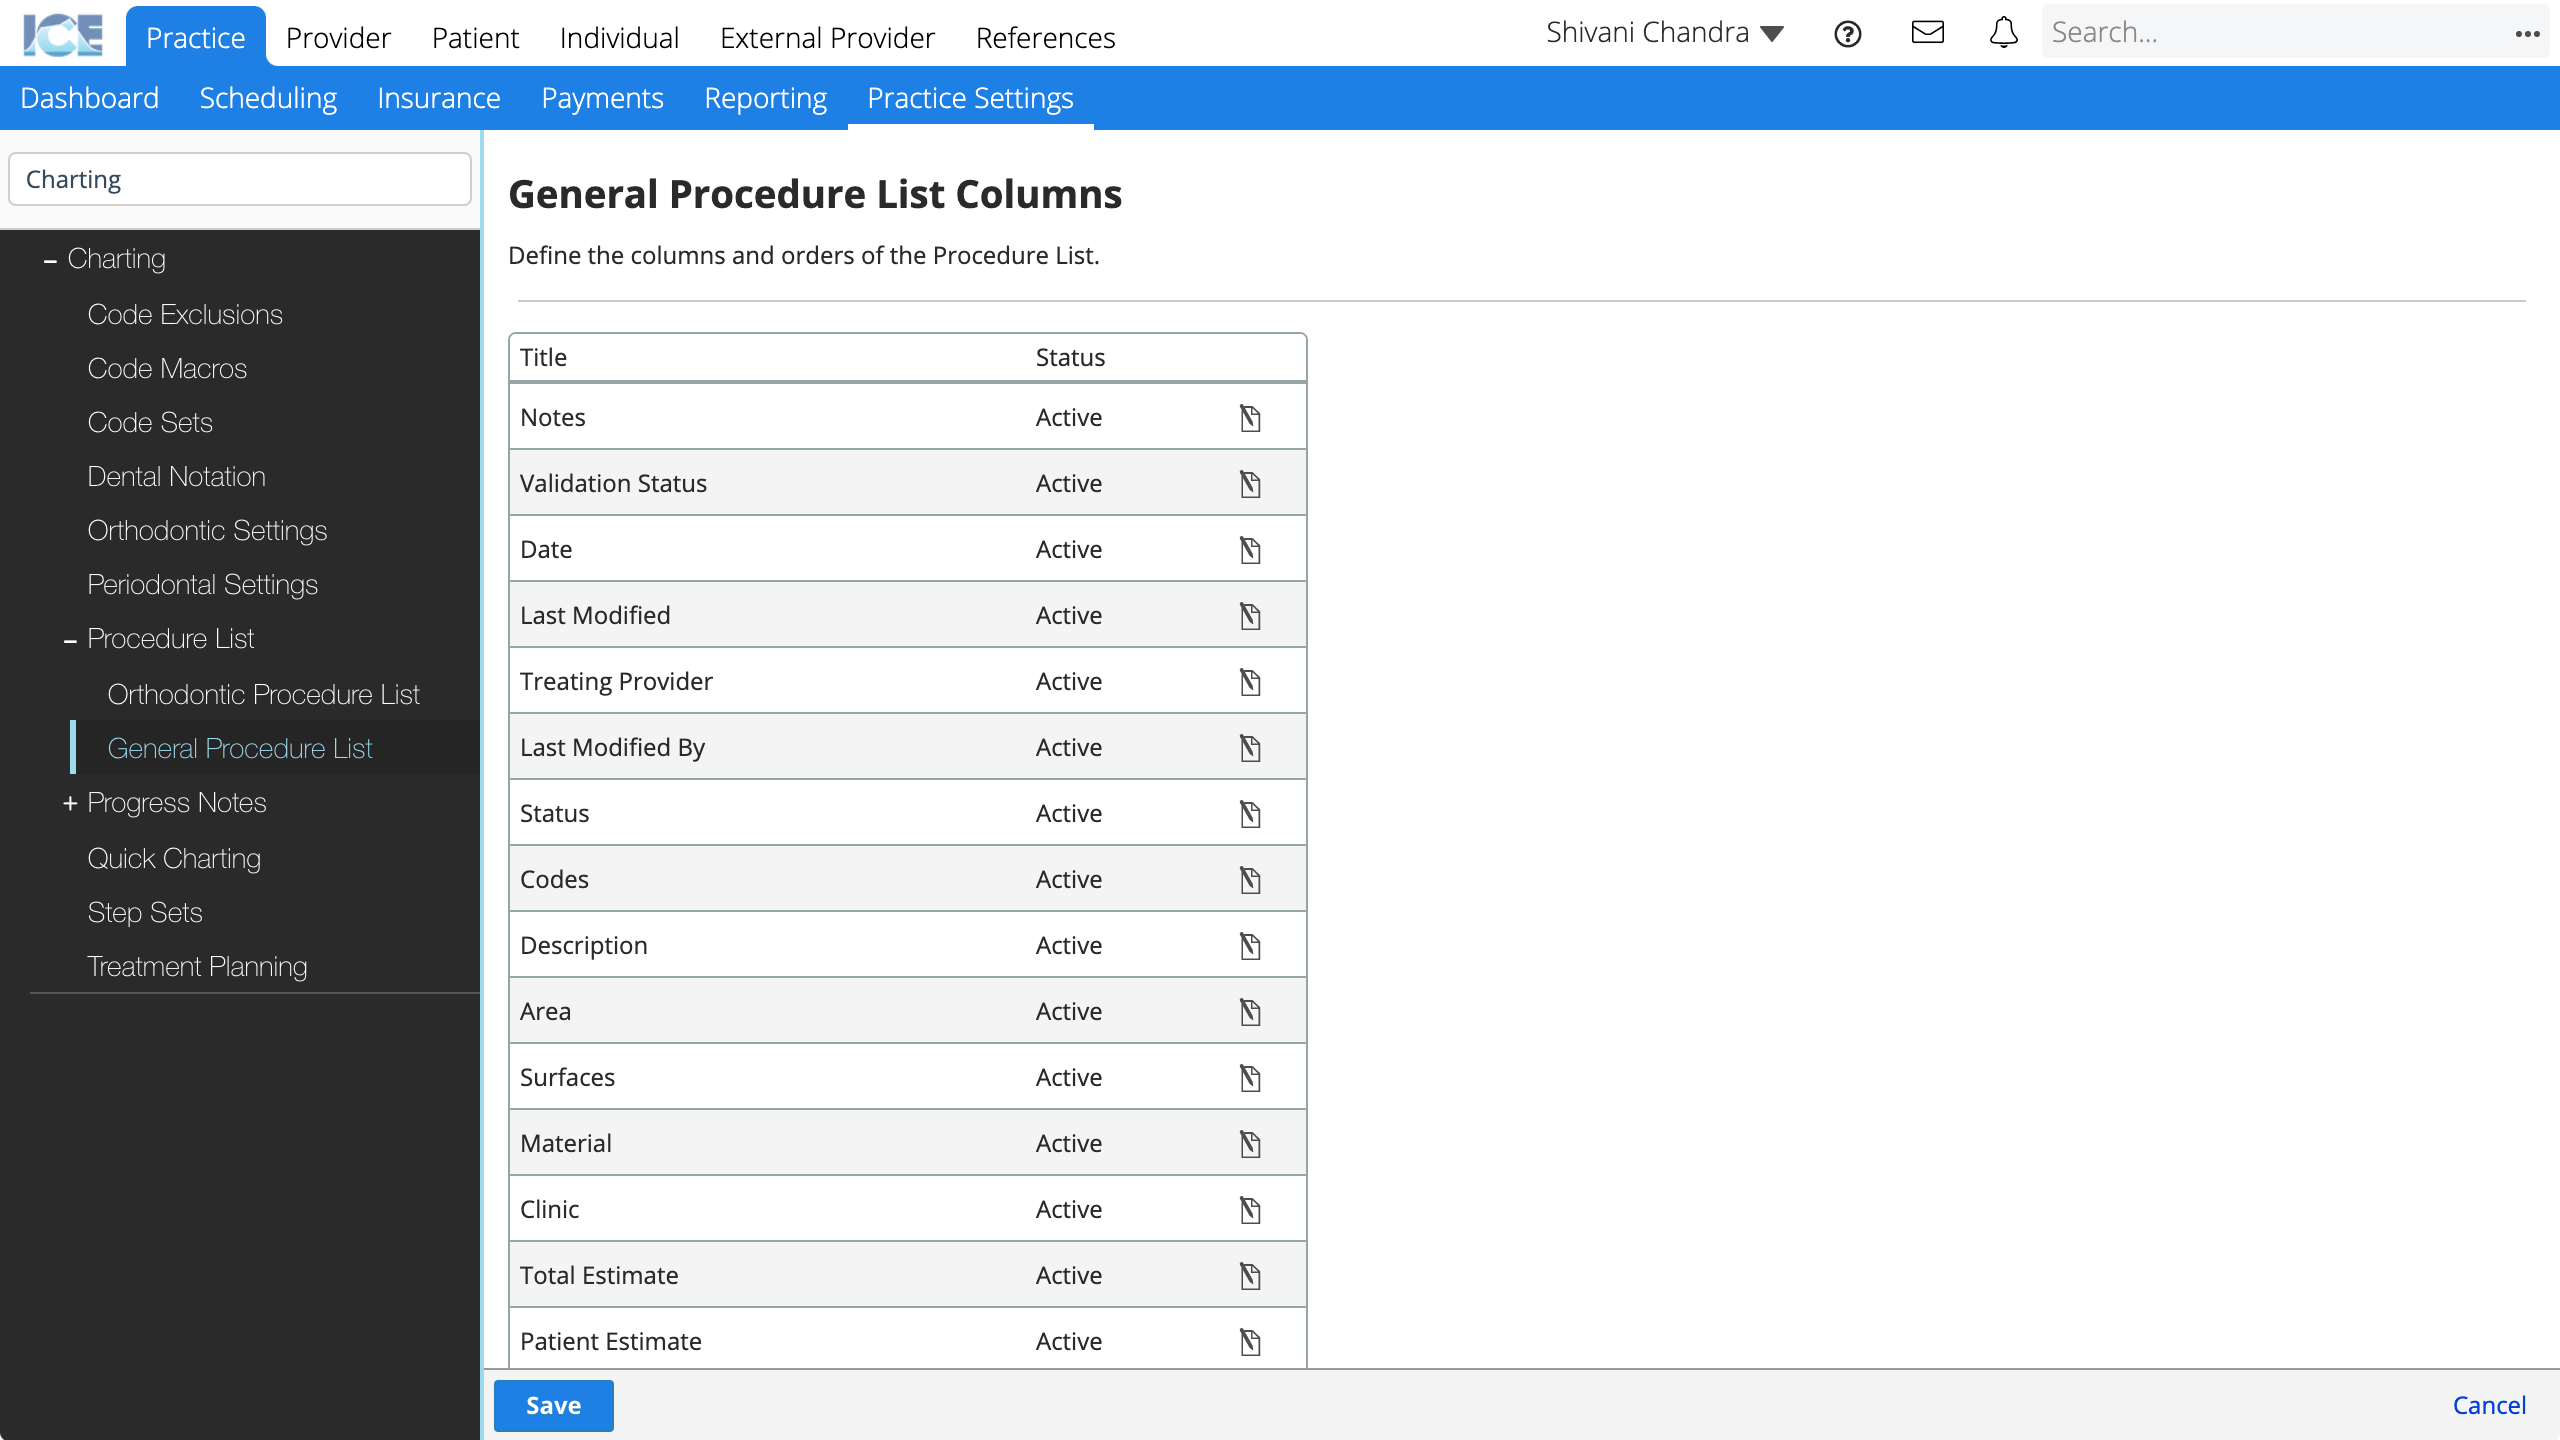
- Select to update the available settings for a column
- Title: The name of the column that appears in the General Procedure List.
- Status: Active columns appear for use in the system. Inactive columns are hidden, but appear in historical references.
- Select OK
- Select Save to save your changes
- Select Cancel to discard your changes.
Progress Note Associated Providers
Associated Provider fields appear in a Progress Note's left sidebar.

They are helpful for identifying the different providers involved with an appointment or treatment.
- Go to Practice > Practice Settings > Charting > Progress Notes > Associated Providers
- Select Create New Associated Provider
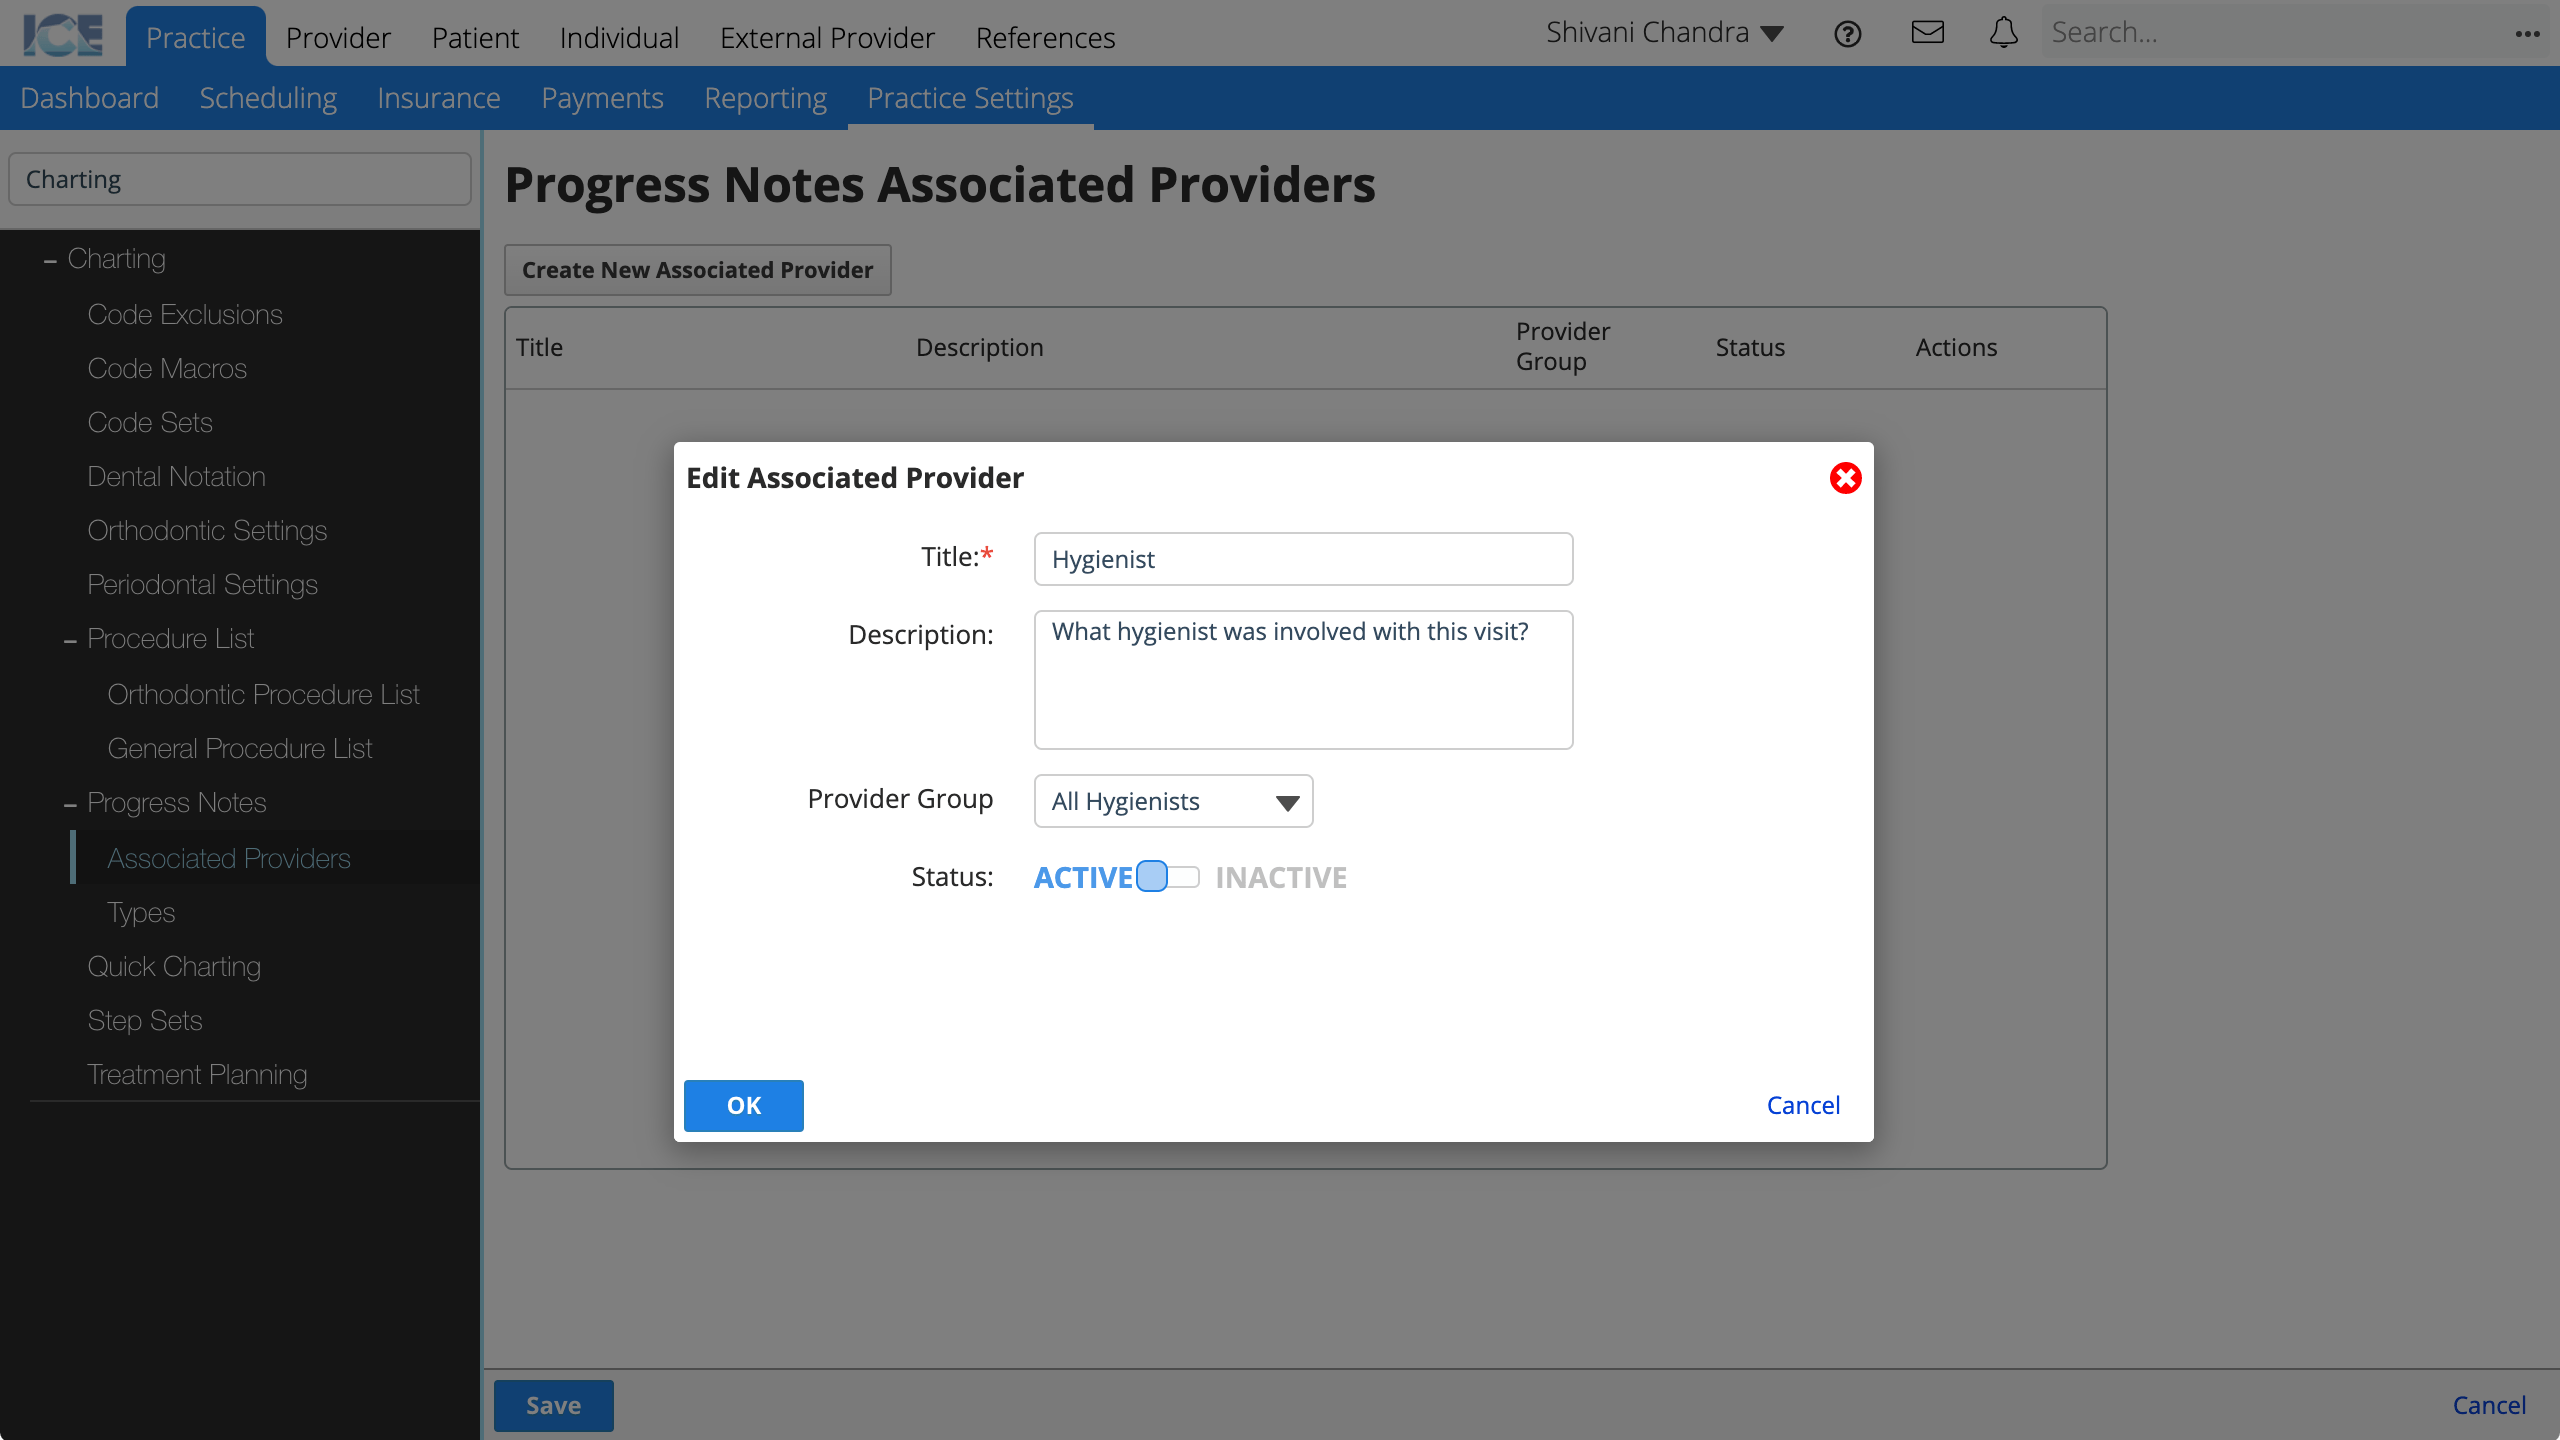
- Complete the required fields
- Title: The name of the field that appears in the left sidebar of the progress notes panel.
- Description: A longer description that only appears here in Practice Settings.
- Provider Group: Only the providers in this group will be included in the associated provider drop-down menu.
- Status: Active fields appear for use in the system. Inactive fields cannot be used, but appear in historical references.
- Select OK
- Select Save to save your changes
- Select Cancel to discard your changes.
To edit an existing associated provider field, select ![]() in the Action column.
in the Action column.
Progress Note Types
When configuring progress note templates you can define one or more types to help organize and report on your practice's progress notes.
- Go to Practice > Practice Settings > Charting > Progress Notes > Types
- Select Create New Progress Note Type
- Complete the required fields
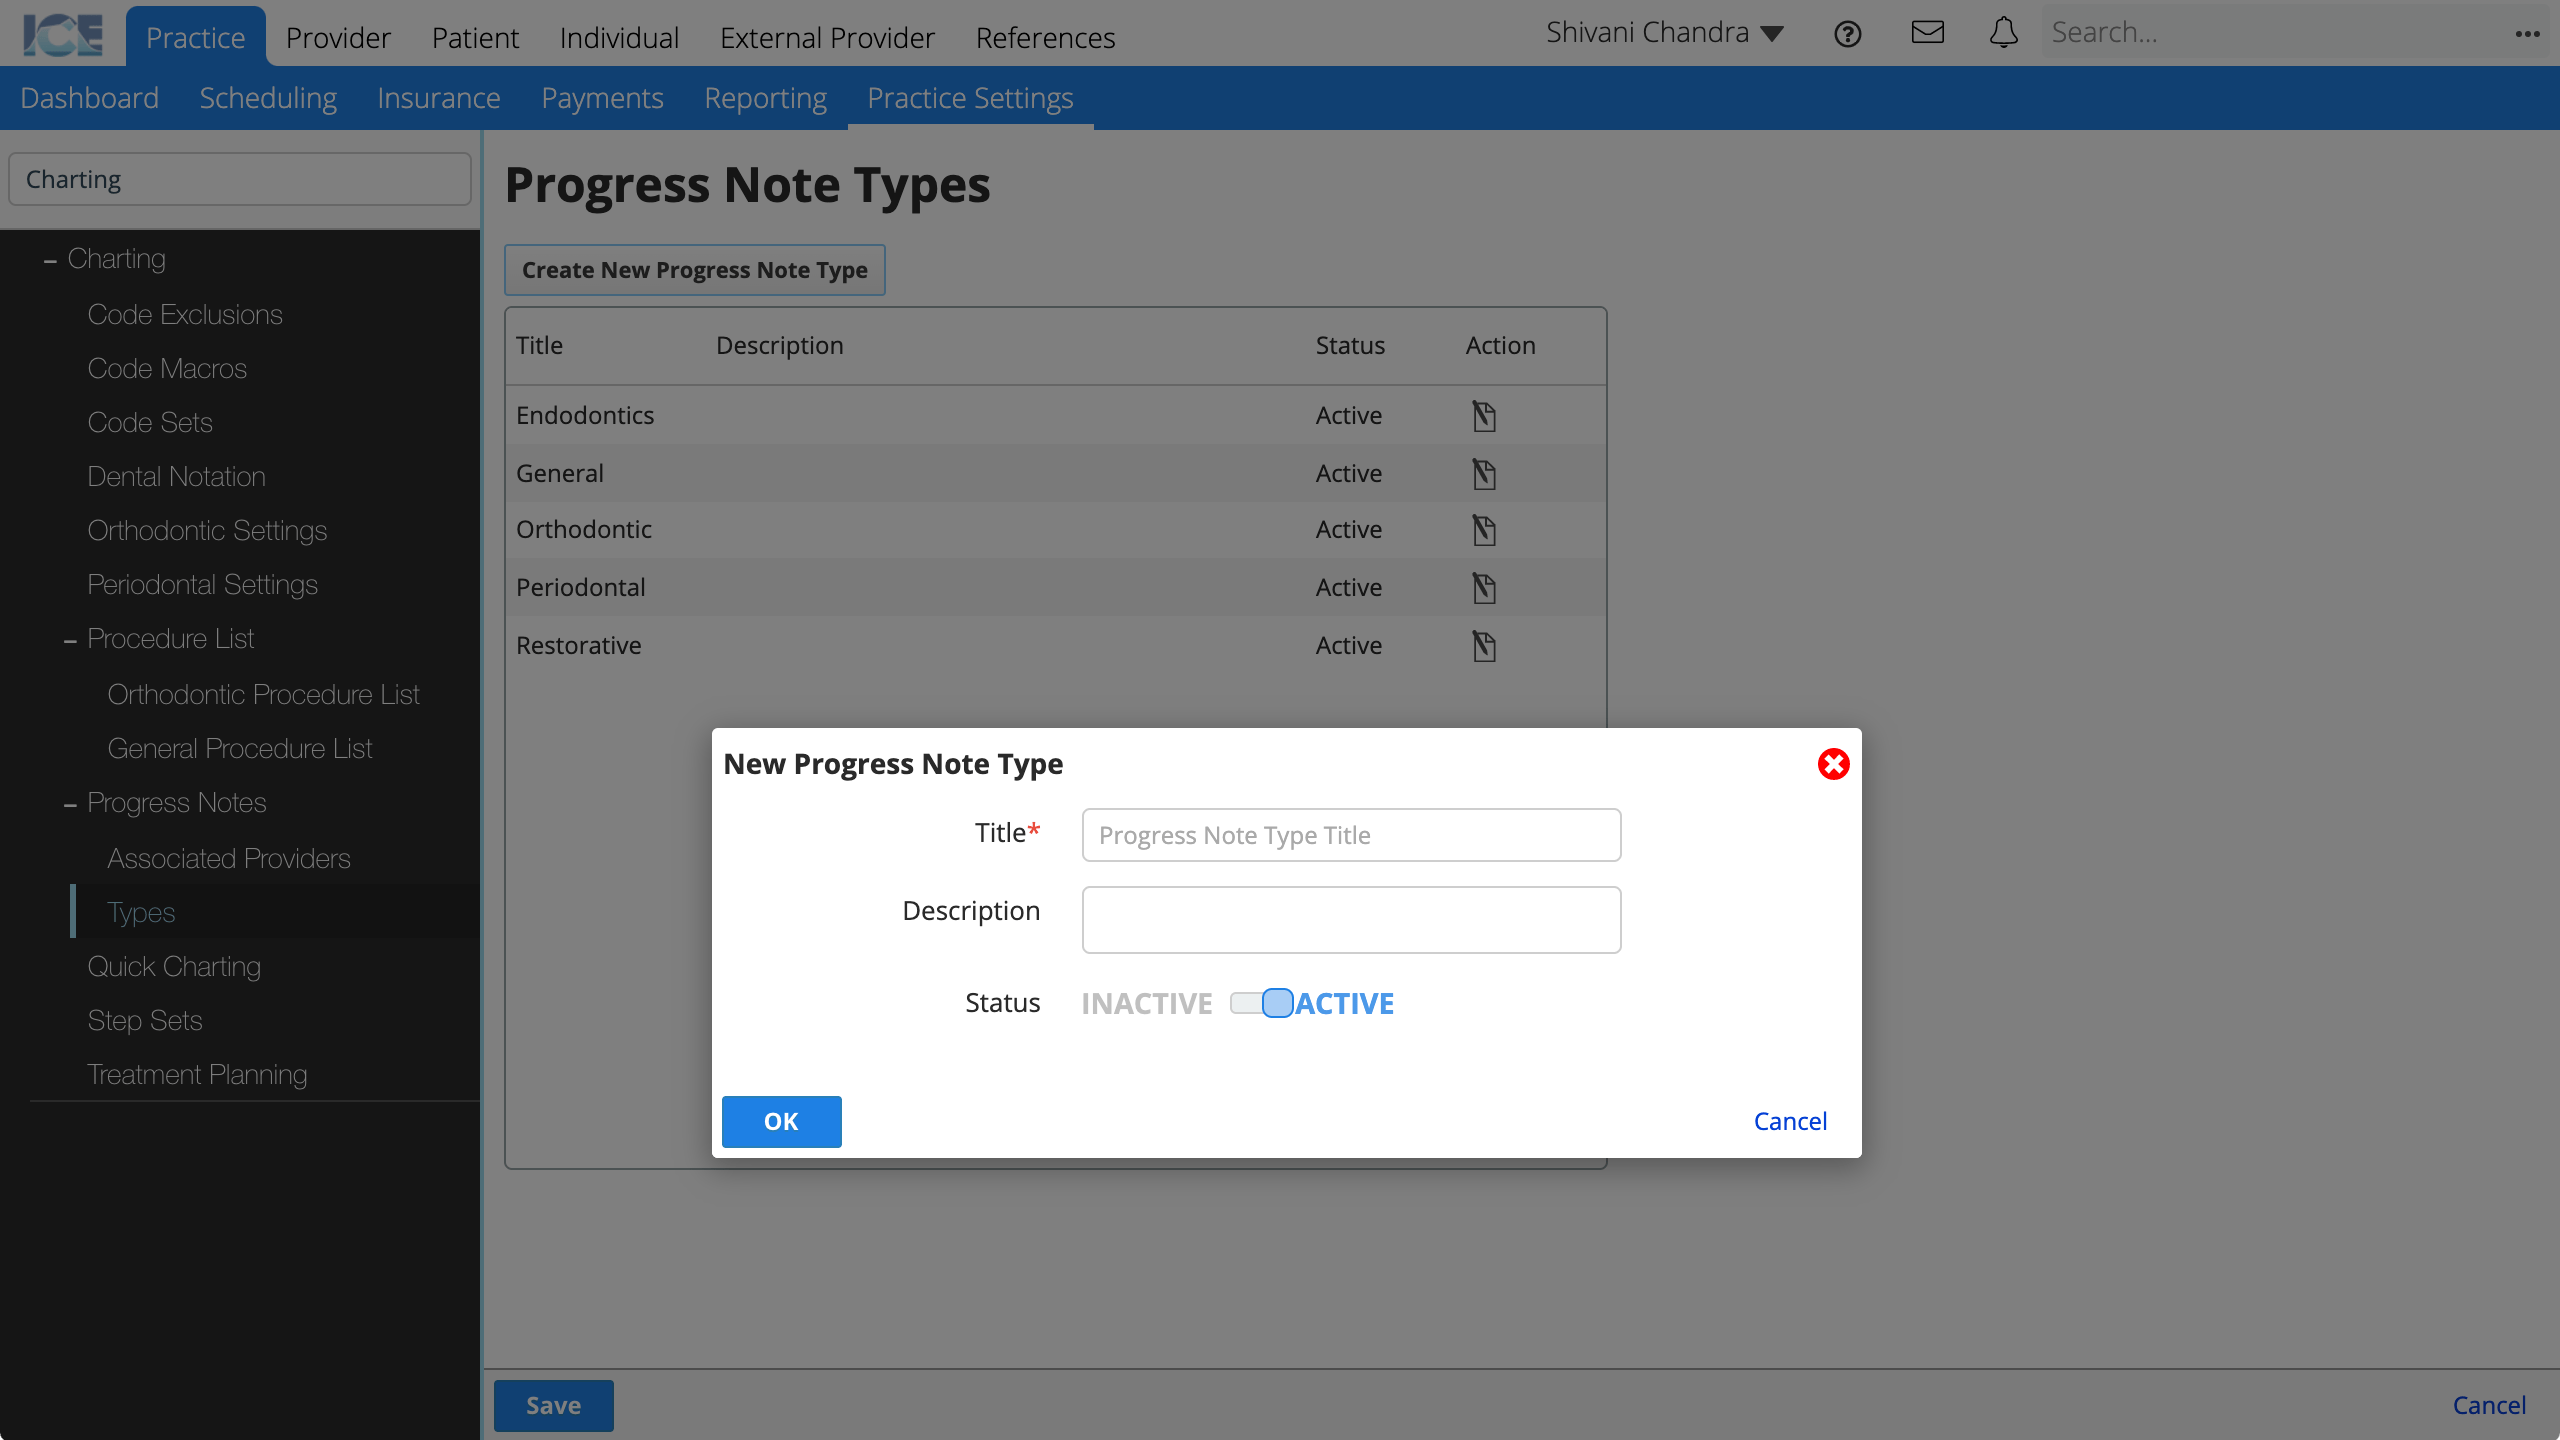
- Title: The name of the progress note type you can select when configuring progress note templates.
- Description: A longer description that only appears here in Practice Settings.
- Status: Active types appear for use in the system. Inactive types cannot be used, but appear in historical references.
- Select OK
- Choose Save to save your changes
- Select Cancel to discard your changes.
To edit an existing progress note type, select ![]() in the Action column.
in the Action column.
Quick Charting
The quick charting pop-up appears when you select a tooth or surface on the General Odontogram.
The pop-up displays 5 pre-configured procedure codes and a search option that opens the standard Procedure Input window.
Only codes that can be added to a single tooth can be added to Quick Charting.
- Go to Practice > Practice Settings > Charting > Quick Charting
- Confirm that Enable Quick Charting is set to On
- If set to Off, selecting a tooth or surface on odontogram does not show the Quick Charting pop-up.
- Select the Code field
- Search and choose the code you want to add
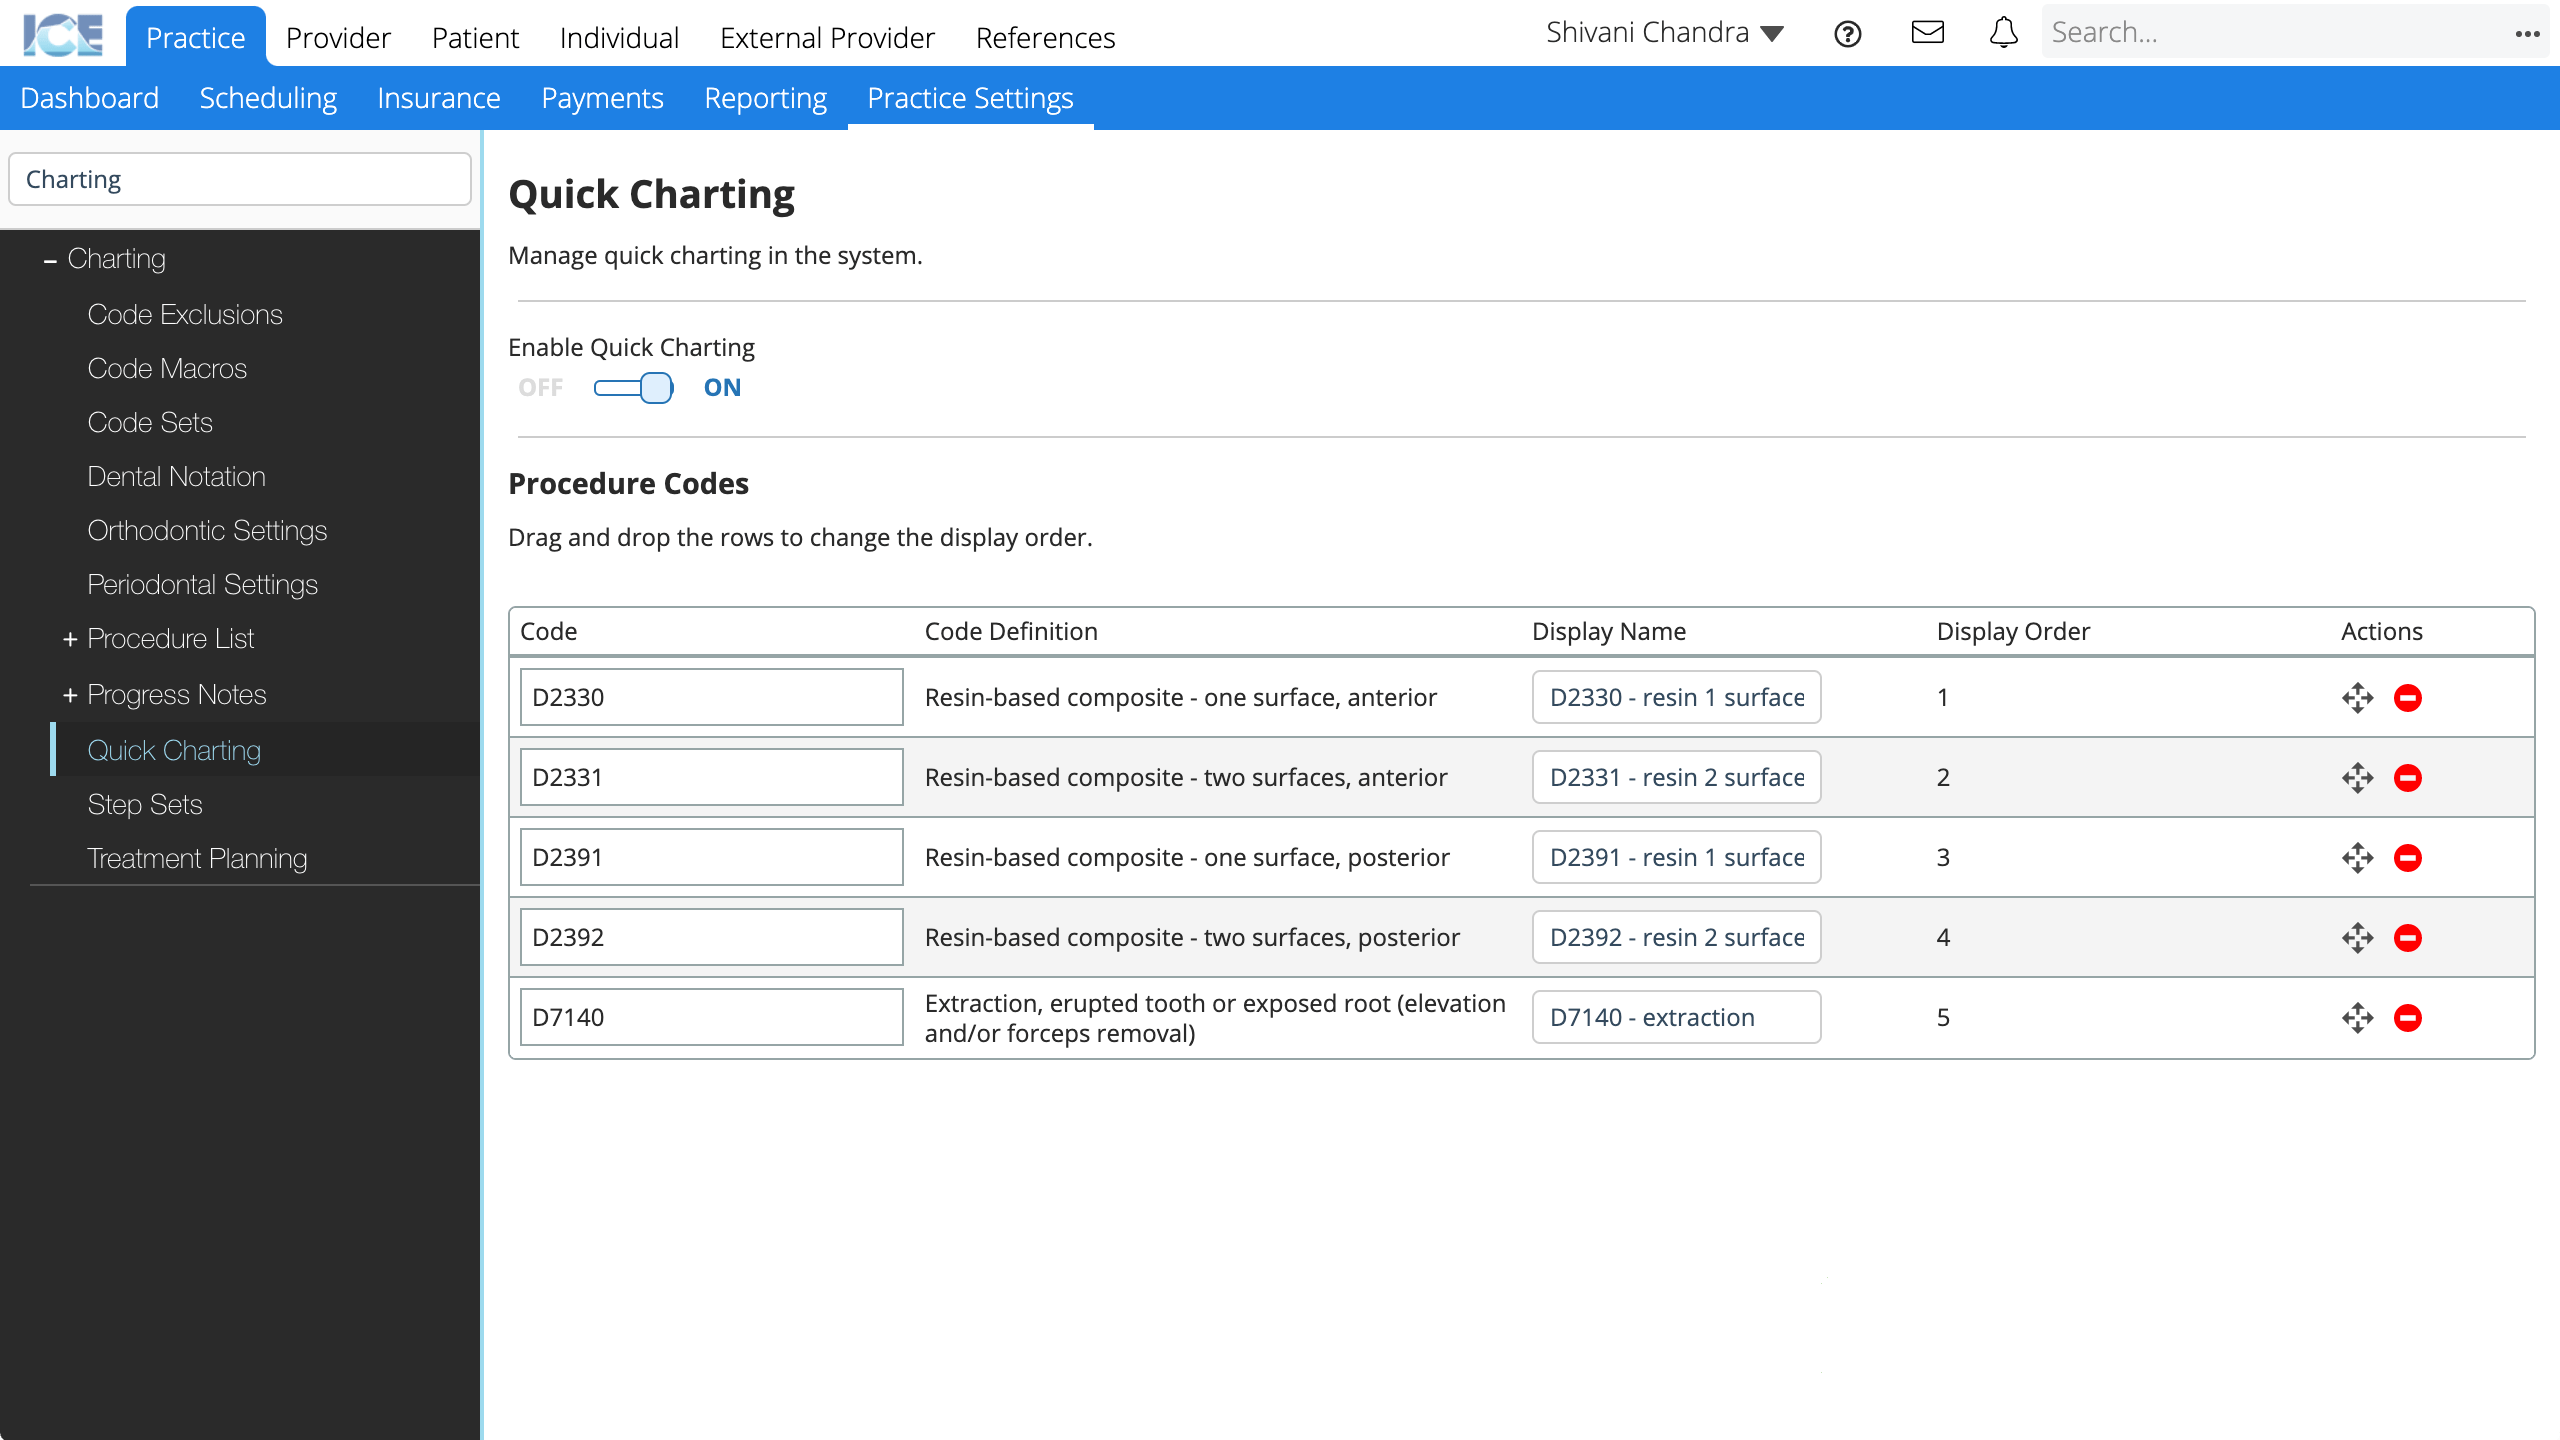
- Configure how the codes appear in the pop-up by:
- Updating the Display Name field text.
- Dragging to re-order the codes.
- Selecting to remove a code.
- Your changes are saved automatically
Step Sets
Completing a procedure can involve several steps before the work is truly completed for a patient. Step sets are used to track progress for these types of procedures. For example, providing a crown for a patient that may involve multiple steps completed over time.
A billable step can be configured for these step sets in order to indicate when in the process a patient will be billed for the entire cost of the procedure. Revenue can be calculated separately per step using the Actual Cost field. The parent code selected during the set creation process will be used for billing purposes.
Each step you define appears in charting as its own line or procedure entry. This lets you track treatment dates and statuses separately for each step. To learn more about how step sets appear in charting, see Entering step sets.
- Go to Practice > Practice Settings > Charting > Step Sets
- Select Create New Step Set
- Search and select the procedure code that is the basis for this step set
- Enter a description that will appear in procedure search results
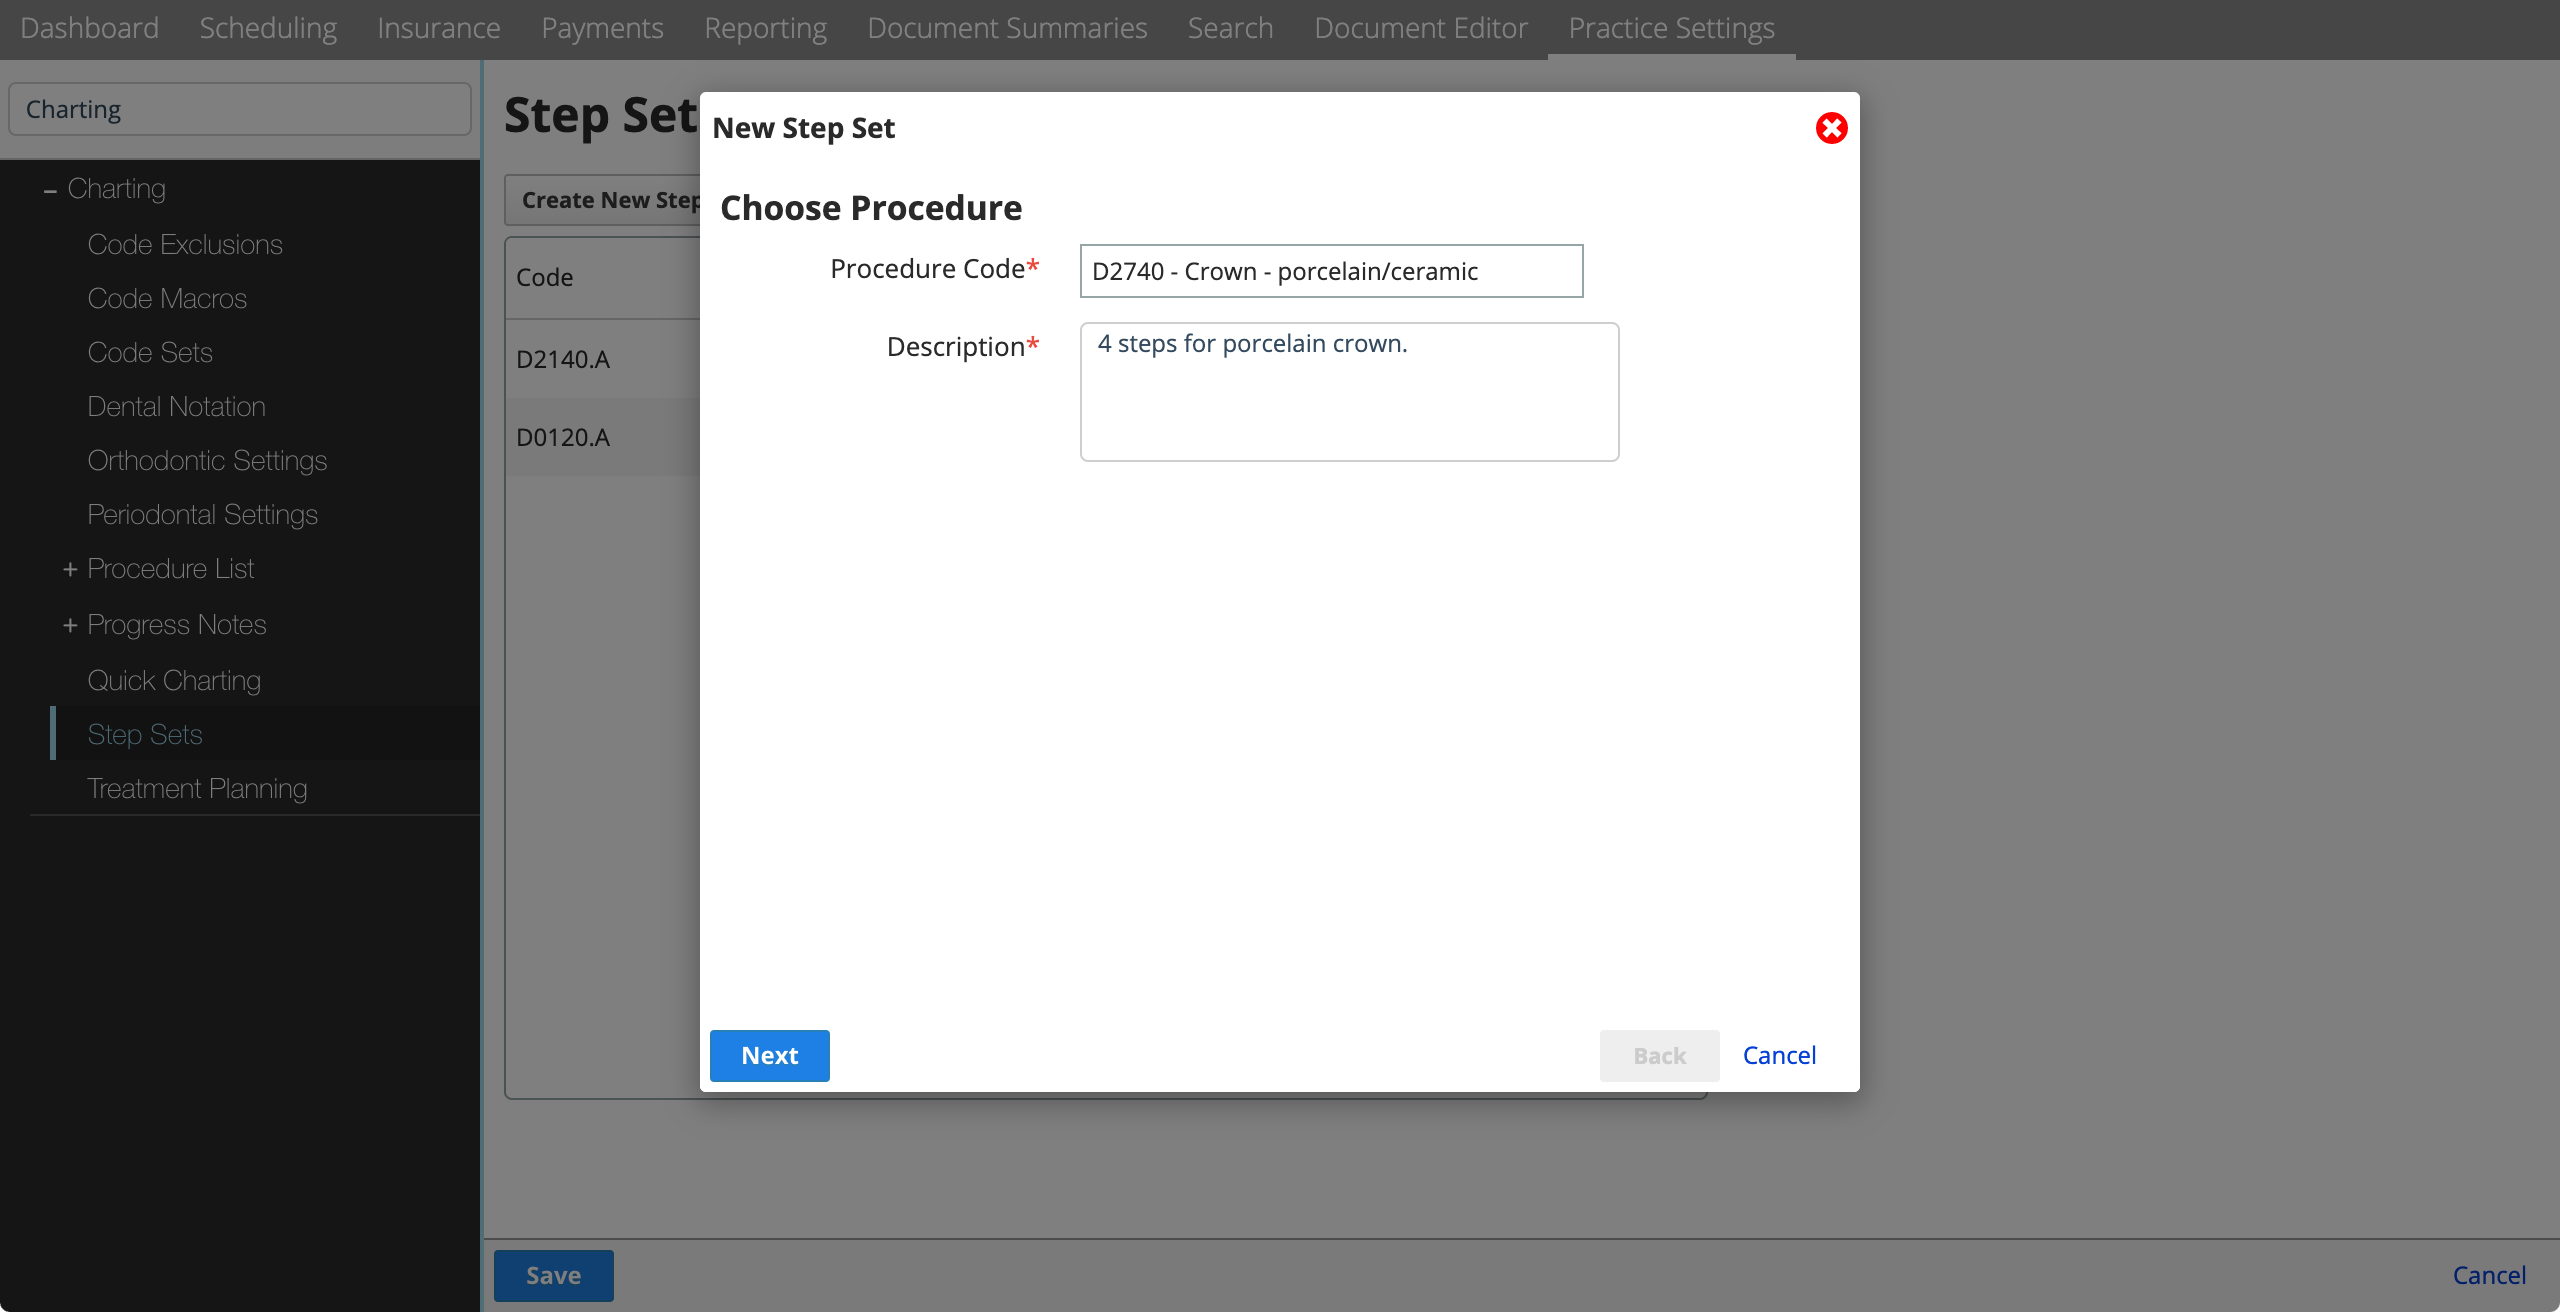
- Select Next
- Select Add Step and enter a description for each step
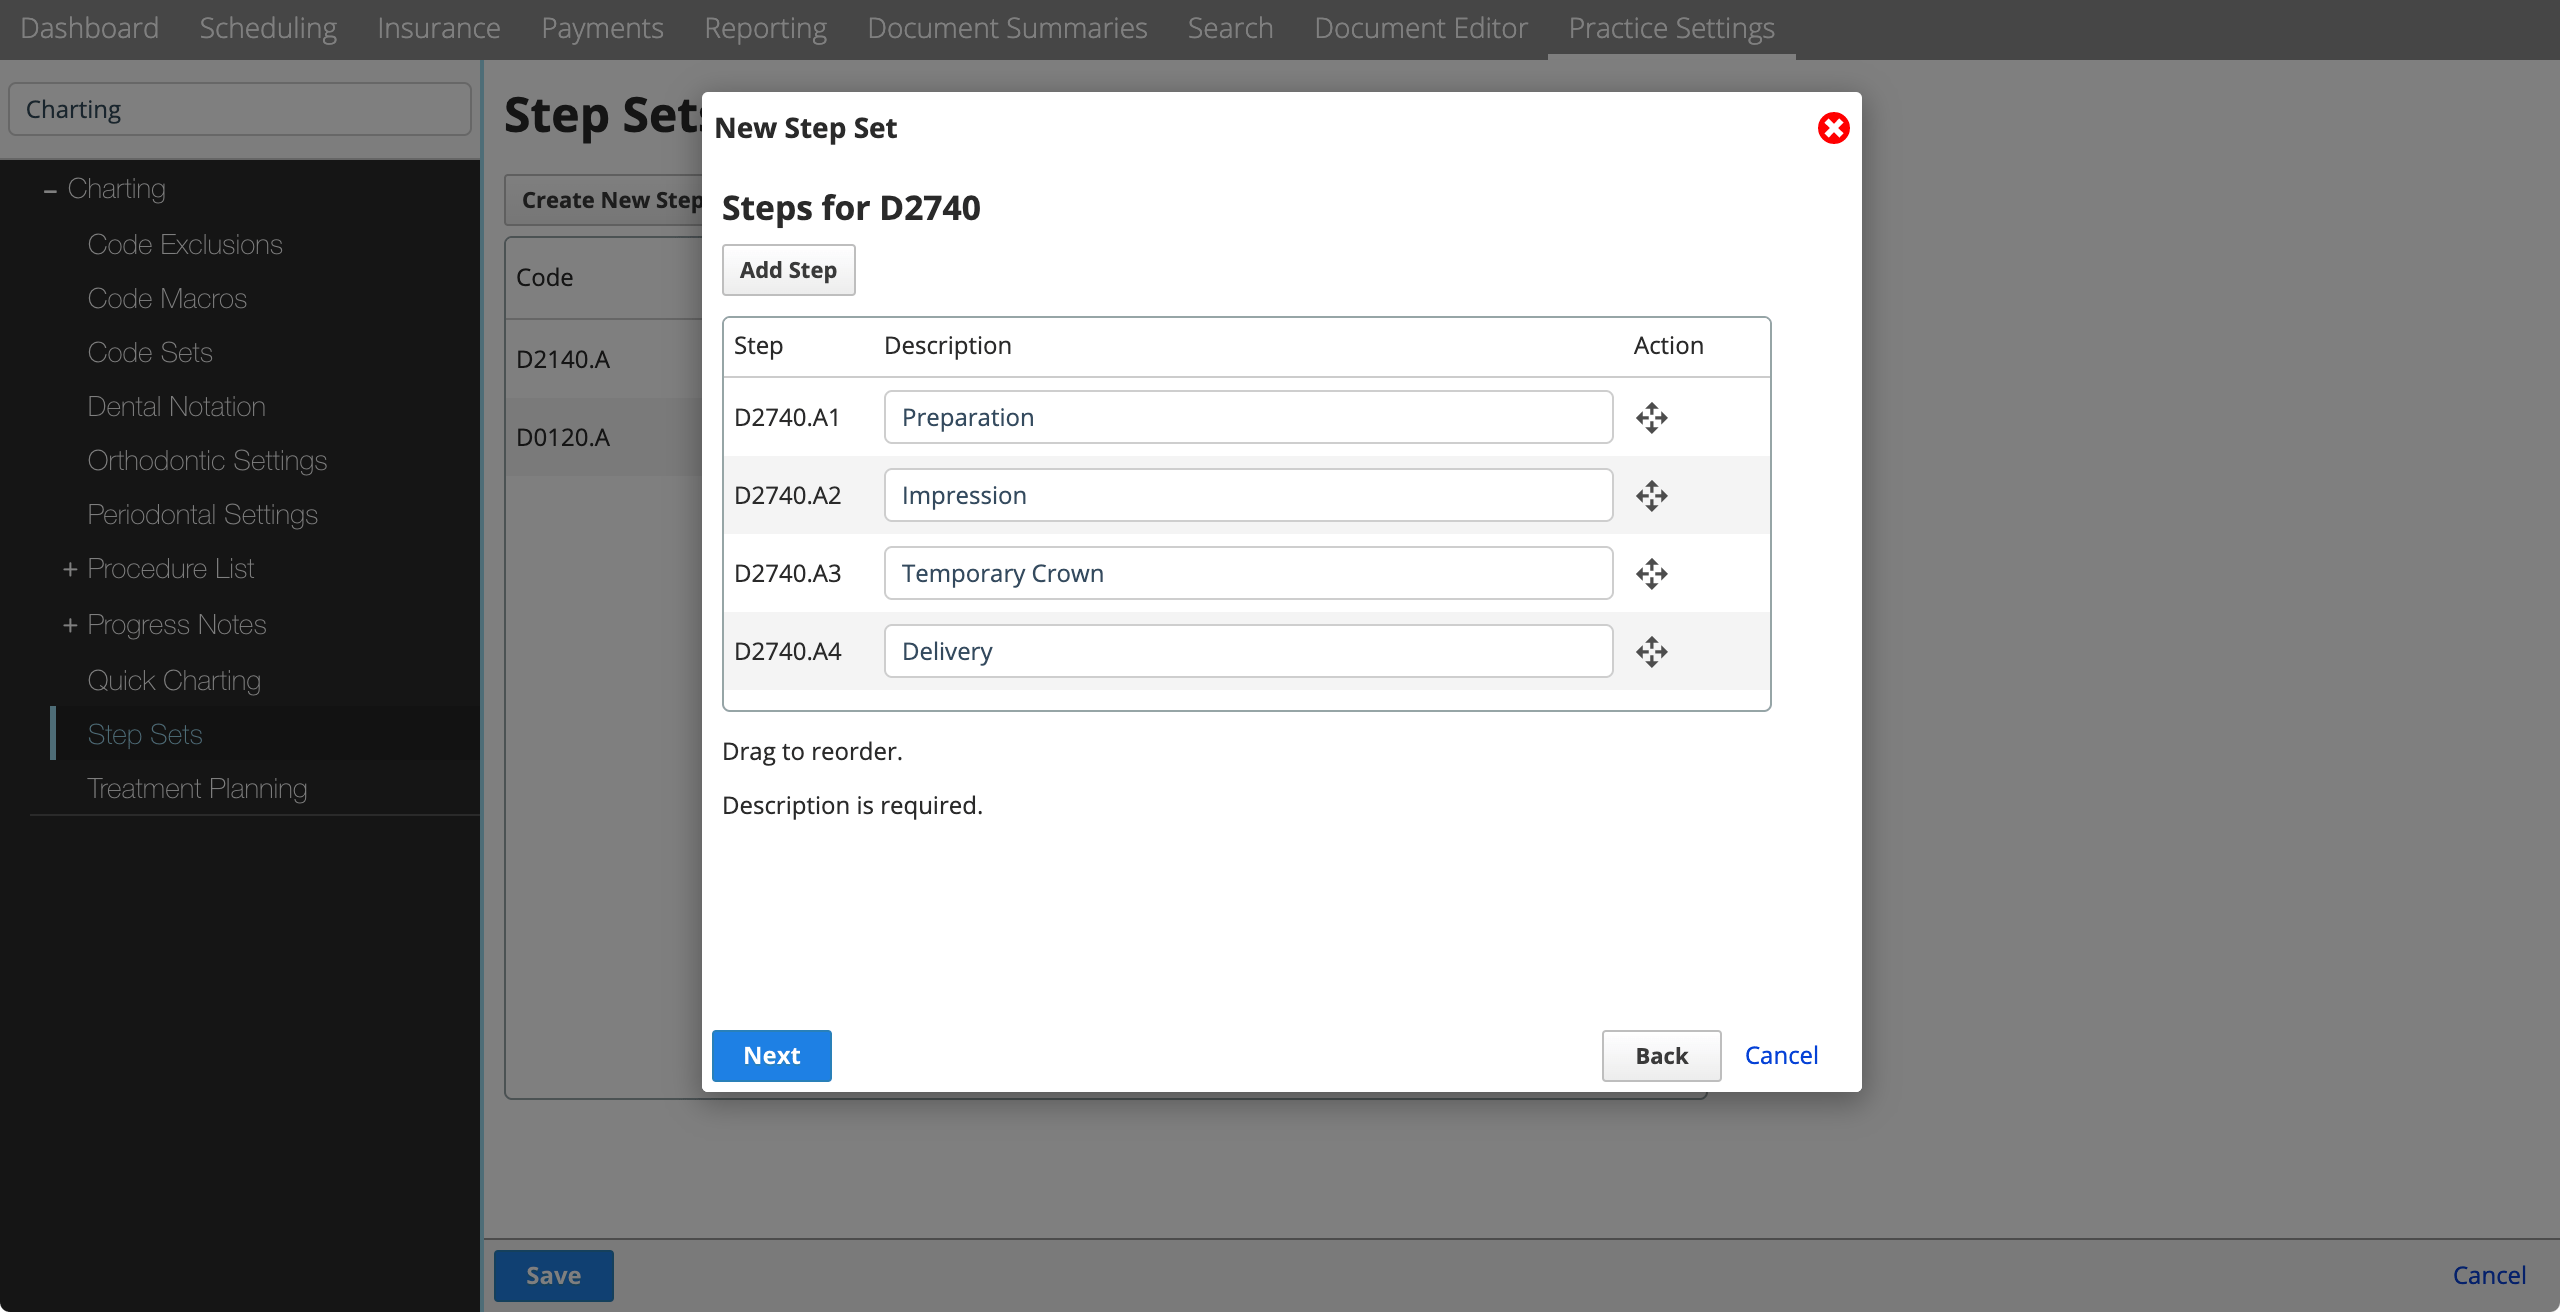
- Repeat as necessary and select Next
- Update the Actual Cost % for each step

- The Actual Cost is used to determine what portion of the cost is declared as revenue in financial reporting.
- Choose the Billable Step
- The patient is billed for the full amount of the procedure when this step is marked as completed in charting.
- Select Add Step Set
You cannot edit a step set's steps or cost breakdown after creating it. You can only set its status to inactive or update the description.
Treatment Planning
You can customize the number and names of the treatment phases available in the Treatment Planning panel.
You can define the default number of option columns to display in the Treatment Planning panel. A provider can still manually add more options if necessary.
- Go to Practice > Practice Settings > Charting > Treatment Planning
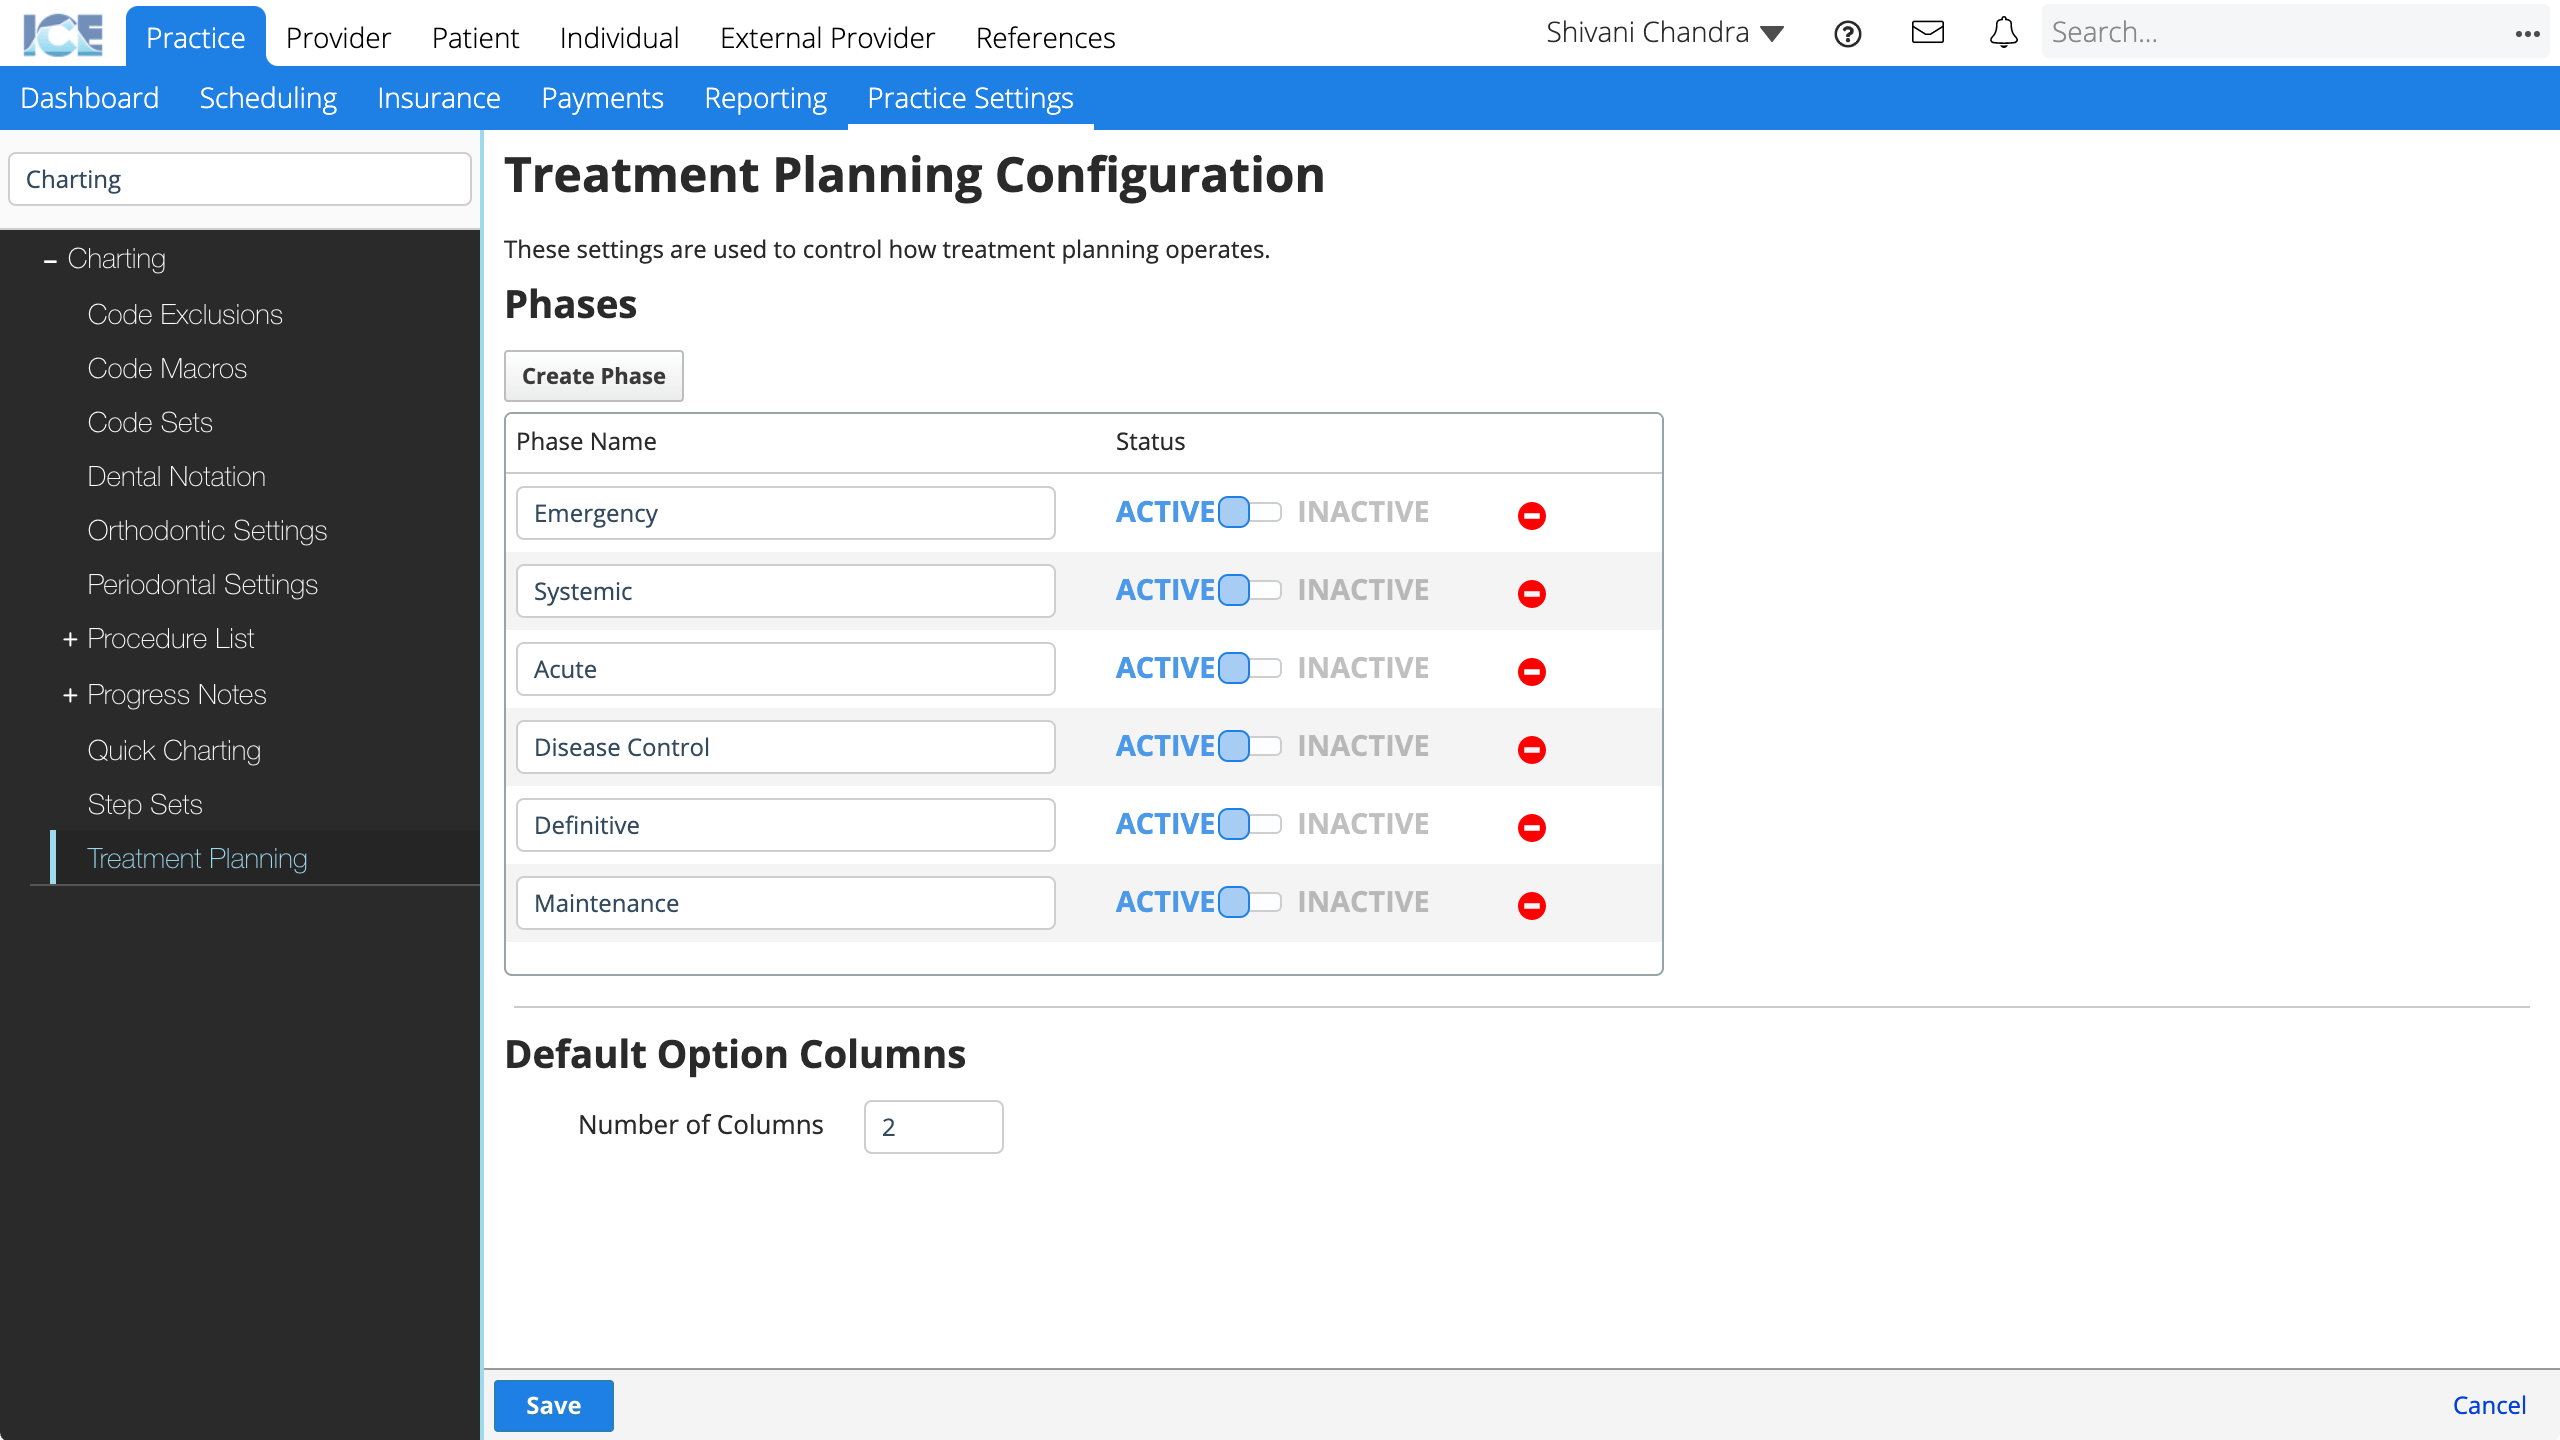
- To create a new phase, select Create Phase and enter a phase name
- Only active phases appear in the treatment planning panel.
- To delete a phase, select
- You can only delete a phase if treatment was never associated with it.
- Setting the phase to inactive hides it and any associated treatment from the treatment planning panel.
- To define how many option columns everyone starts with, update the Number of Columns field
- Choose Save to save your changes
- Select Cancel to discard your changes.