Practice settings: imaging
In Practice Settings you can create and configure image templates, configure image labels, and define which label the patient photo uses.
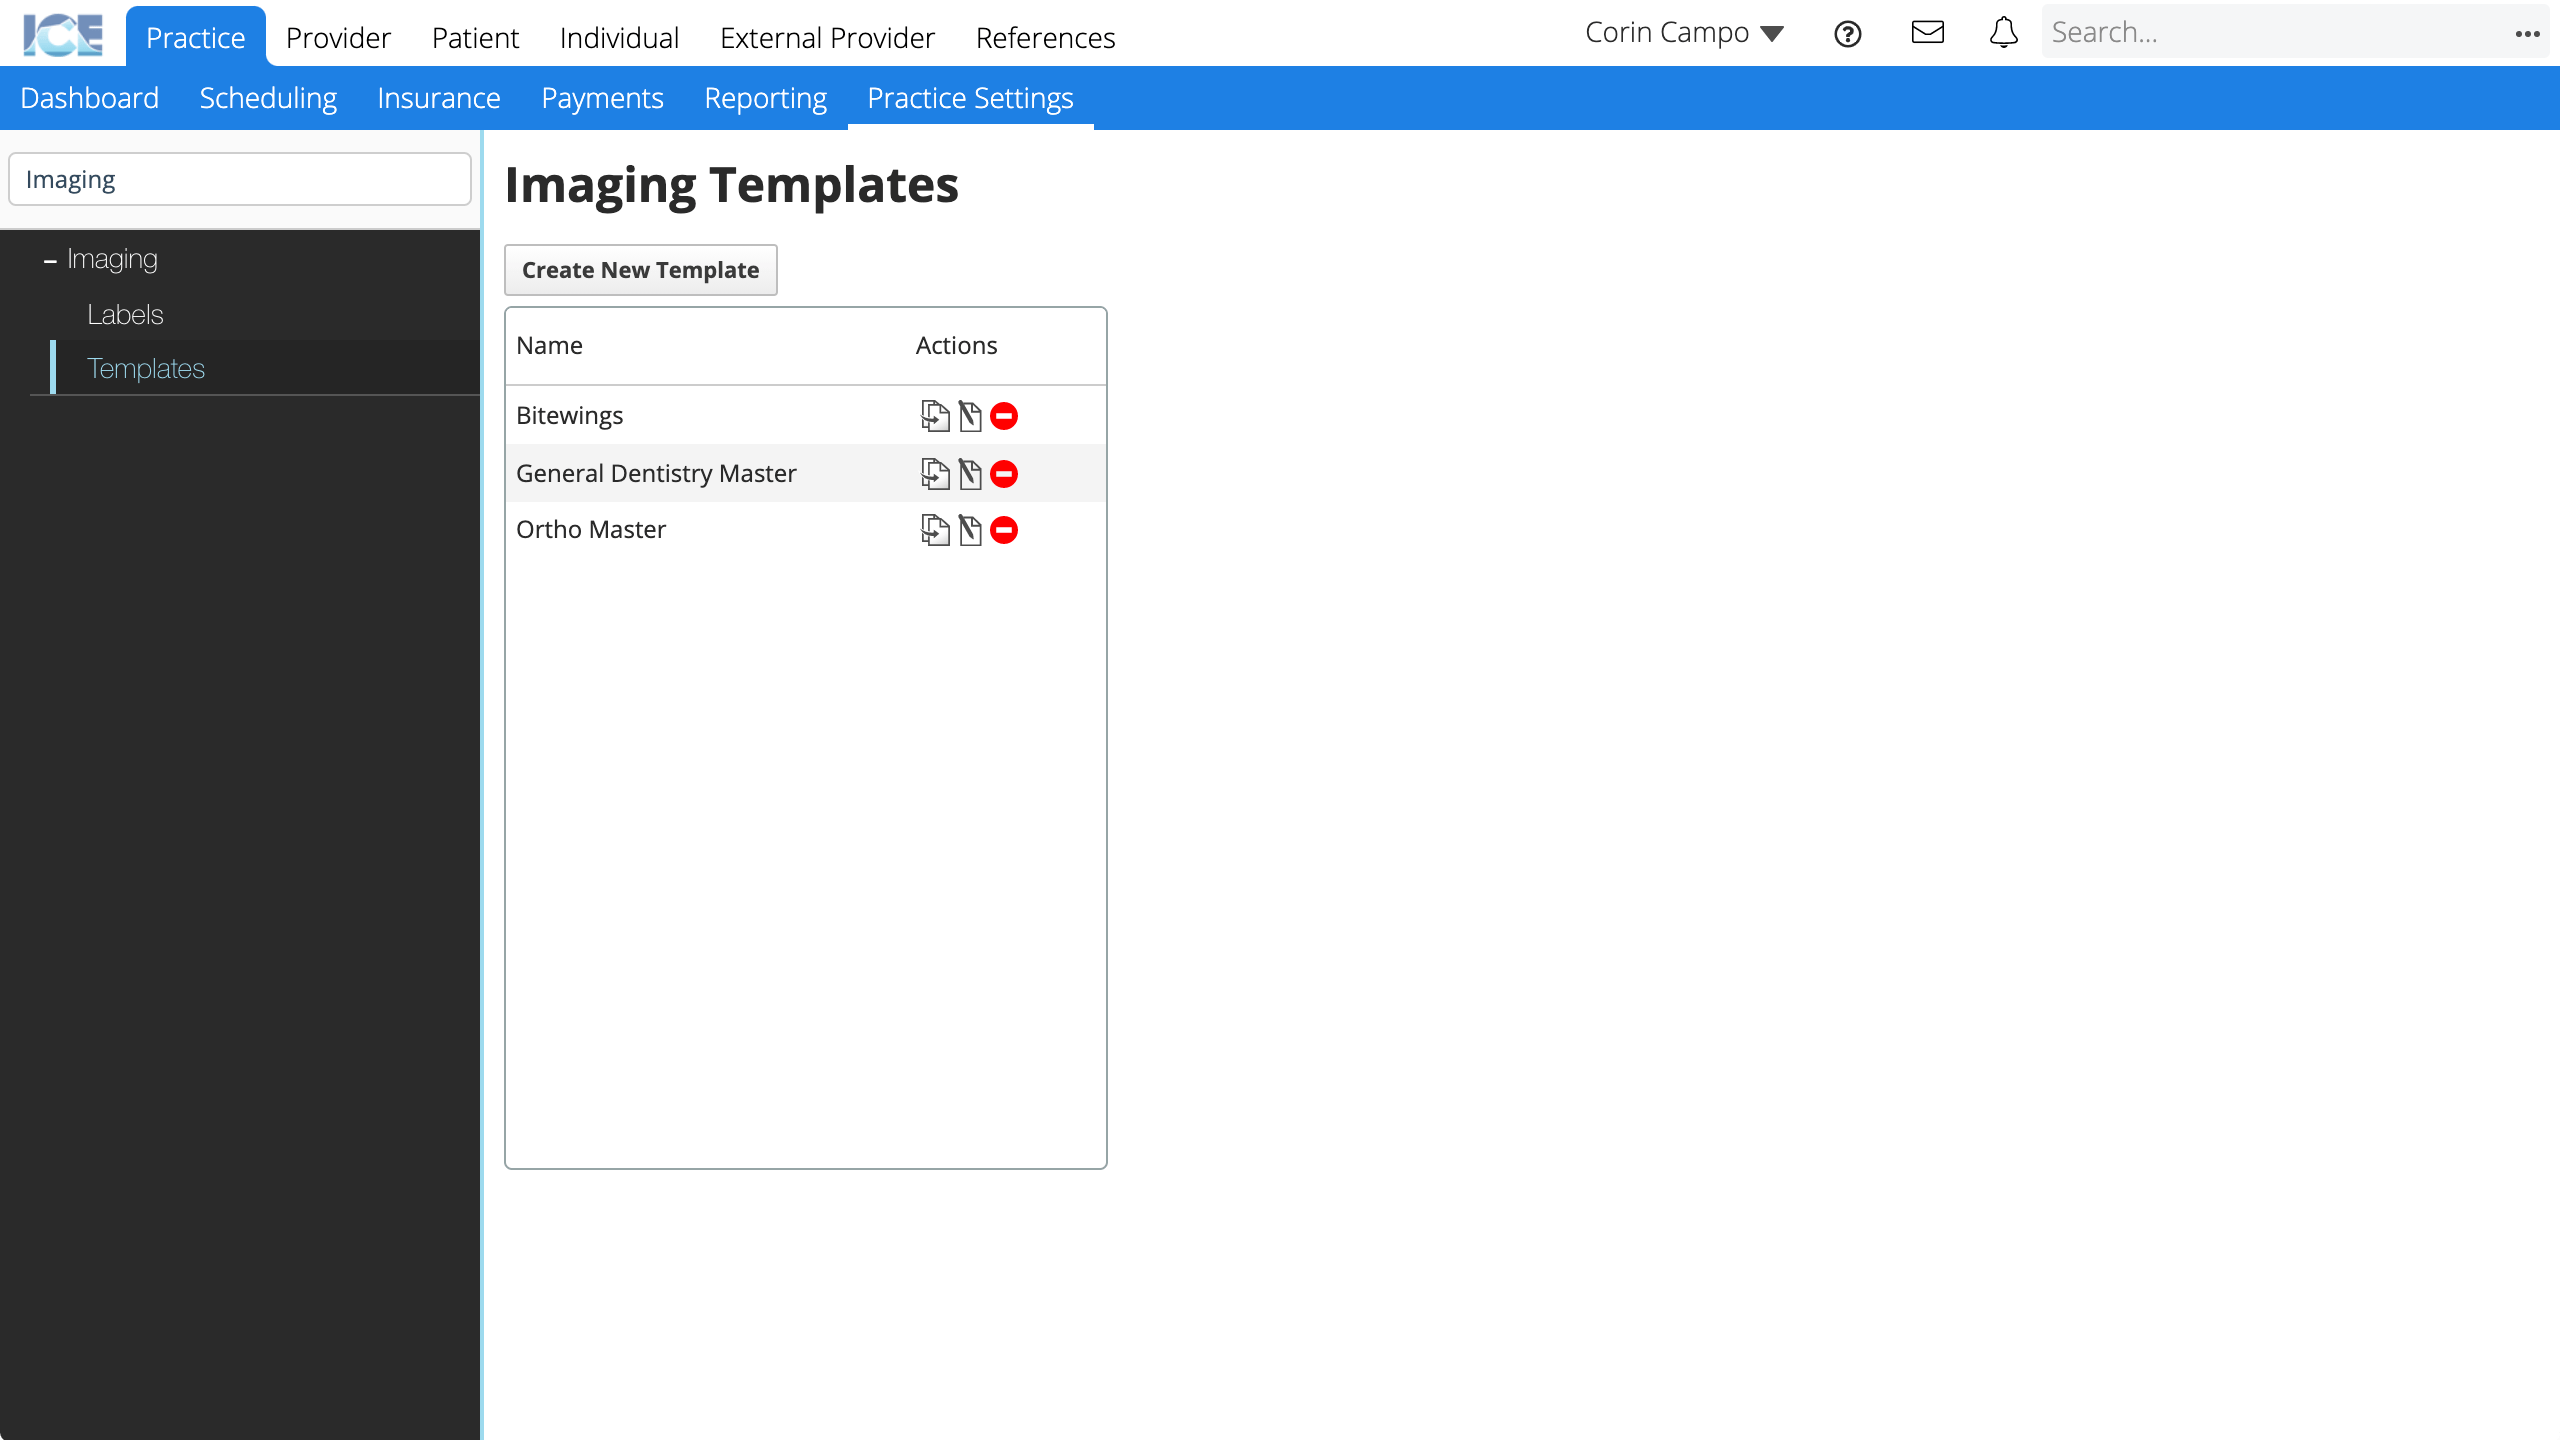
Templates
You can create image templates that display one or more types of images in pre-defined positions on screen.
- Go to Practice > Practice Settings > Imaging > Templates
- Select Create New Template
- Enter a name for the template
- Select Save to continue
- Use the available tools to configure the template
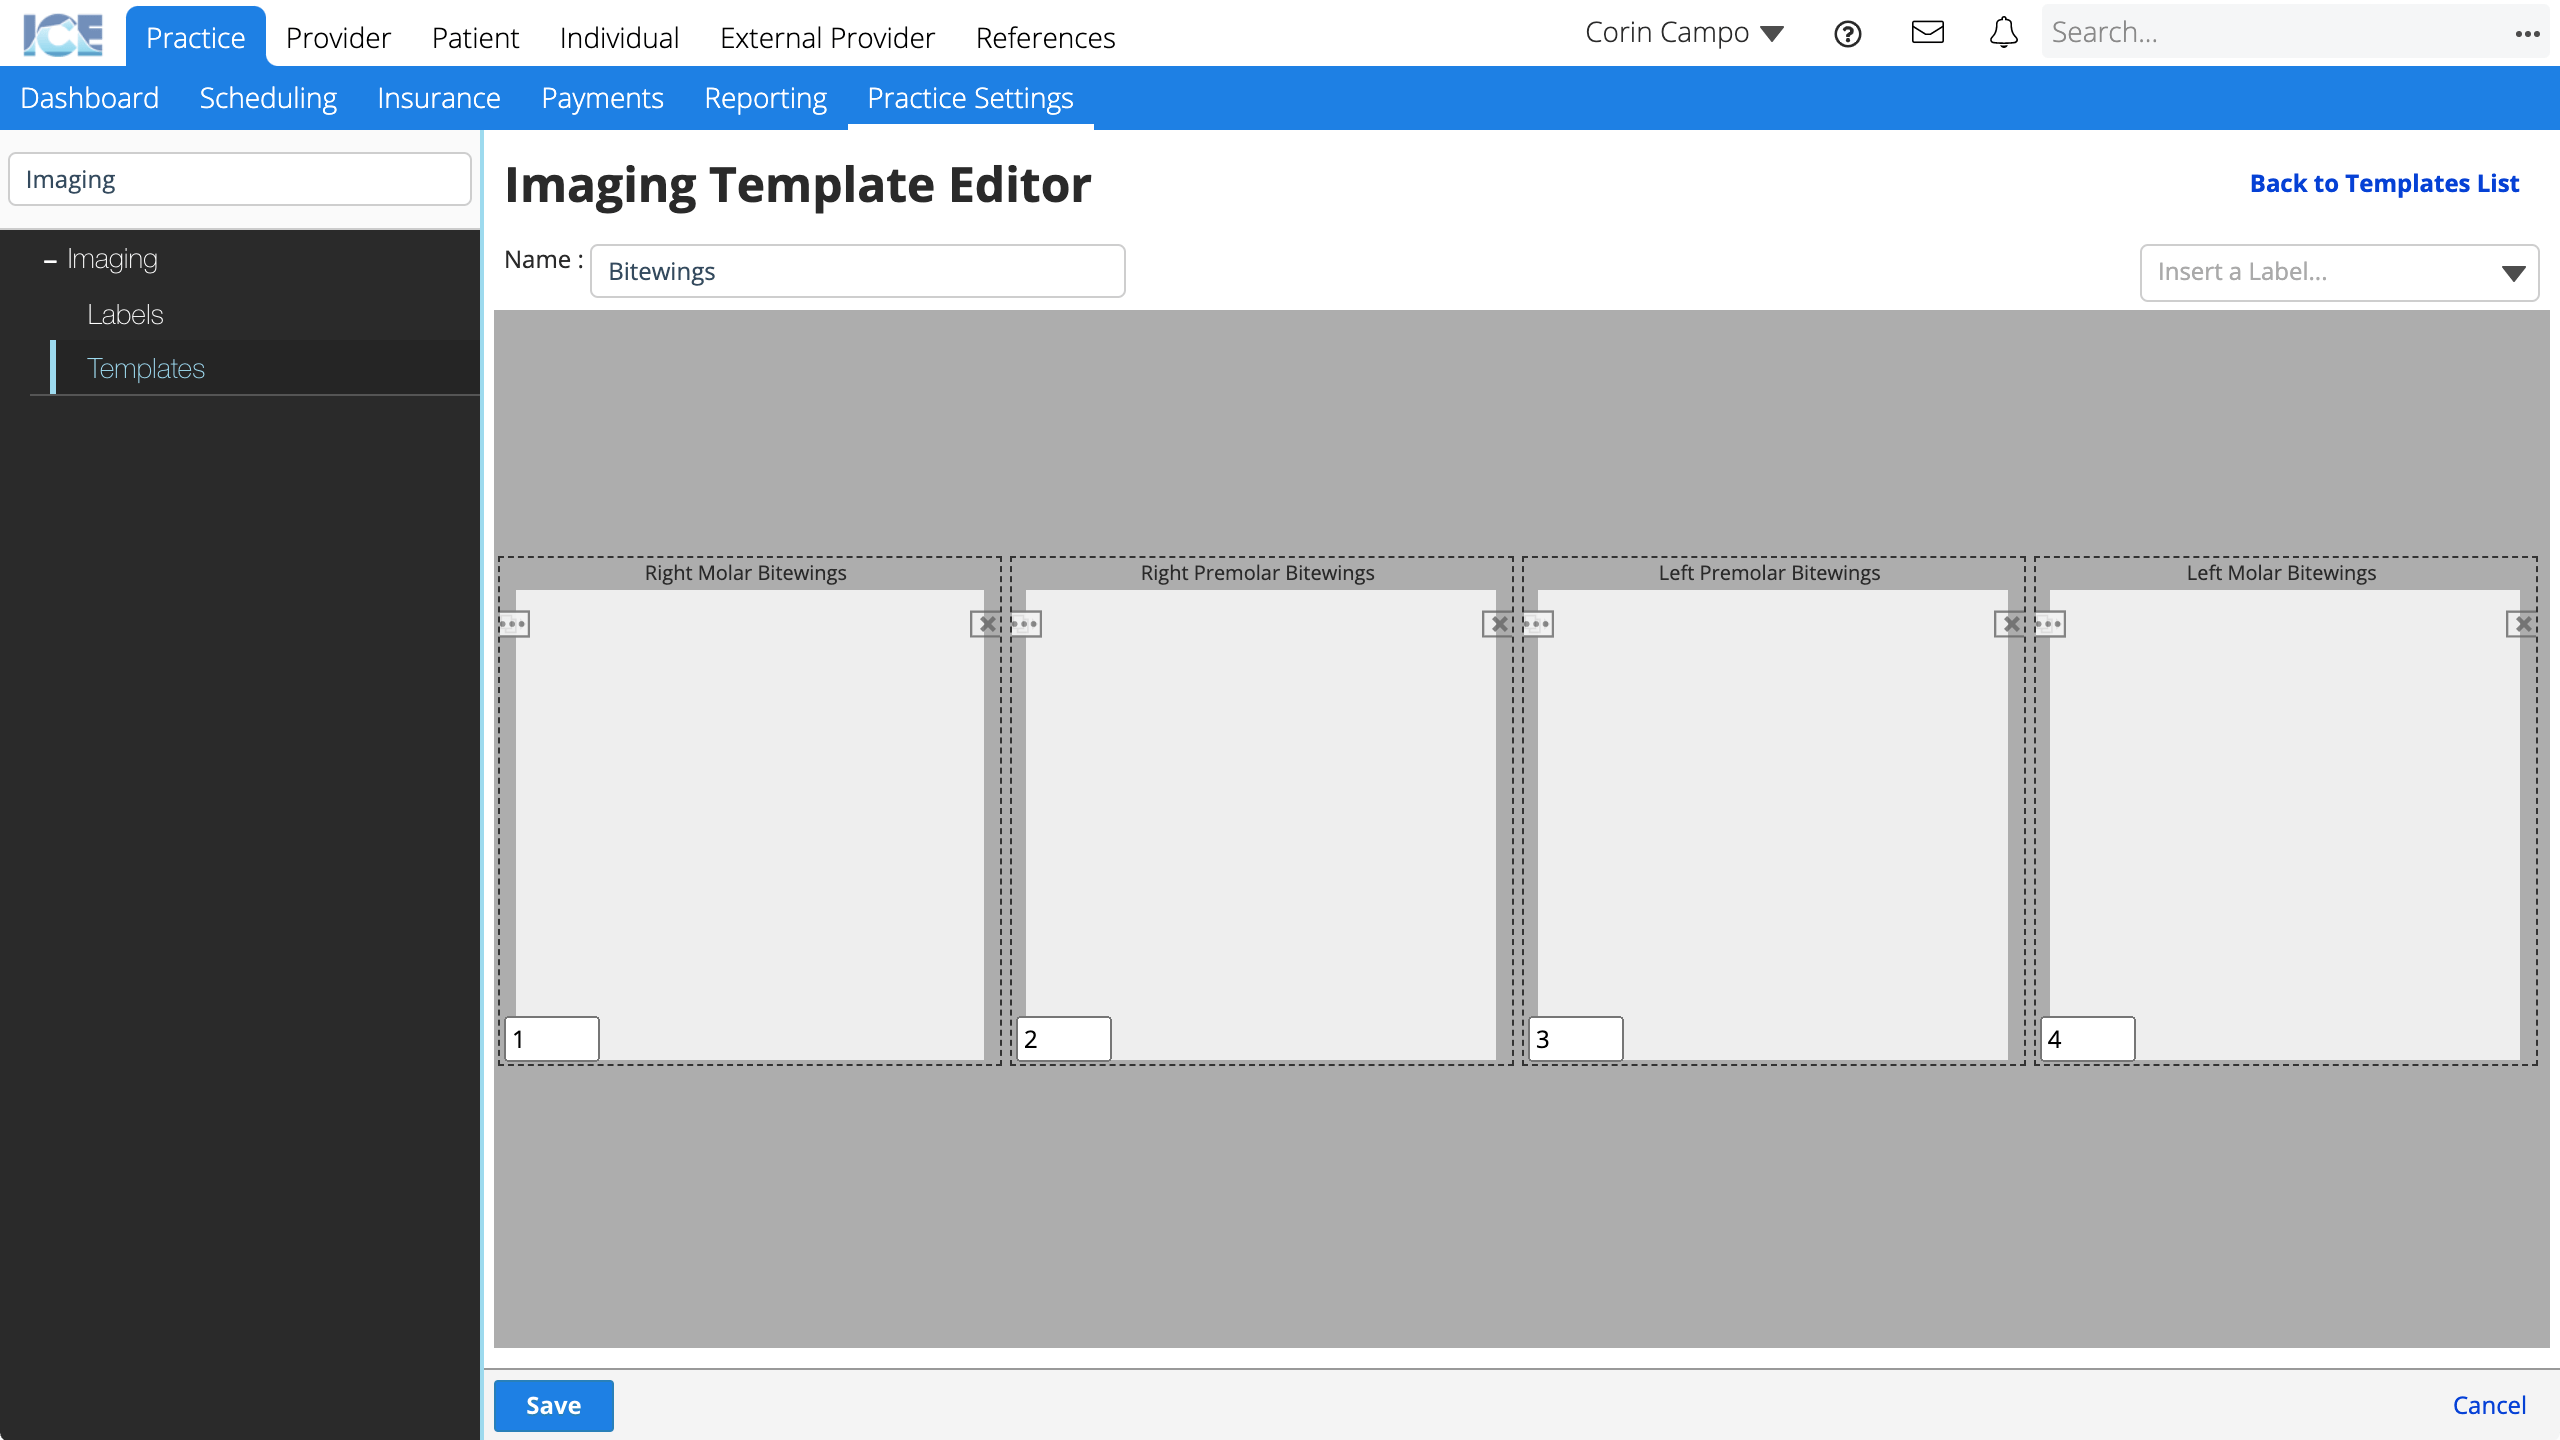
- Insert a Label: Choose an image label from the drop-down to add to the template.
- Move: Drag the label around the canvas to reposition it in the template.
- Resize: Click and drag the dotted outline of a label to adjust its height or width.
- A label's aspect ratio settings in Practice Settings > Imaging > Labels also affects how the image fills the template when you upload an image to it.
- Remove: Select
 to remove a label from the template.
 - Upload Order: Edit the number on each label to define the order the system uses to place images into labels if you upload multiple images at once.
- People uploading images can move them to different labels afterwards if the order isn't always the same.
- Select Save to save your changes
- Select Cancel to discard your changes.
- Select Back to Templates List when you are finished
To edit an existing template, select ![]() in the Actions column.
in the Actions column.
To remove an existing template, select ![]() in the Actions column.
in the Actions column.
To duplicate an existing template, select ![]() in the Actions column.
in the Actions column.
Labels
The system includes many image labels that describe types of images you may capture and display.
You can create your own labels if some are missing or rename existing ones to better match the terminology you use.
- Go to Practice > Practice Settings > Imaging > Labels
- Select Create New Label

- Complete the required fields
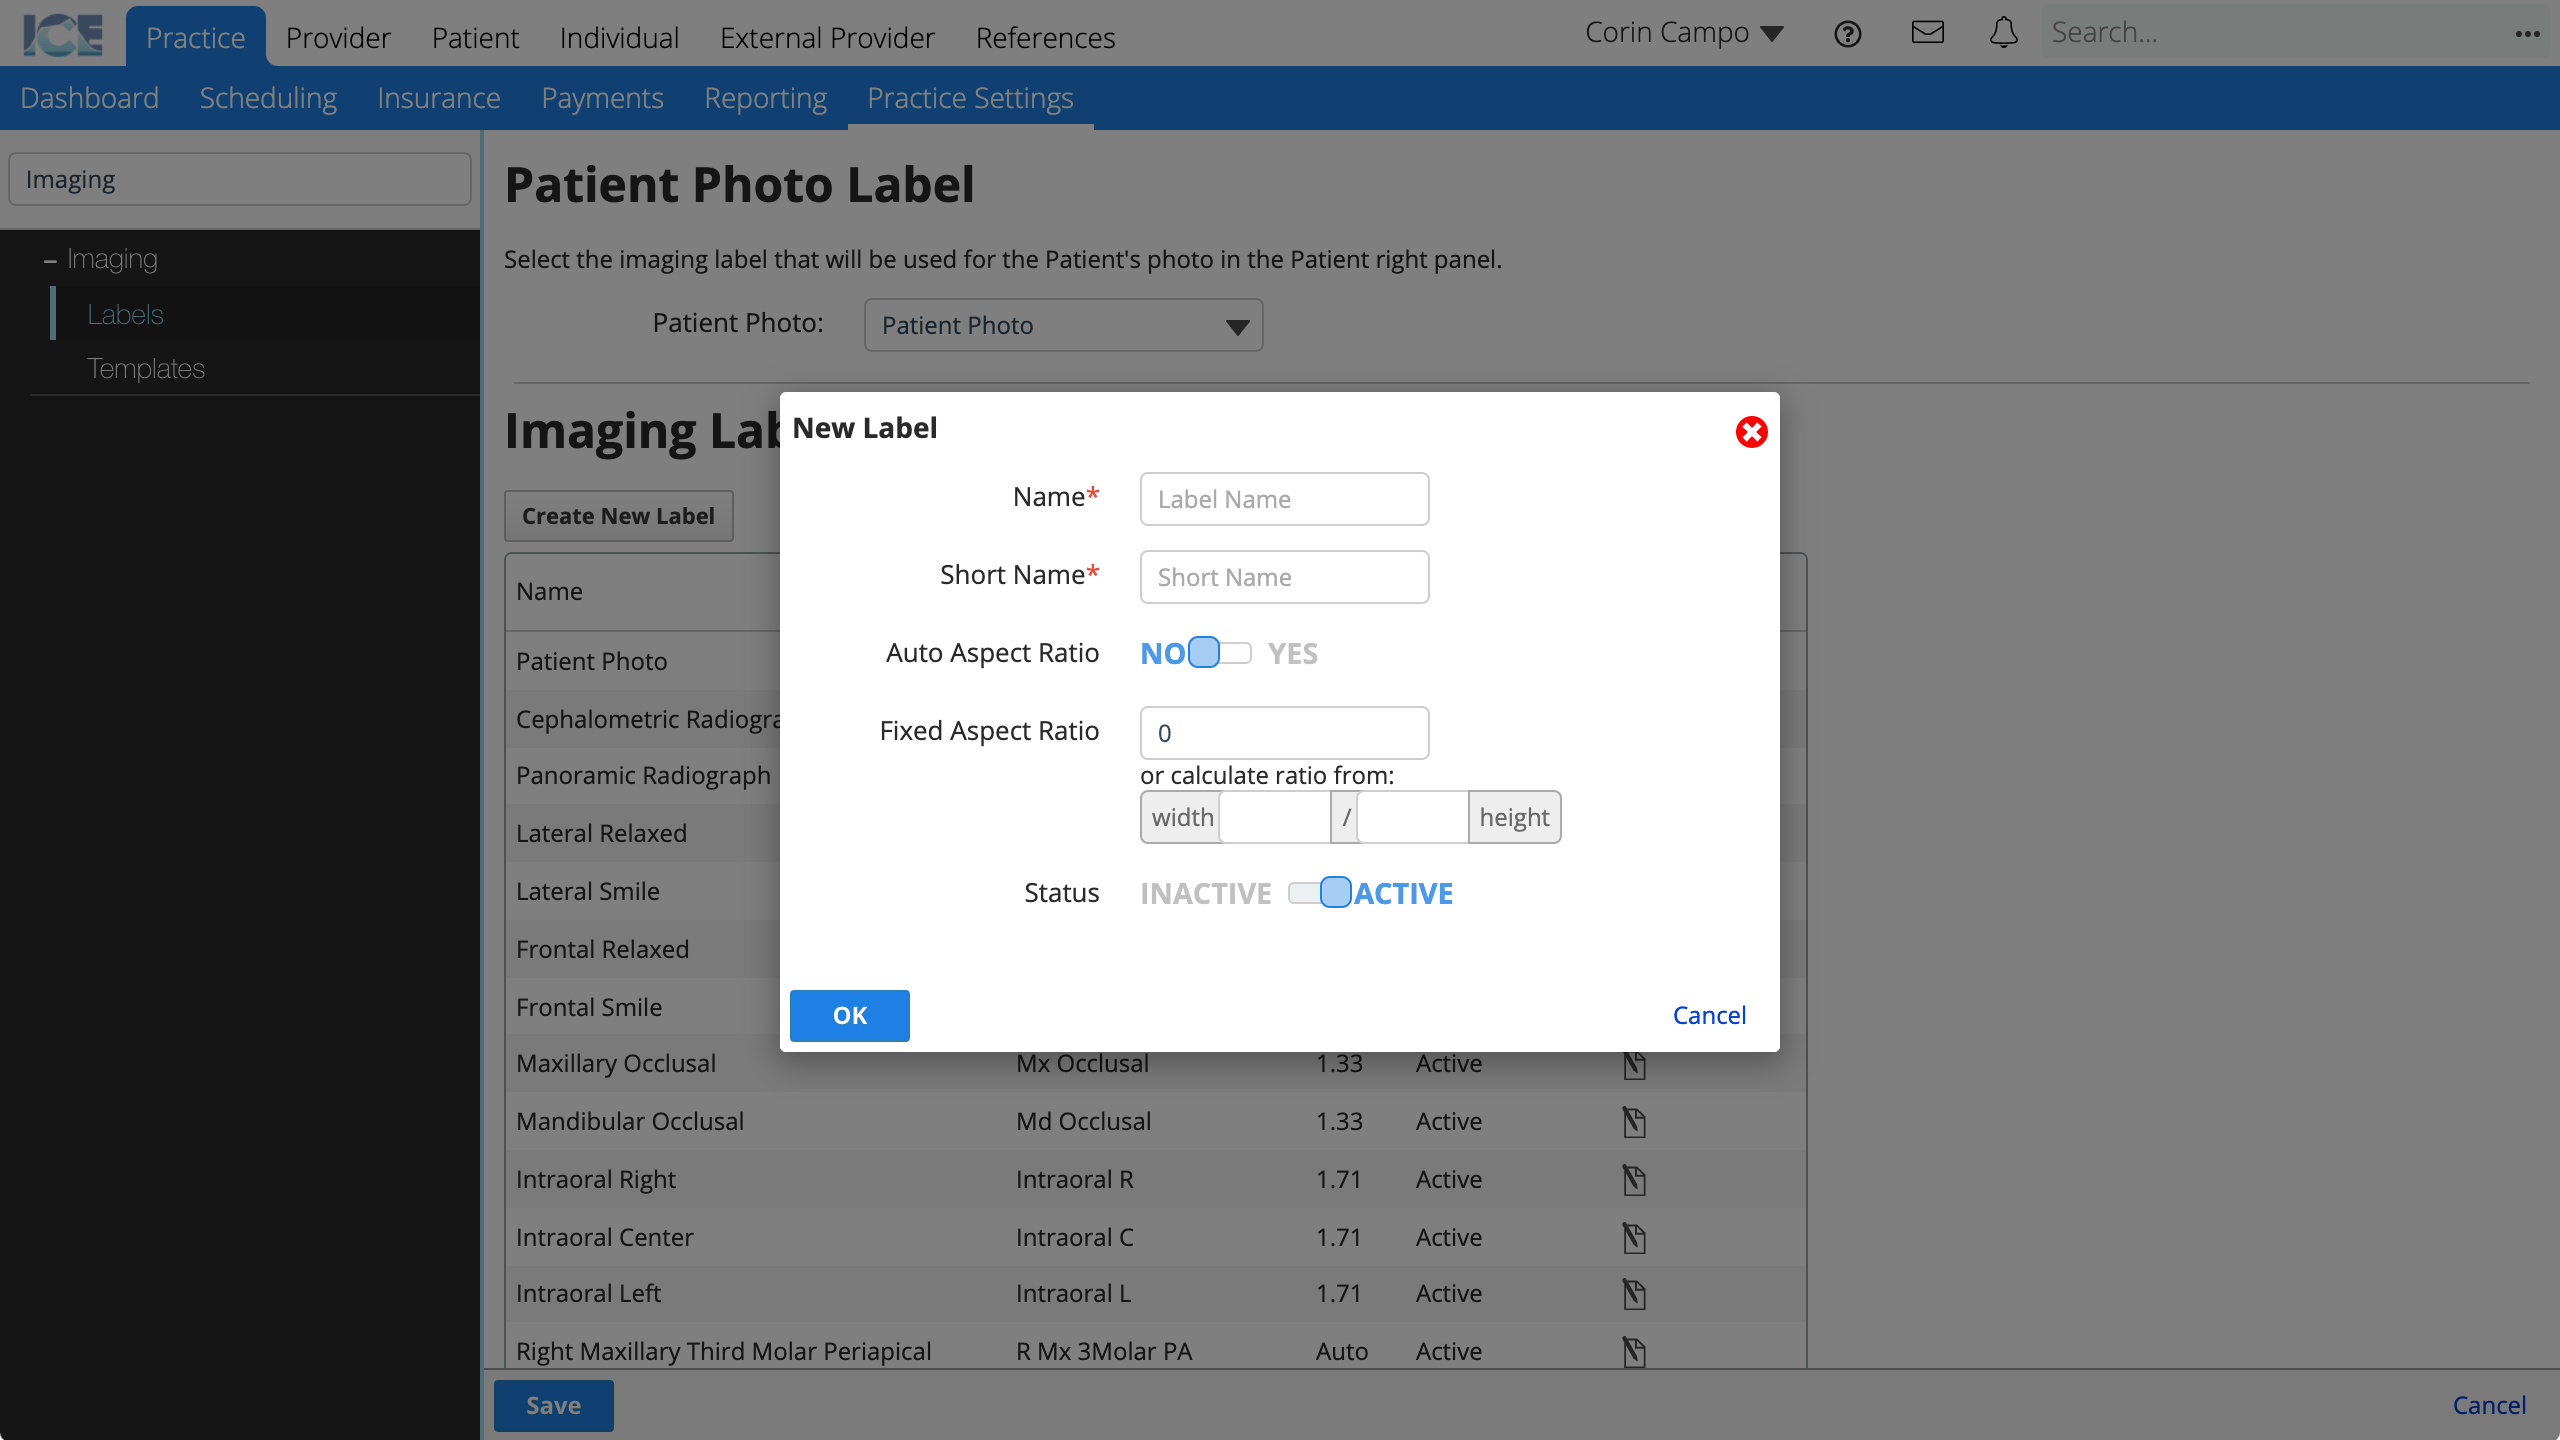
- Name: The name that appears in Patient > Imaging and when configuring an image template.
- Short Name: A short name that appears in the same locations when space is limited.
- Auto Aspect Ratio: Define the aspect ratio the system uses to display images in this label.
- Yes: The system uses the aspect ratio of the uploaded image.
- No: The system uses a fixed ratio you define here, ignoring the aspect ratio of the uploaded image.
- Status: Active labels appear for use in the system. Inactive labels cannot be used, but appear in Practice Settings for reference.
- Select OK to save your changes to the label
- Select Save to save all of your changes in this session
- Select Cancel to discard your changes in this session.
To edit an existing label, select ![]() in the Actions column.
in the Actions column.
Patient Photo Label
You can define which image label the system uses for a patient's profile photo.
- Go to Practice > Practice Settings > Imaging > Labels
- Chose an image label from the Patient Photo drop-down menu
- Select Save to save your change
- Select Cancel to discard your change.
On a patient record this means:
- The newest image in this label appears on the patient's card.
- A photo you upload by selecting the patient profile image goes into this label.