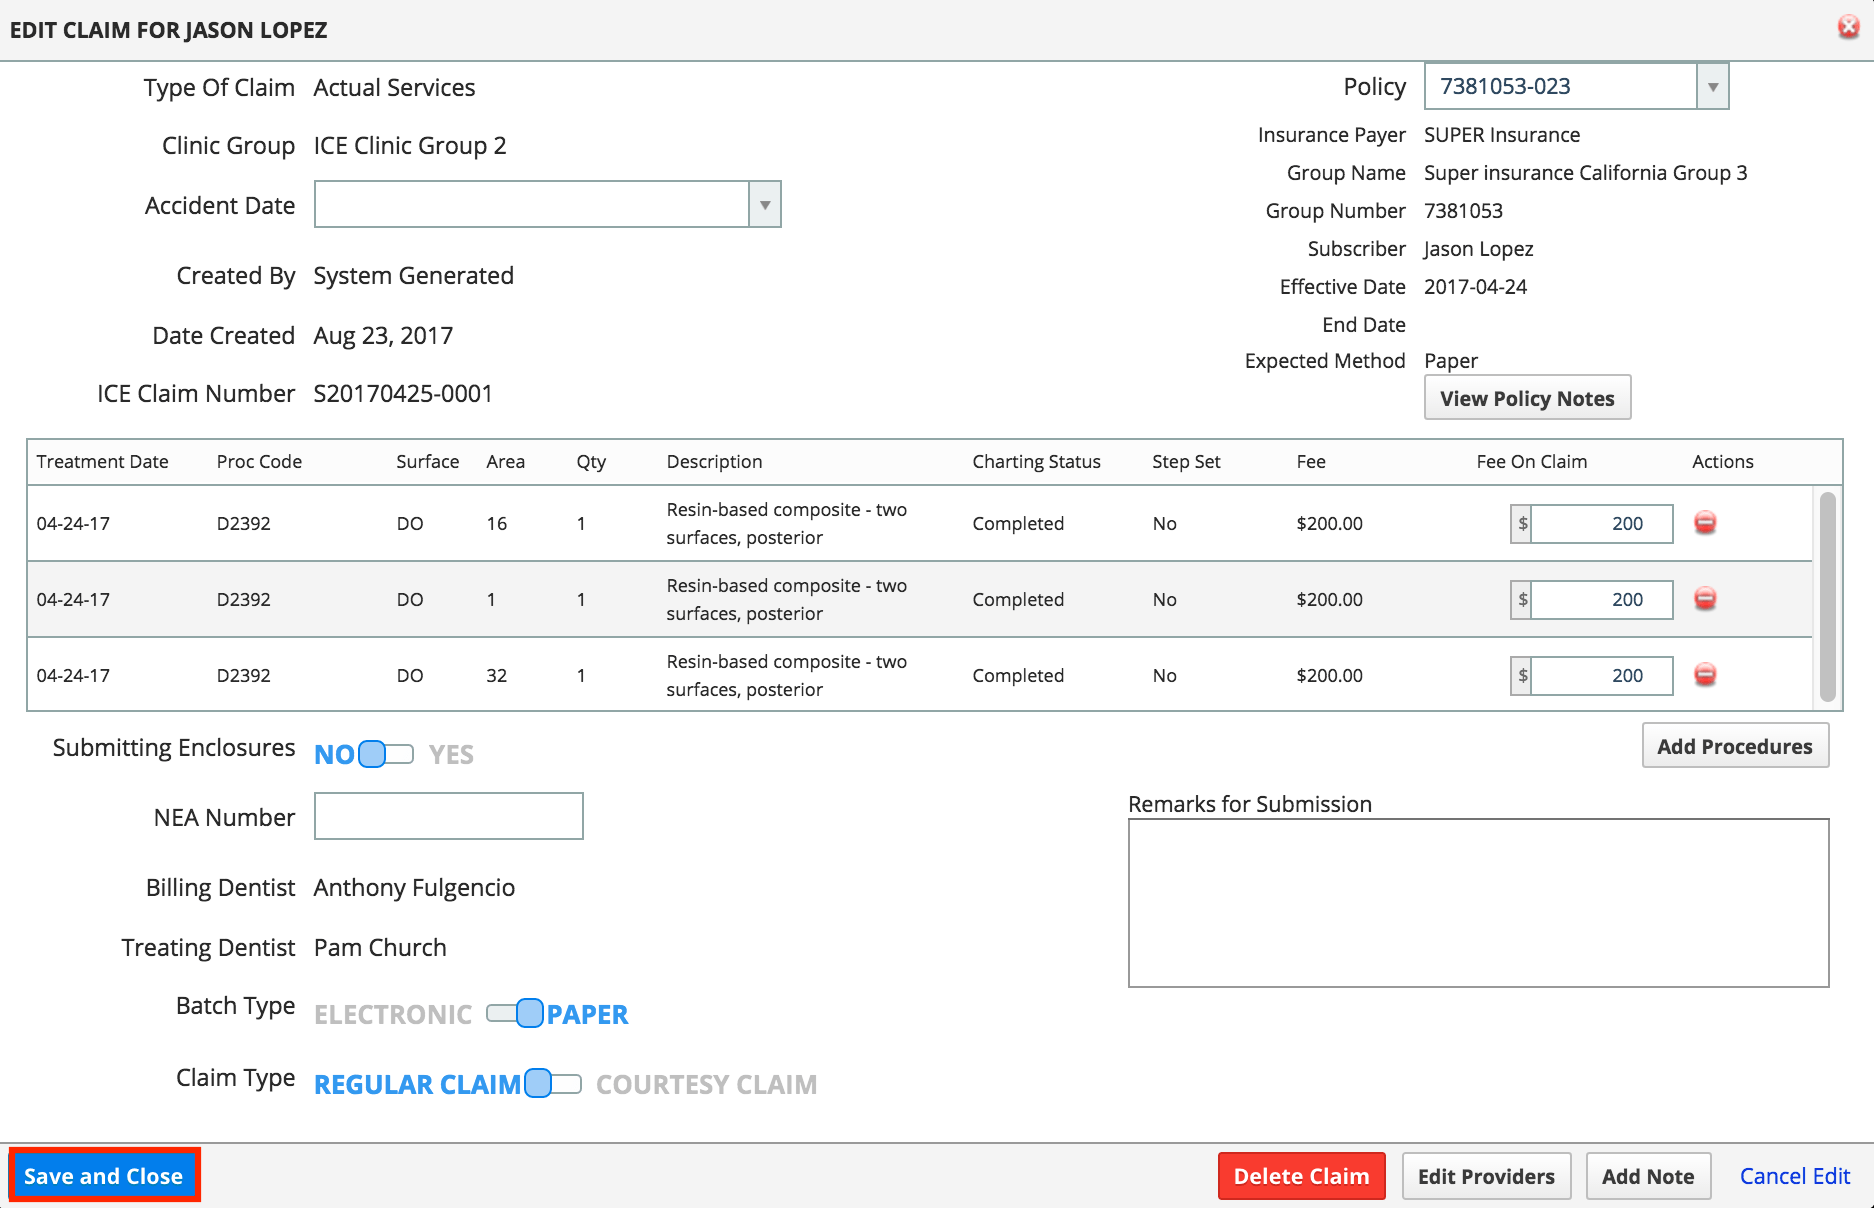
Correct a claim
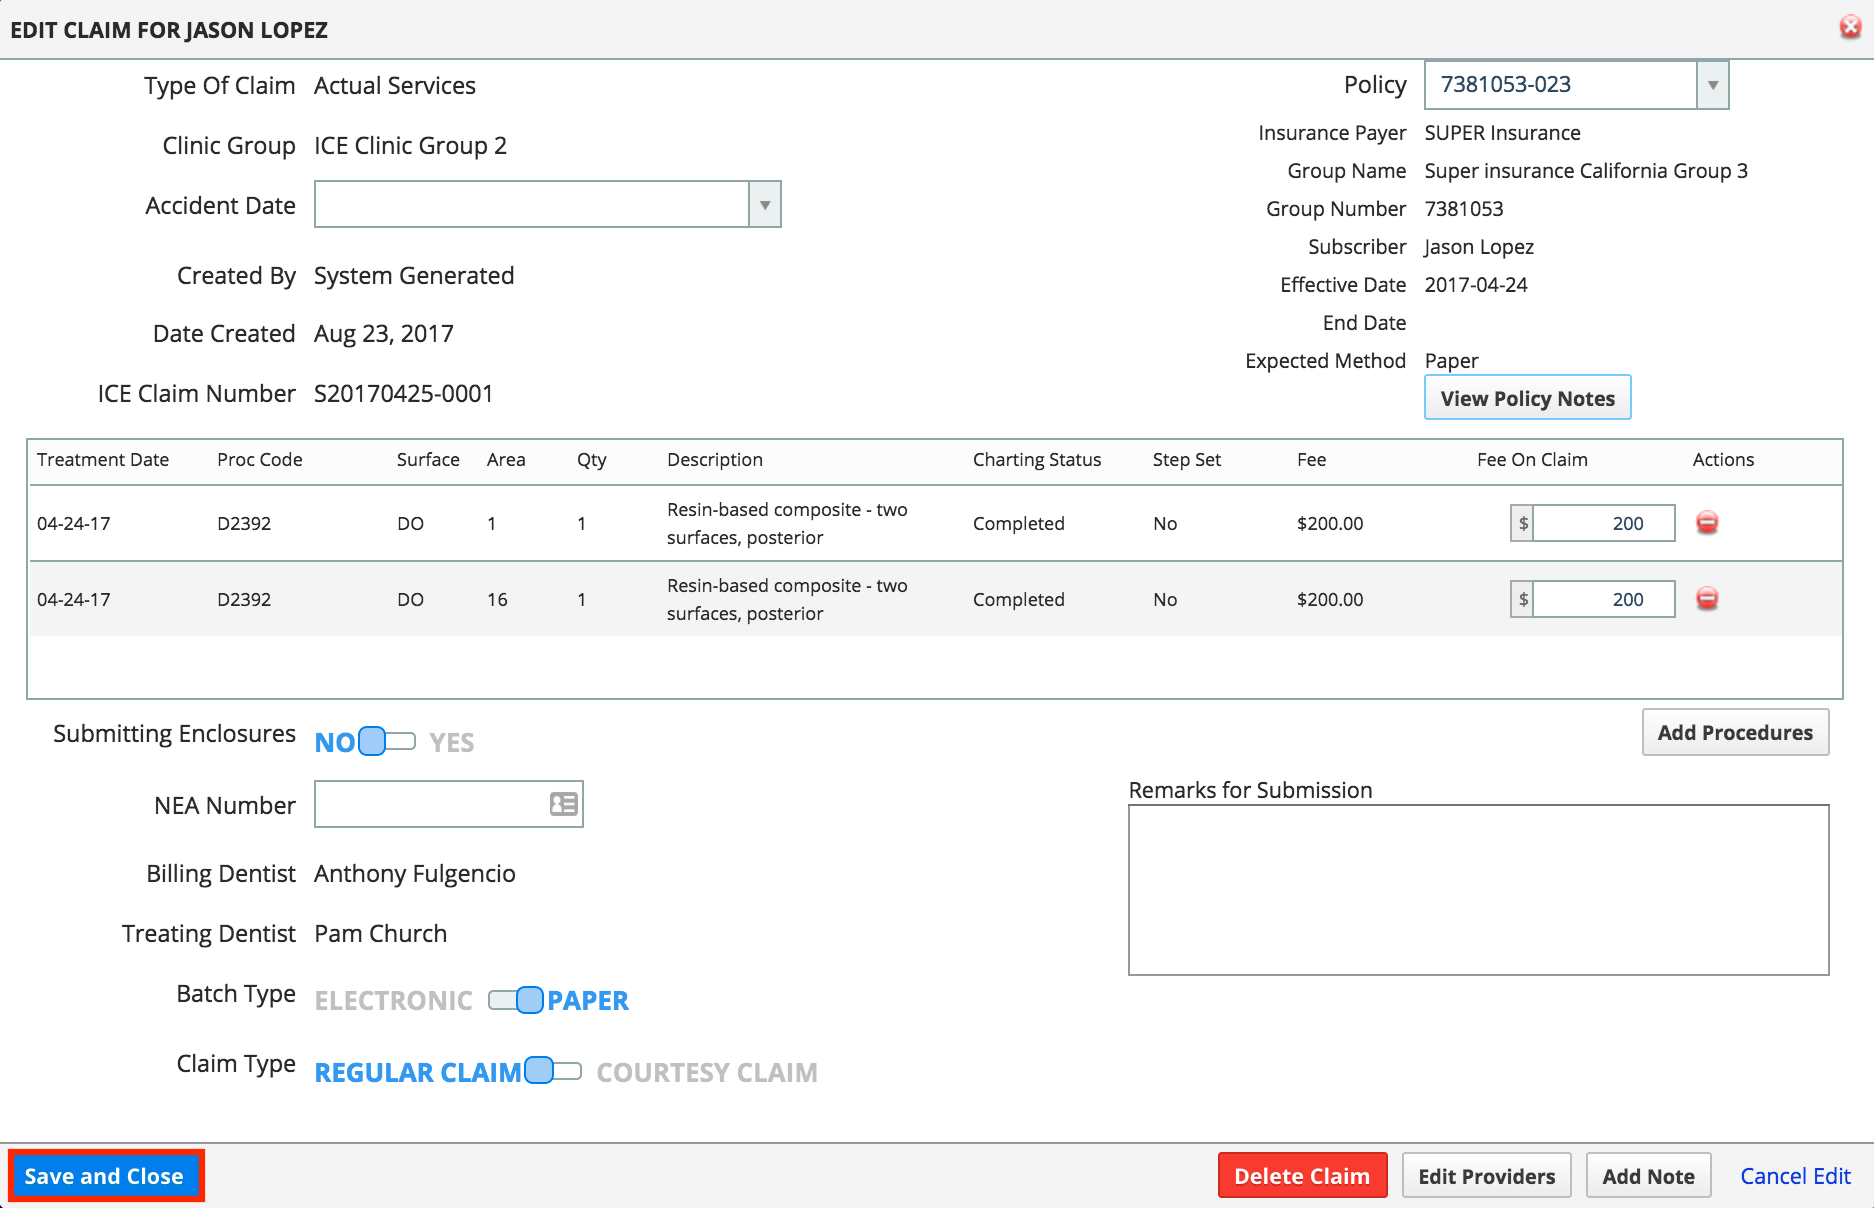
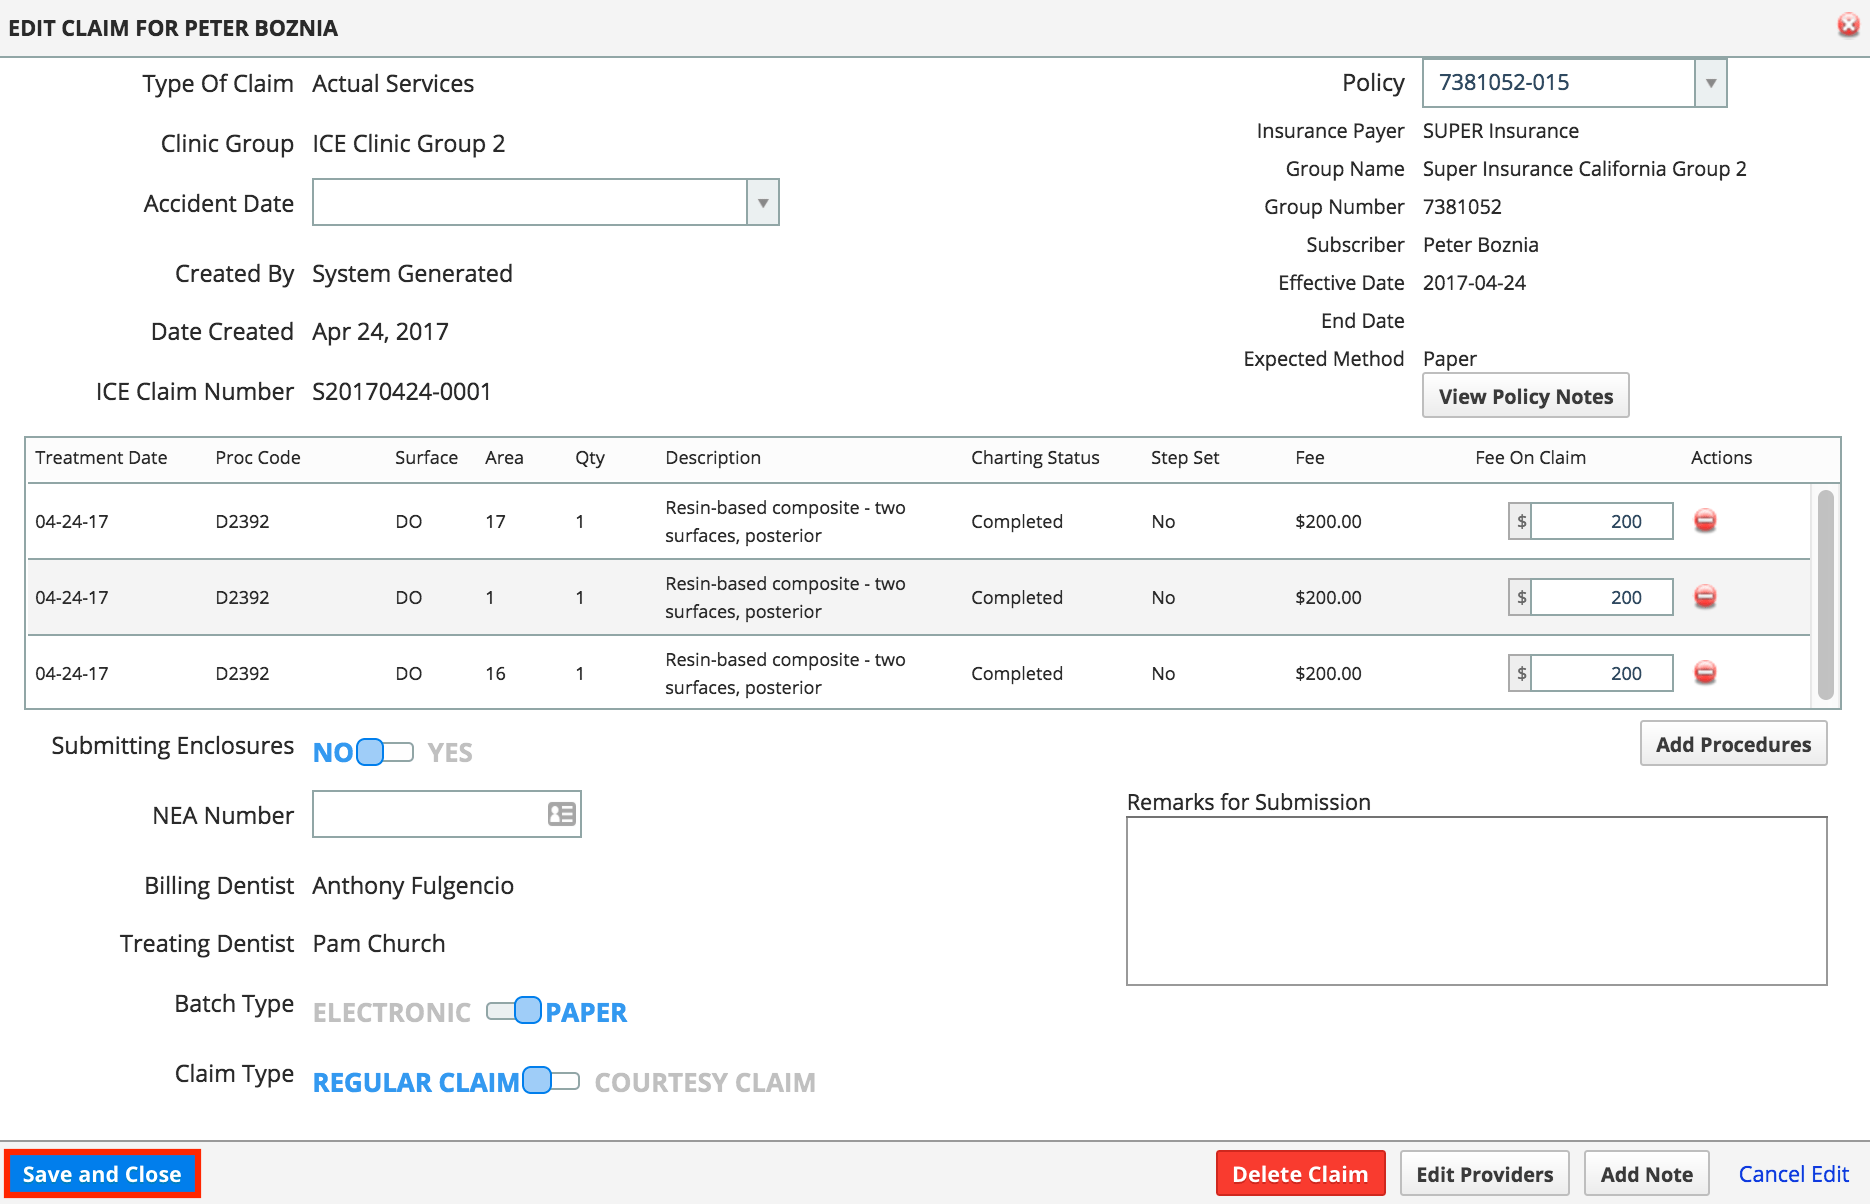
You can edit claims to ensure information is correct, so insurance payers have no issues processing them. Claims can be edited before they are submitted electronically or printed and mailed out.
You can revise information including the claim's policy number, billing and treating providers, or if the claim is meant to be electronic or paper.
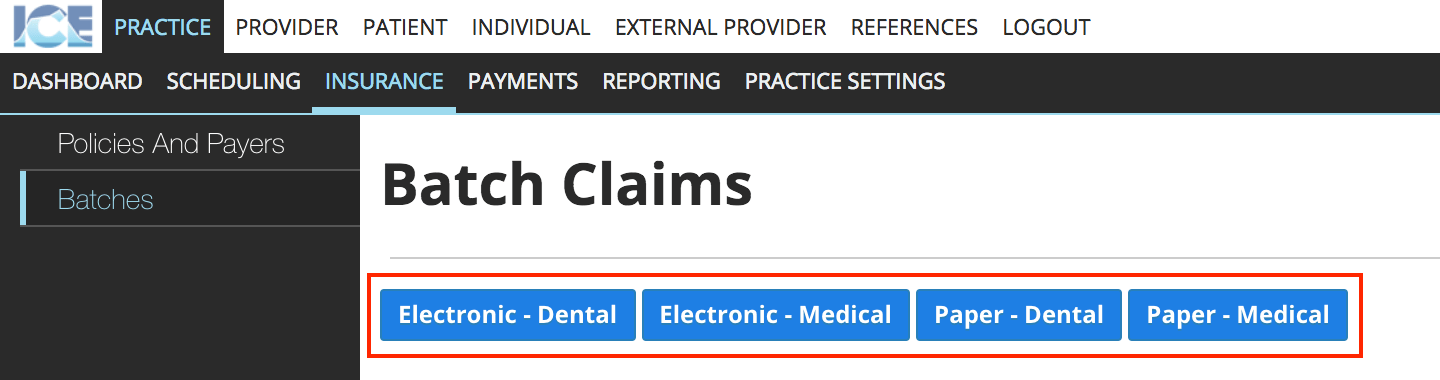
Edit basic details
- Go to Practice > Insurance > Batches
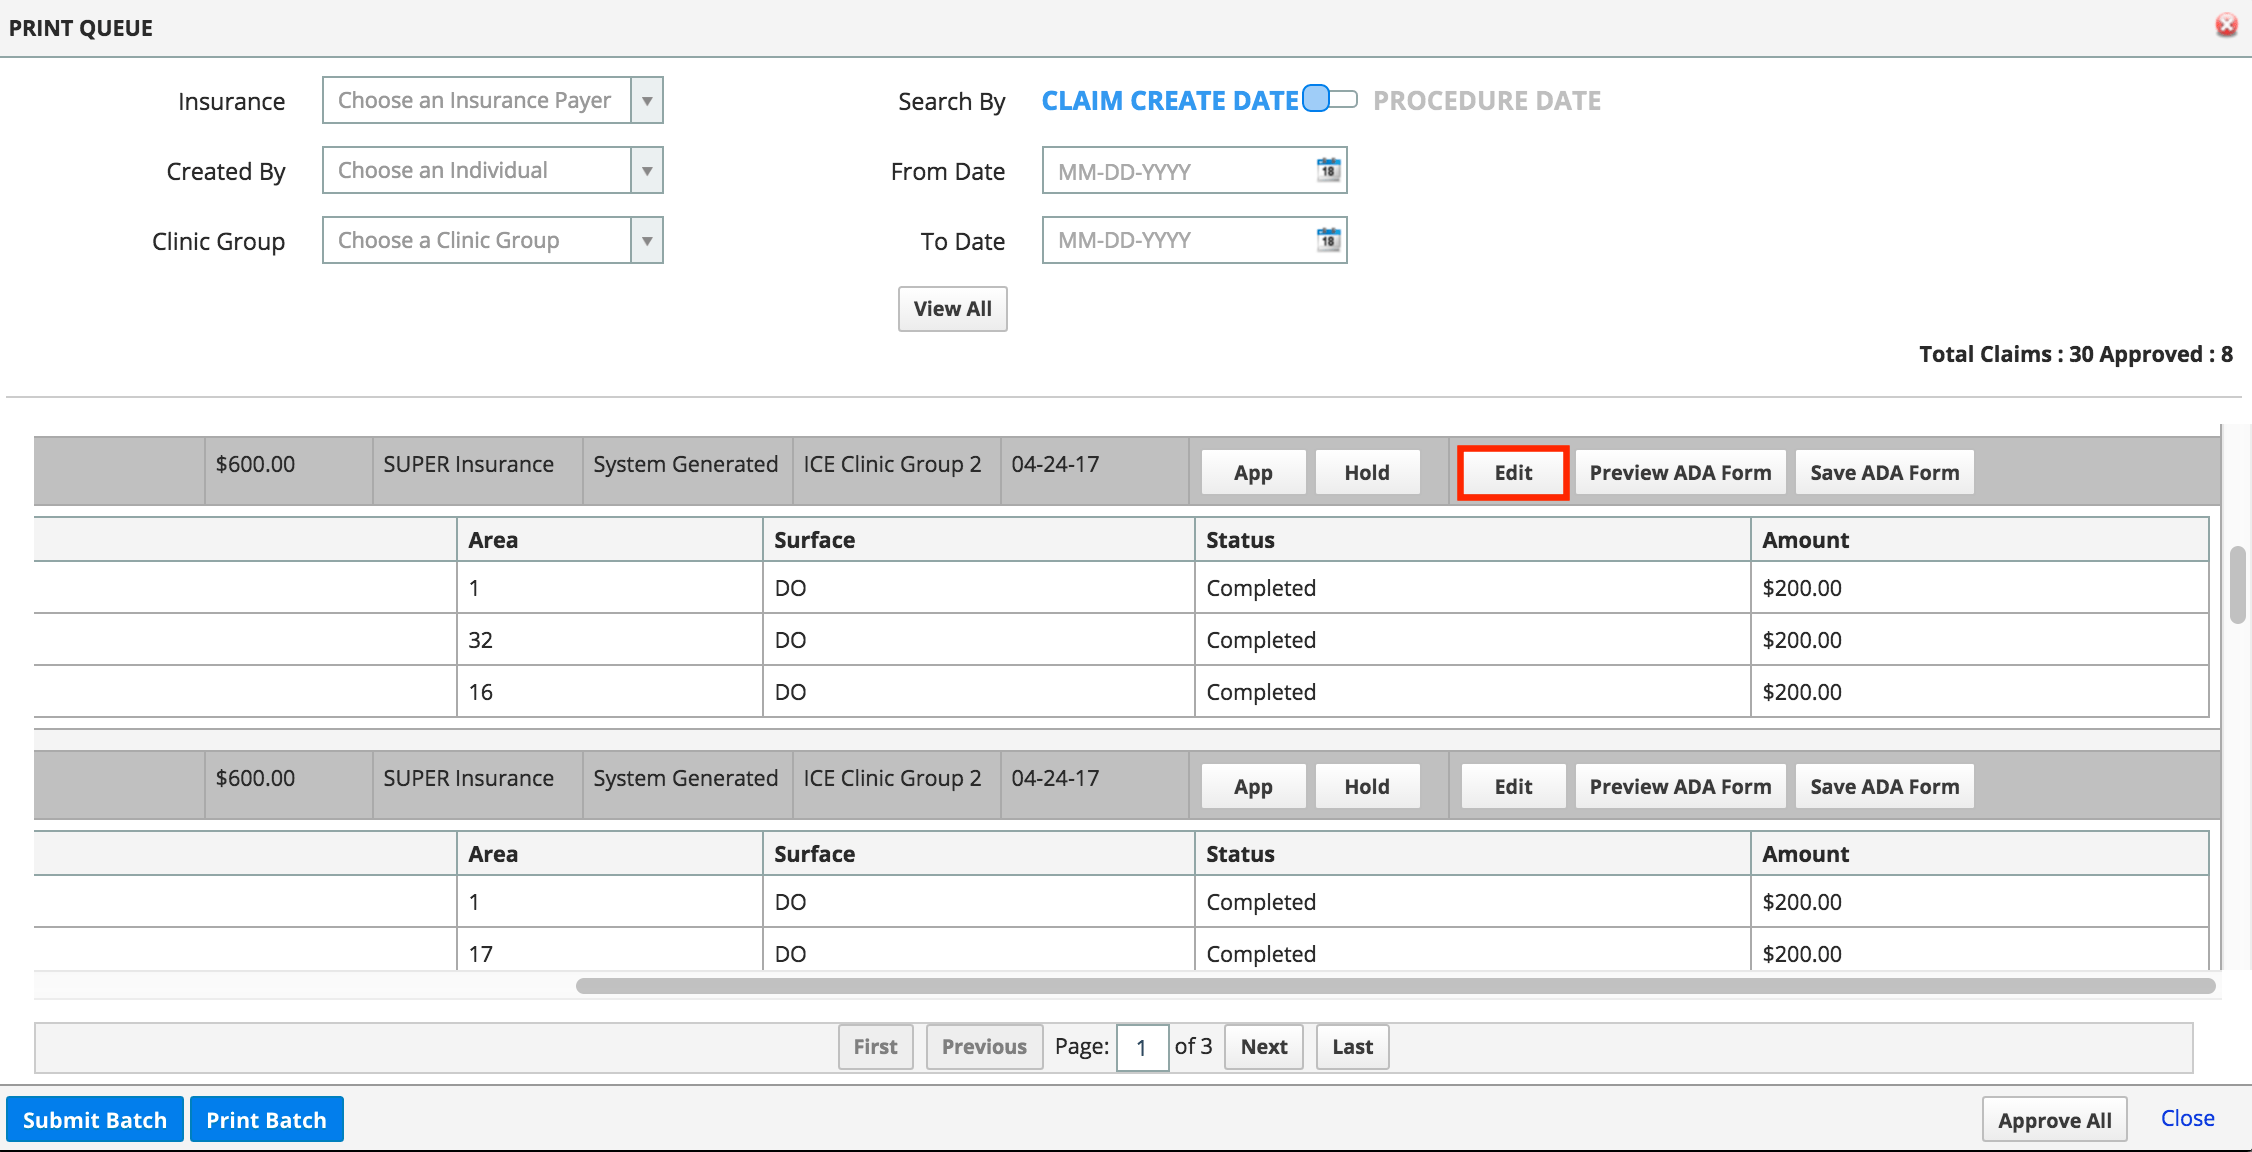
- Select the queue you want to review
- Select Edit beside a claim
- Edit the claim details inside the Edit Claim window:
- The accident date
- Policy Number
- NEA Number
- Fee on claim
- Toggle the Batch Type between Electronic or Paper
- Toggle the Claim Type
- Regular Claim: When insurance pays the clinic directly.
- Courtesy Claim: When patient pays clinic and insurance reimburses the patient.
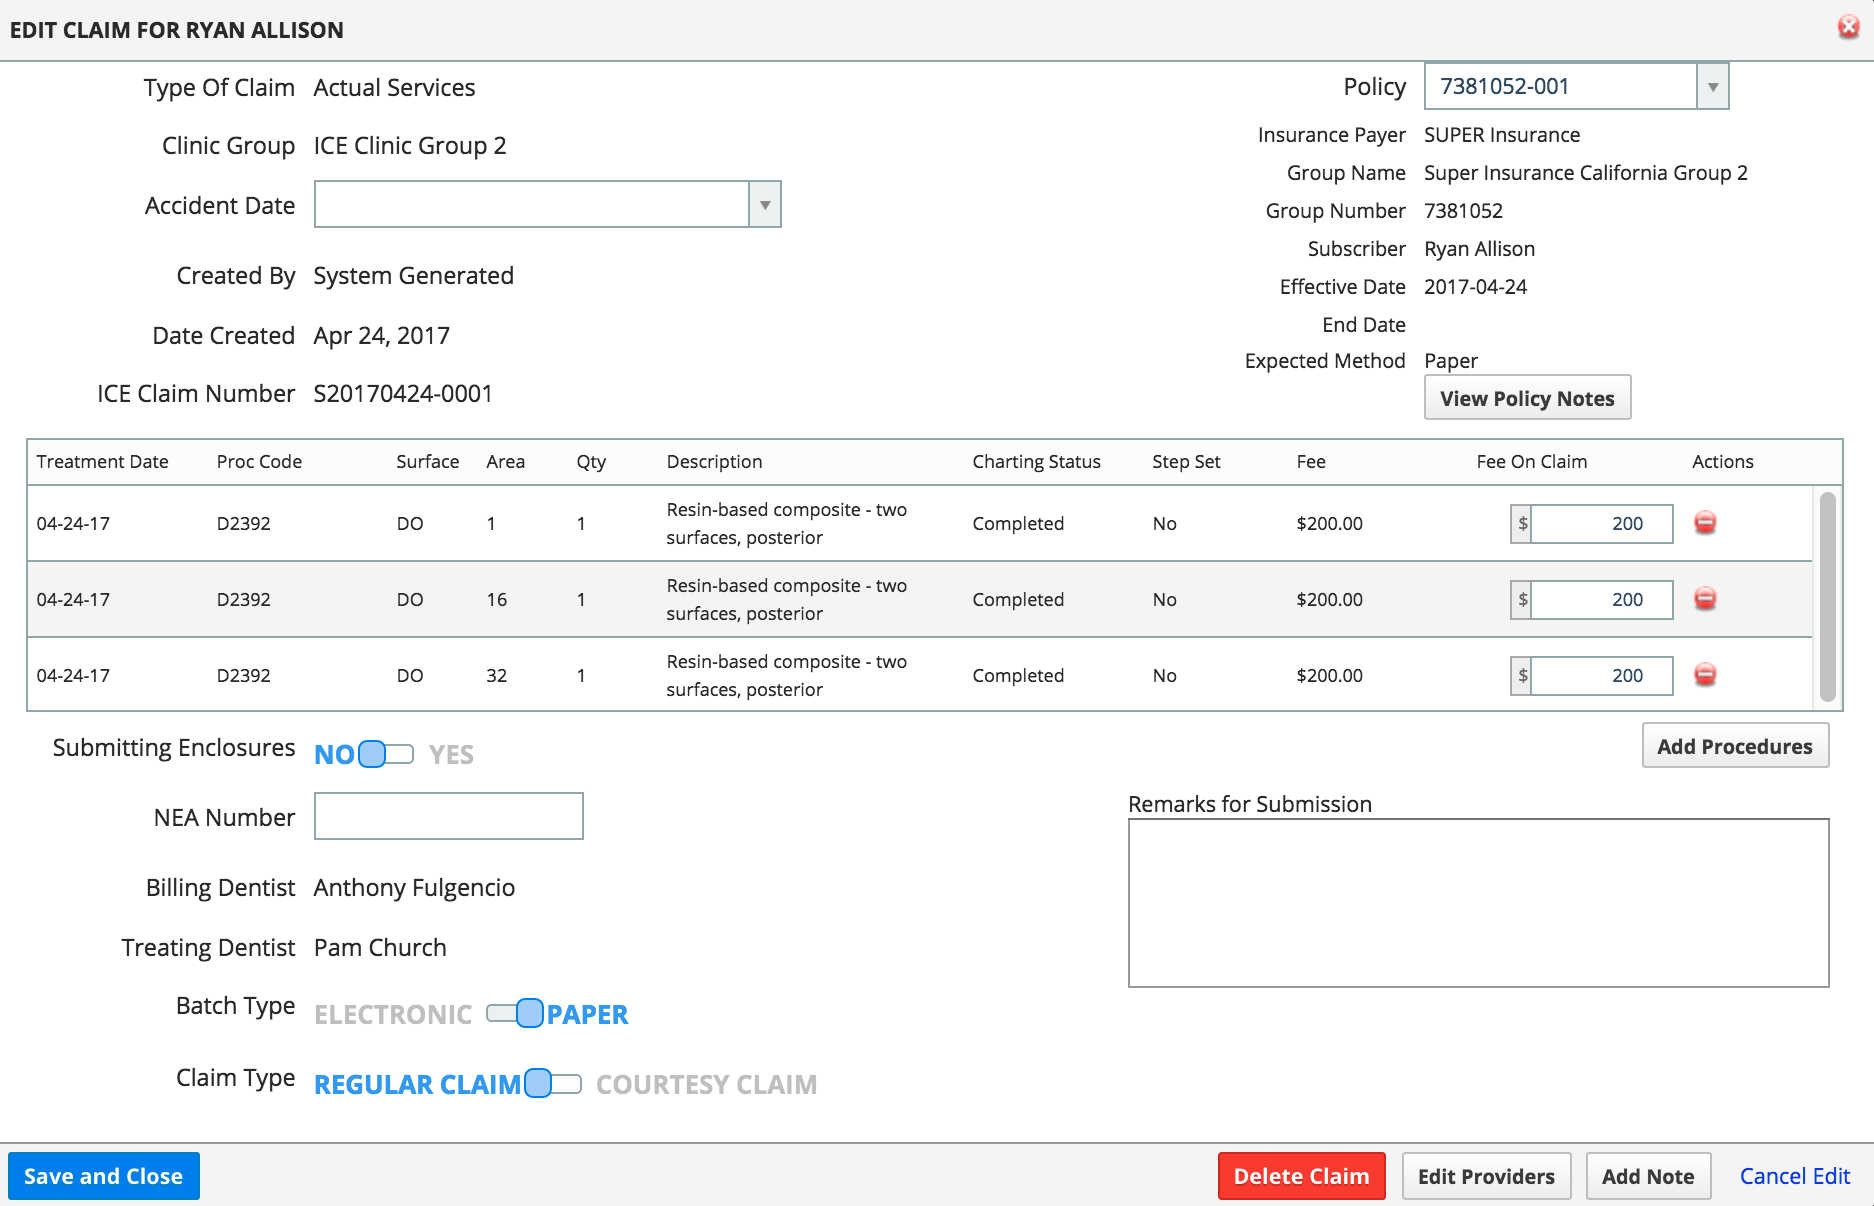
- Select Save and Close from the Edit Claim window
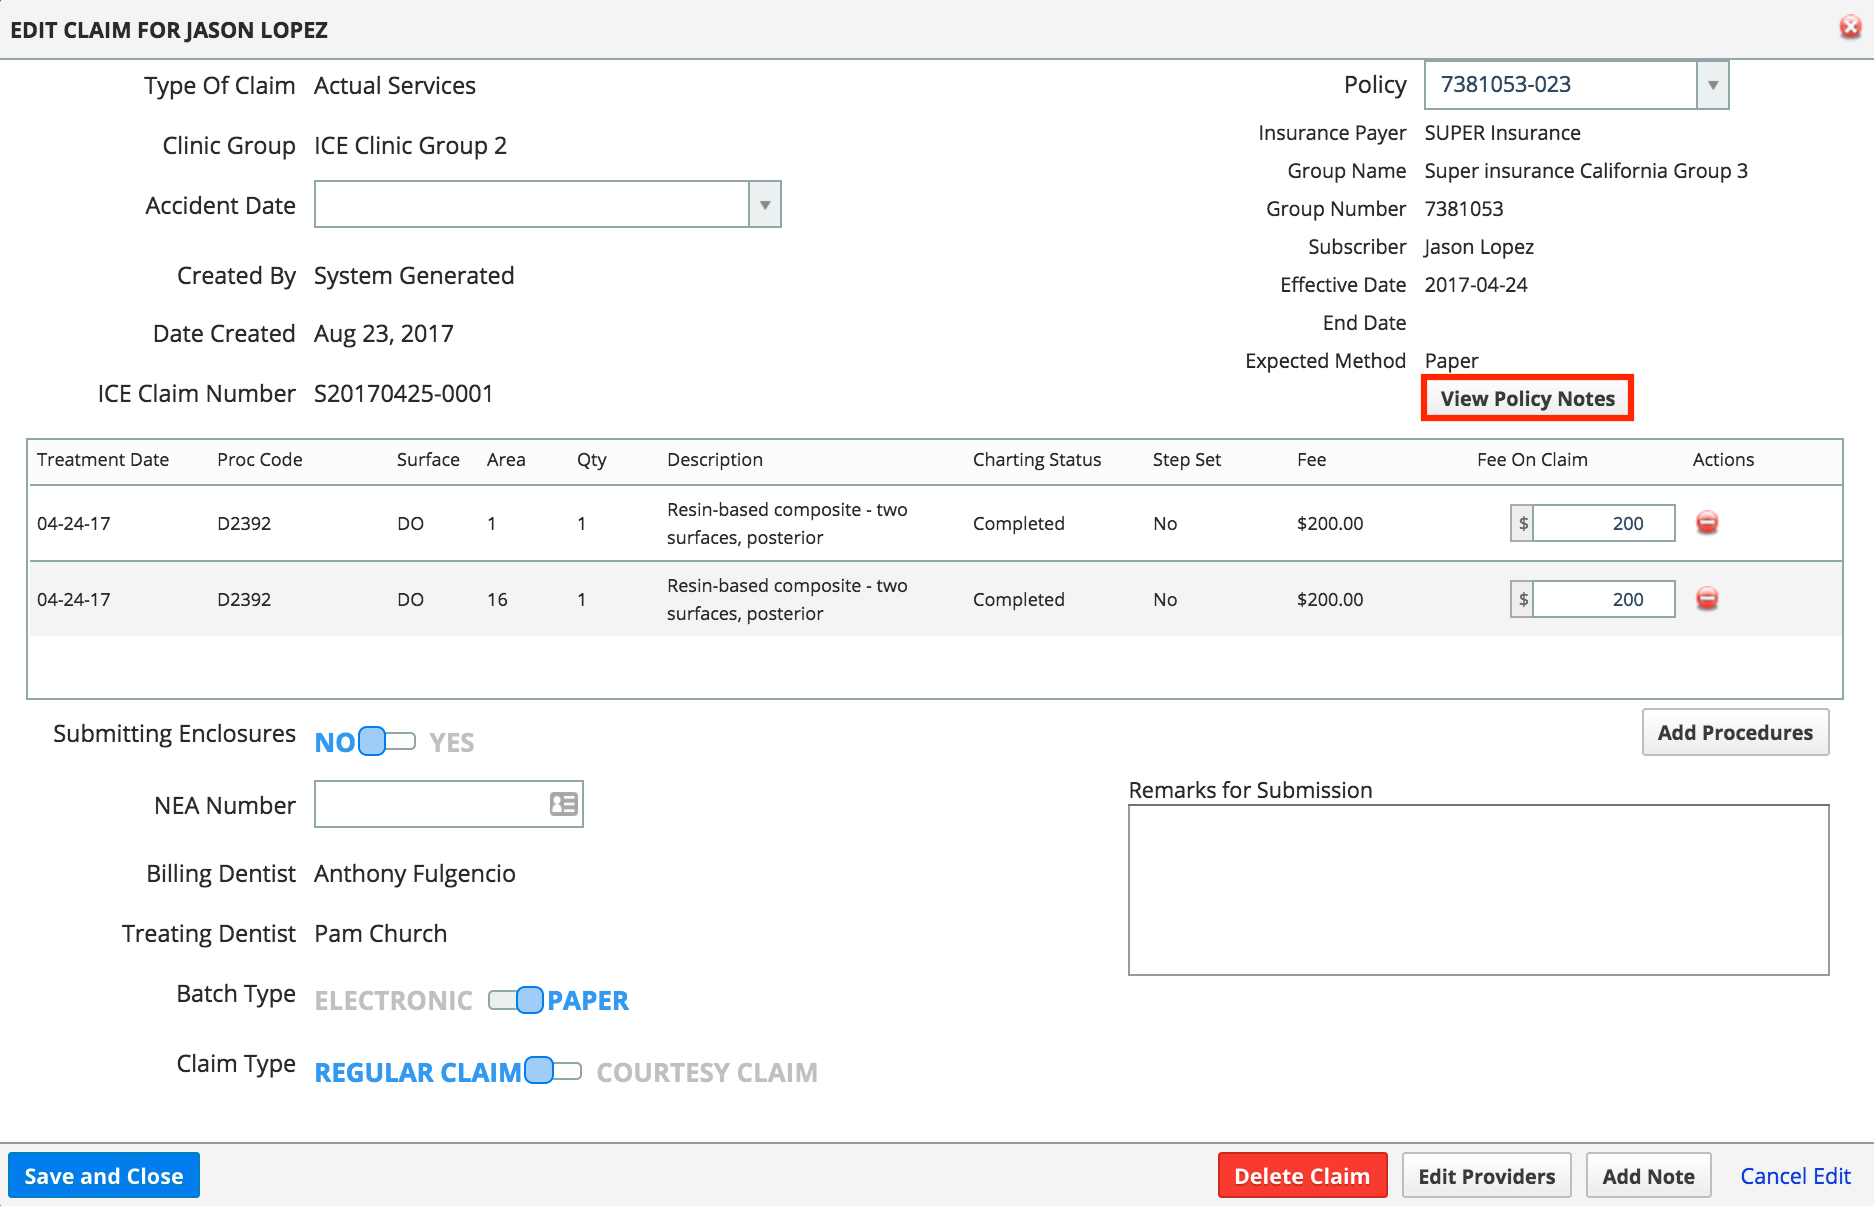
Add and view policy notes on a claim
Policy Notes can be custom notes concerning coverage details, adjustments or charge clarifications in relation to the patient's insurance policy.
- Select View Policy Notes
- Review any existing notes
- Enter your policy notes inside the Add Note field
- Select Save from the Item Notes window
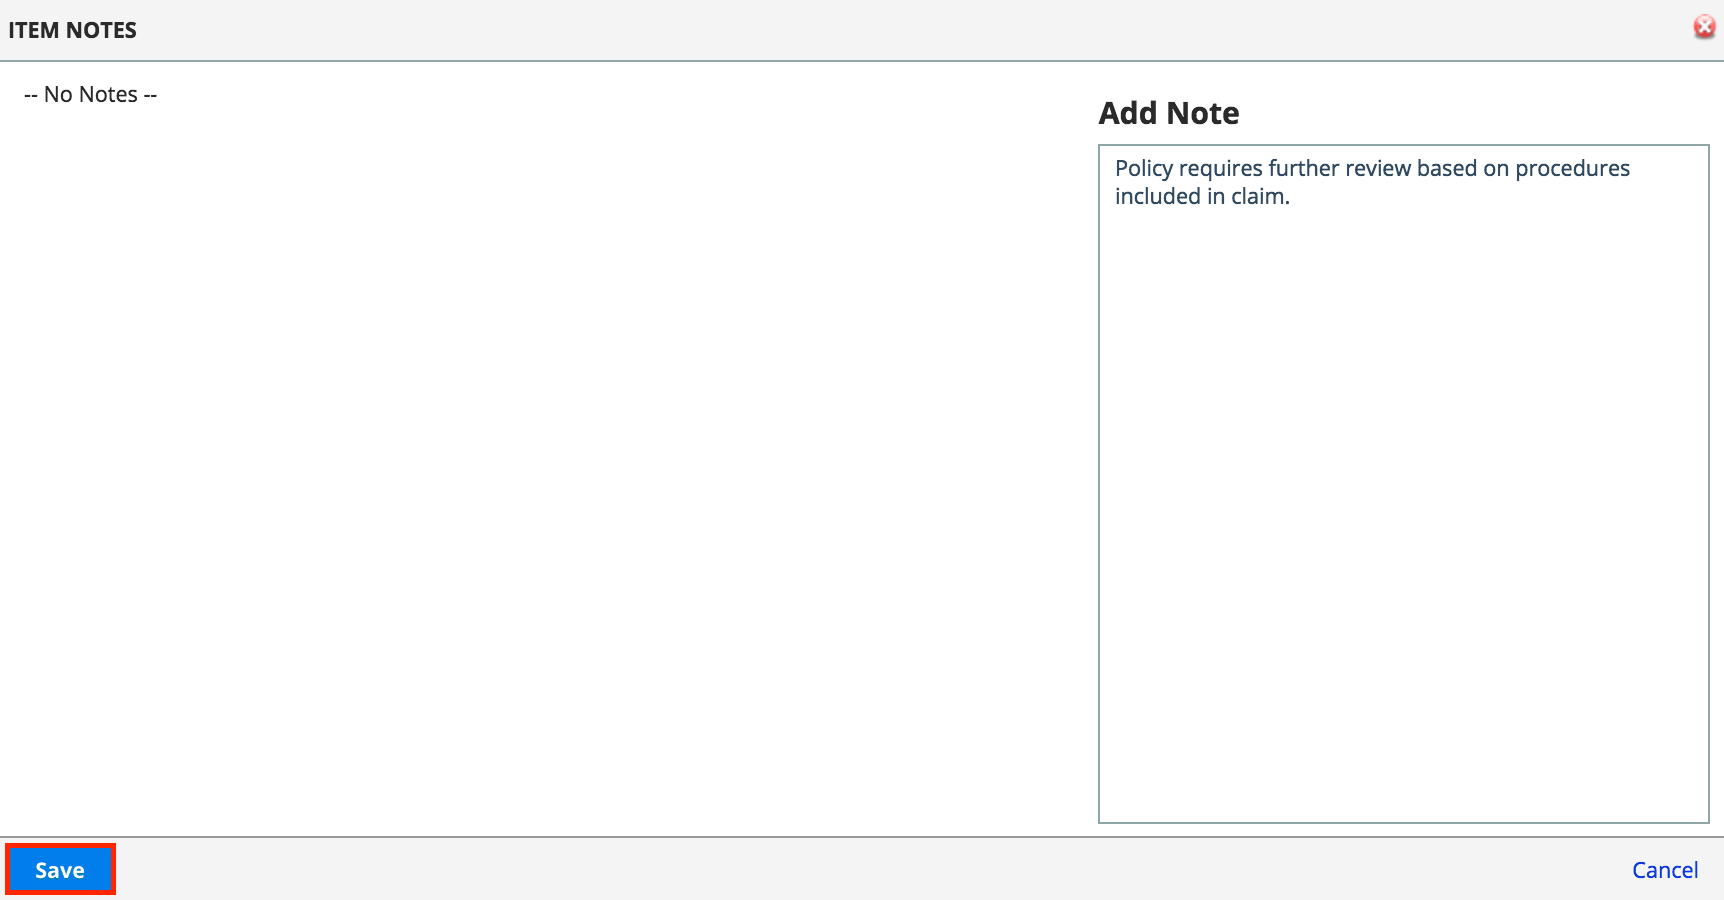
- Select Save and Close from the Edit Claim window
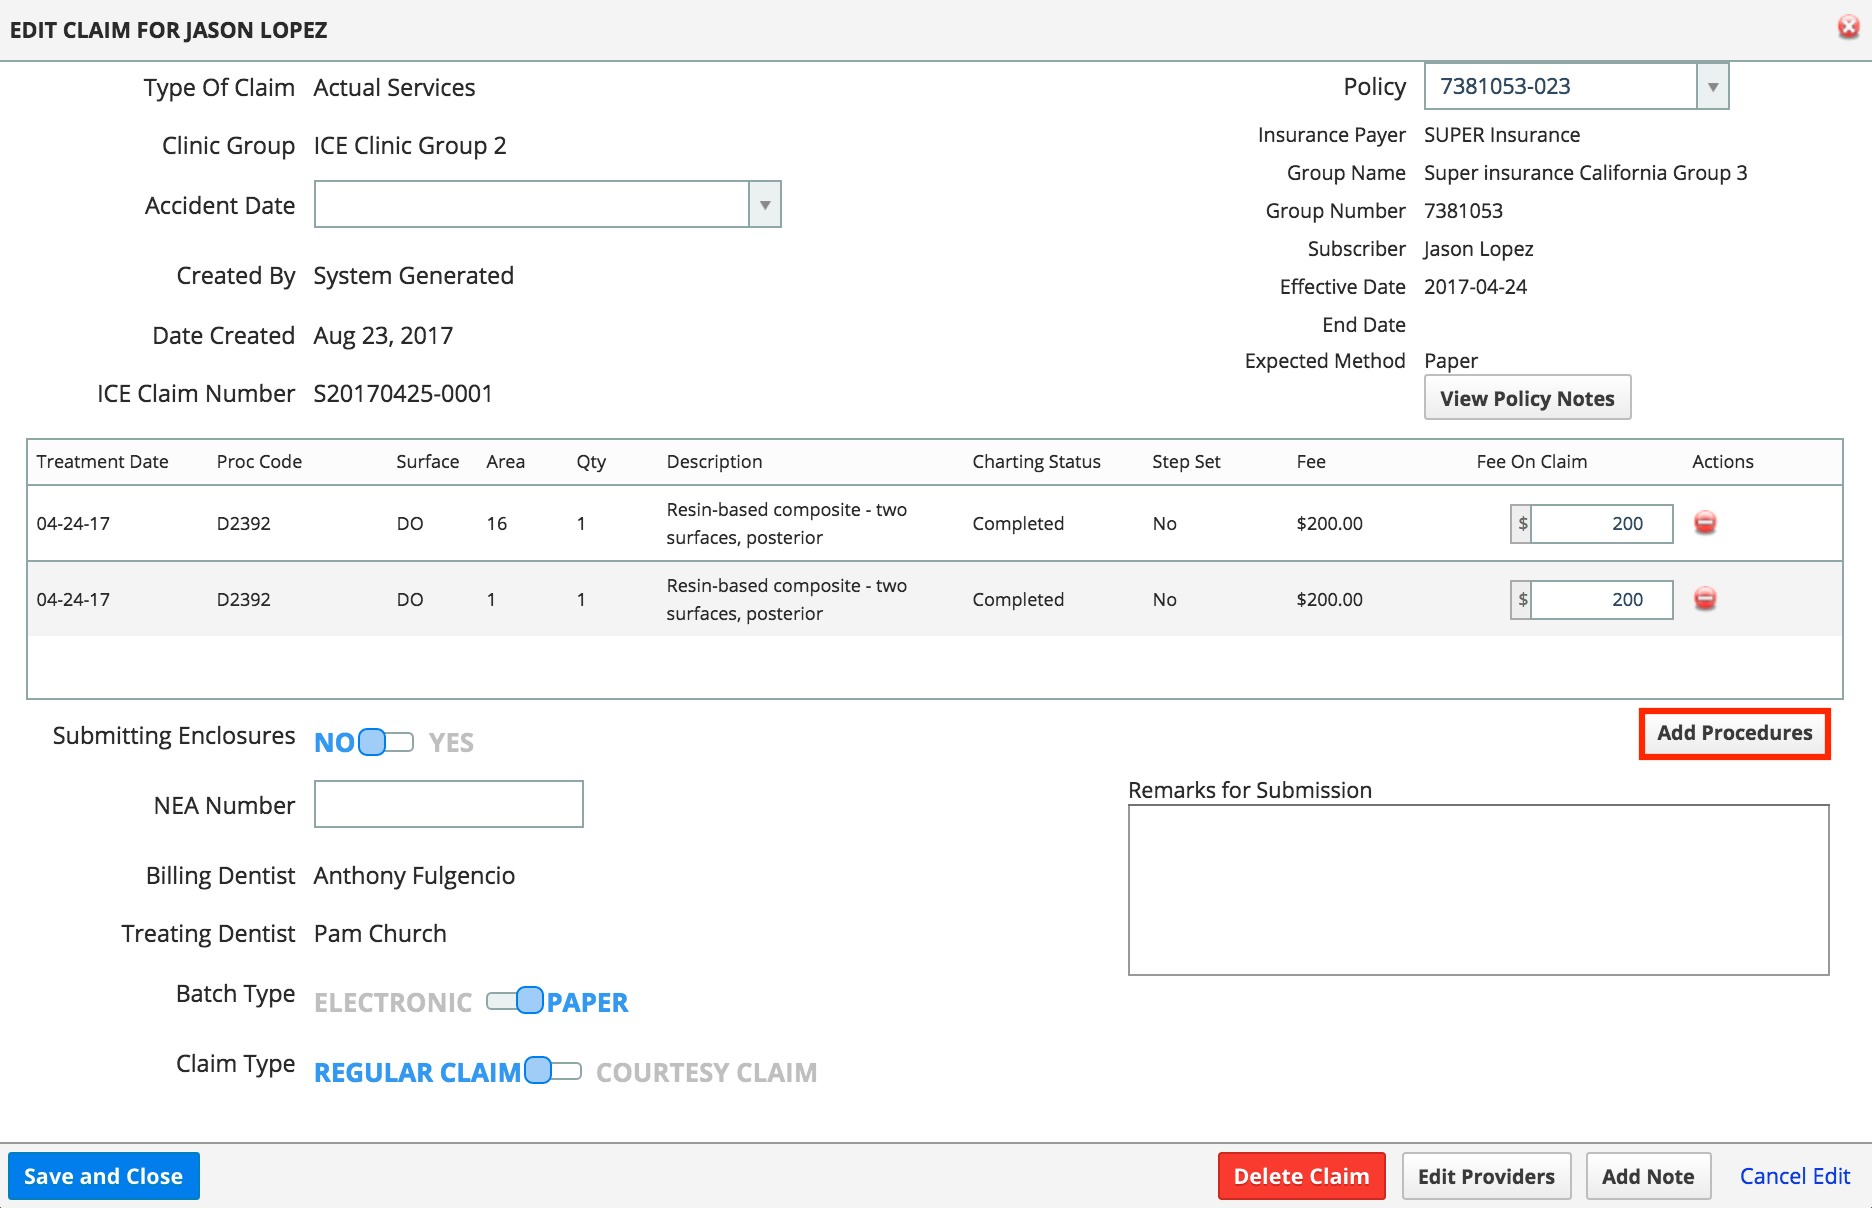
Remove and add procedures to a claim
Procedures can be removed or added to a claim. This may be beneficial in cases where an insurance payer does not cover a specific procedure for a patient or if a procedure was incorrectly added to a claim.
Removing Procedures
- Select
 to the right of a procedure
 - Select Save and Close from the Edit Claim window
Adding Procedures
Procedures can be added to a claim. This is helpful when you want to include procedures after a claim is already generated.
- Select Add Procedures
- Select the checkbox beside the specific procedure
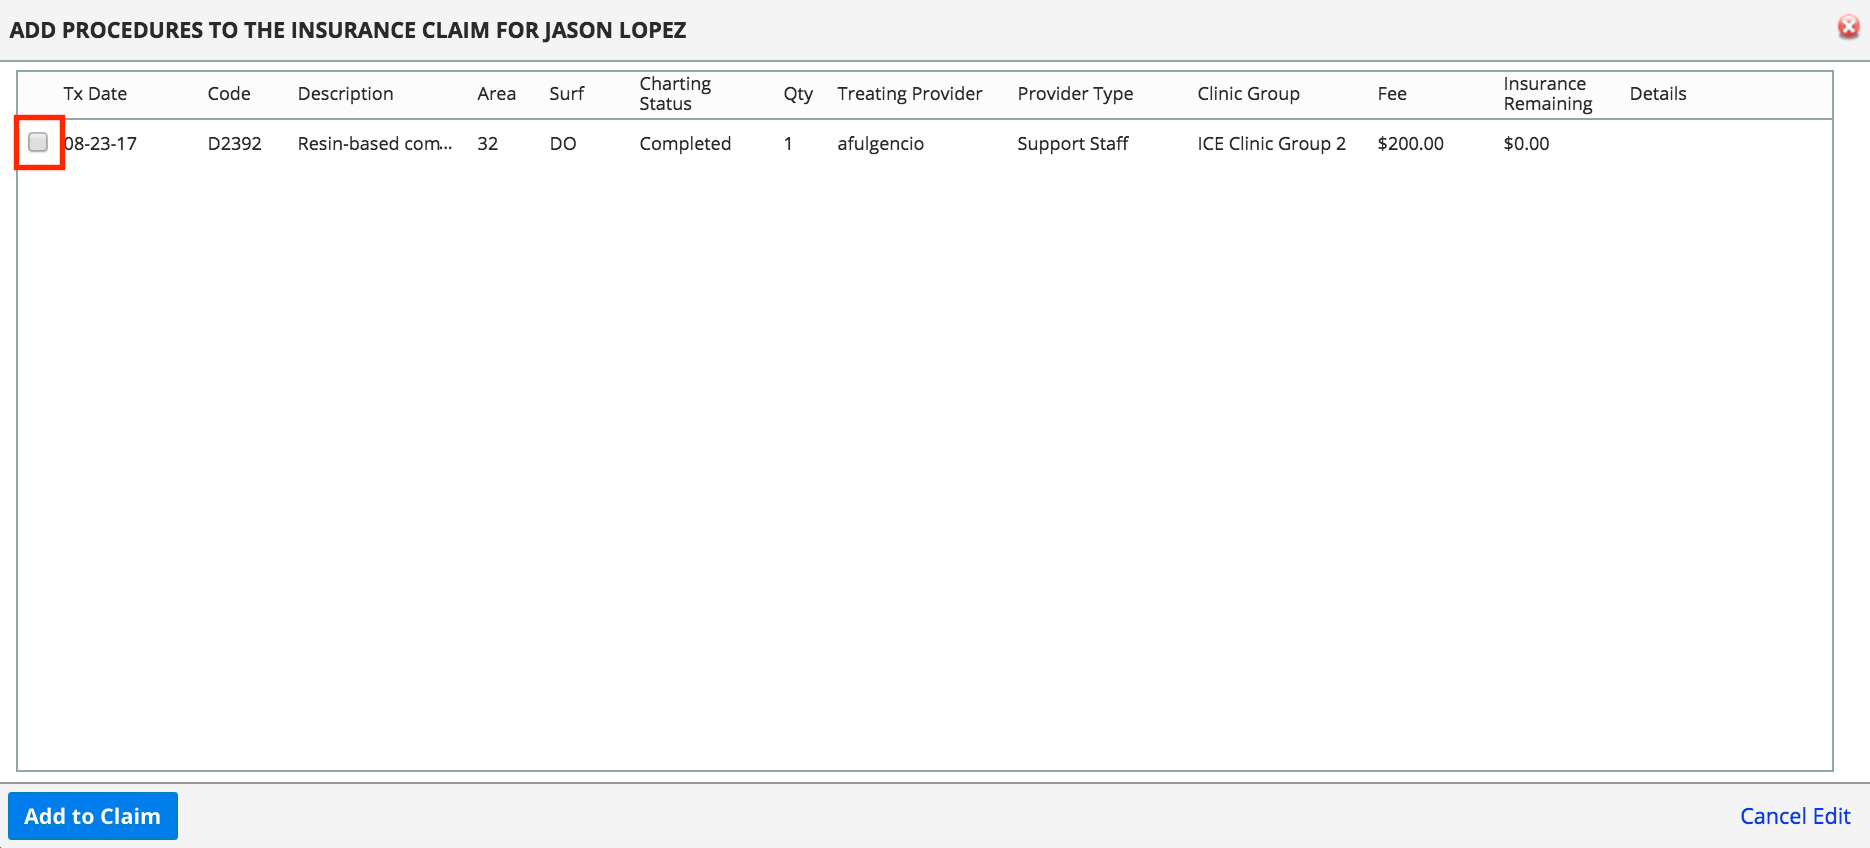
- Select Add to Claim from the Add Procedures to the Insurance Claim window
- Select Save and Close from the Edit Claim window
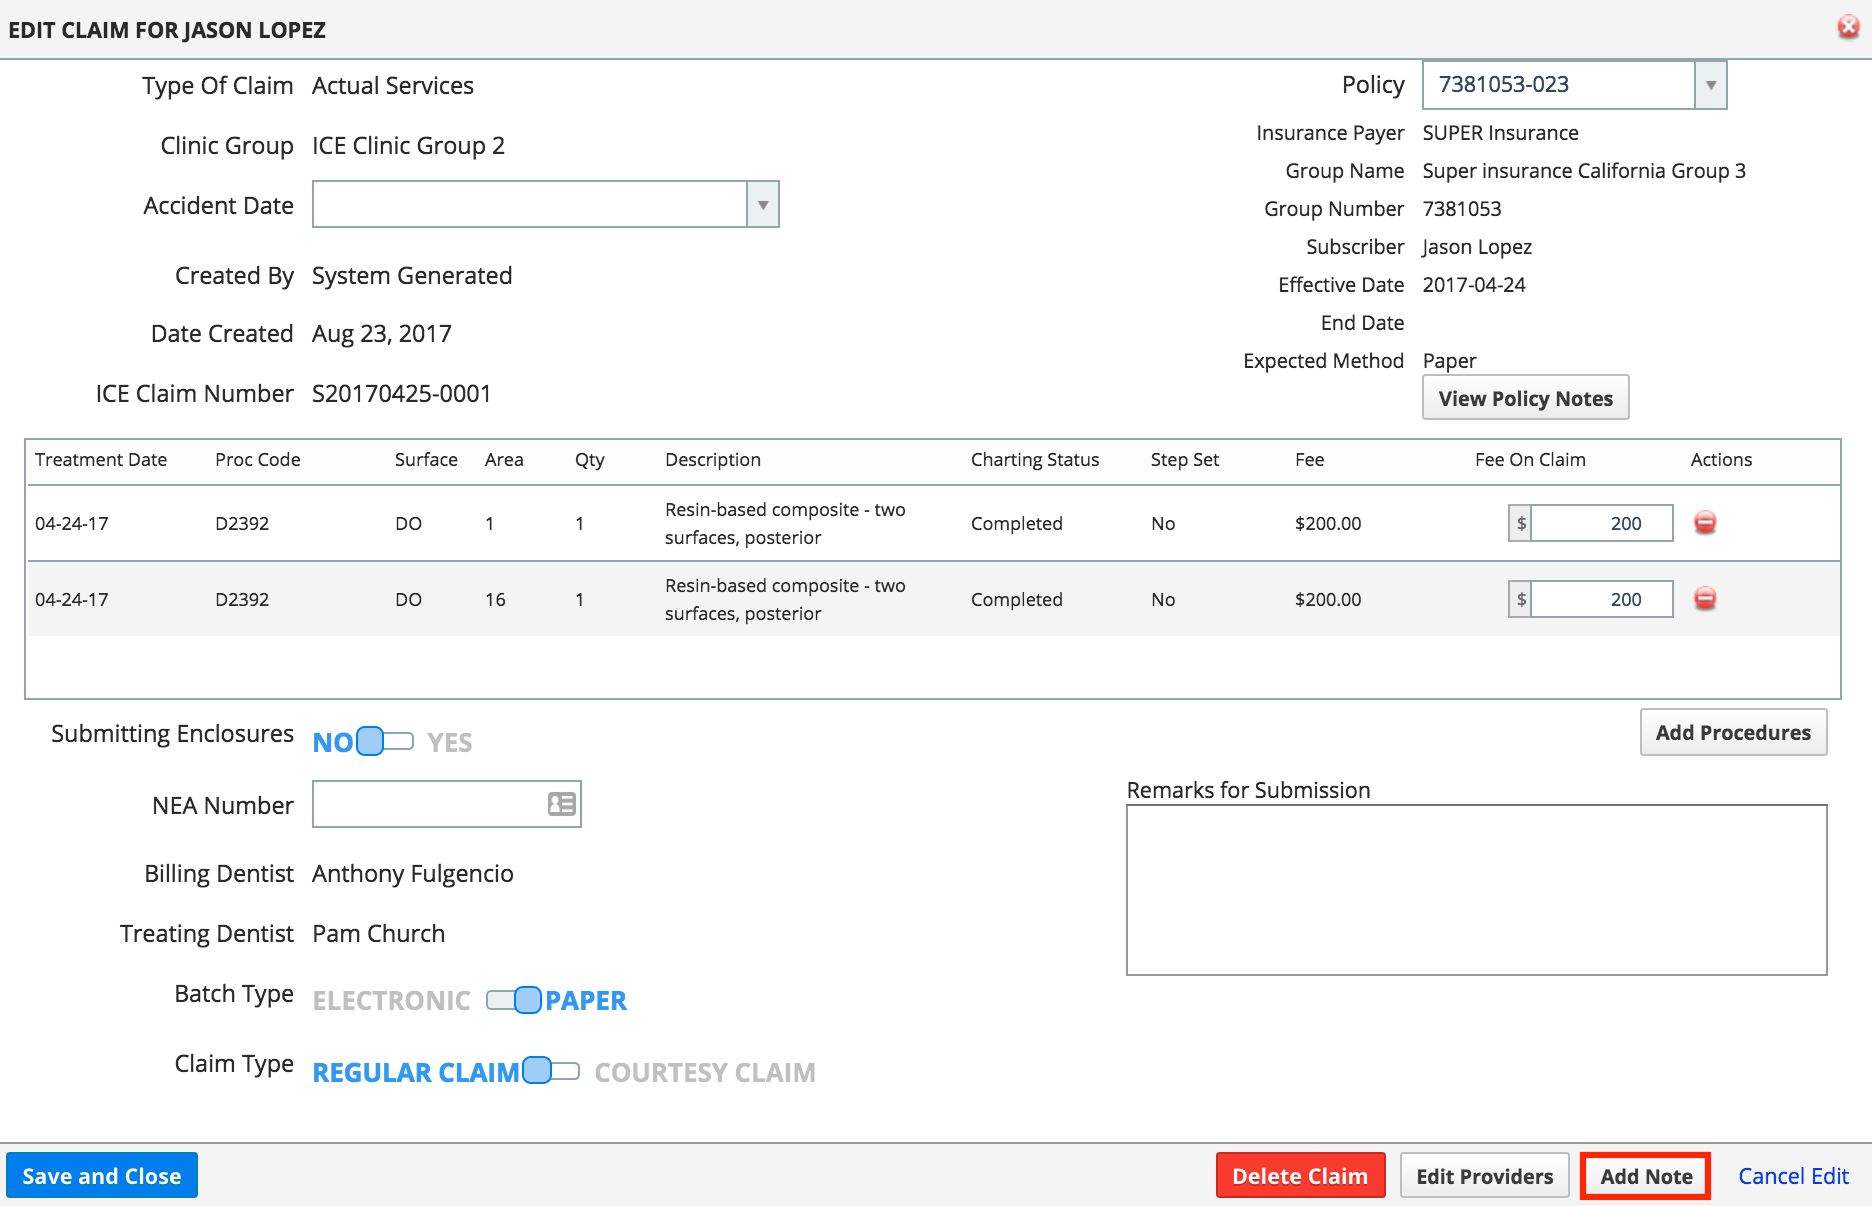
Add notes to a claim
Notes can be added to a claim. These can include details about the claim that are not related to the insurance policy.
- Select Add Note
- Enter notes inside the Add Note field
- Select Save from the Item Notes window
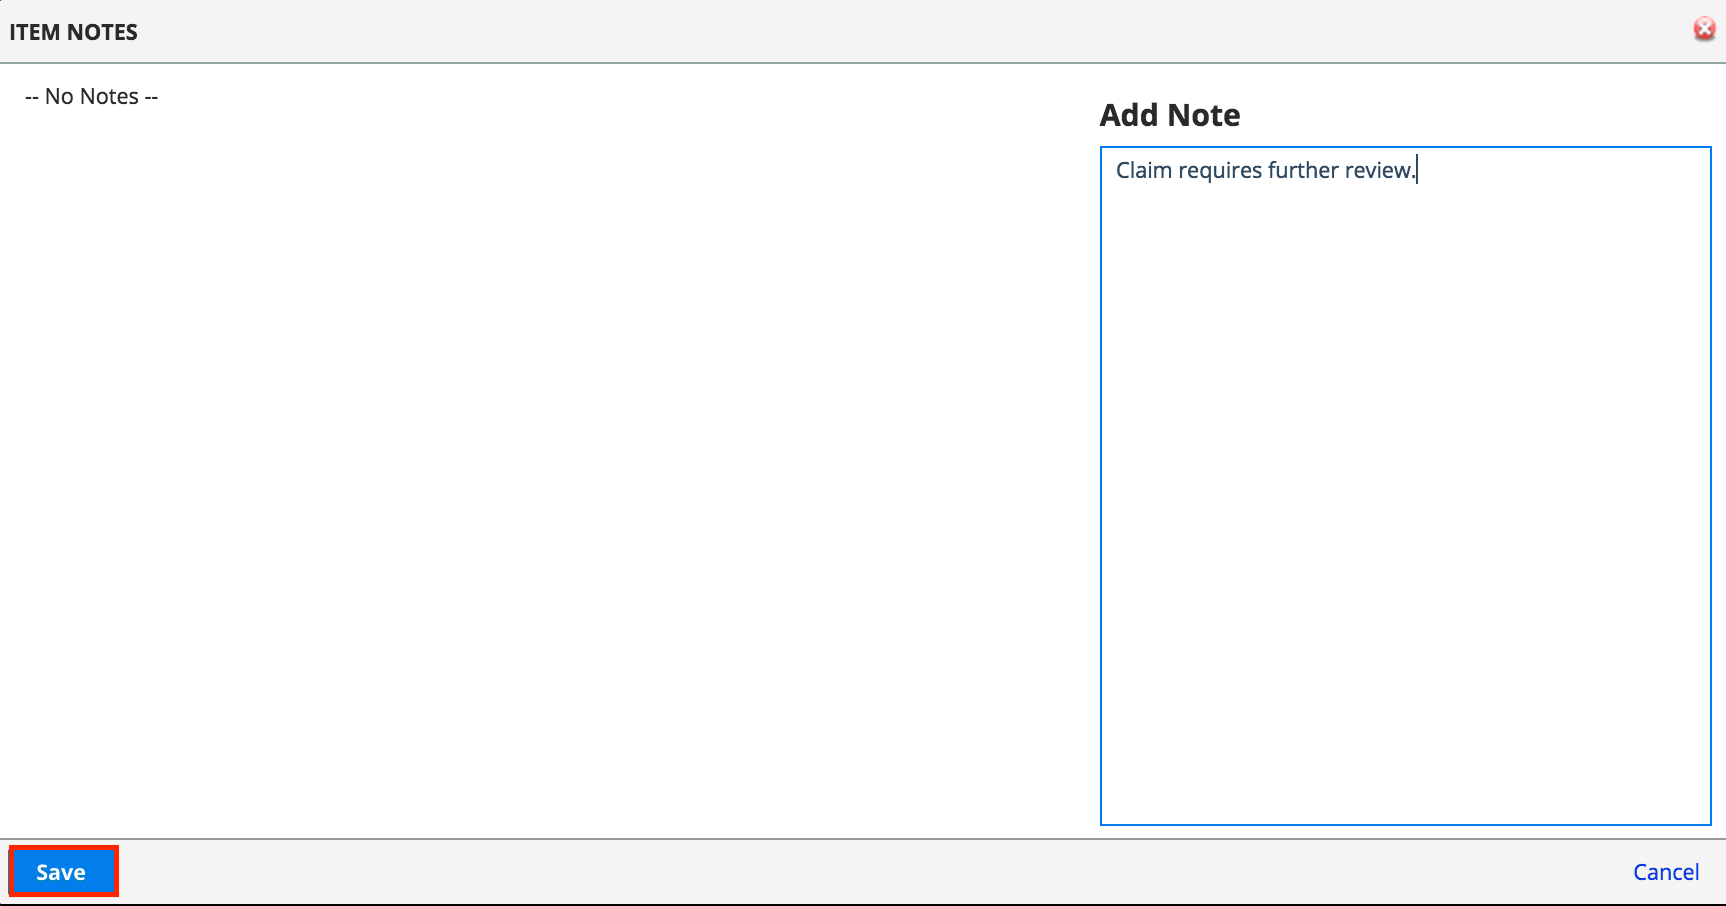
- Select Save and Close from the Edit Claim window

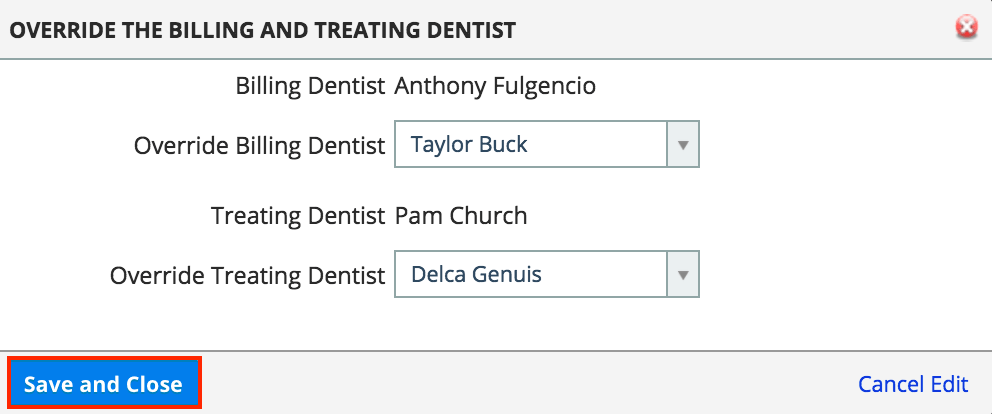
Edit the billing and treating dentists
Billing and treating dentists can be changed before a claim is submitted. This can be helpful when claims have the incorrect provider selected, and the insurance requires a specific billing or treating provider listed to process claims.
- Select Edit Providers
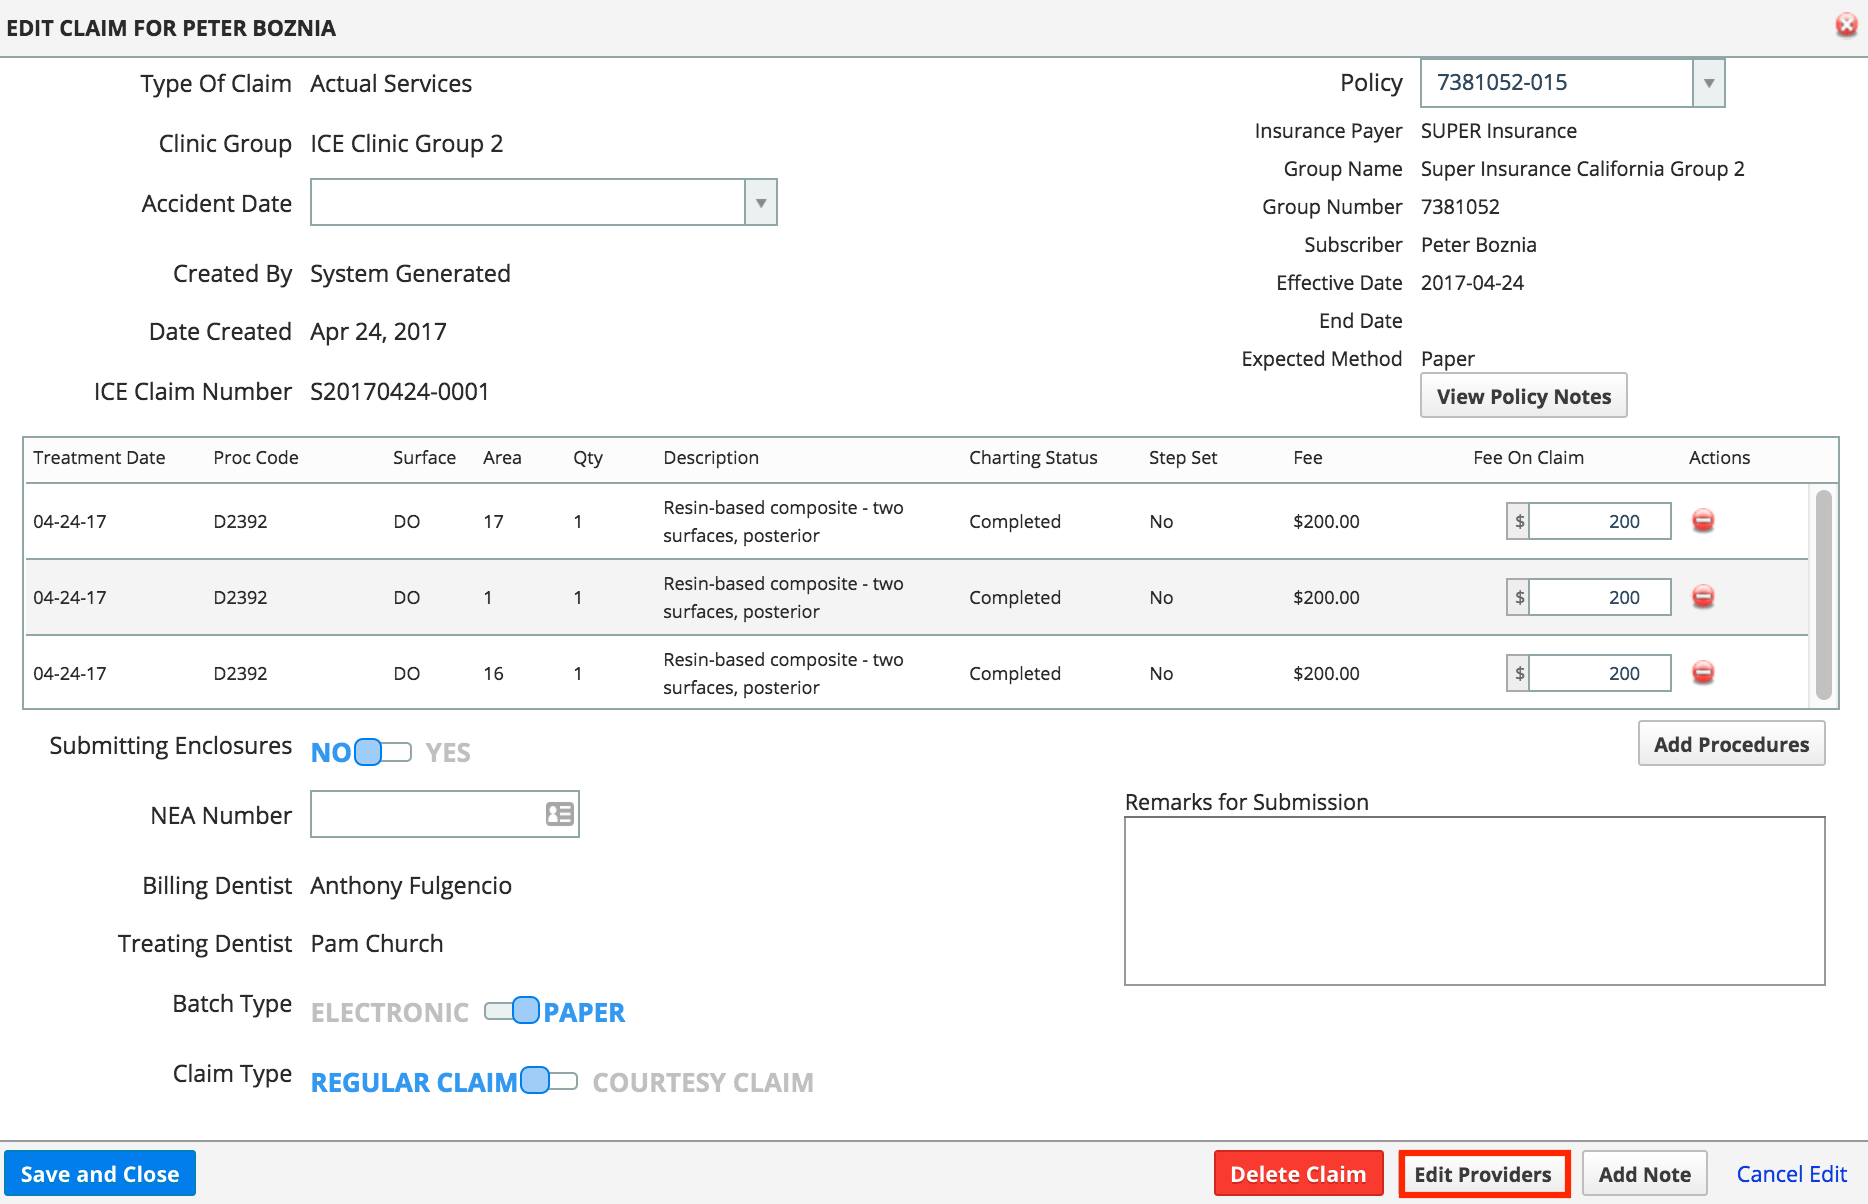
- Choose a billing dentist from the Override Billing Dentist drop-down menu
- Choose a treating dentist from the Override Treating Dentist drop-down menu
- Select Save and Close from the Override The Billing and Treating Dentist window
- Select Save and Close from the Edit Claim window
Re-order diagnostic pointers for a claim
If a claim is denied because of the order of the diagnostic pointers or ICD codes, you can adjust the order they appear on the claim and then re-submit it.
- Go to Patient > Charting and find the General Procedure List panel
- Find the relevant procedure code entry in the General Procedure List
- Select
 to the left of that entry in the list
 - Select Diagnostic Pointers
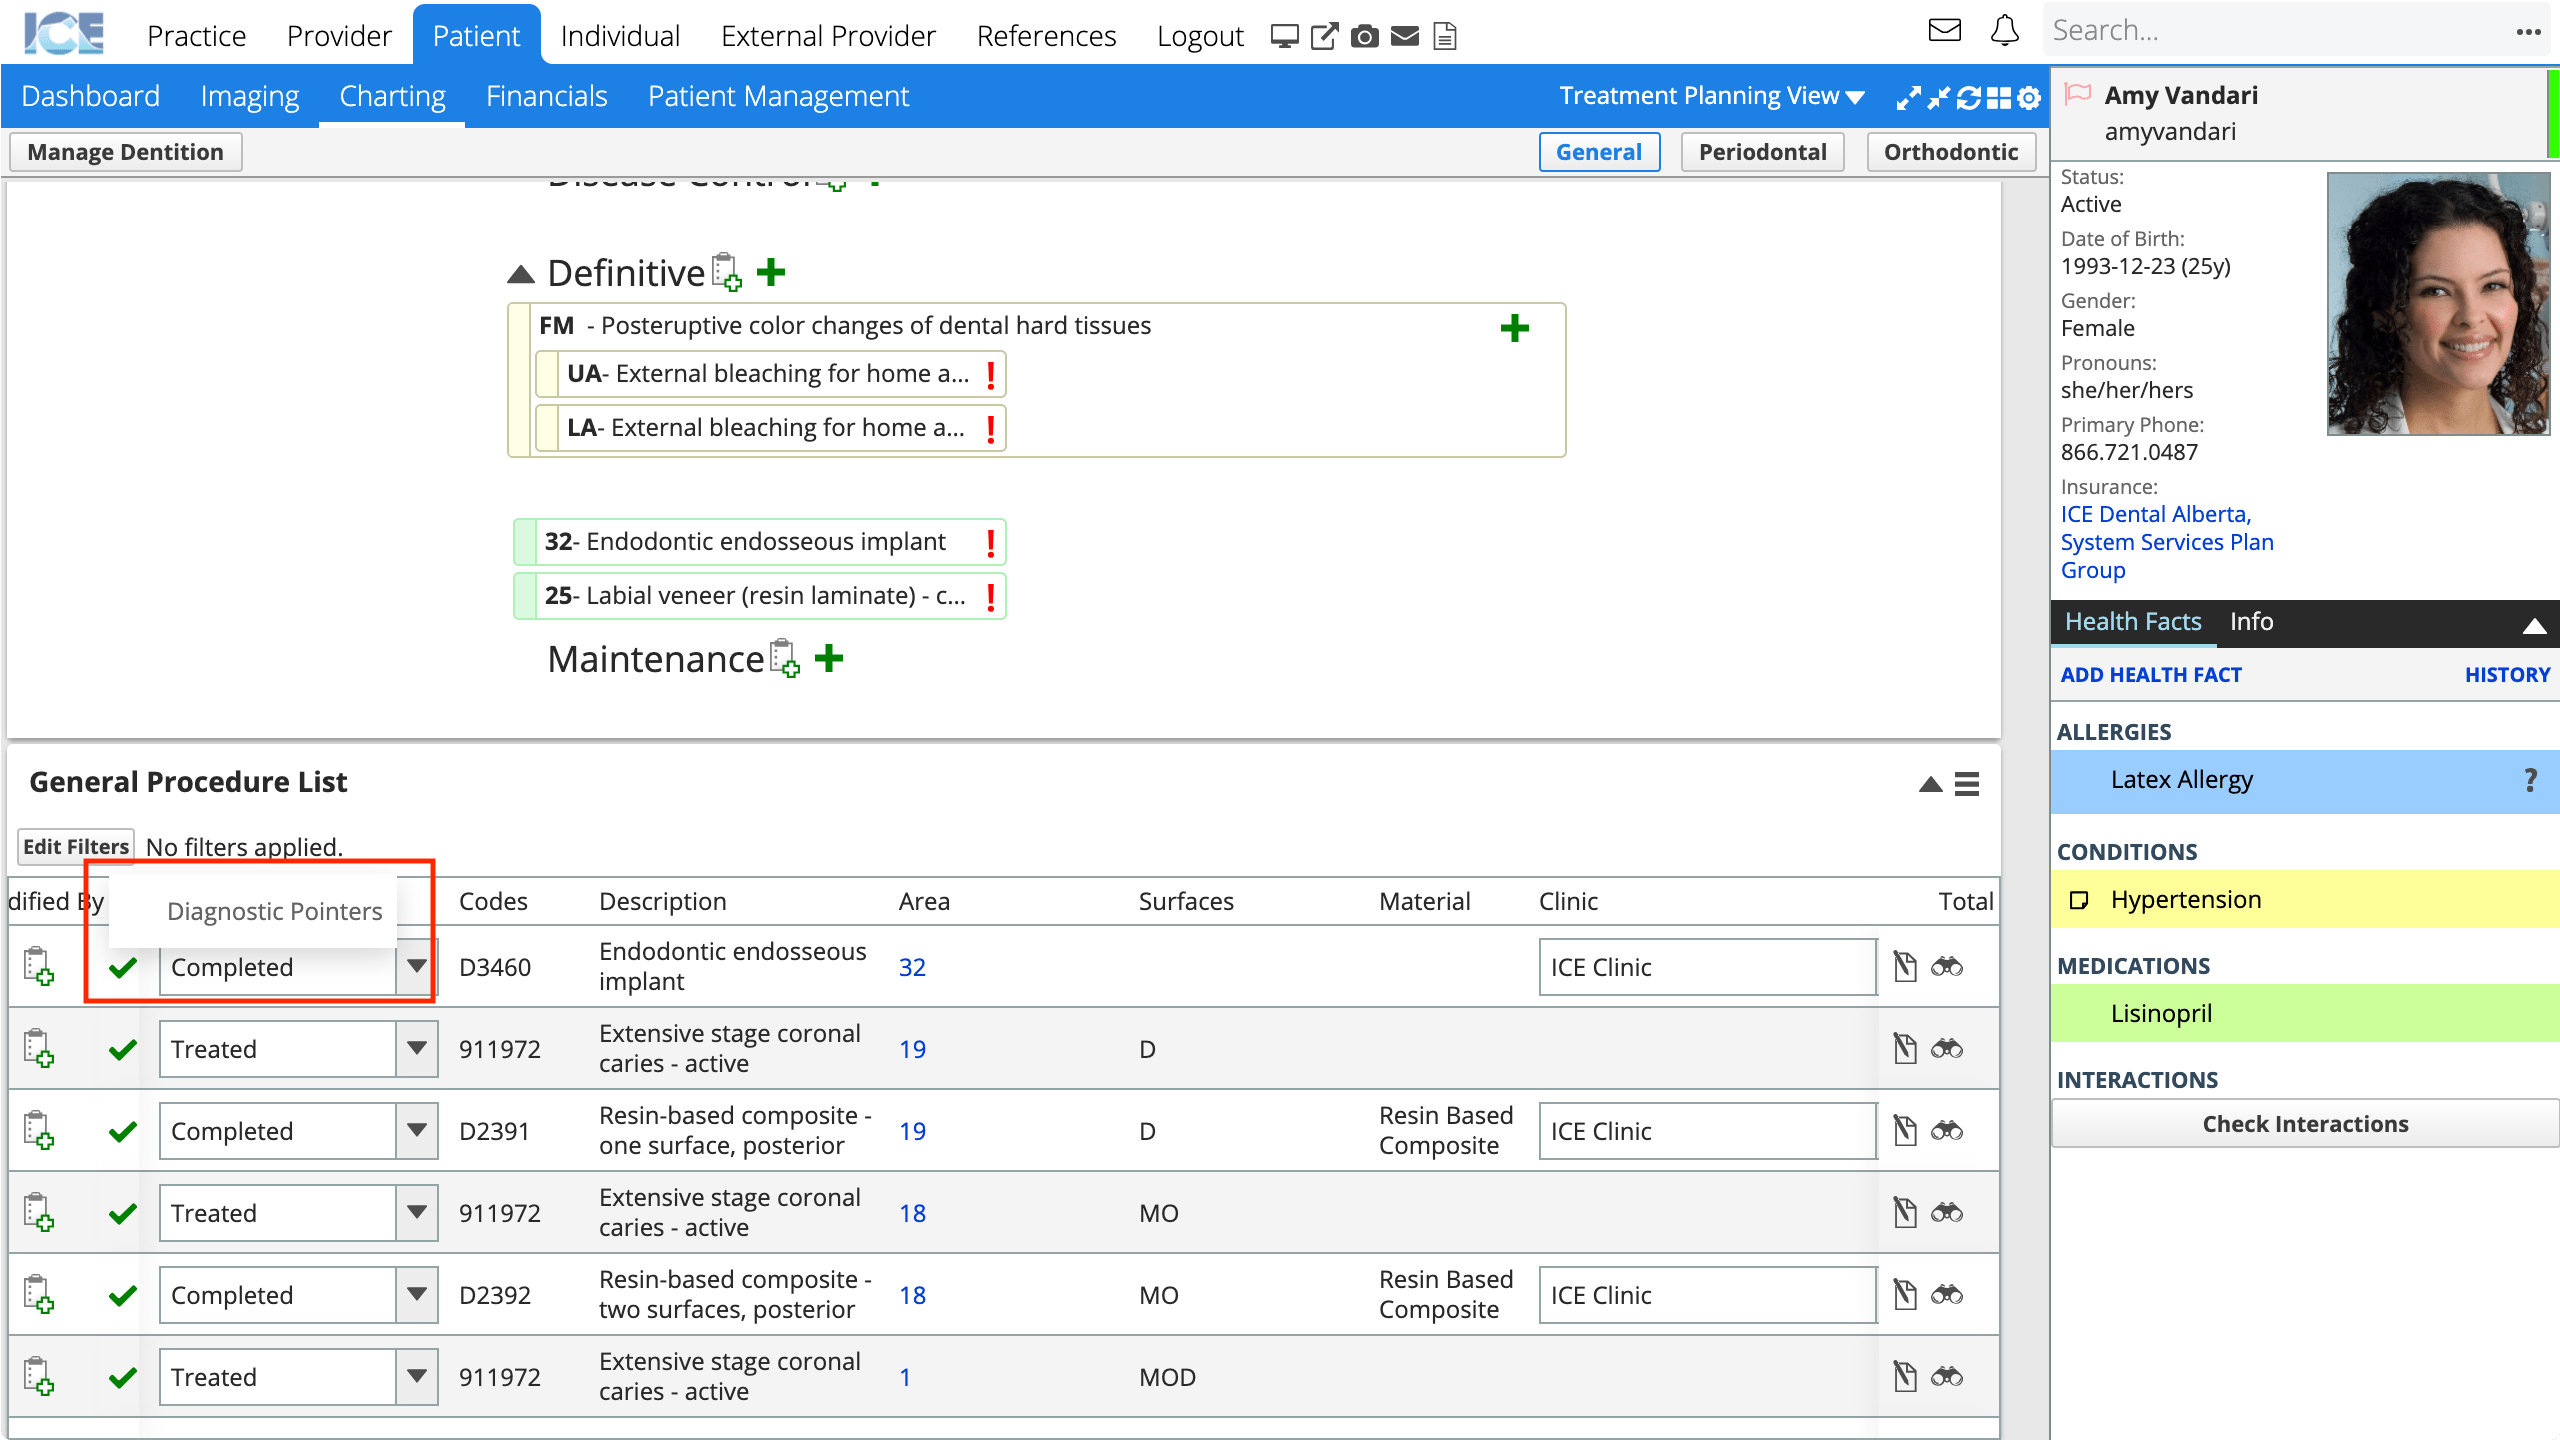
- This option is only visible for completed procedures.
- Select the A to D drop-down menus in order to re-order the diagnoses until the required code is in spot A
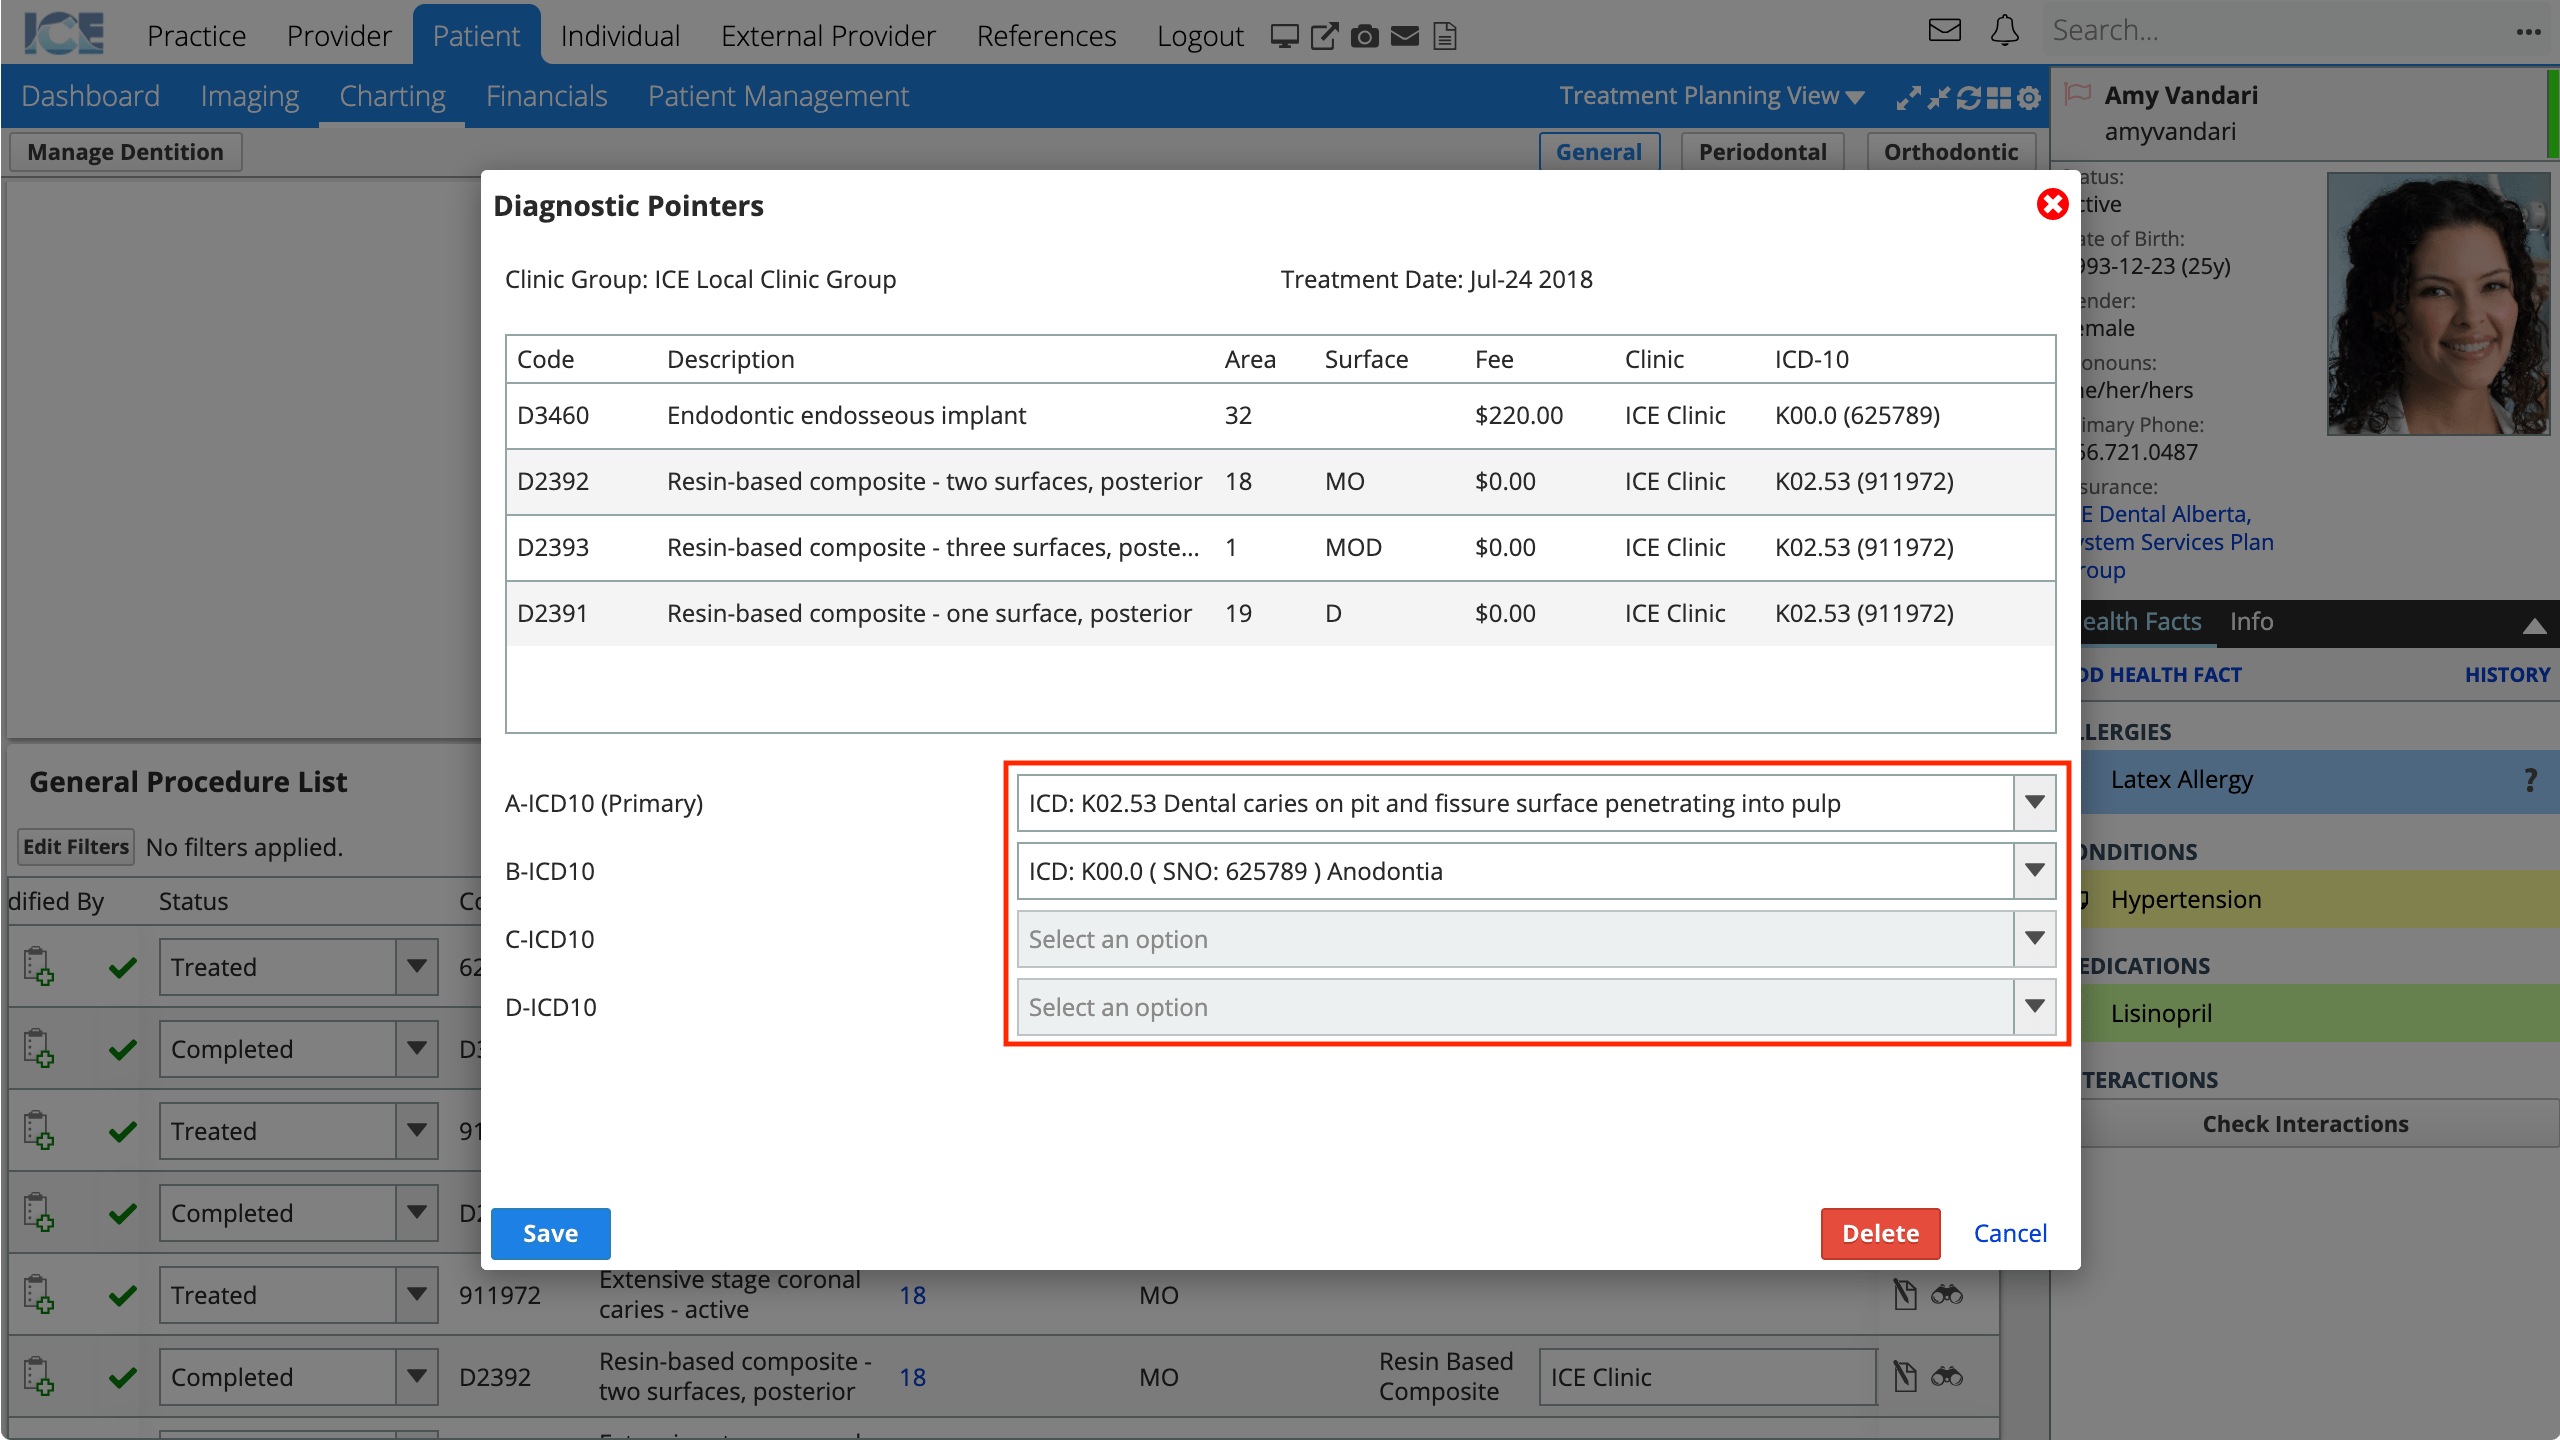
- Select Save
- The next time the claim is generated, the diagnostic pointers will appear in this clinical override order.
All procedures completed on the same day, in the same clinic group, appear in the Diagnostic Pointers window. Procedures can only be associated with one diagnosis.
Add billing modifier codes to procedures
When a treatment is charted using a CPT medical code, you can track up to four billing modifier codes per CPT code.
- Go to Patient > Charting and find the General Procedure List panel
- Find the relevant procedure code entry in the General Procedure List
- Select to the left of that entry in the list
- Select Billing Modifier Codes
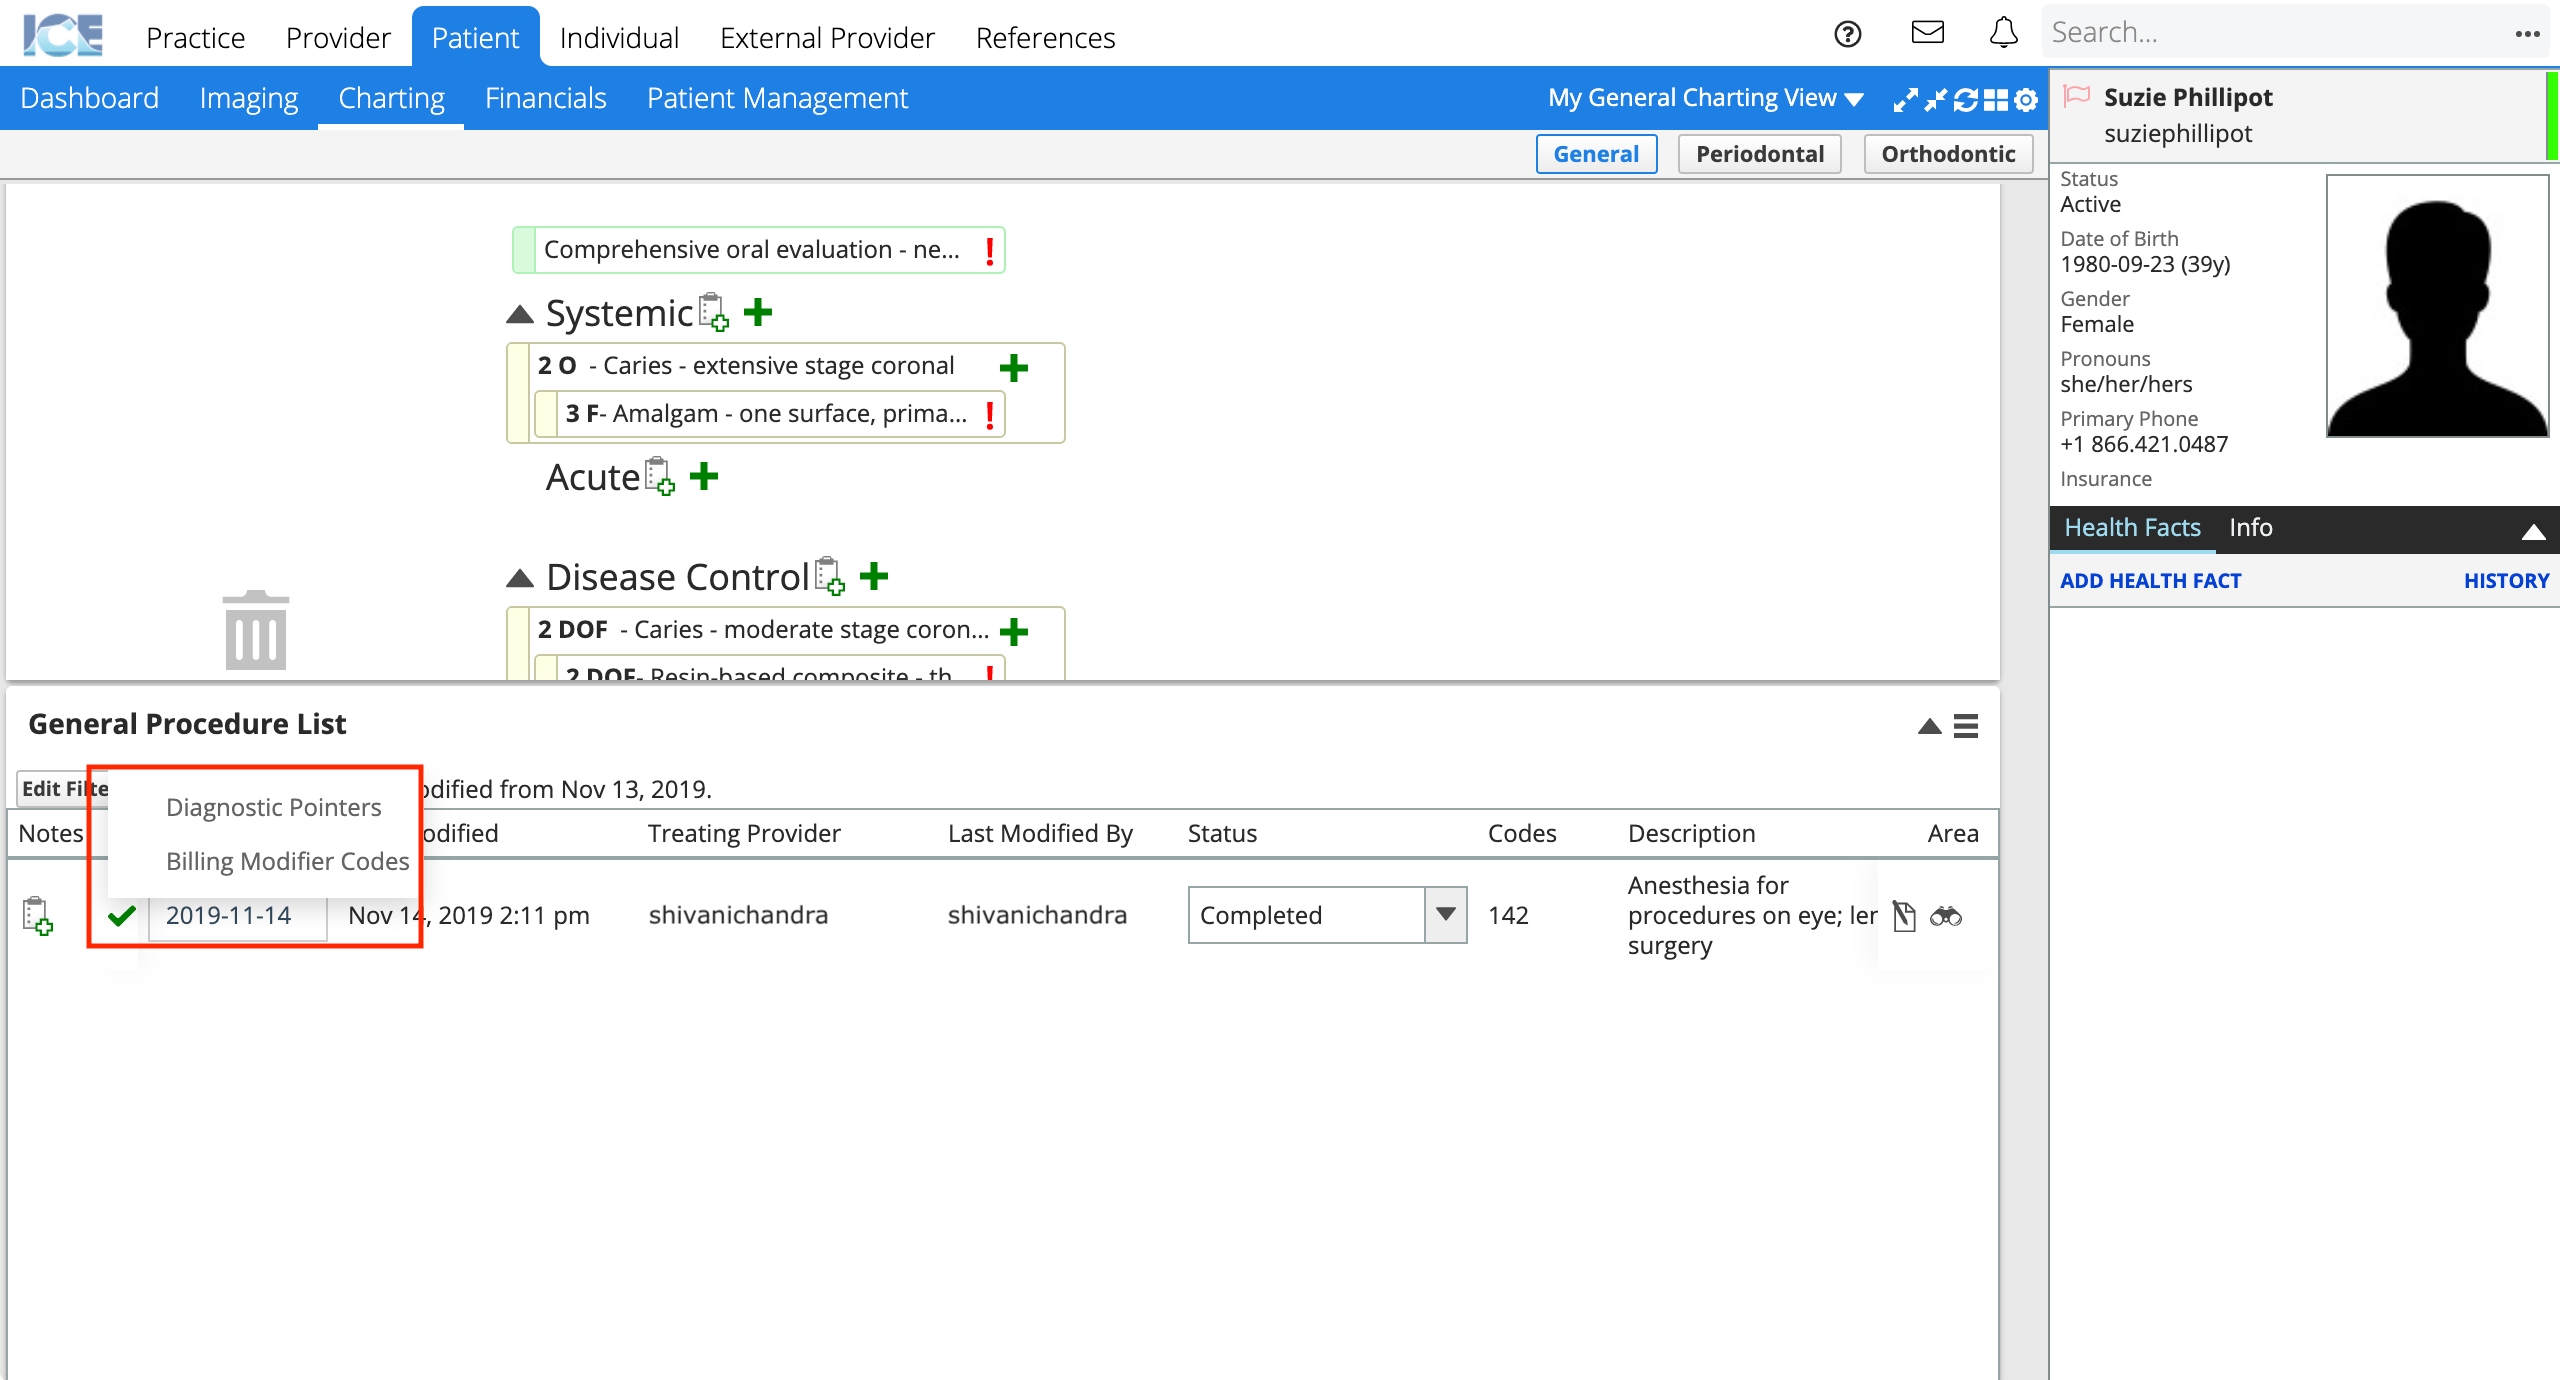
- This option is only visible for medical codes.
- Select the A to D drop-down menus in order to add billing modifier codes to the procedure
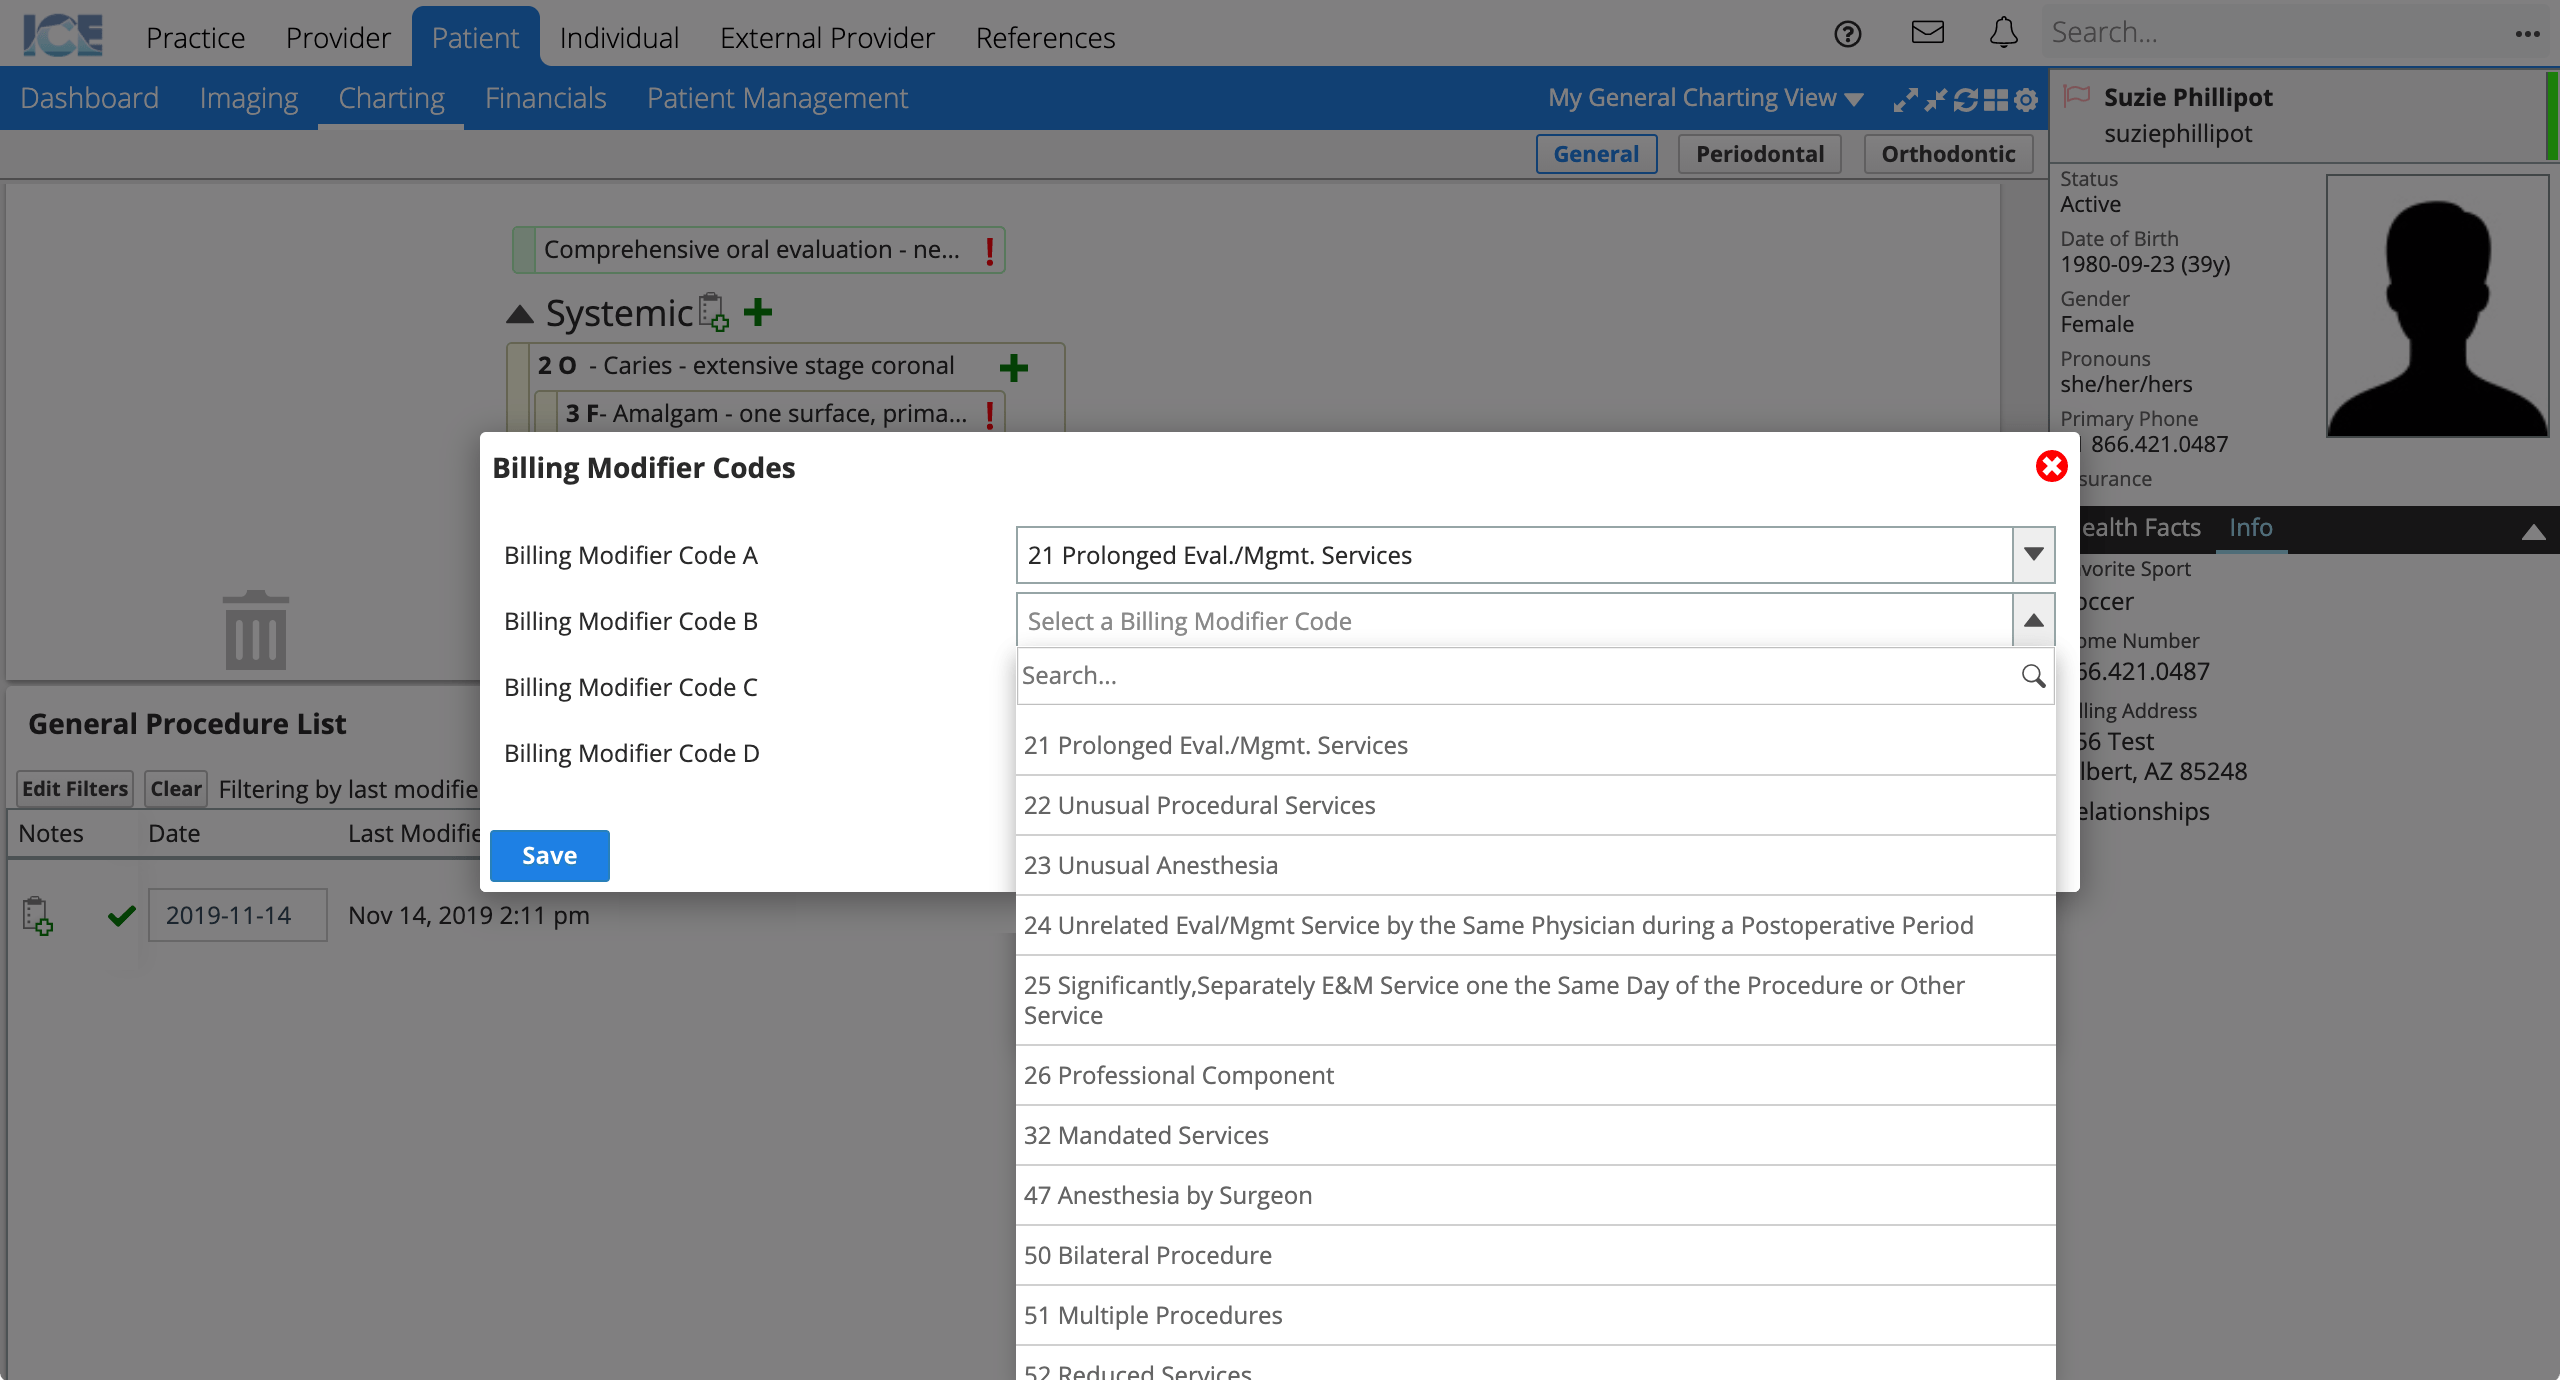
- Select Save
- The next time the claim is generated, the billing modifier codes will appear in the claim line.