Charting overview
The charting area includes tools for General, Periodontal, and Orthodontic charting.
Although each area has its own specialty tools, there are some features that are consistent across all three areas.
Access charting features
- Go to Patient > Charting
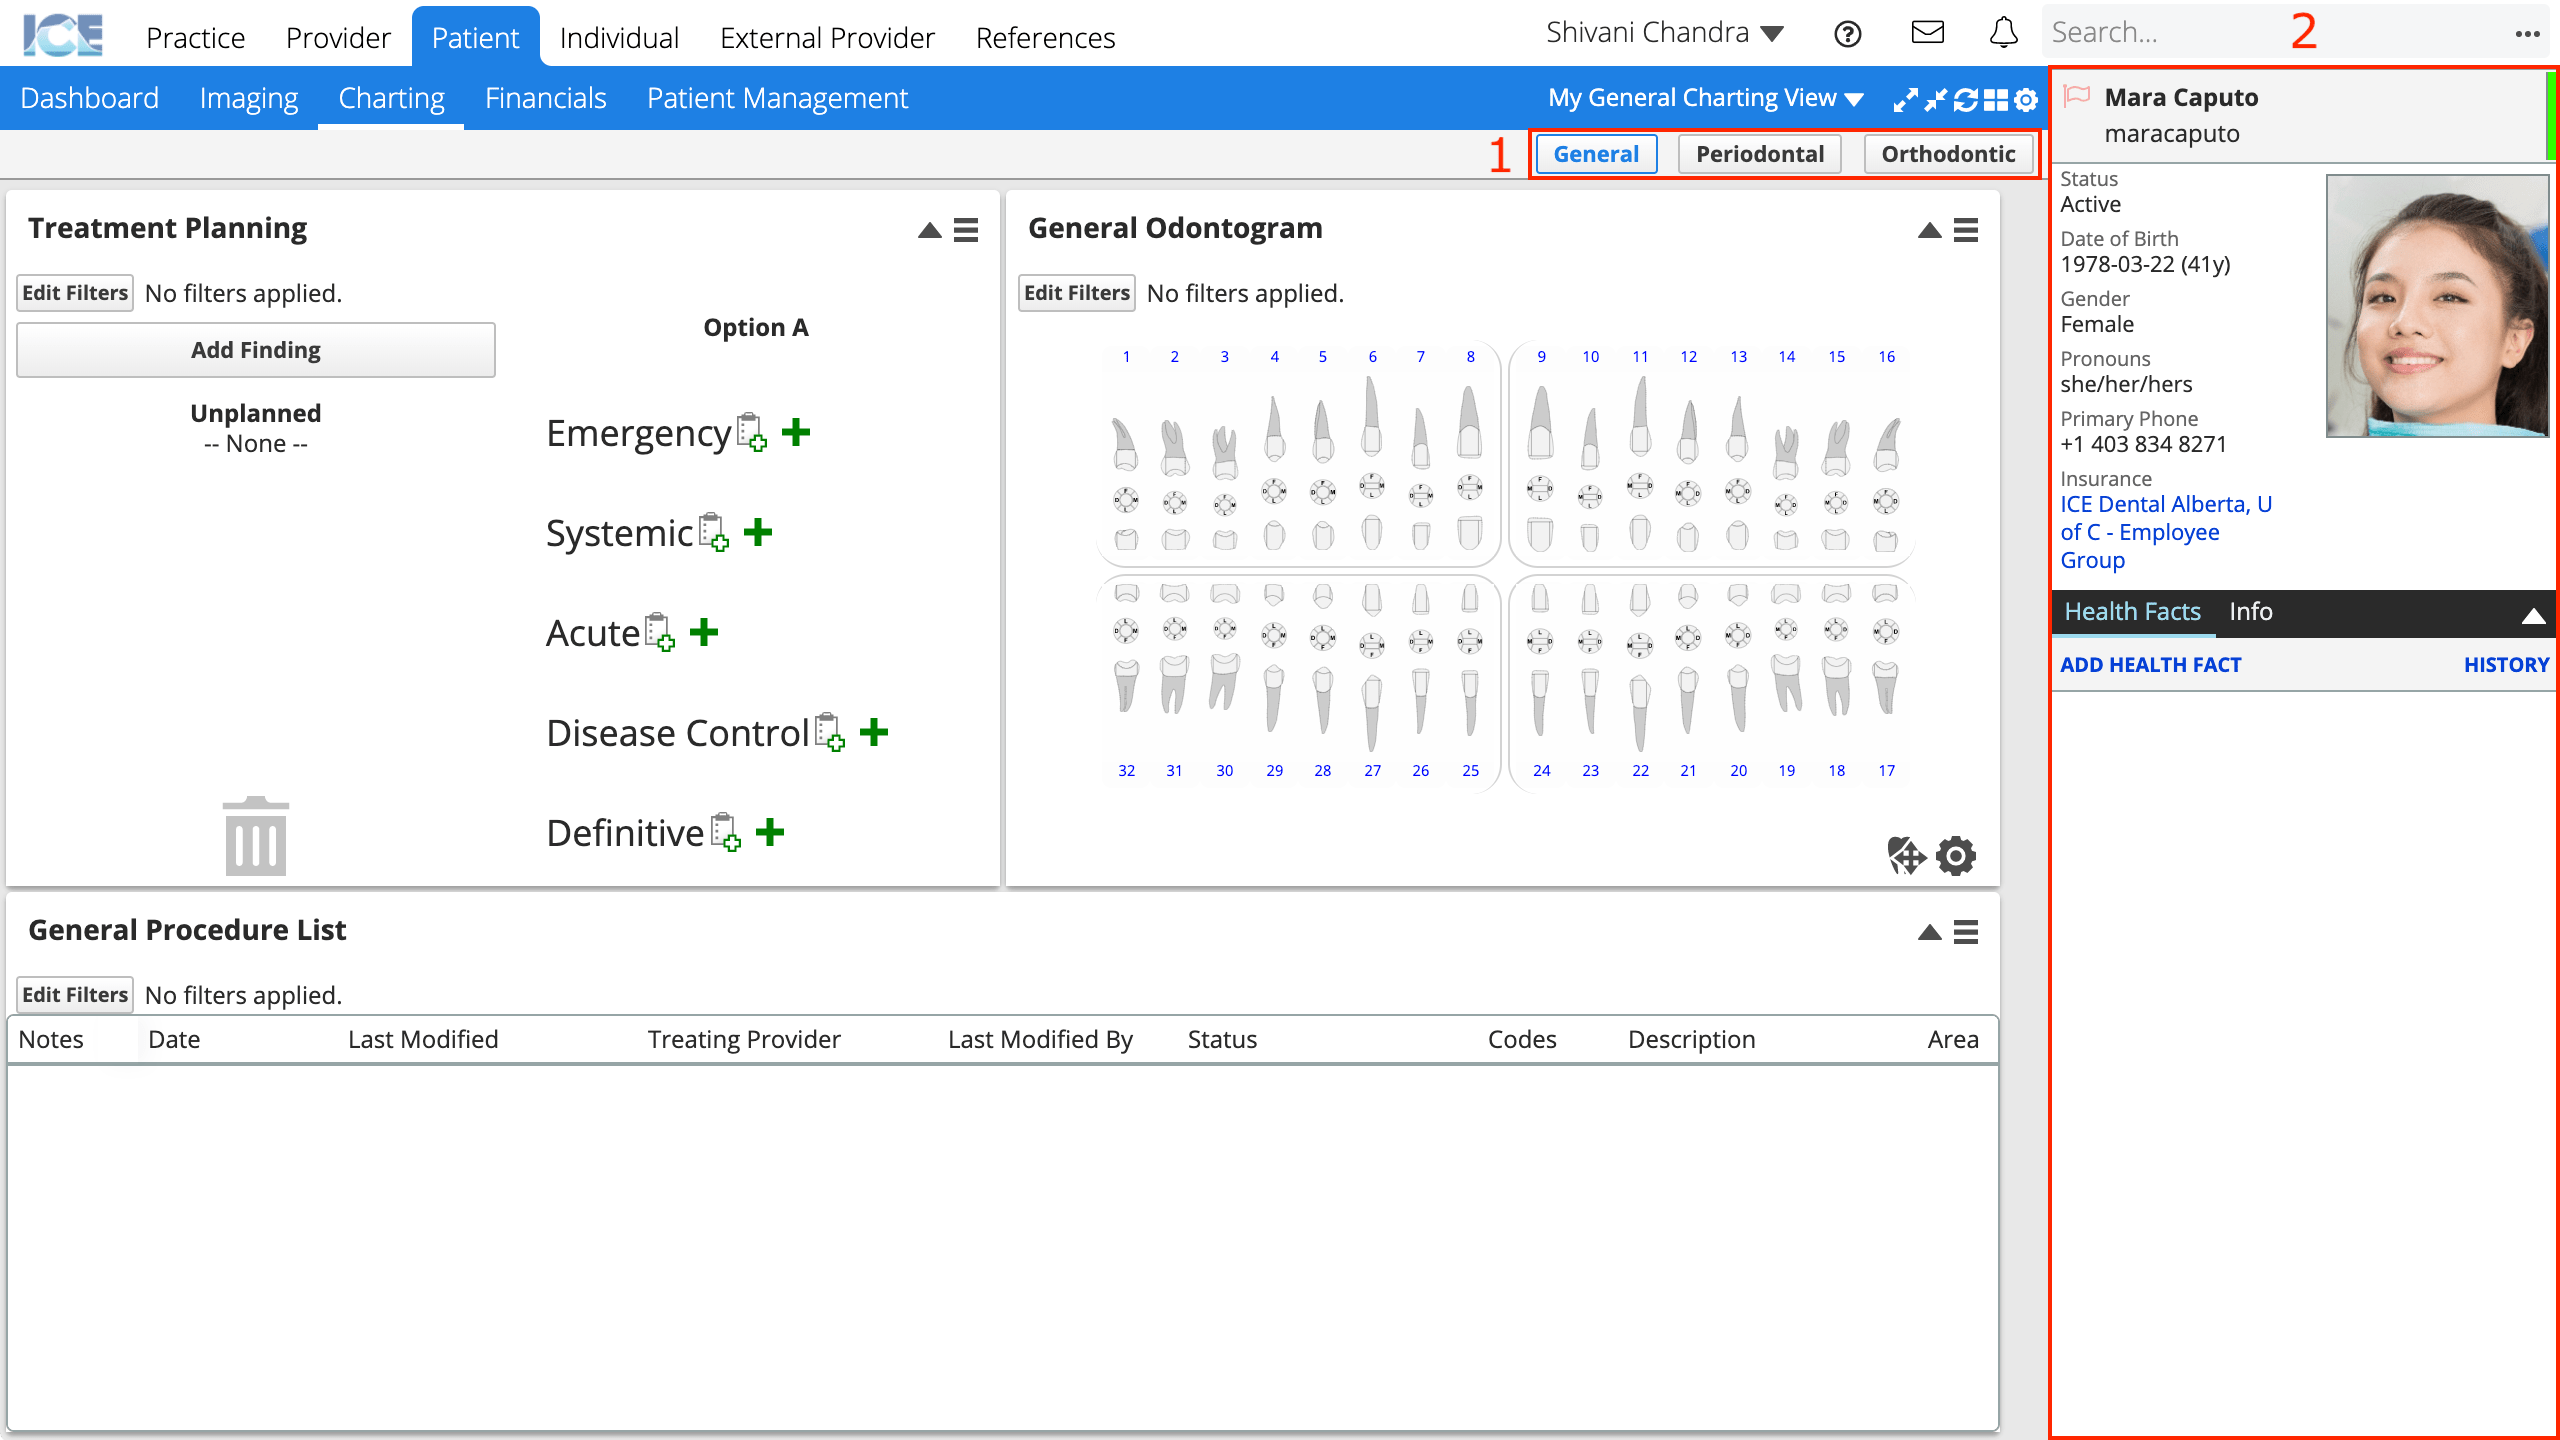
- All three charting areas include the Charting Area Selectors (#1), and Patient Sidebar (#2)
- Select a charting area that matches the type of work you want to do

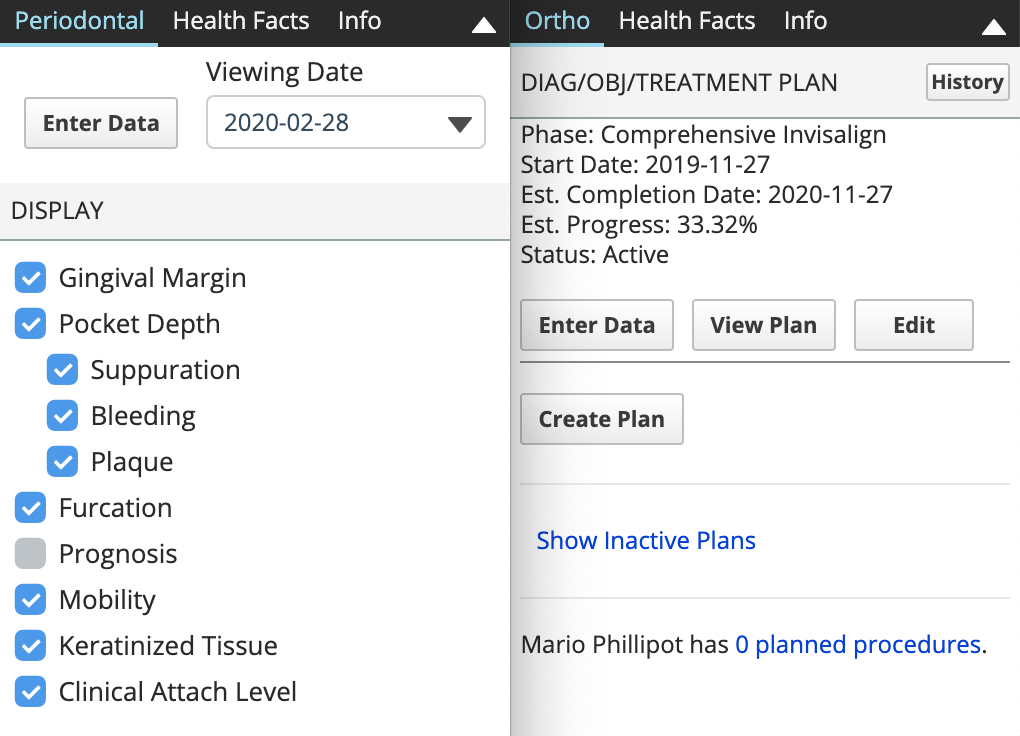
Access data input tools from the patient sidebar
You use the patient sidebar to enter data for Periodontal and Orthodontic charting.
Switching areas updates the patient sidebar to match.
Customize charting provider settings
You can customize display settings in charting to better match how you prefer to work.
For example, by displaying the general odontogram in sextants instead of quadrants, showing micro surfaces, or enabling zoom on hover.
For general charting settings
- Select
 in the bottom right corner of the General Odontogram or the Findings Input odontogram
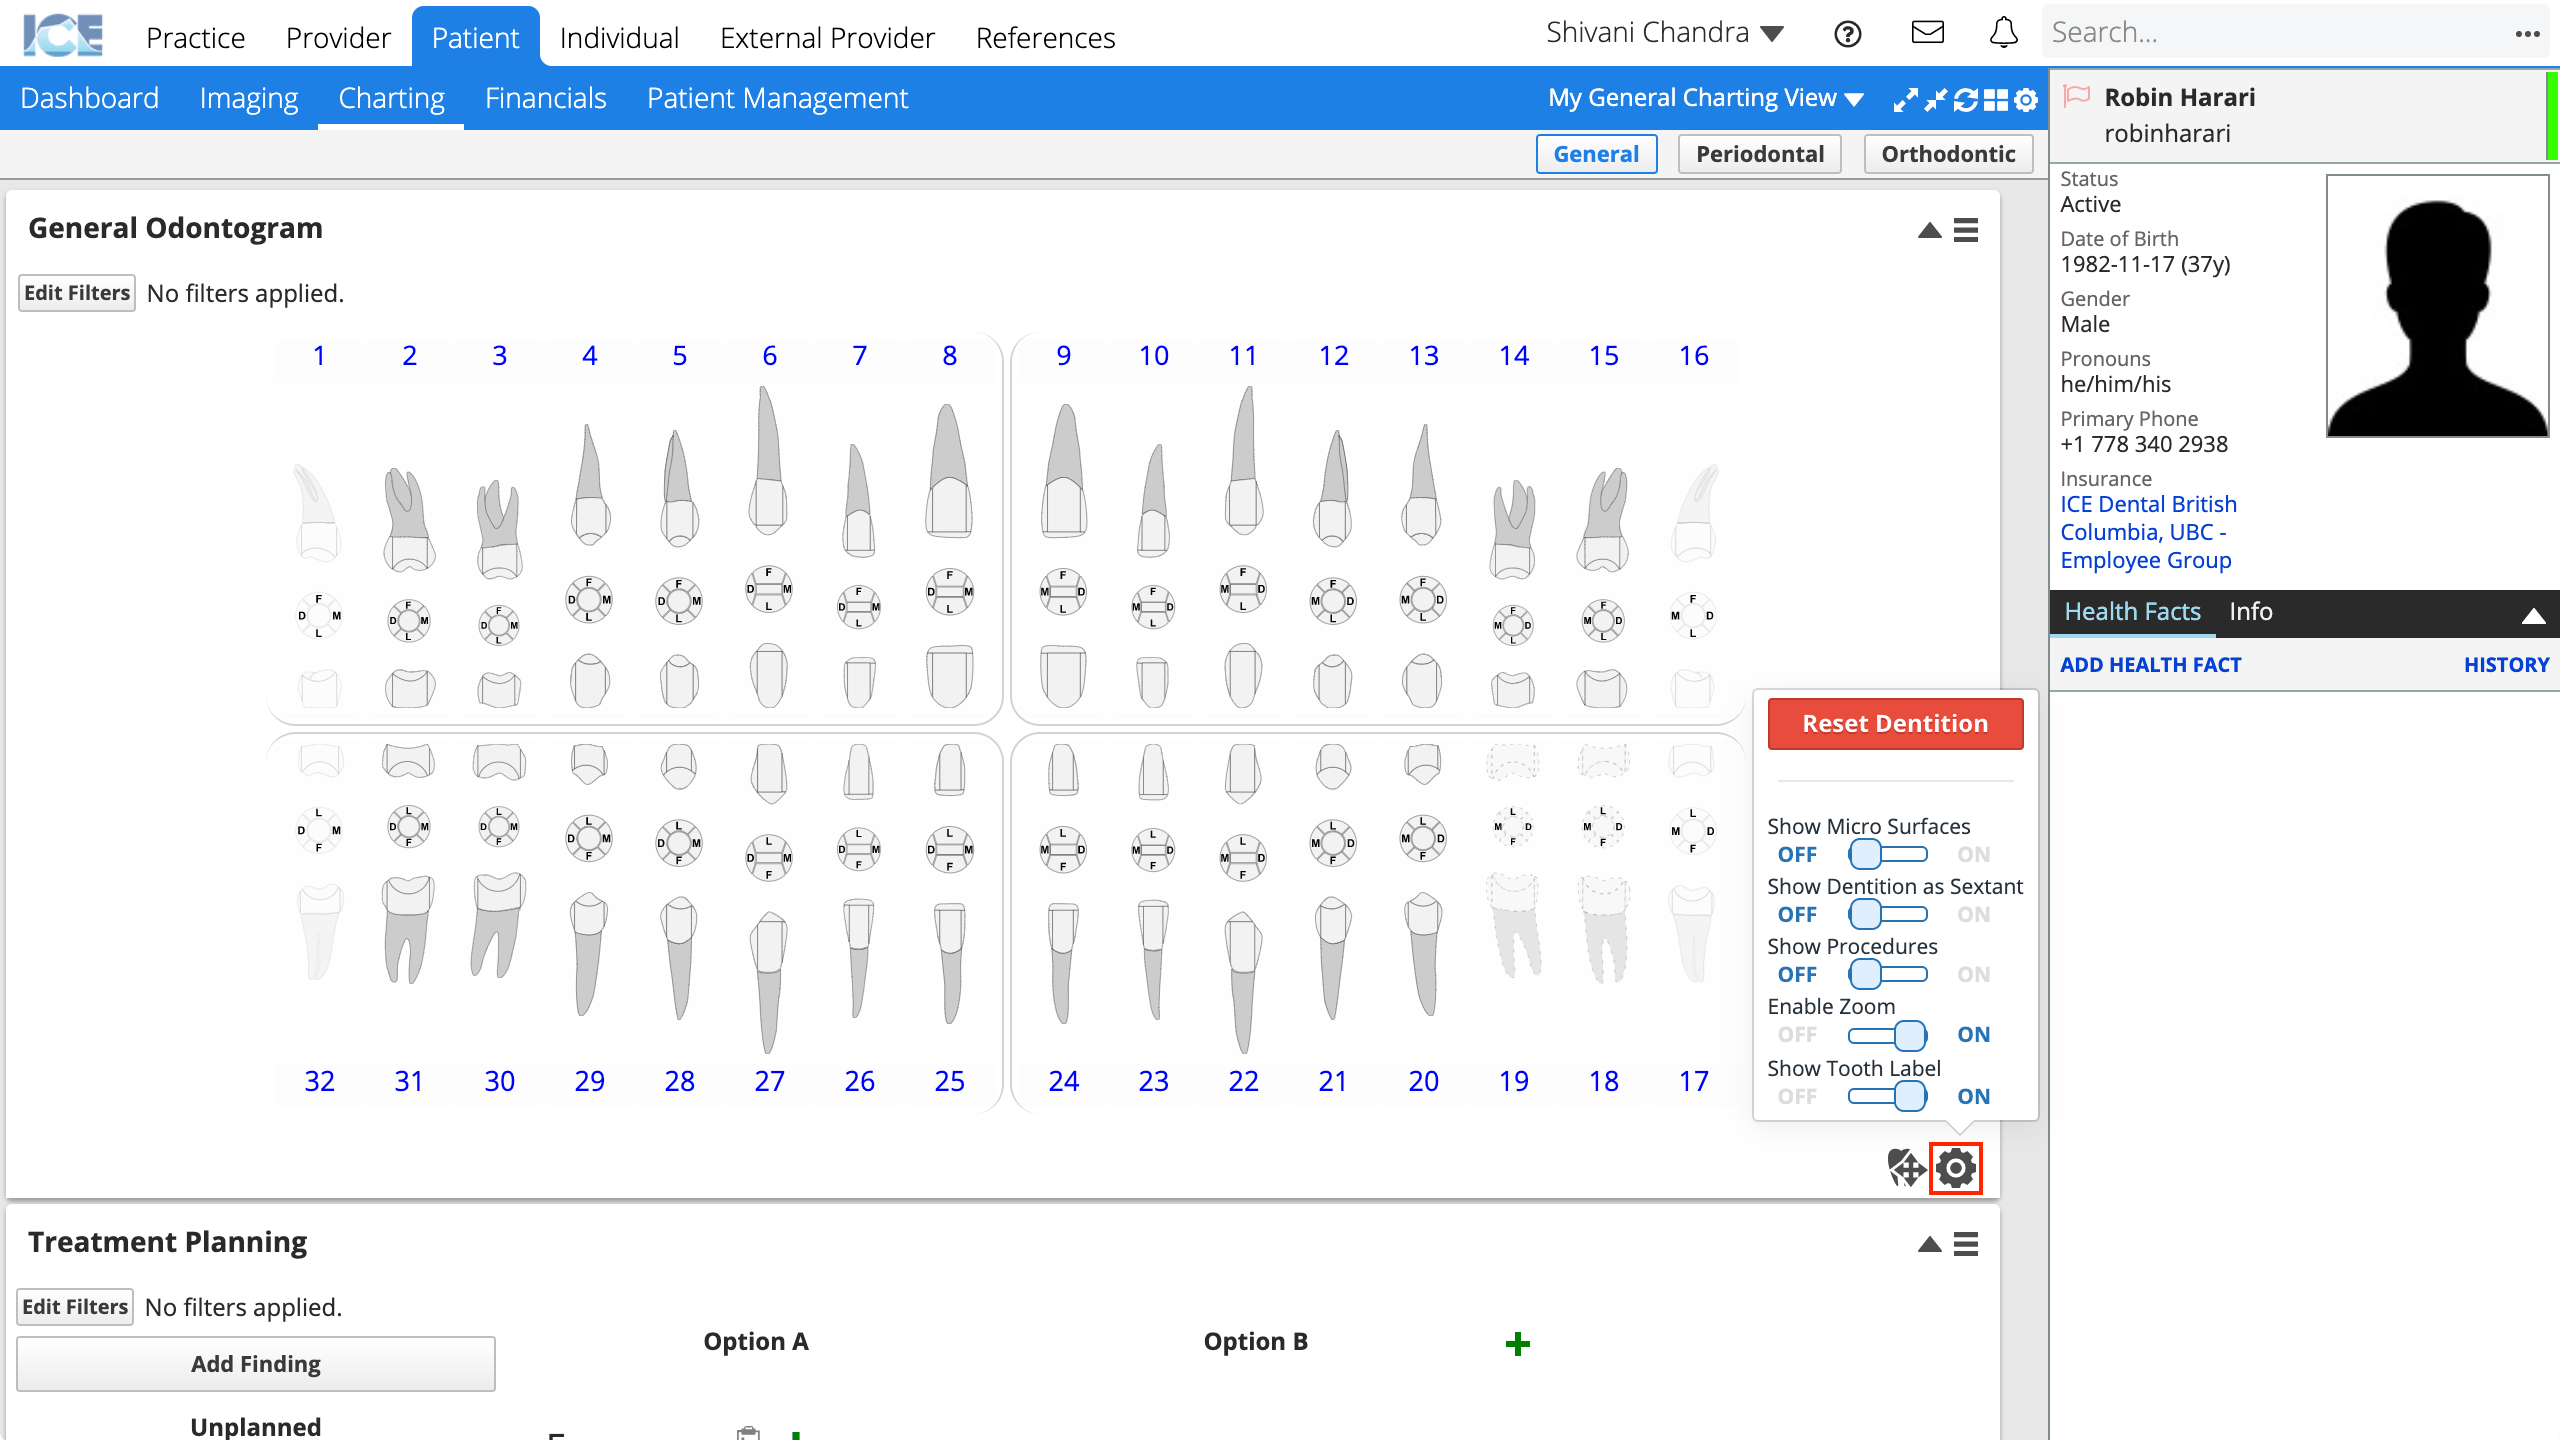
- Make your changes
- If you enable micro surfaces for detailed data entry, procedures are billed to the standard or "parent" surface.
- The system saves your changes automatically
For periodontal charting settings
- Select in the top right corner of any charting area
- The Charting Provider Settings window displays the customizable charting options for periodontal charting
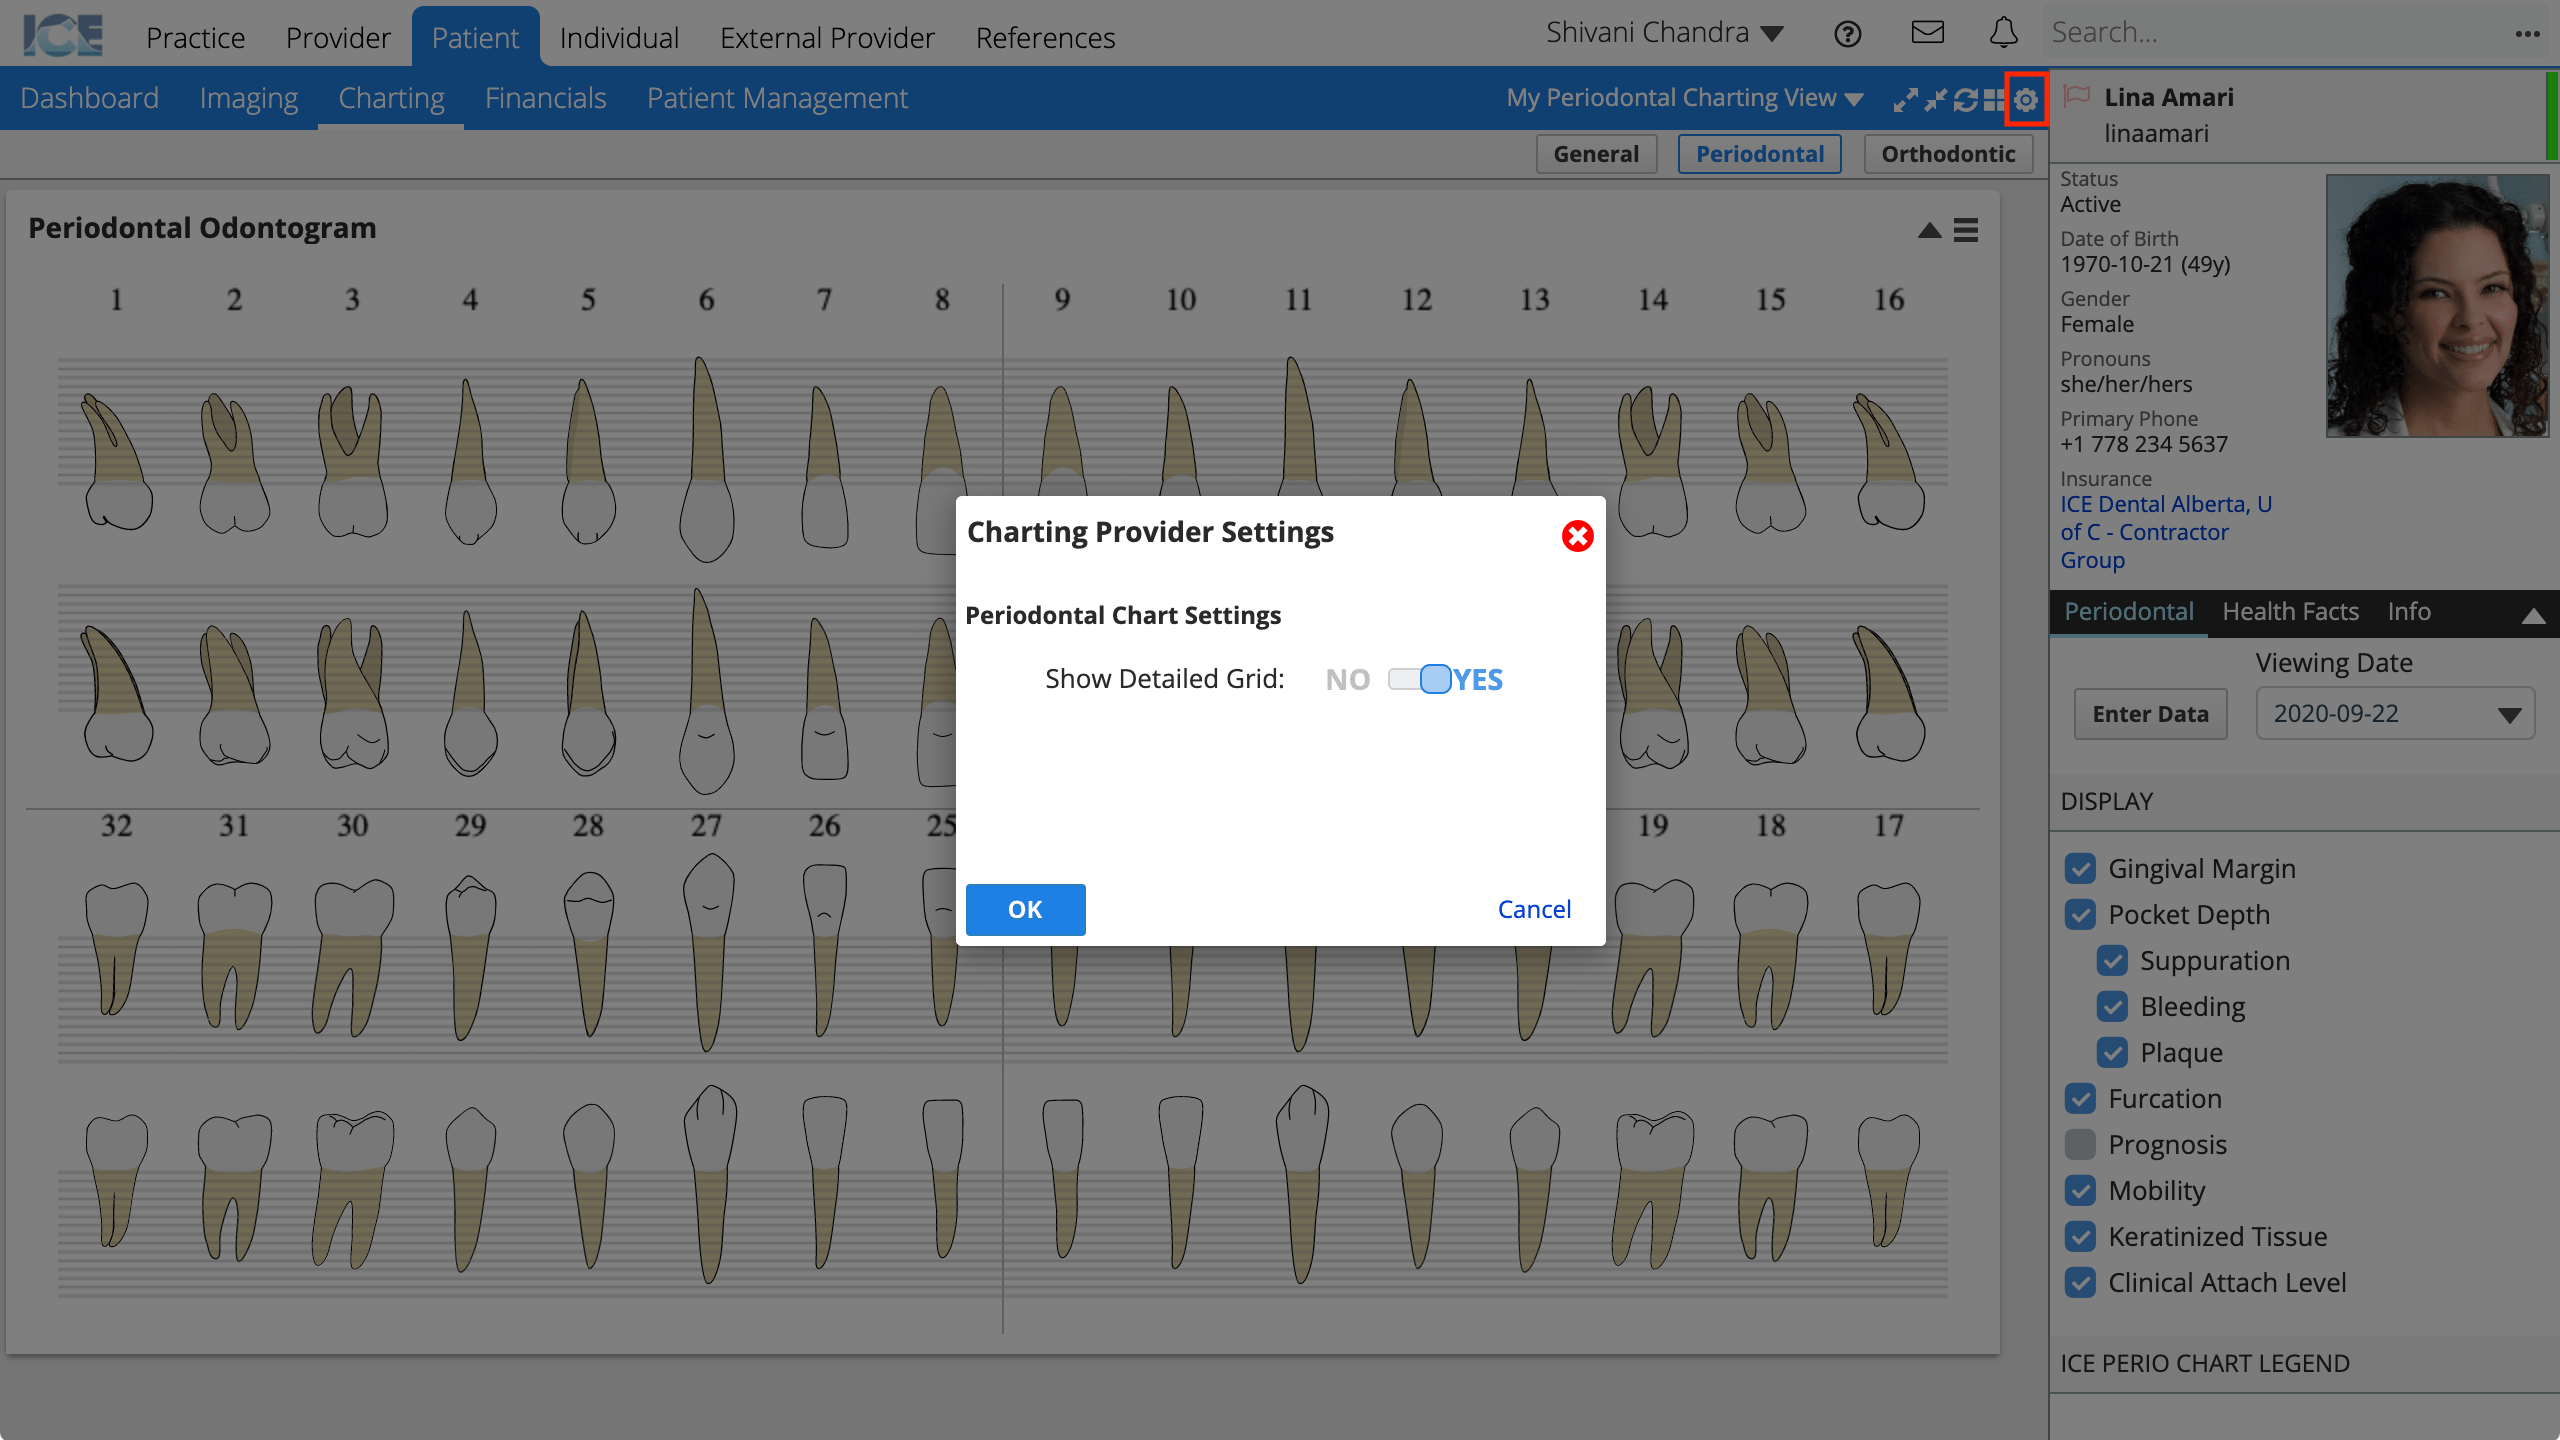
- Make your changes and select OK