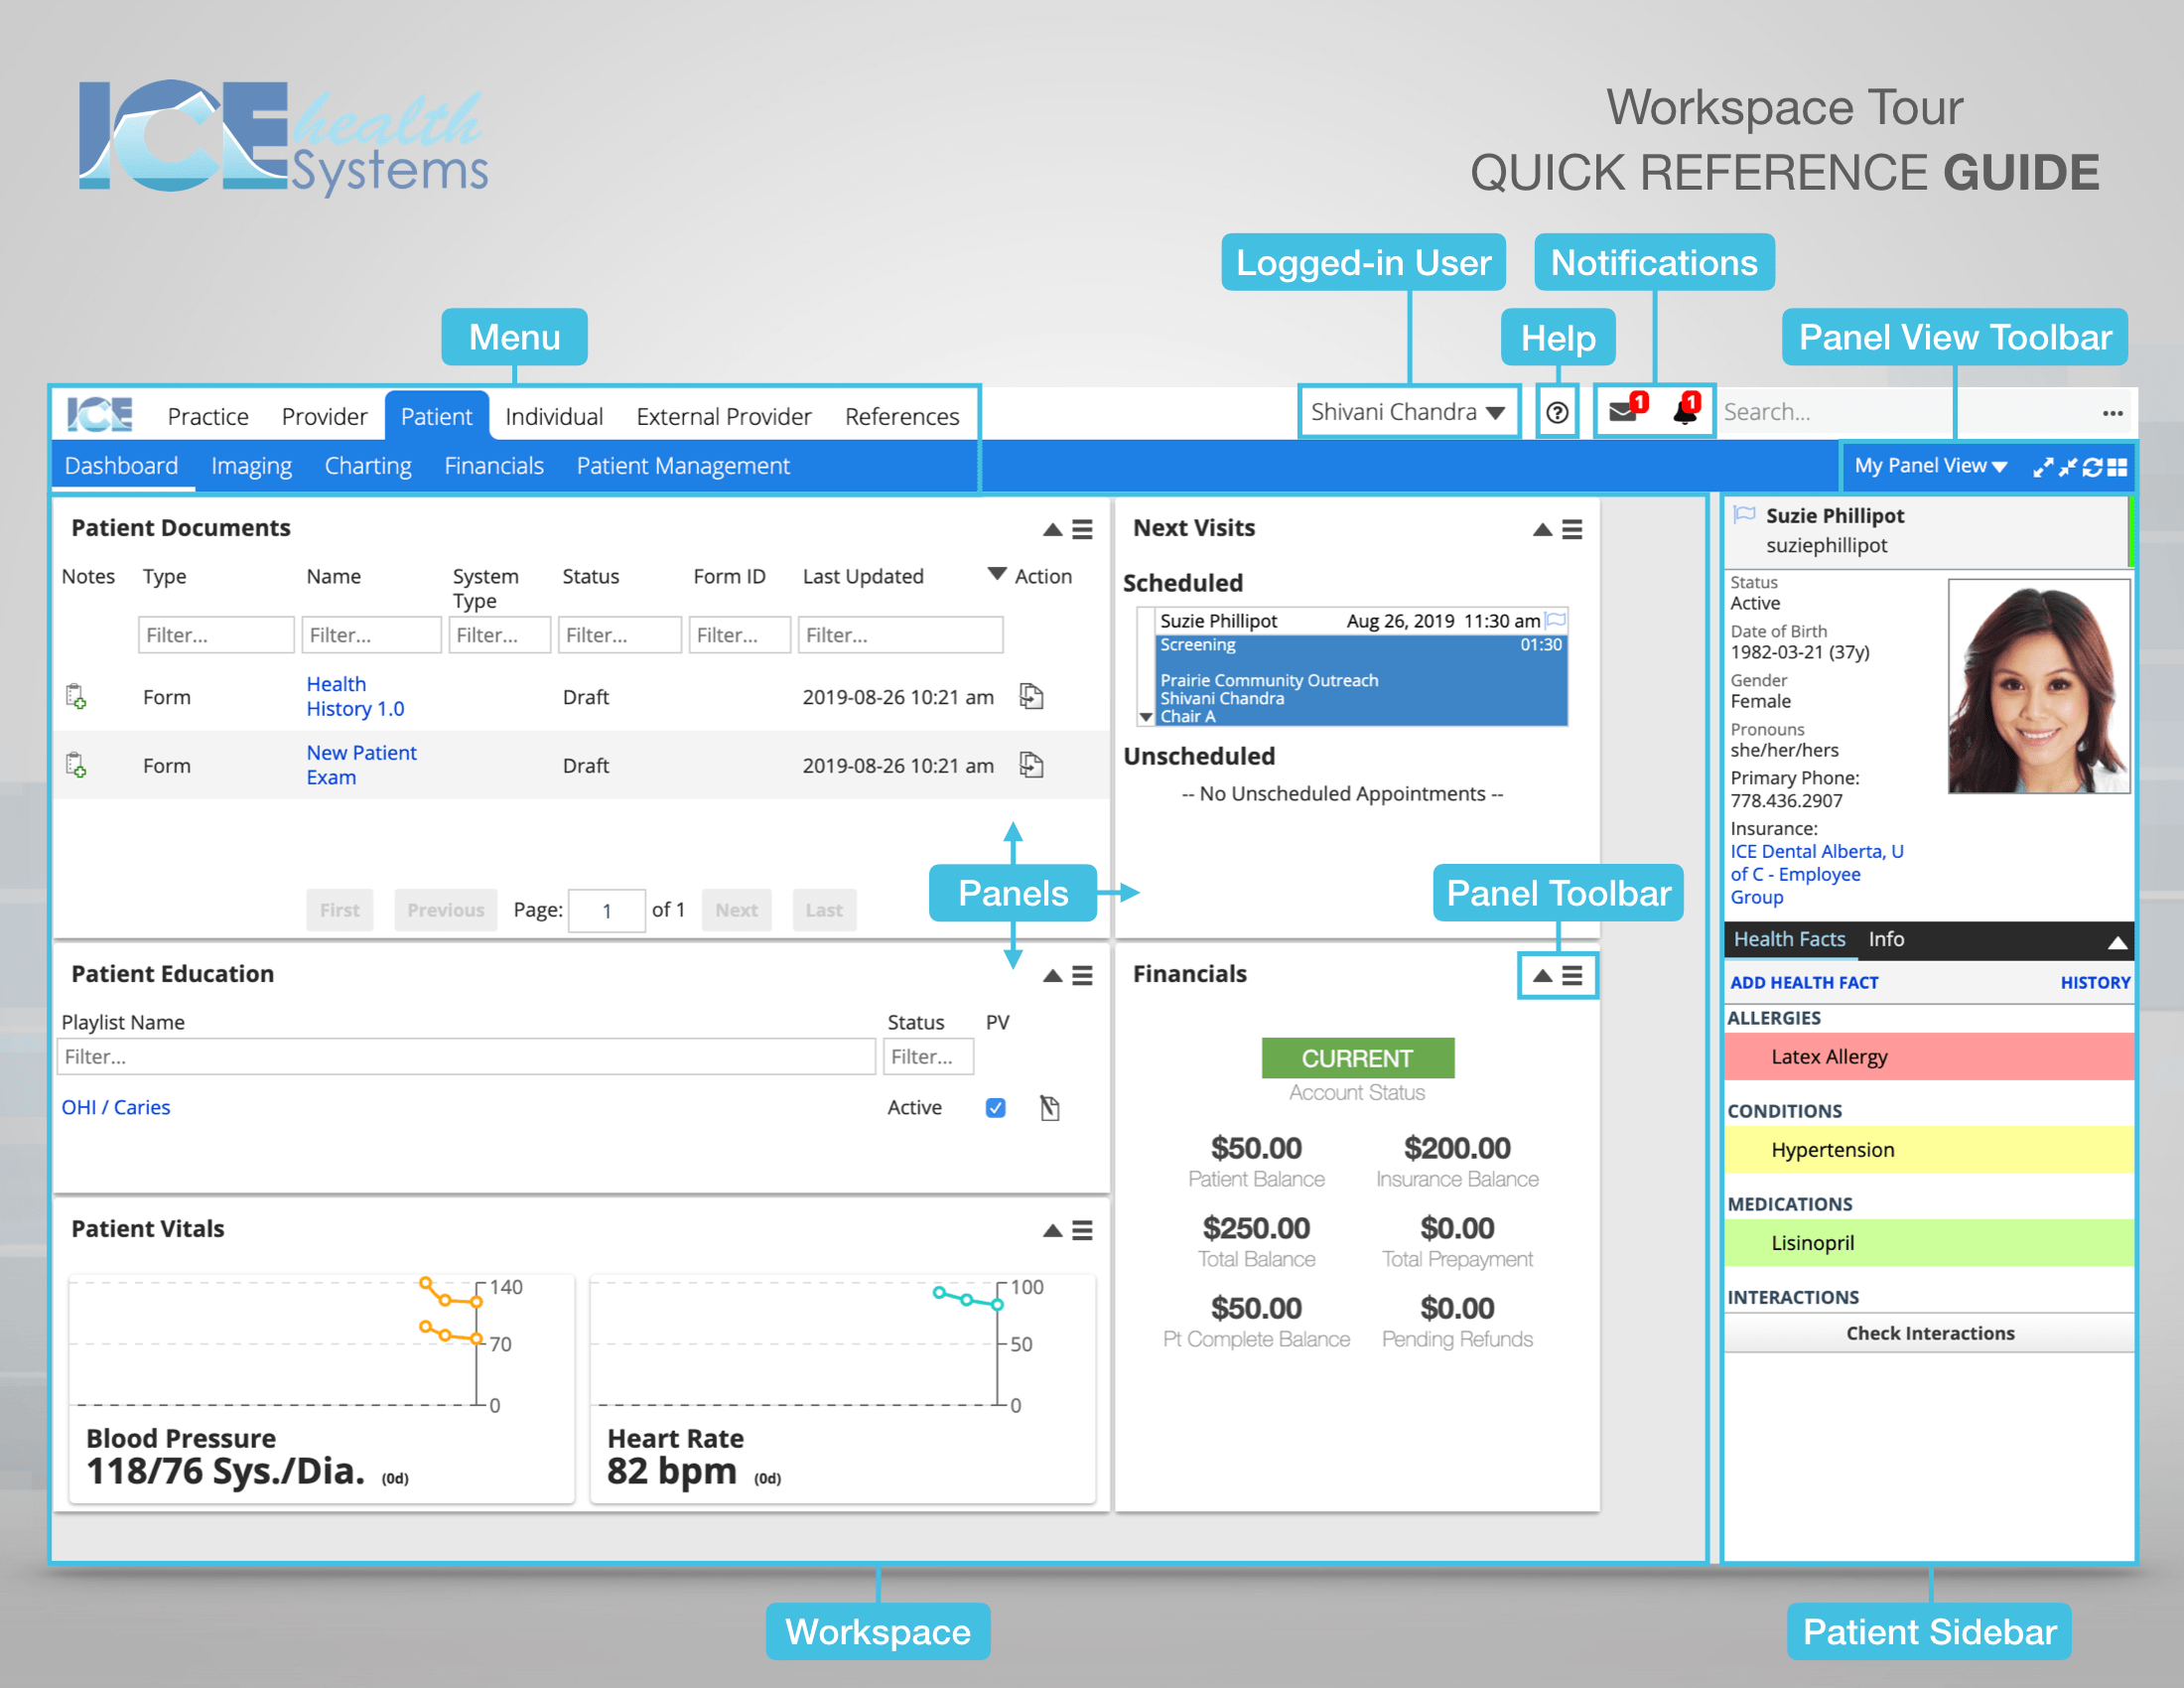
Layout and navigation
The system is organized around the main menu at the top of the screen and a workspace below.
- To see a larger version of this guide with a second page that includes more detail for each item, check out the PDF - Workspace Tour Quick Reference Guide.
Each menu contains different tools or features.
- Select a menu to view the tools below it
- Select a sub-menu to access the available tools for that menu
The most important menus are: Practice, Provider, and Patient.
Practice is for clinic or practice wide information.
- It includes tools like reporting, practice configuration, and scheduling.
- For example: To view the schedule, select Practice, and then select Scheduling.

Provider is for tools specific to your account inside the system.
- It includes your dashboard, messages, and account settings.
- For example: To see your latest messages, select Provider, and then select Collaborations.

- The term "Provider" refers to any person that has the ability to log in and use the system. It is similar to the term "user".
- Providers aren't just clinicians, they could be front desk, billing, or IT support staff as well.
Patient is for viewing and adding information to a patient record.
- It includes tools to enter patient information, track treatment, and record patient financials.
- For example: To enter a patient's contact information, select Patient, then select Patient Management, and then select Demographics.

Individual is for viewing and adding information about a person who is not a patient or provider.
- Individuals are often created to record emergency contact or family information for patients.
- For example: To enter an individual's relationship with a patient, select Individual, then select Individual Management, and then select Relationships.

External Provider is for viewing and adding information about a clinician who is not a part of your clinic or practice.
- External providers are used in referrals to track more detail about who you are working with. They cannot login to the system.
- For example: To enter an external provider's contact information, select External Provider, then select External Provider Management, and then select Demographics.

References is for reviewing training and support materials.
- It includes version details about the latest release, the Lexicomp medication database, and access to the ICE Help site.
- For example: To check what version of ICE Health Systems your server uses, select References, and then select About.

The workspace below the menus can include a variety of different panels.
A panel is small window or widget that appears on your workspace. Panels display many types of information and give you access to multiple tools.
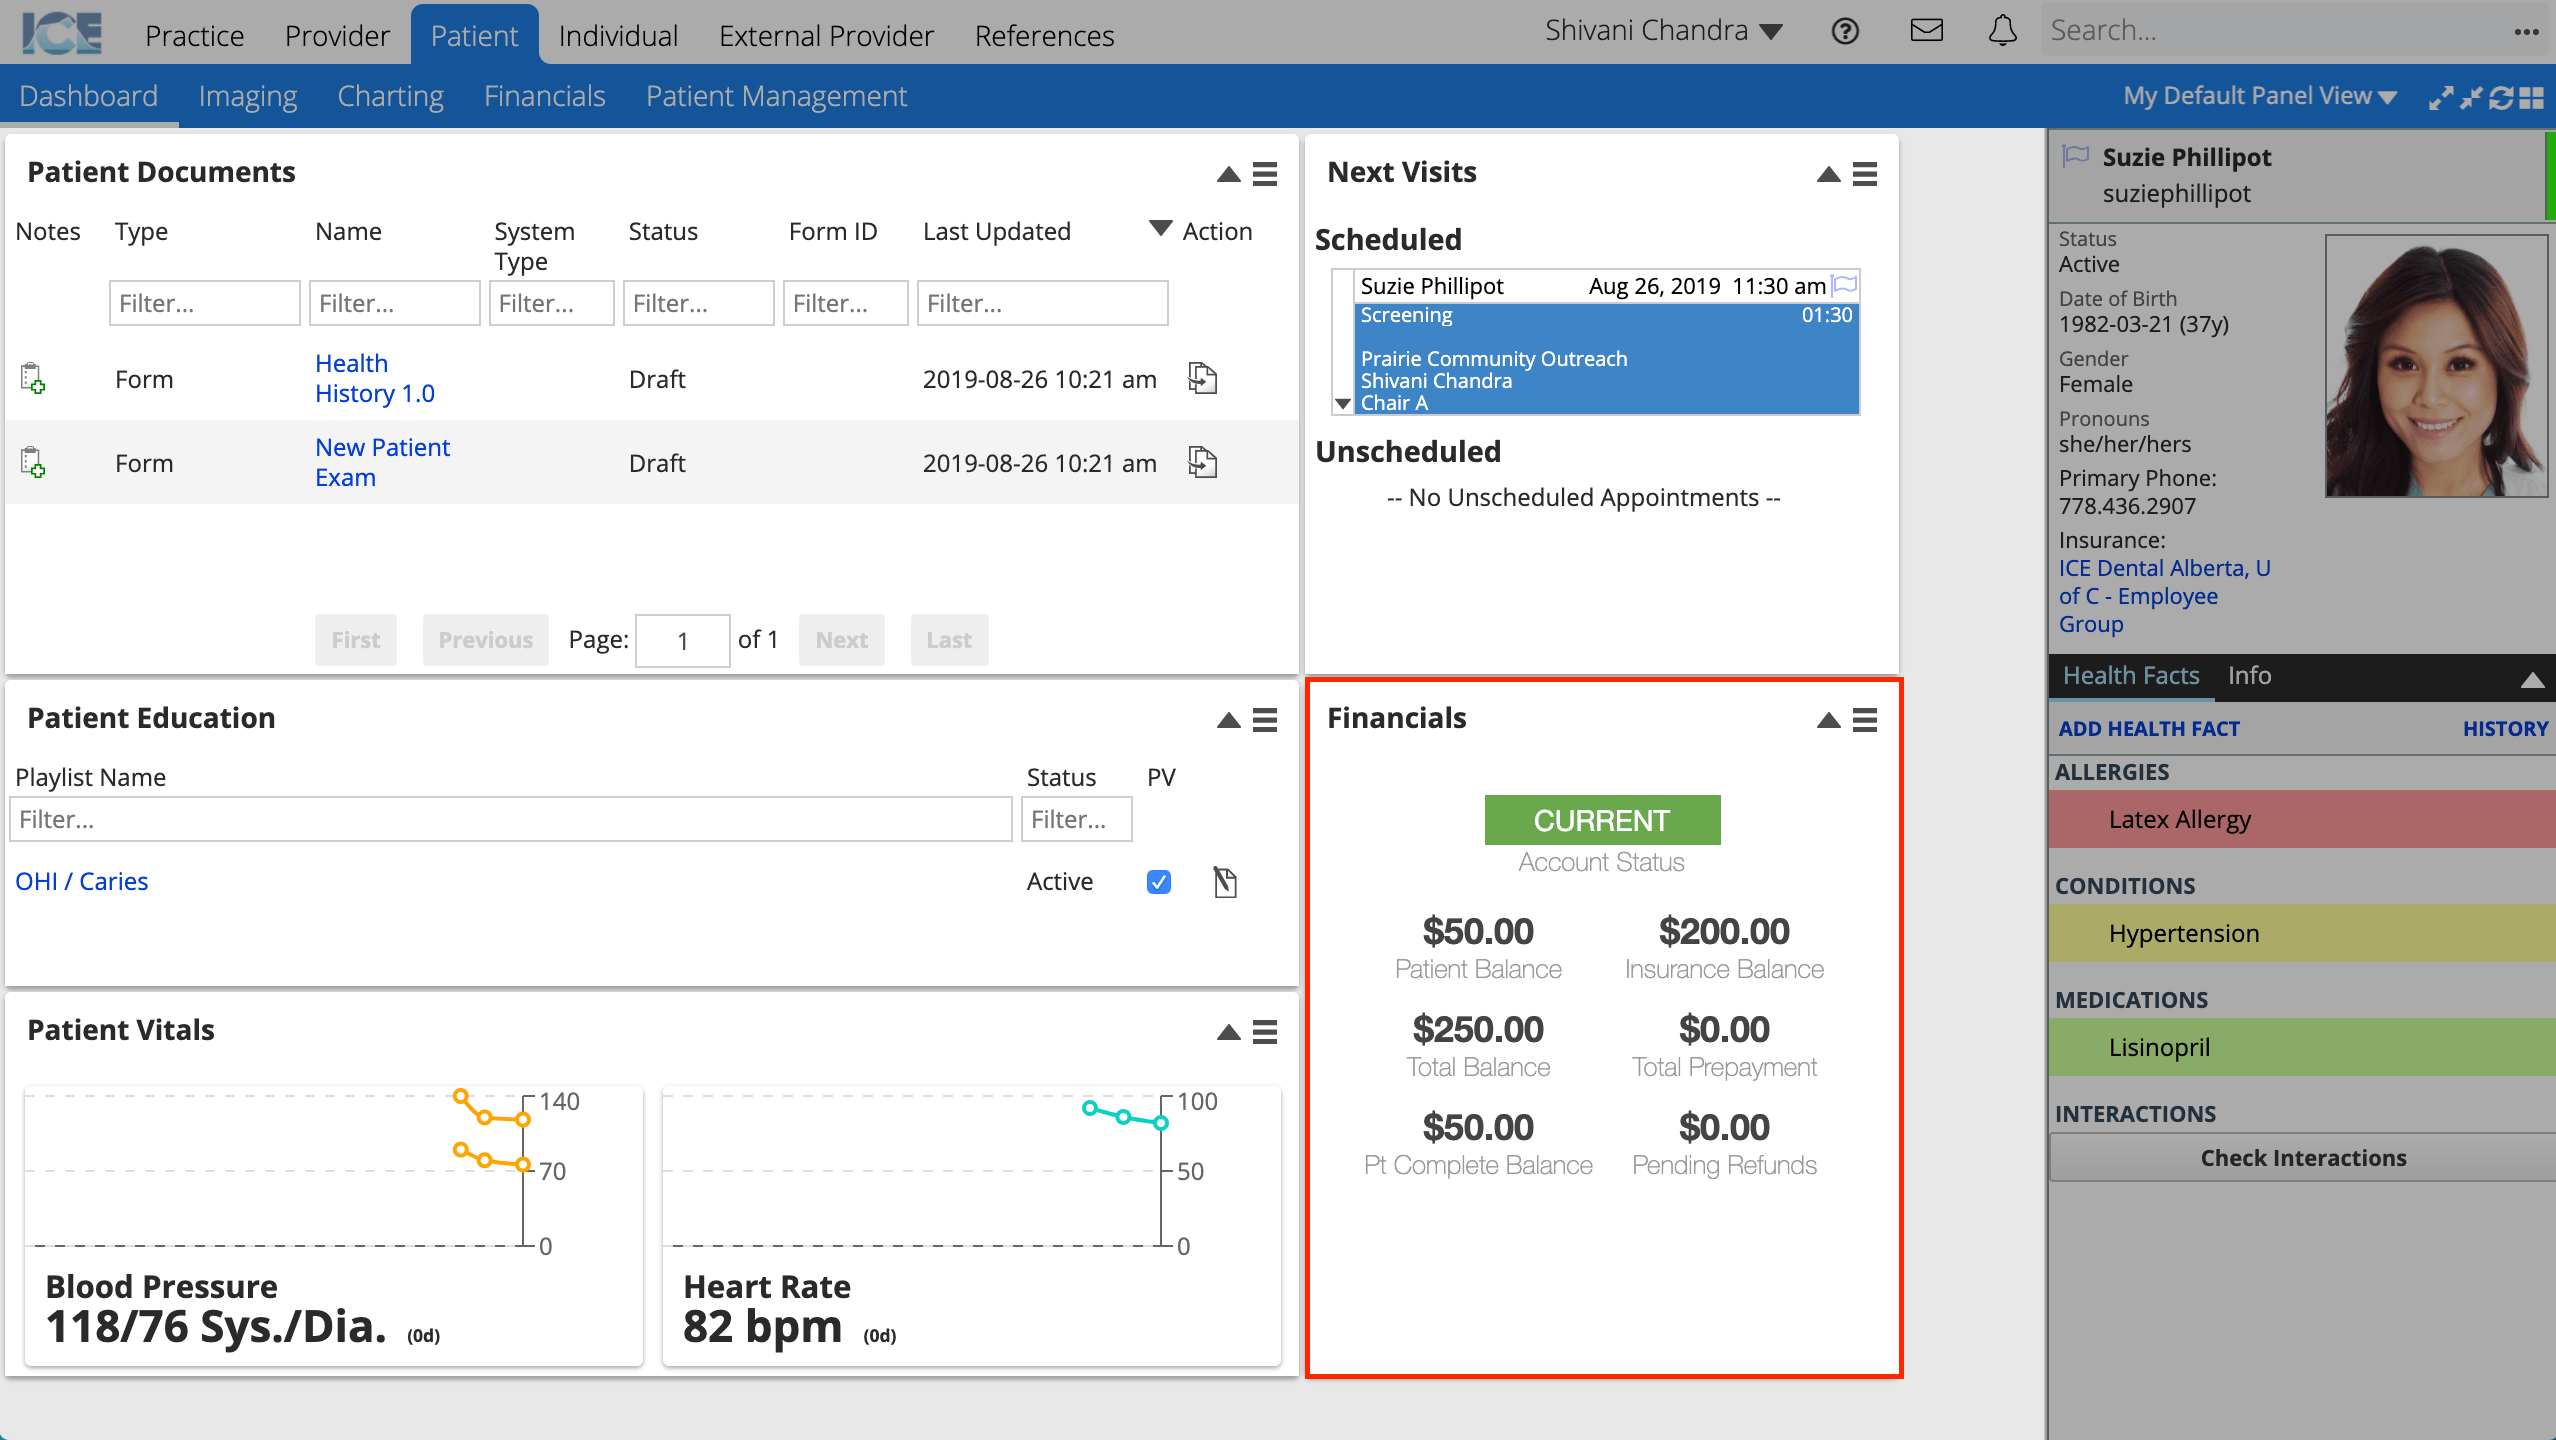
For example, the Patient Dashboard for front desk staff has the Financials panel on it so that you can:
- Quickly check a patient's balance
- Select the Financial panel's menu icon
 to access features like:
- Taking a payment
or - Generating a PDF financial statement for the patient
- Taking a payment
To learn more about how the system is organized or how to work with panels, see the support materials and videos below.
Reference Material
- Video - Navigating the System A 2 minute overview of how to navigate the system using the menus.
- Video - Panels Overview A 1 minute video describing what panels are and how to work with them.
- PDF - Workspace Tour Quick Reference Guide A handout to familiarize yourself with the system layout and terminology.
- Article - Menus overview Descriptions of what each menu contains and can be used for.
- Article - Panels overview An overview of what panels are and how to use them.