Create an appointment
It's easy to create an appointment once you've found an open time range for the providers and resources you want to schedule.
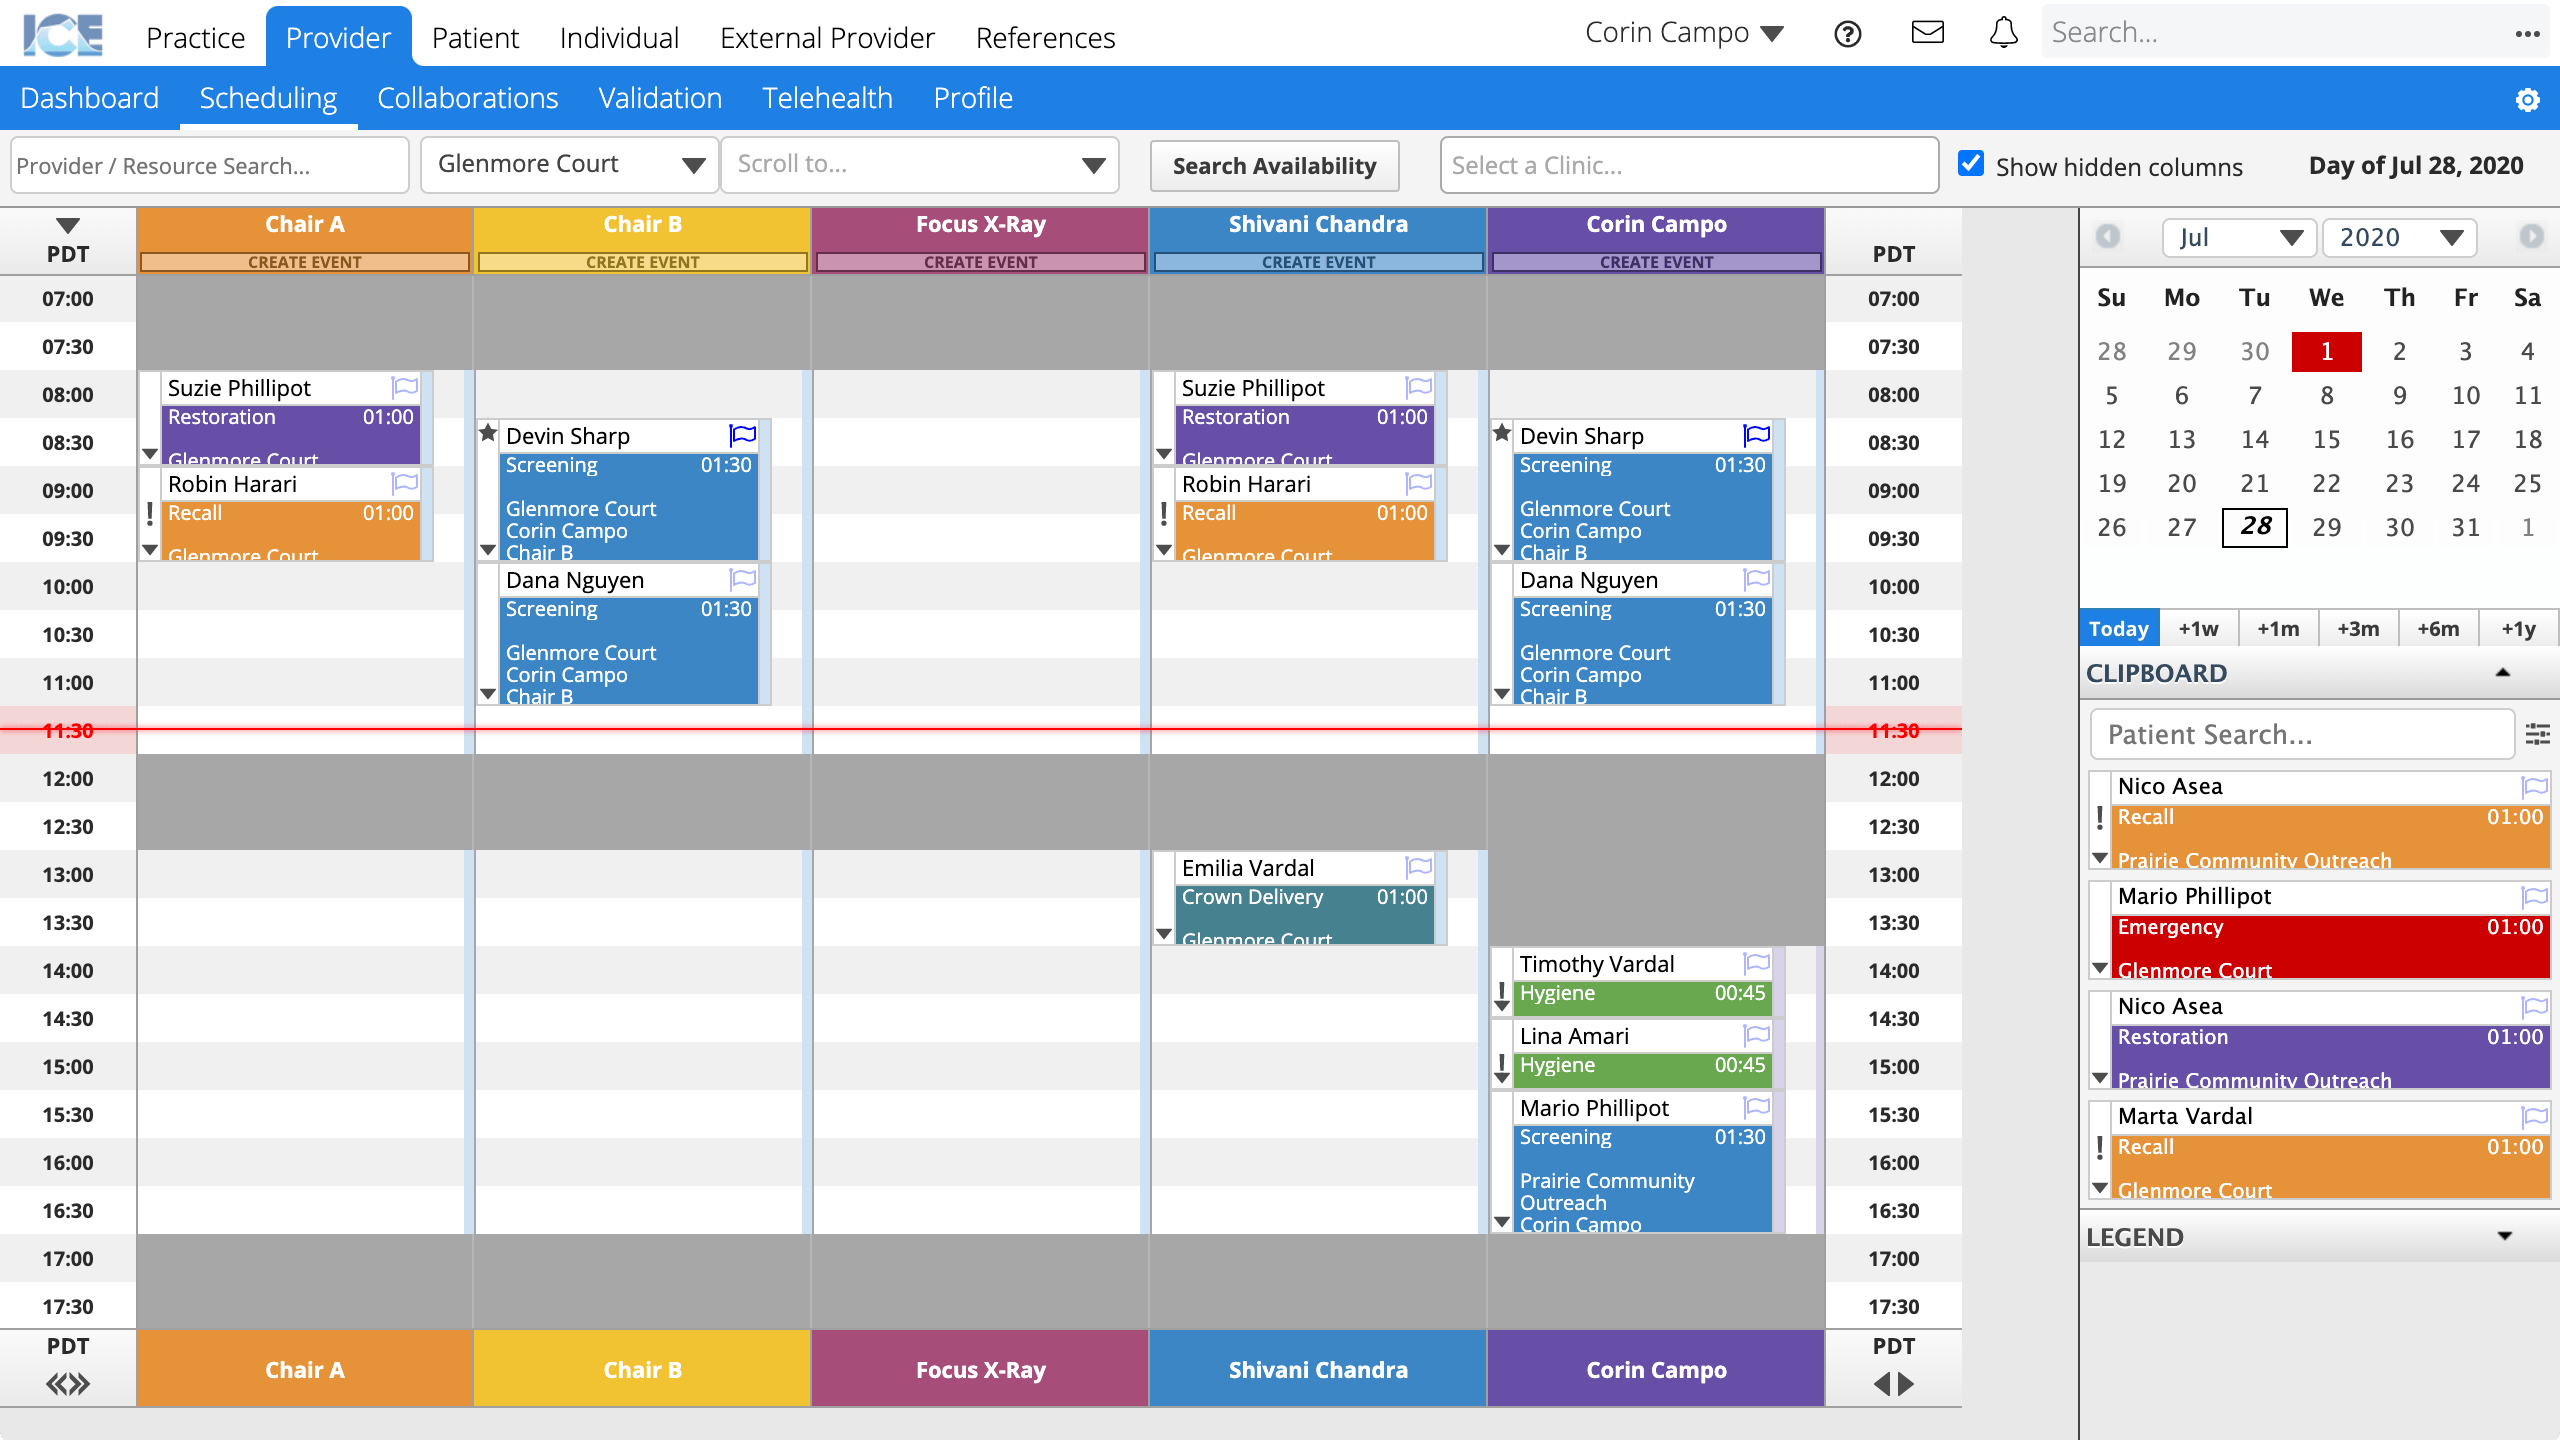
- Double click the schedule grid at the time and under the provider or resource you want to schedule
- The available clinic, date, start time, and provider or resource are autofilled
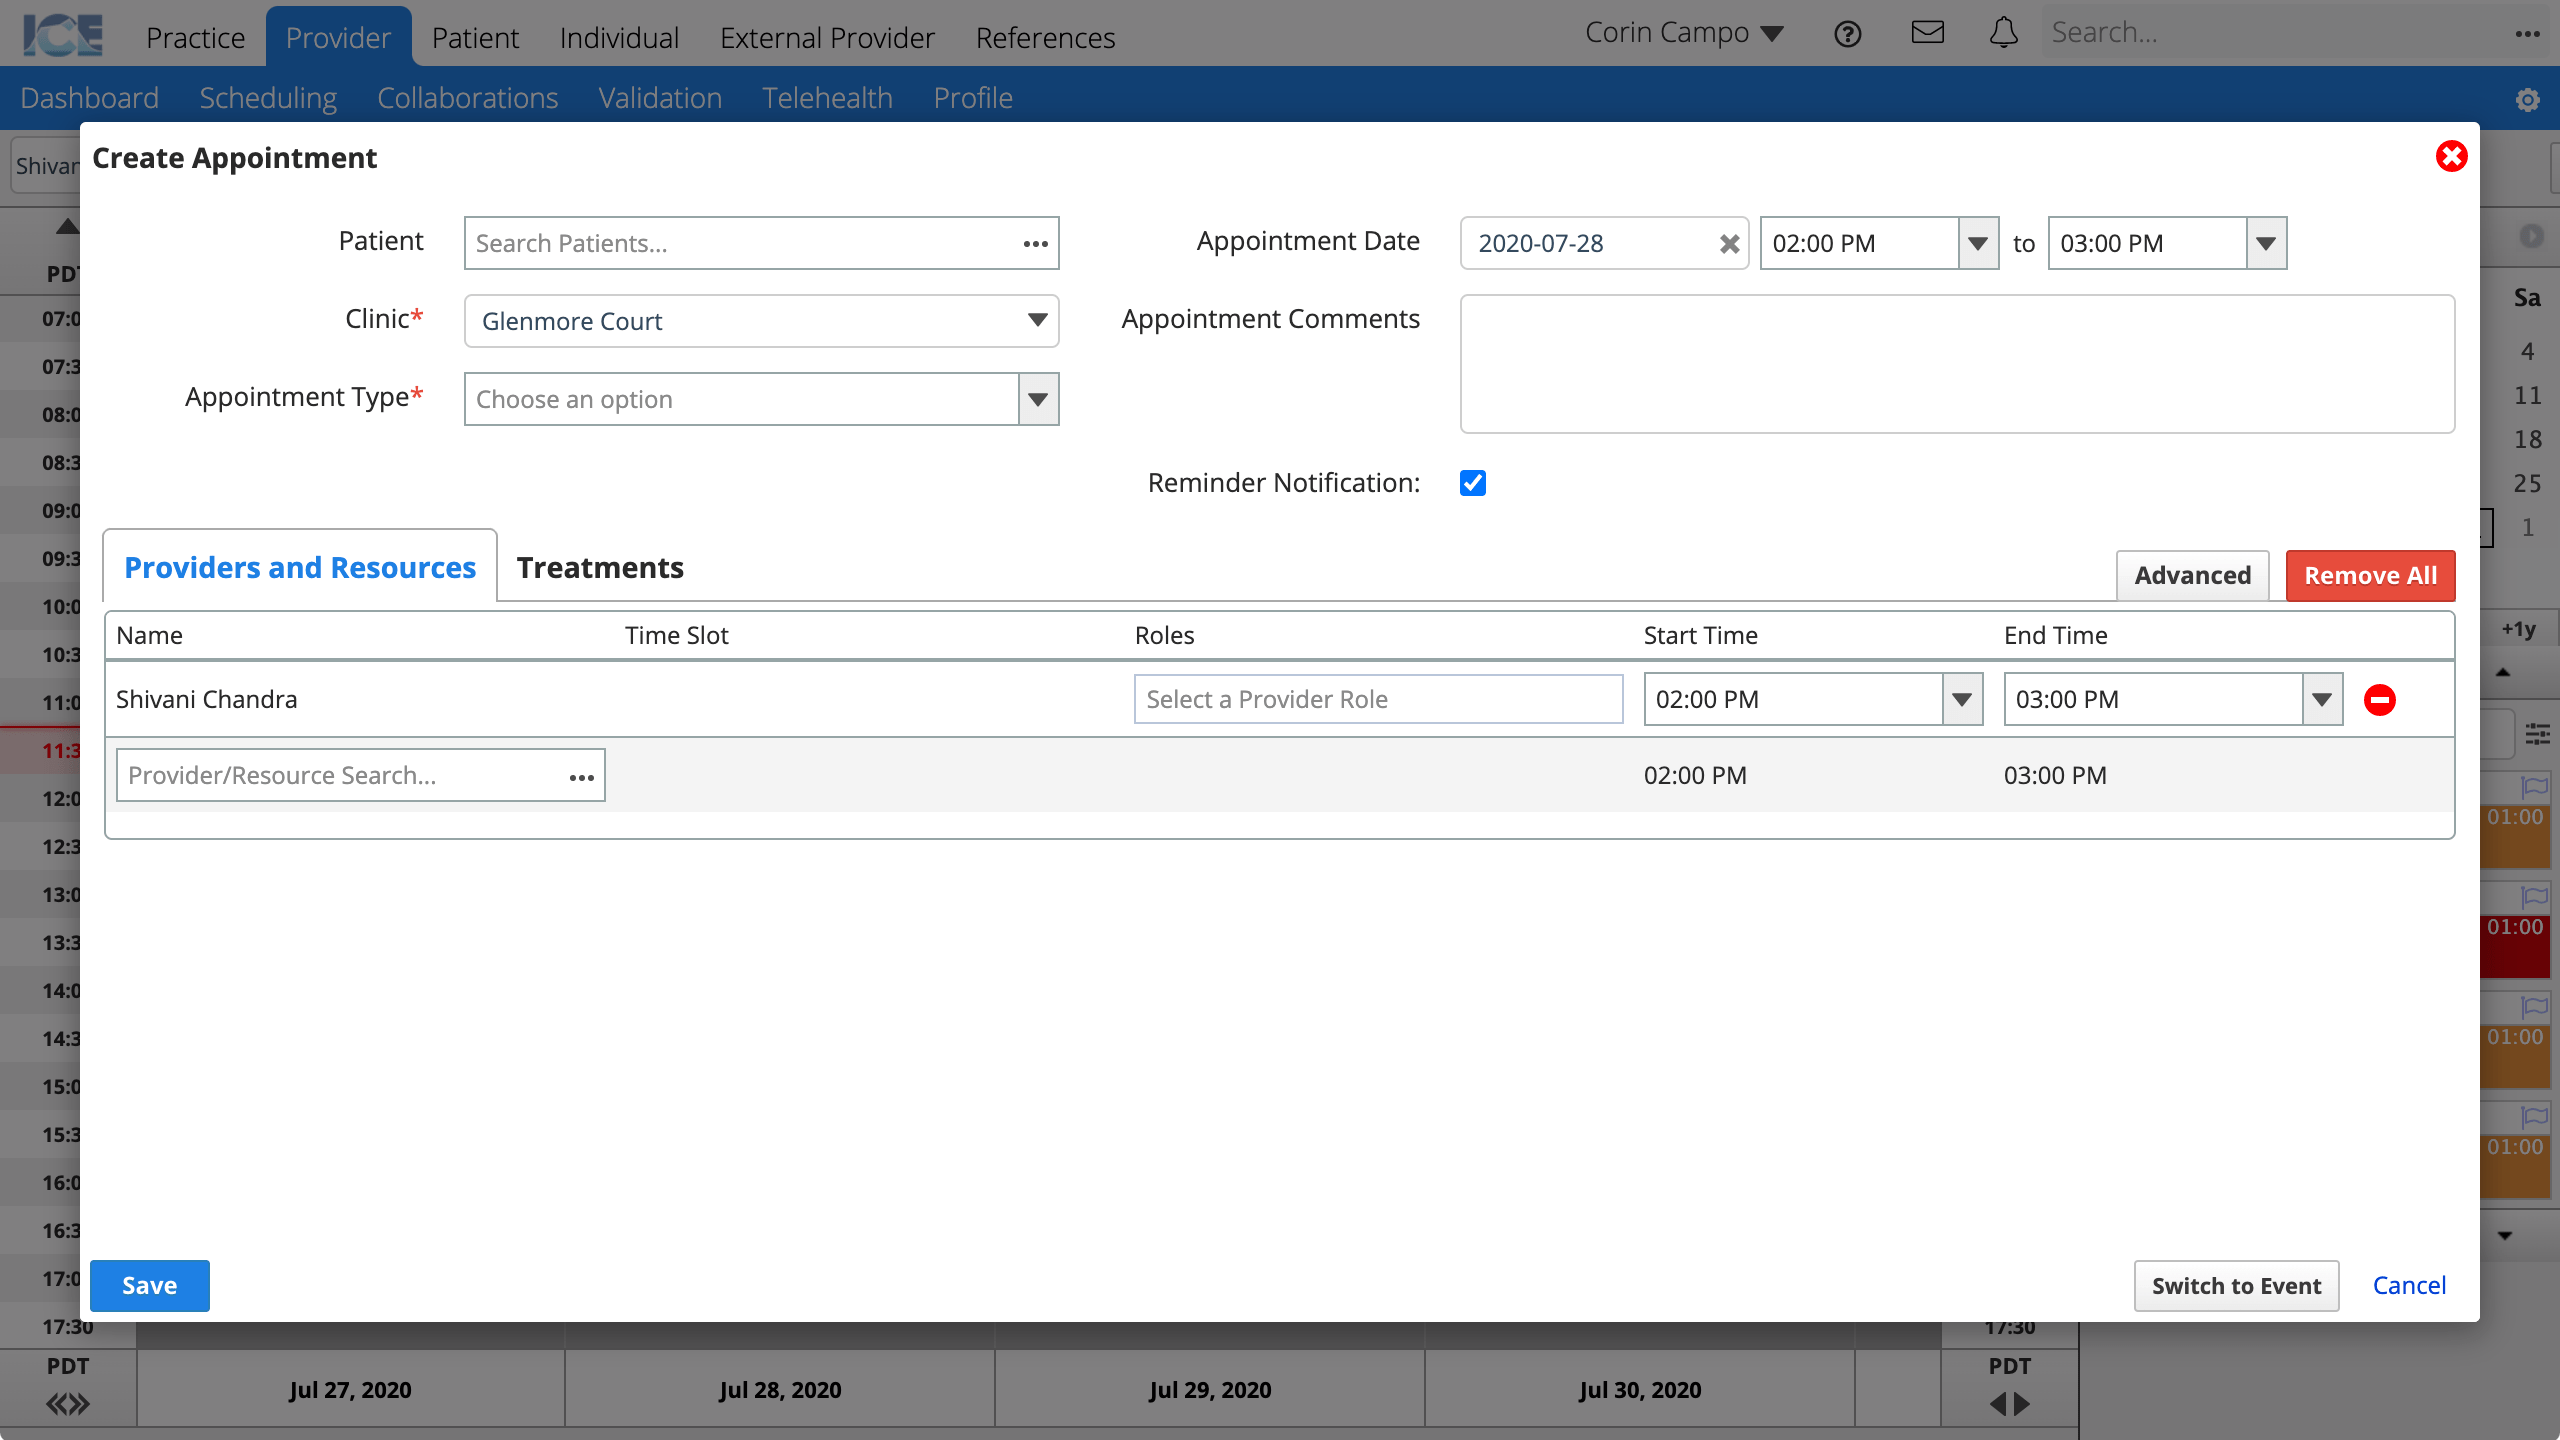
- If you see the Create Event window instead of the Create Appointment window, select Switch to Appointment in the bottom right corner of the window.
- Confirm the patient, appointment type, end time, and add any necessary comments
- The time fields are highlighted in orange if you attempt to schedule an appointment today with a start time that is already past.
- Confirm that the Providers and Resources table includes all of the providers or resources you want to schedule
- To learn more about this table, see Assign providers and resources to an appointment.
- Select Save
Appointment visuals summary
The appointment appears on the schedule grid and displays summary information about itself.
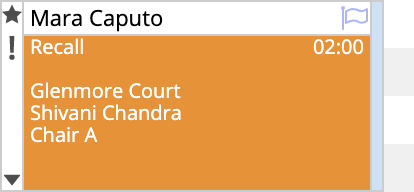
- The patient name, appointment type and colour, appointment duration, clinic, and assigned providers or resources all appear on the appointment.
- A colour bar on the left of the appointment indicates the appointment's status.
- A colour bar on the right of the appointment indicates the appointment's clinic.
- A count at the bottom of the appointment indicates the number of linked procedures from charting. It only appears if there is one or more more.
- To learn more about adding treatments to appointments, see Connect treatment to an appointment.
| Icon | Description |
|---|---|
| A star appears on the appointment if it has comments. | |
| An exclamation mark appears on the appointment if it has empty time slots. | |
| Select the arrow or triangle in the bottom left corner to see and update an appointment's status. | |
| A flag in the top right corner shows whether this patient has any administrative notes. |
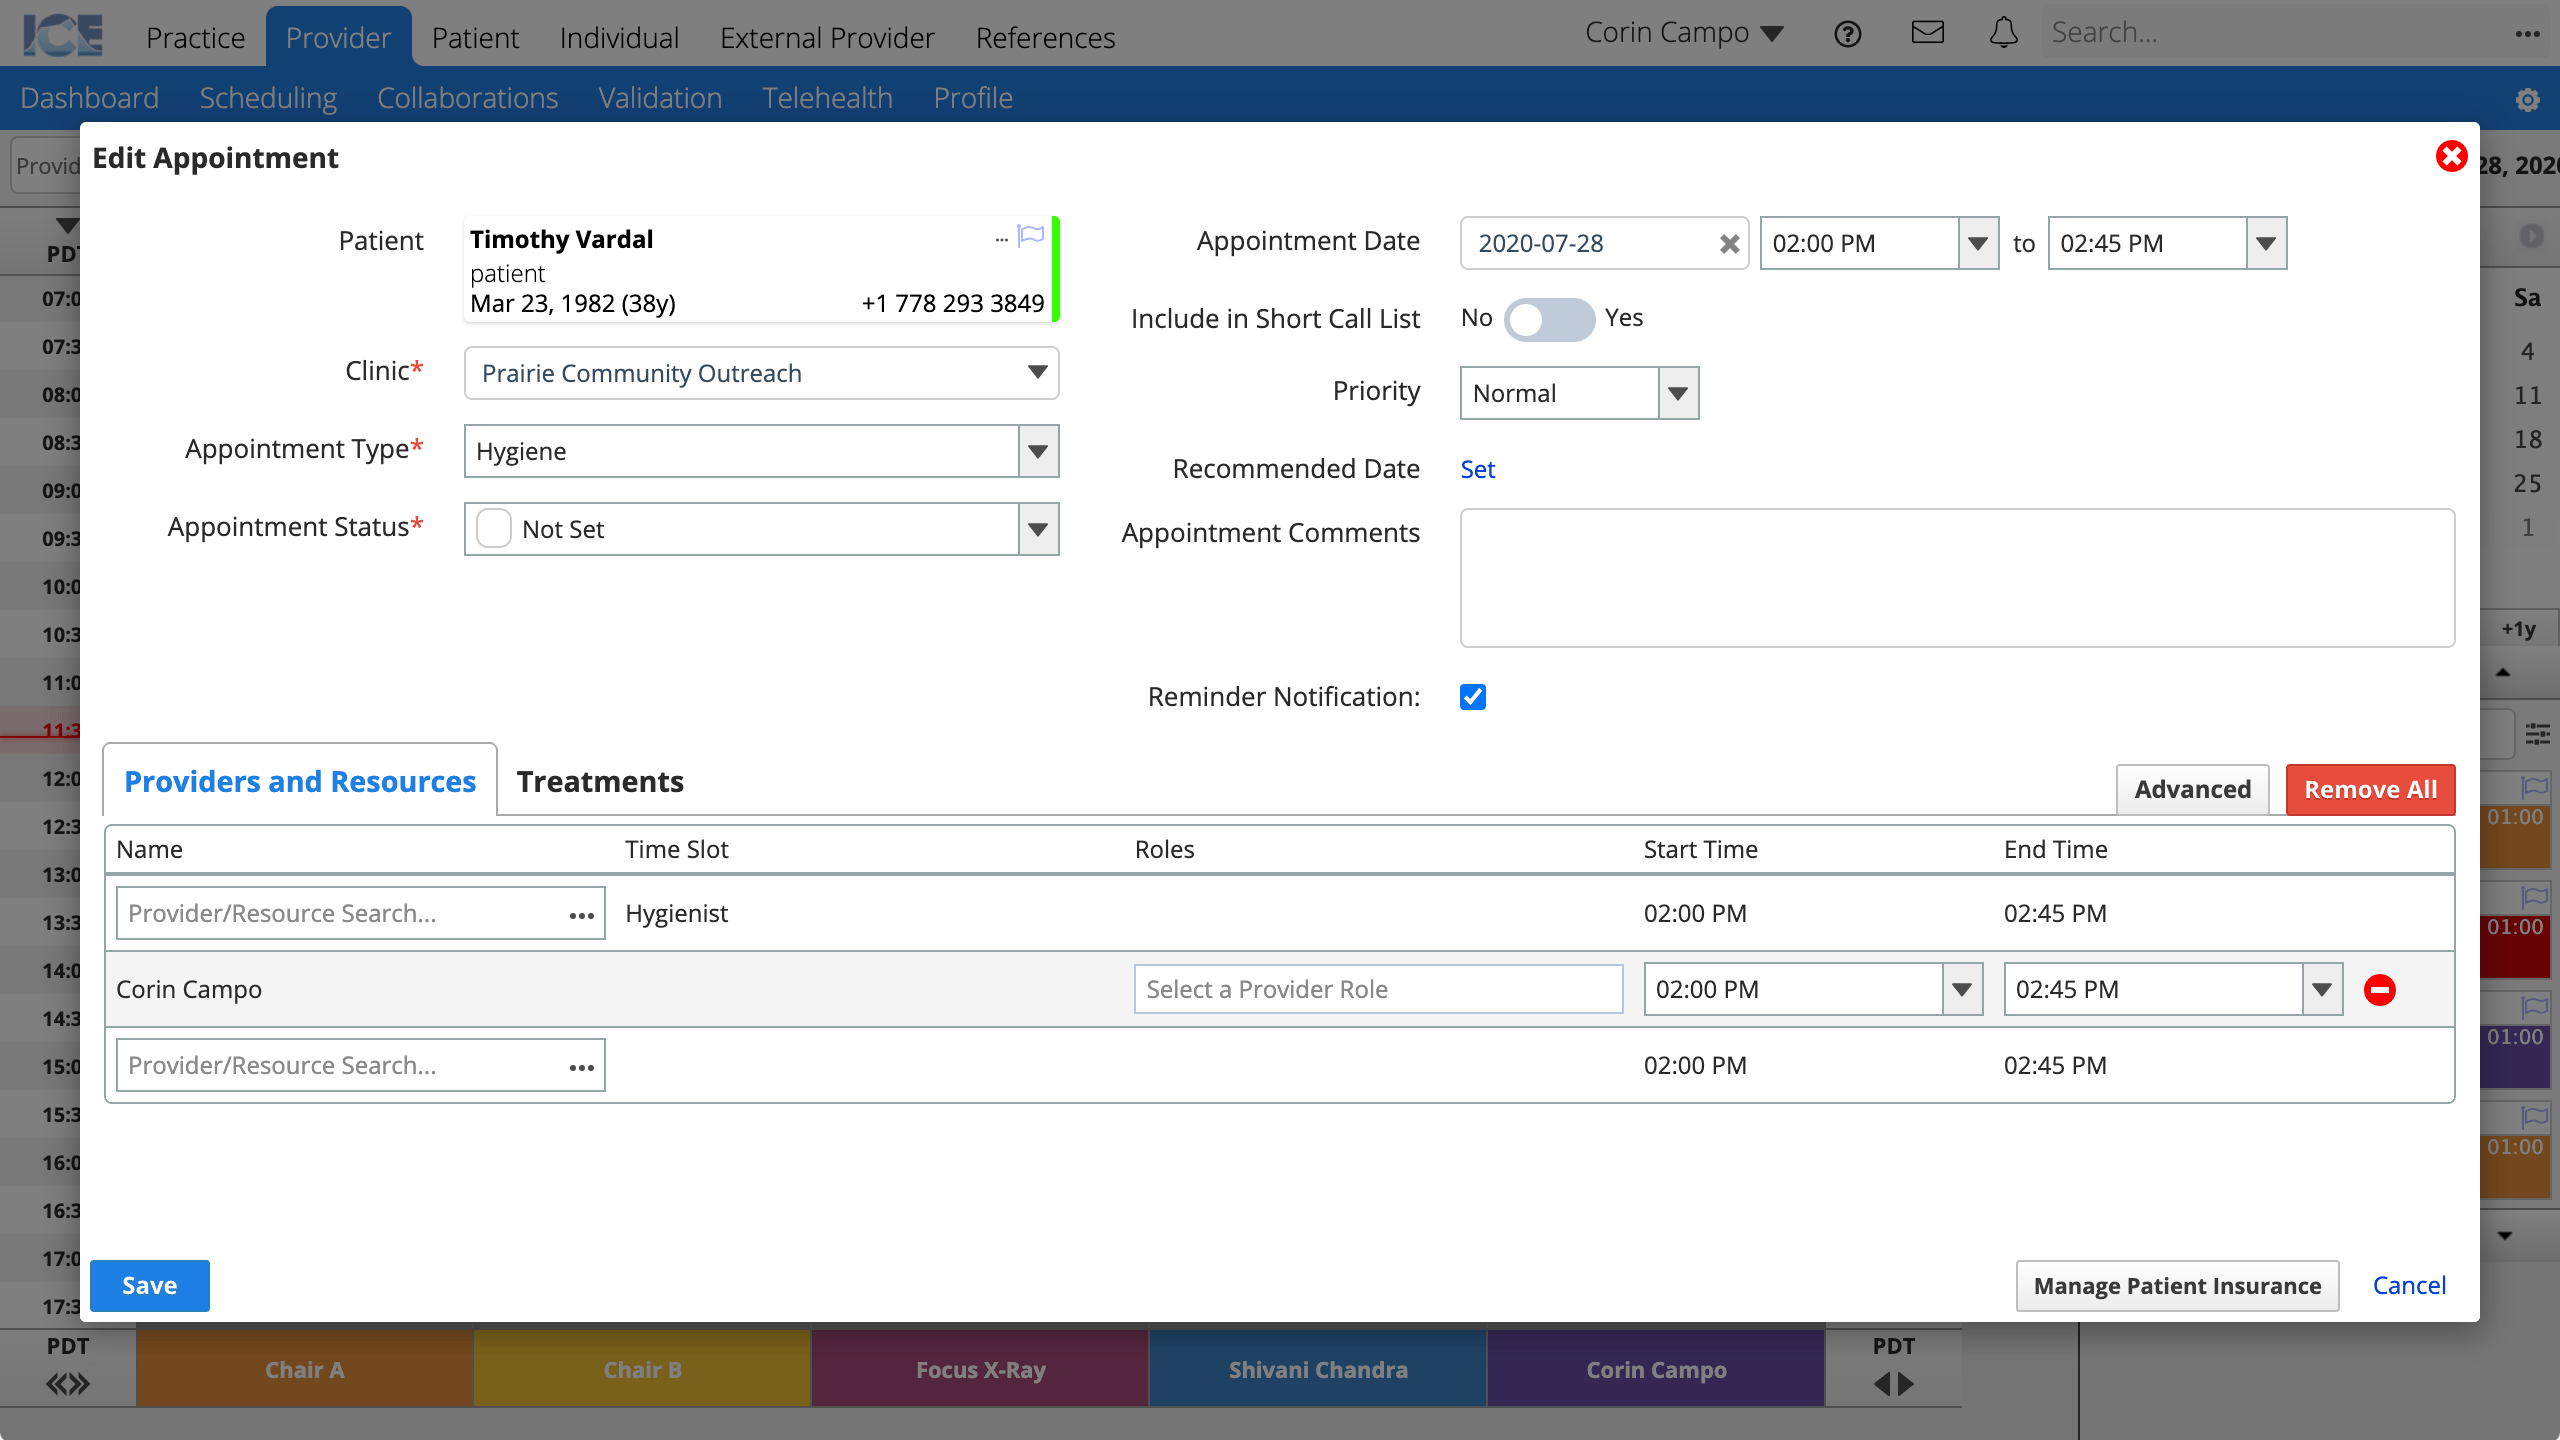
Edit an appointment
- Double-click an appointment to open the Edit Appointment window
or
Select an appointment to view the appointment summary and then select Edit