Scan documents to a patient record
You can scan documents directly into a patient record. These documents may include paper forms, identification cards, or insurance details. The scanned files are saved as PDFs and are accessible from the Files panel.
- Select
 from the Files panel
 - Choose Scan
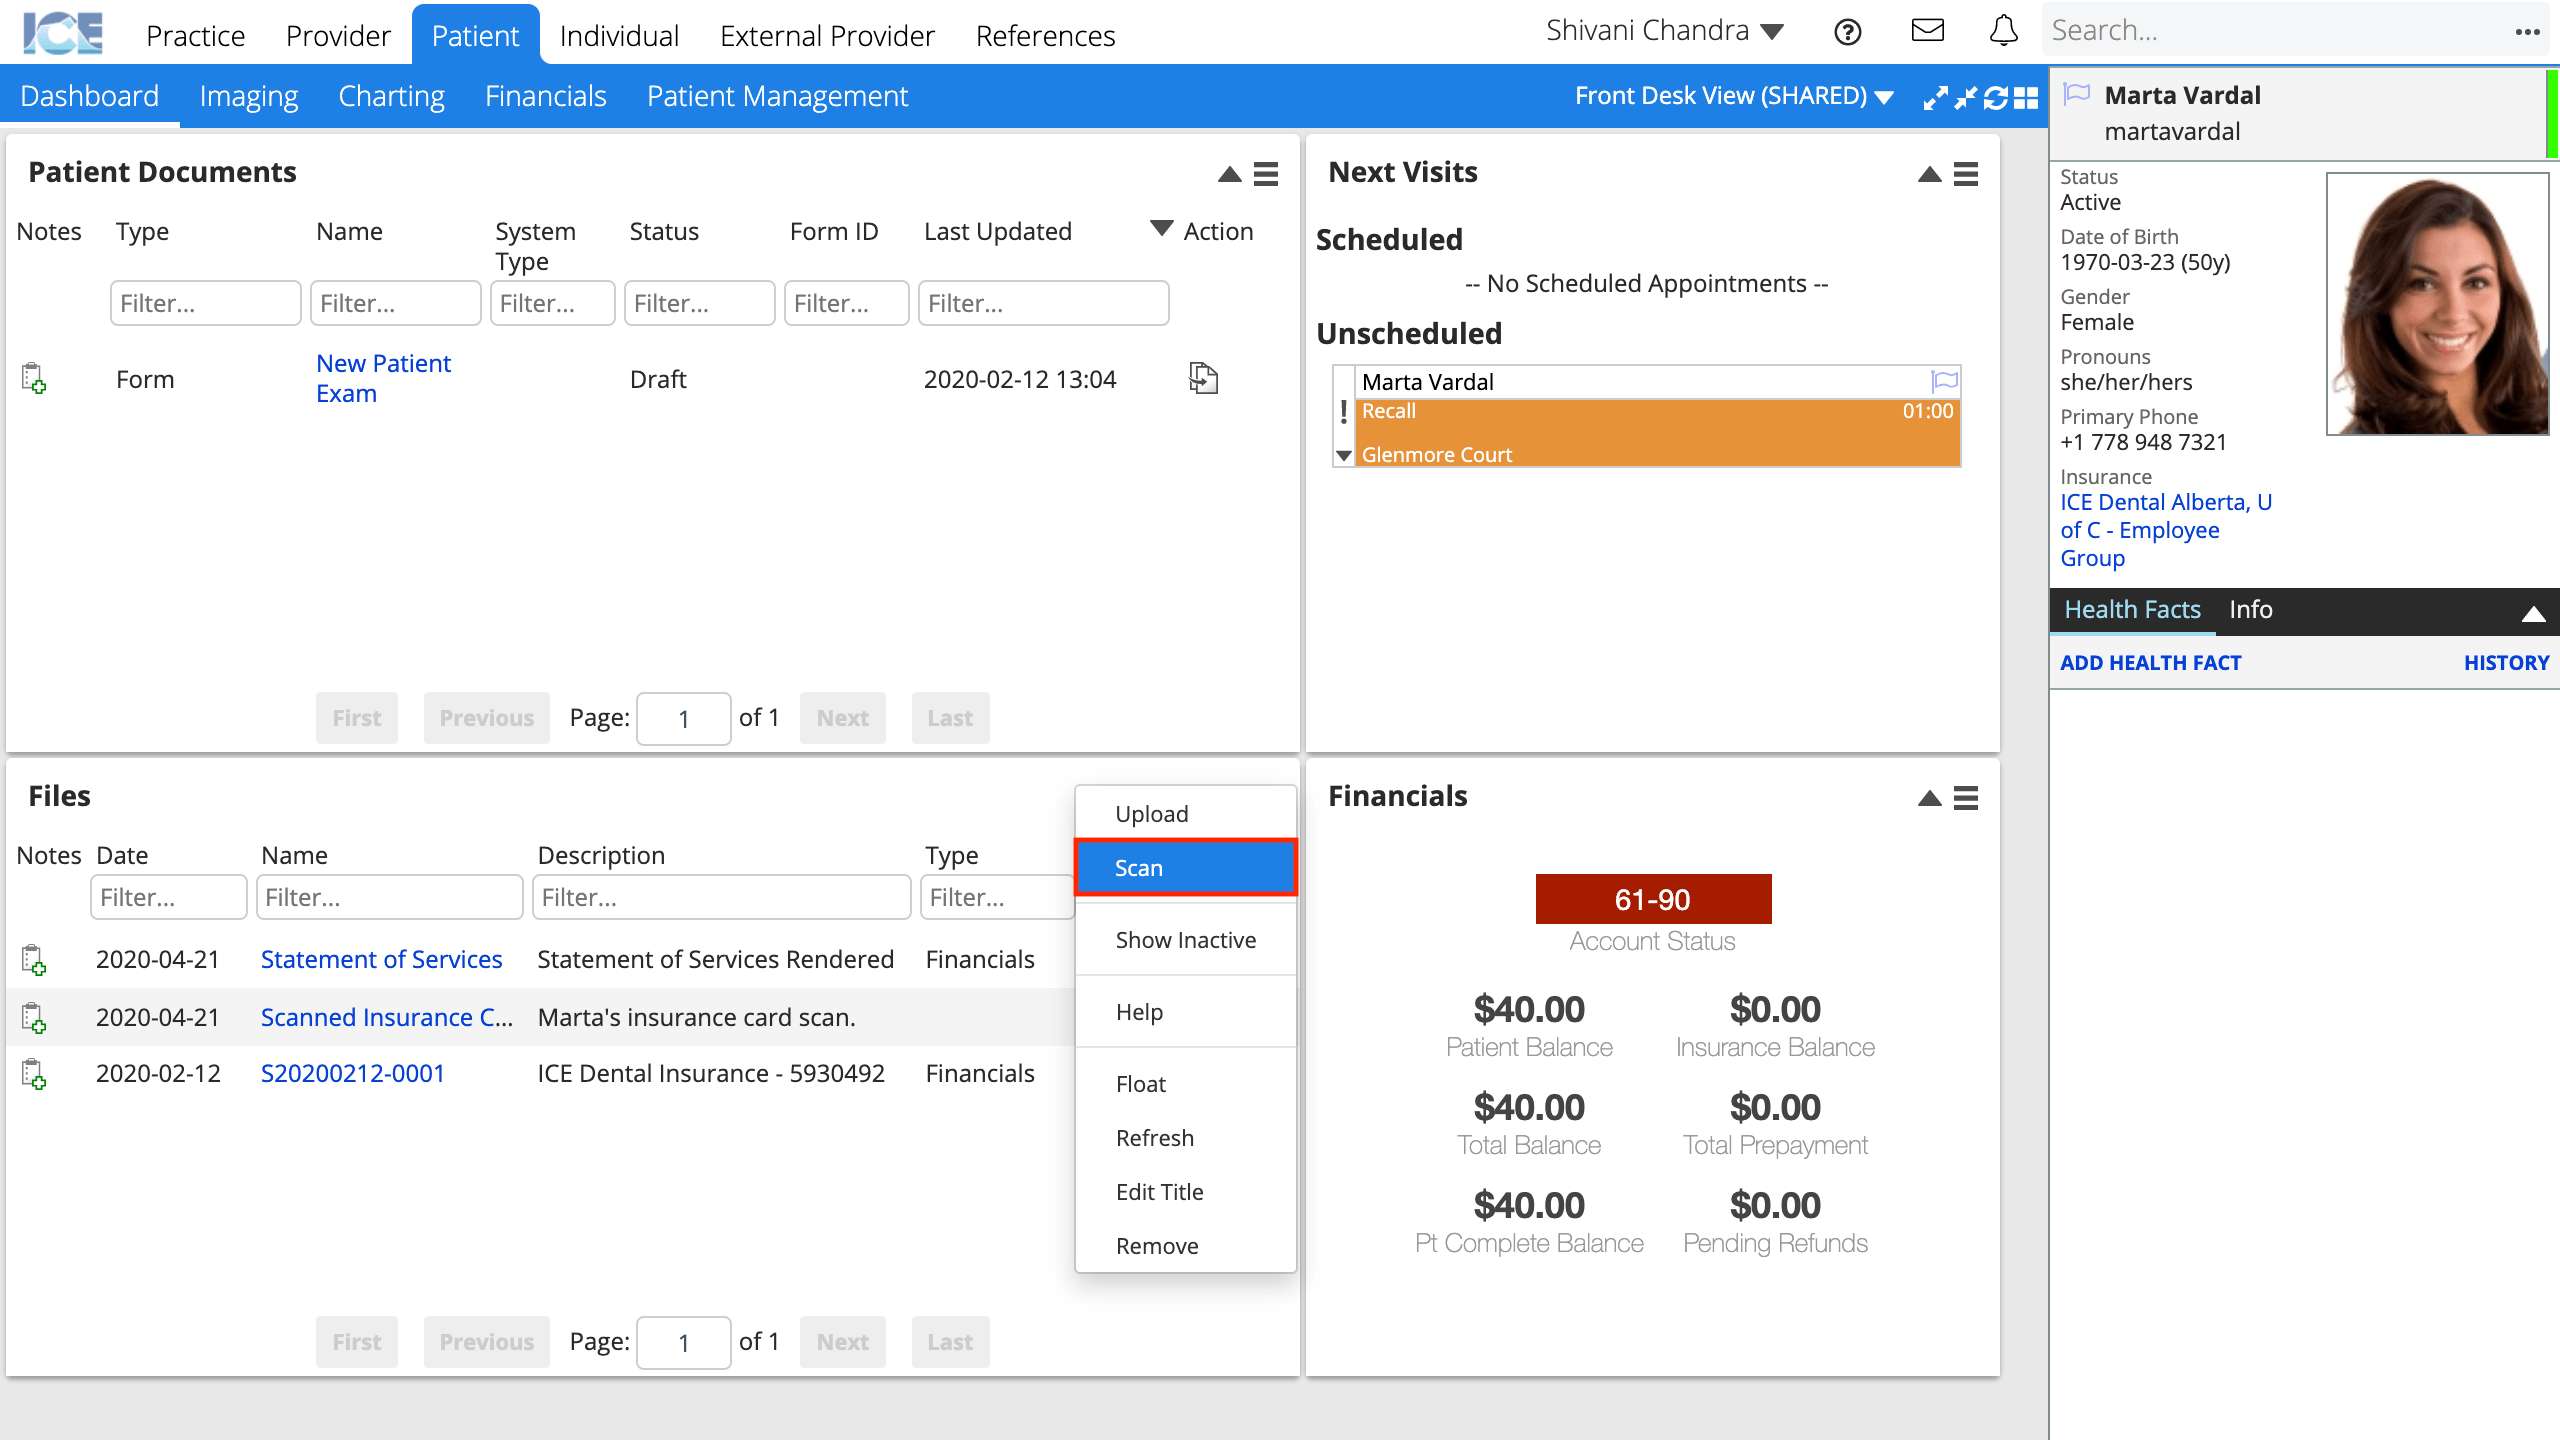
- You may be prompted to authenticate using ICE Local Services to begin your scan. Refer to "Authenticating a scanner with ICE Local Services" below for more information.
- Enter a name and description
- Select Save

- The file is now saved inside the Files panel
- Select
 to the right of the file to edit the name, description and status.
 - Select
 to the left of the file to write a note about it.
- Select
Pick a Files panel
The Practice, Provider, and Patient dashboards each have their own separate Files panel.
Always confirm the Files panel you are using is appropriate for the file you want to view or upload.
- Patient and Practice files are available to people with permissions to view, print, download, or upload.
- Provider files are specific to your login to view, print, download, or upload.
Authenticate a scanner with ICE Local Services
ICE Local Services must be installed on your computer and launched to enable scanning functionality. This allows ICE Health Systems to securely connect to your scanner. To learn more about installing ICE Local Services, see Installing ICE Local Services.
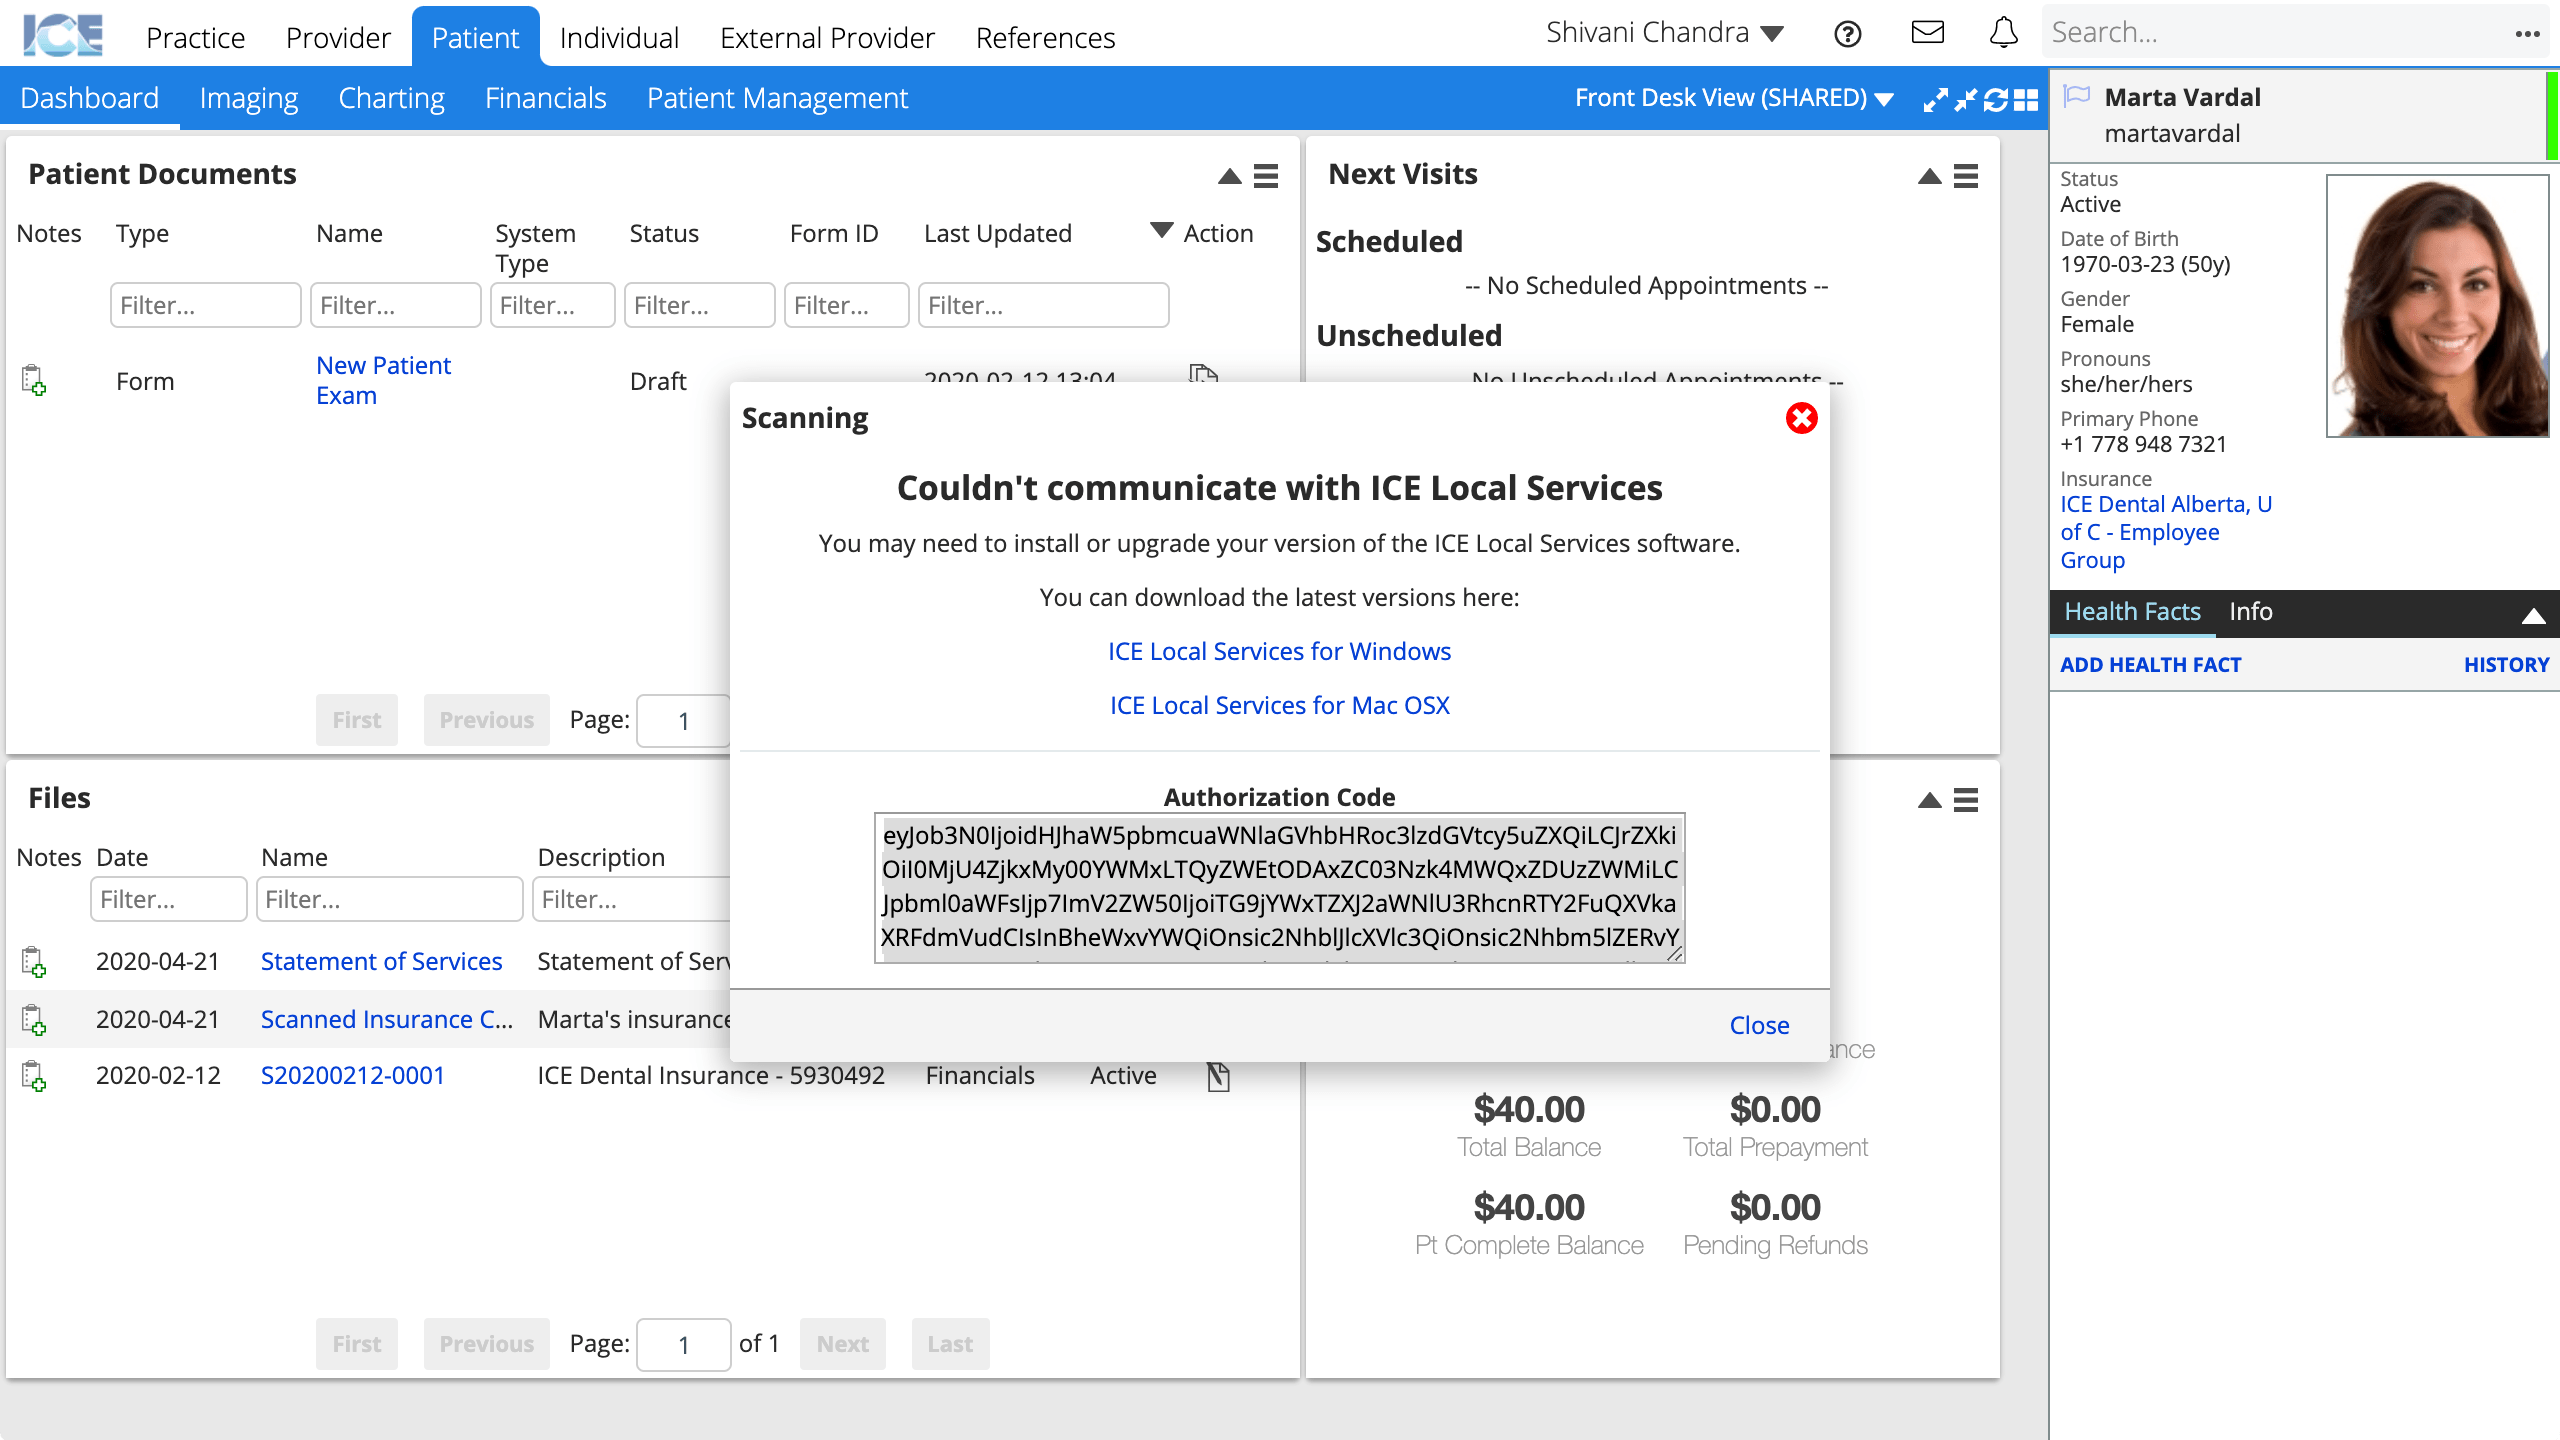
Before you can scan documents and save them to the Files panel, your scanner must be authenticated with ICE Local Services. This requires the authorization code provided in the Scanning window. ICE Health Systems prompts you to enter an authorization code into ICE Local Services during each login session.
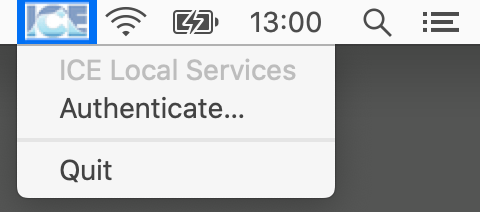
- Confirm ICE Local Services is running in your menu bar (Mac) or system tray (Windows)

- If it is not running, launch the ICE Local Services application.
- Select from the Files panel
- Choose Scan
- Copy the authentication code from the Scanning window
- Select ICE Local Services from your menu bar (Mac) or system tray (Windows) and choose Authenticate
- Paste the authentication code inside the ICE Authentication Token field and select Authenticate

- Your scanner is now authenticated