ICE Health Systems introduction
To help you get started, this page answers three questions we often receive from new learners:
- What is ICE Health Systems?
- How do different people use ICE Health Systems?
- What does ICE Health Systems look like?
A cloud-based health record
ICE Health Systems is a cloud-based electronic health record system.
It can be used by dental and medical clinics, educational institutions, groups providing remote health services, and more.
It is developed and refined in partnership with the Collaboration for Health IT.
- The Collaboration is a group of clinical educators, researchers and administrators at top dental schools.
- It provides official guidance for the system and coordination with the global professional community. To learn more, see https://collaboration4hit.org
Here is a visual summary of the core activities you can complete in the system.
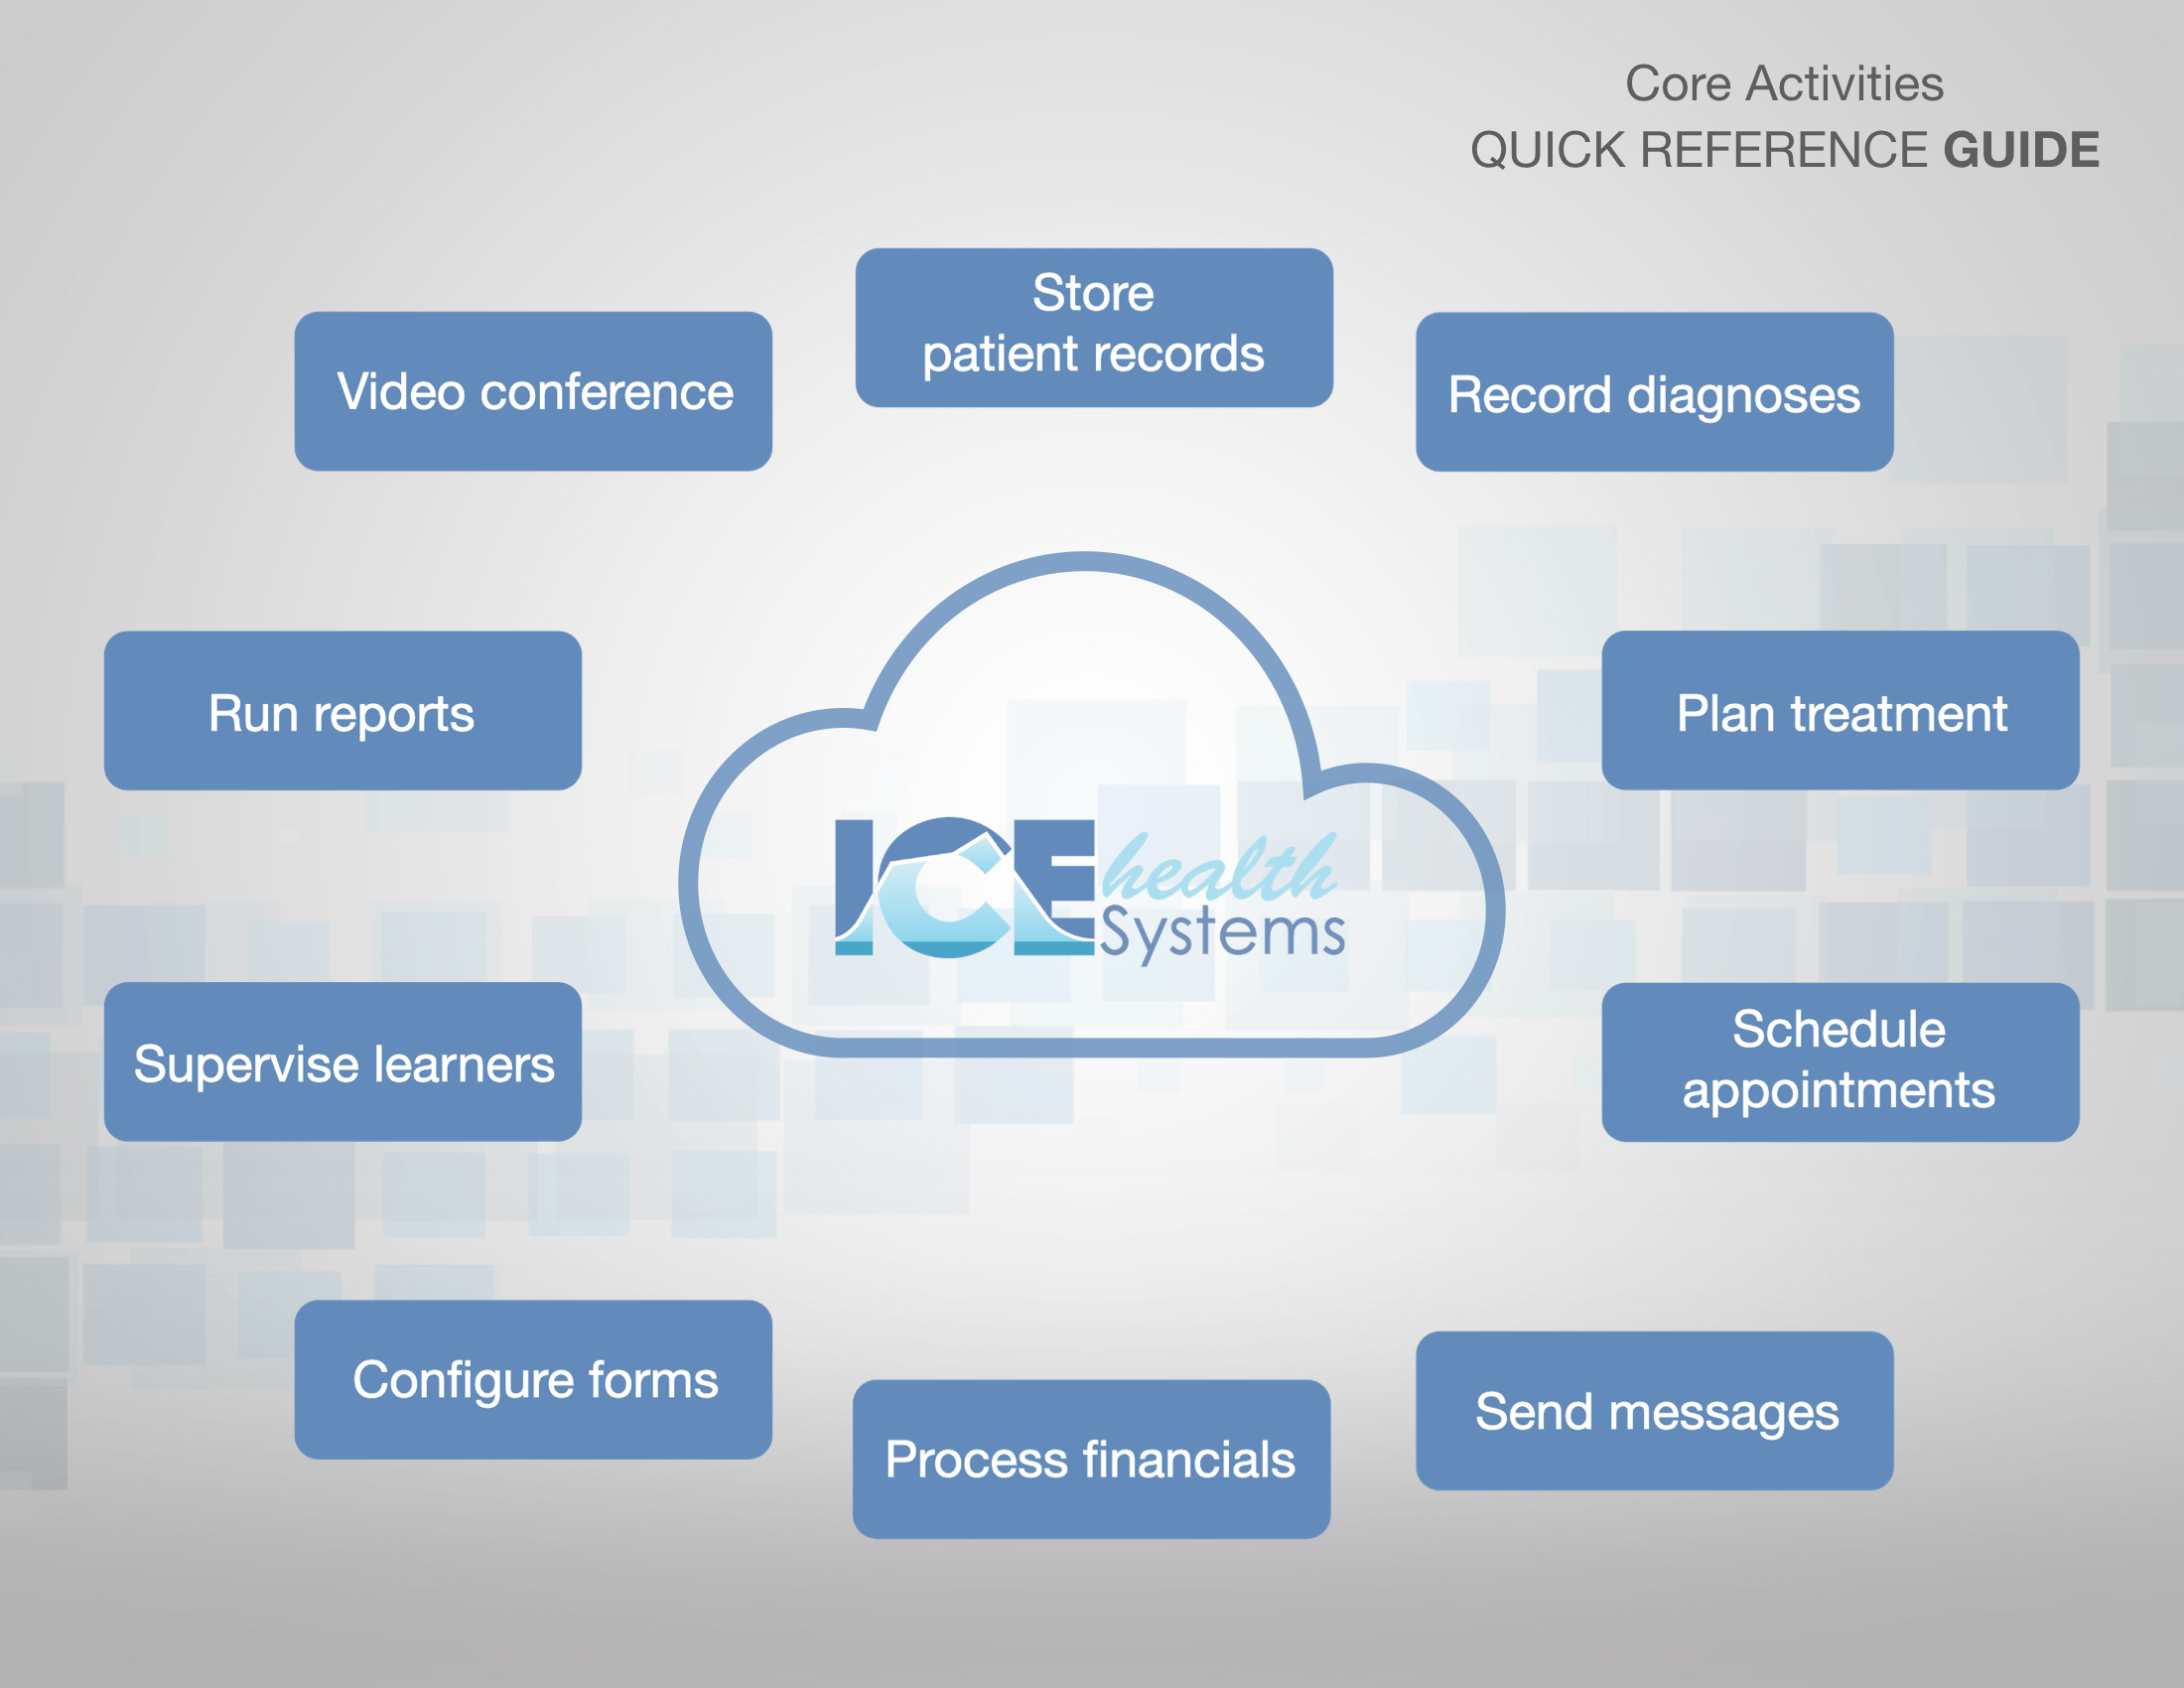
- To learn more about an activity, select it in this interactive PDF to open a related help article: PDF - Core Activities Quick Reference Guide.
For clinicians, educators, researchers, and more
Our collaborators are finding new ways to take advantage of the tools in ICE Health Systems all the time.
Here is a visual example of what some people in different roles may enter into the system and what the system can provide in return.
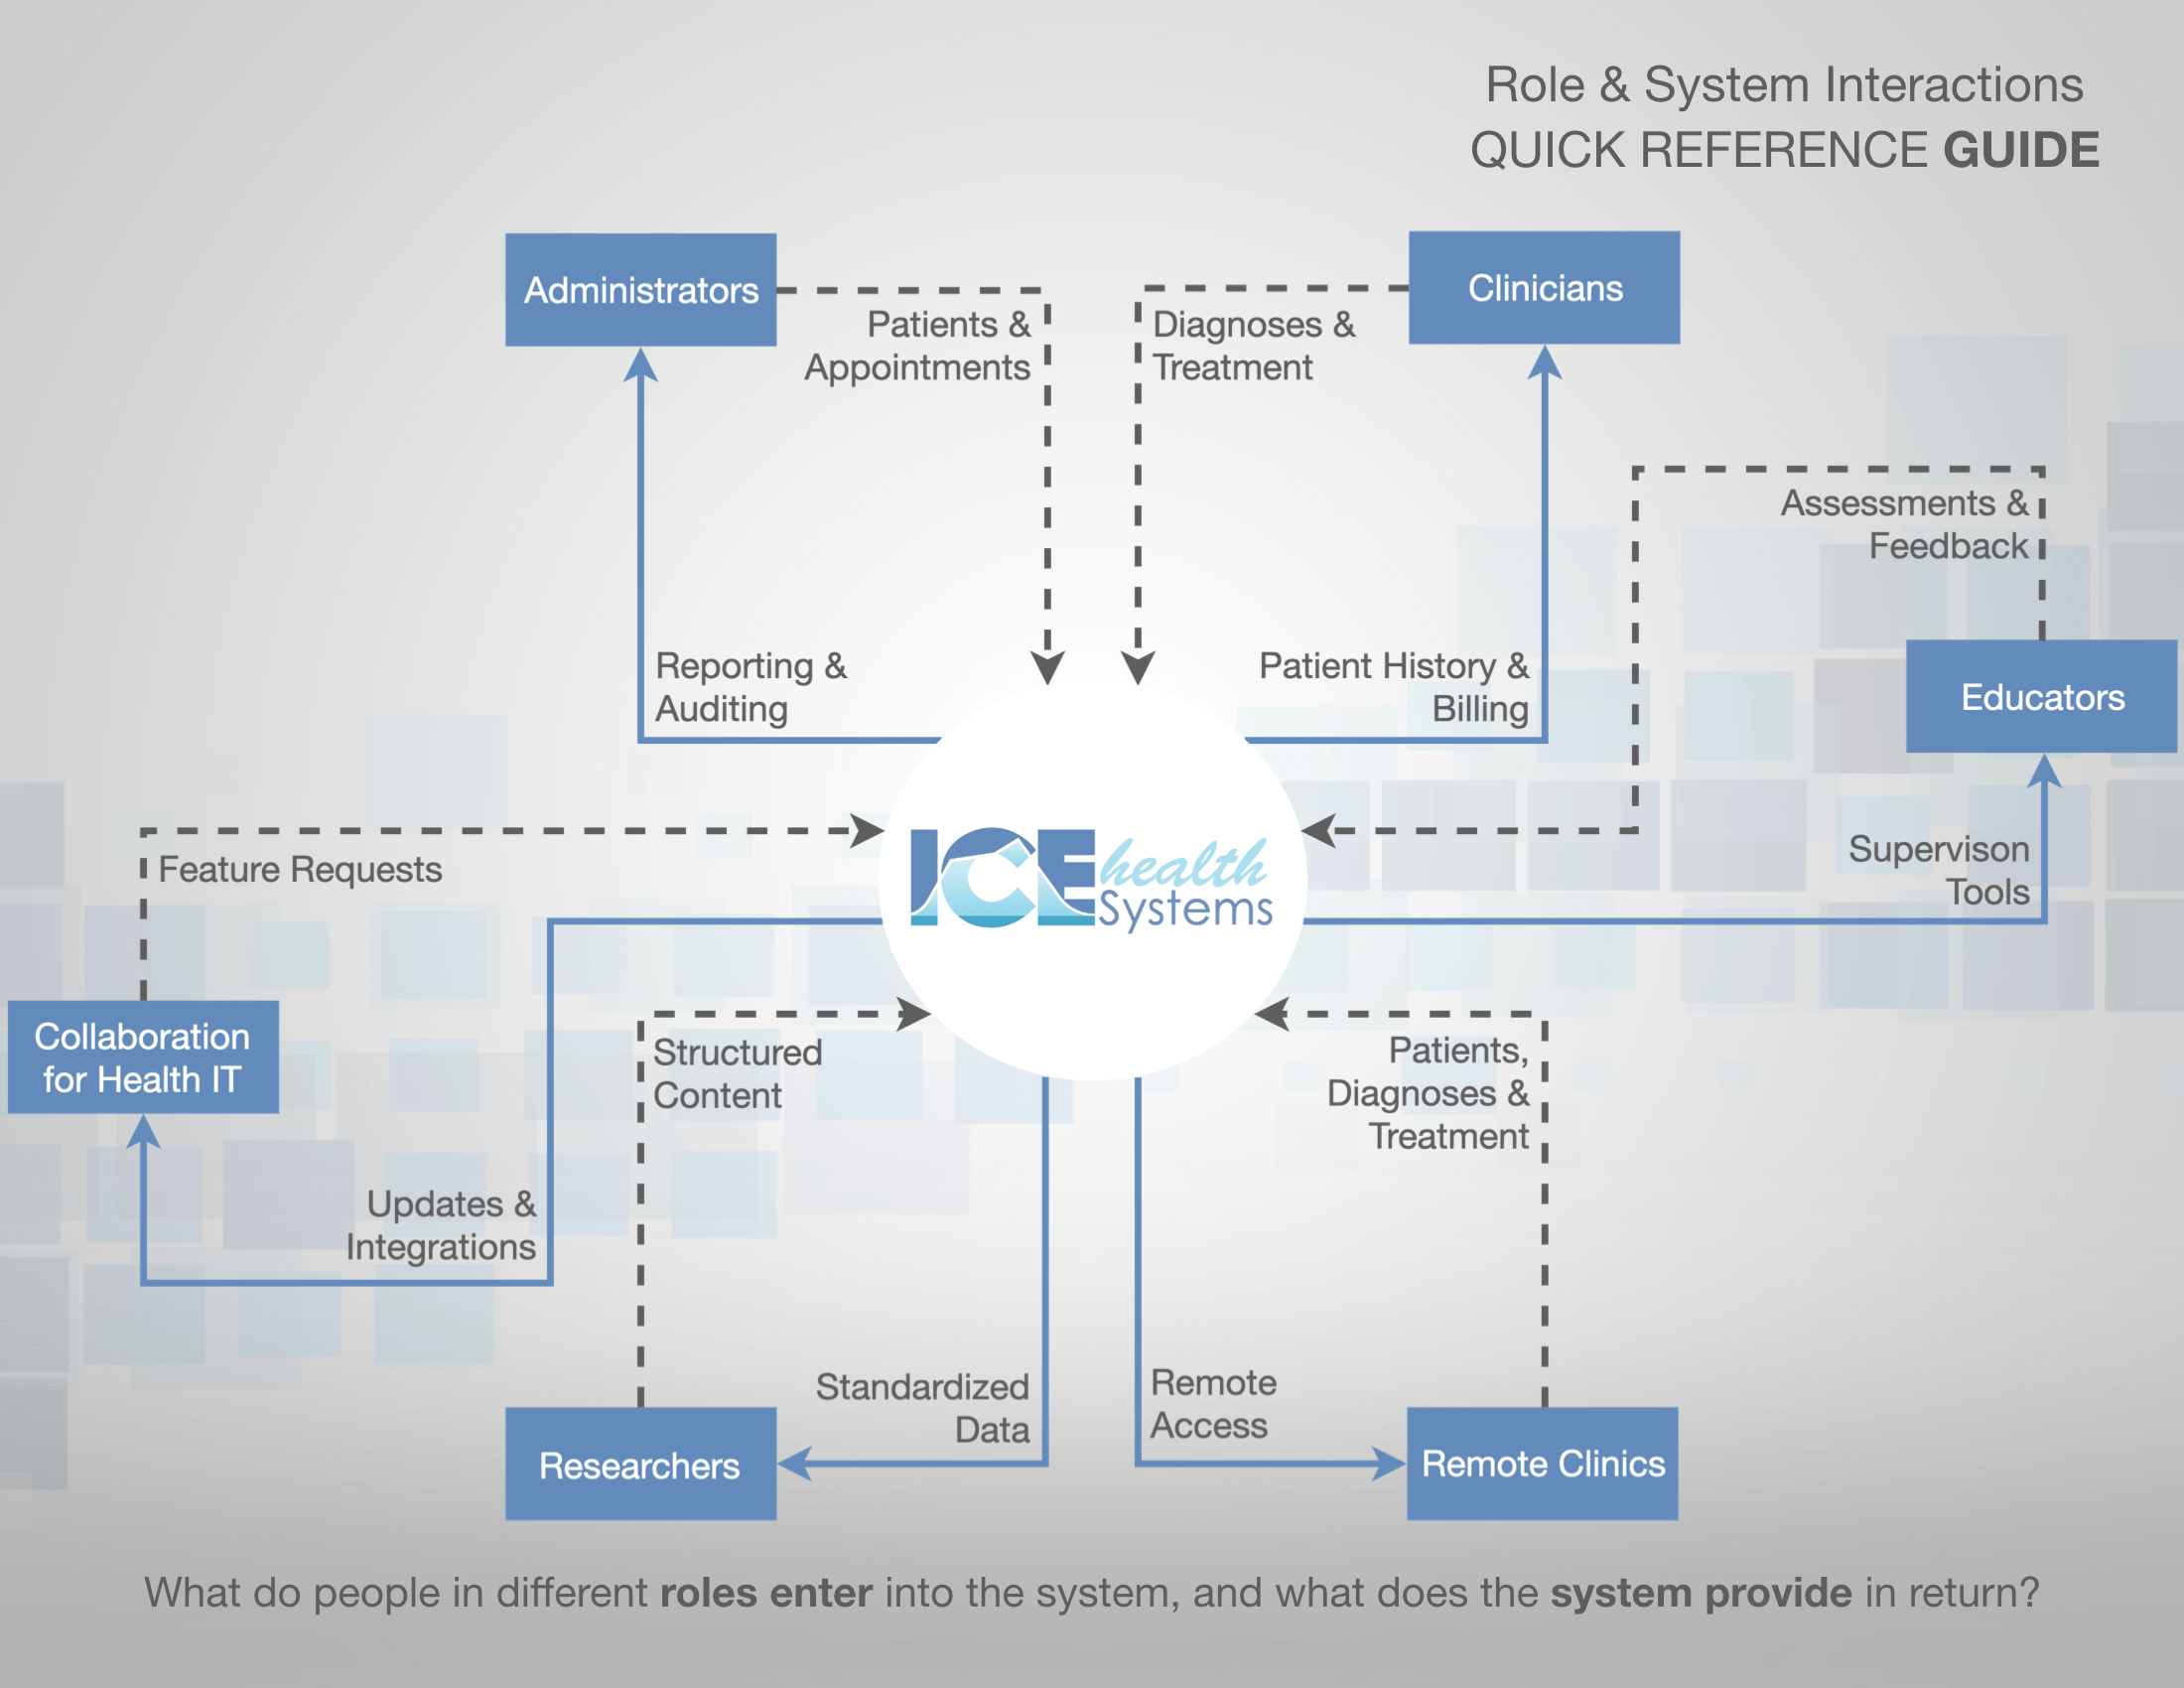
These are only a few examples of how people are using the system. Feel welcome to explore the help material and brainstorm other ways you could take advantage of the available features.
Built around a flexible workspace
The environment you use might have a different color theme or logo, but the basic structure is the same.
The system is organized around the main menus at the top of the screen and a workspace below.
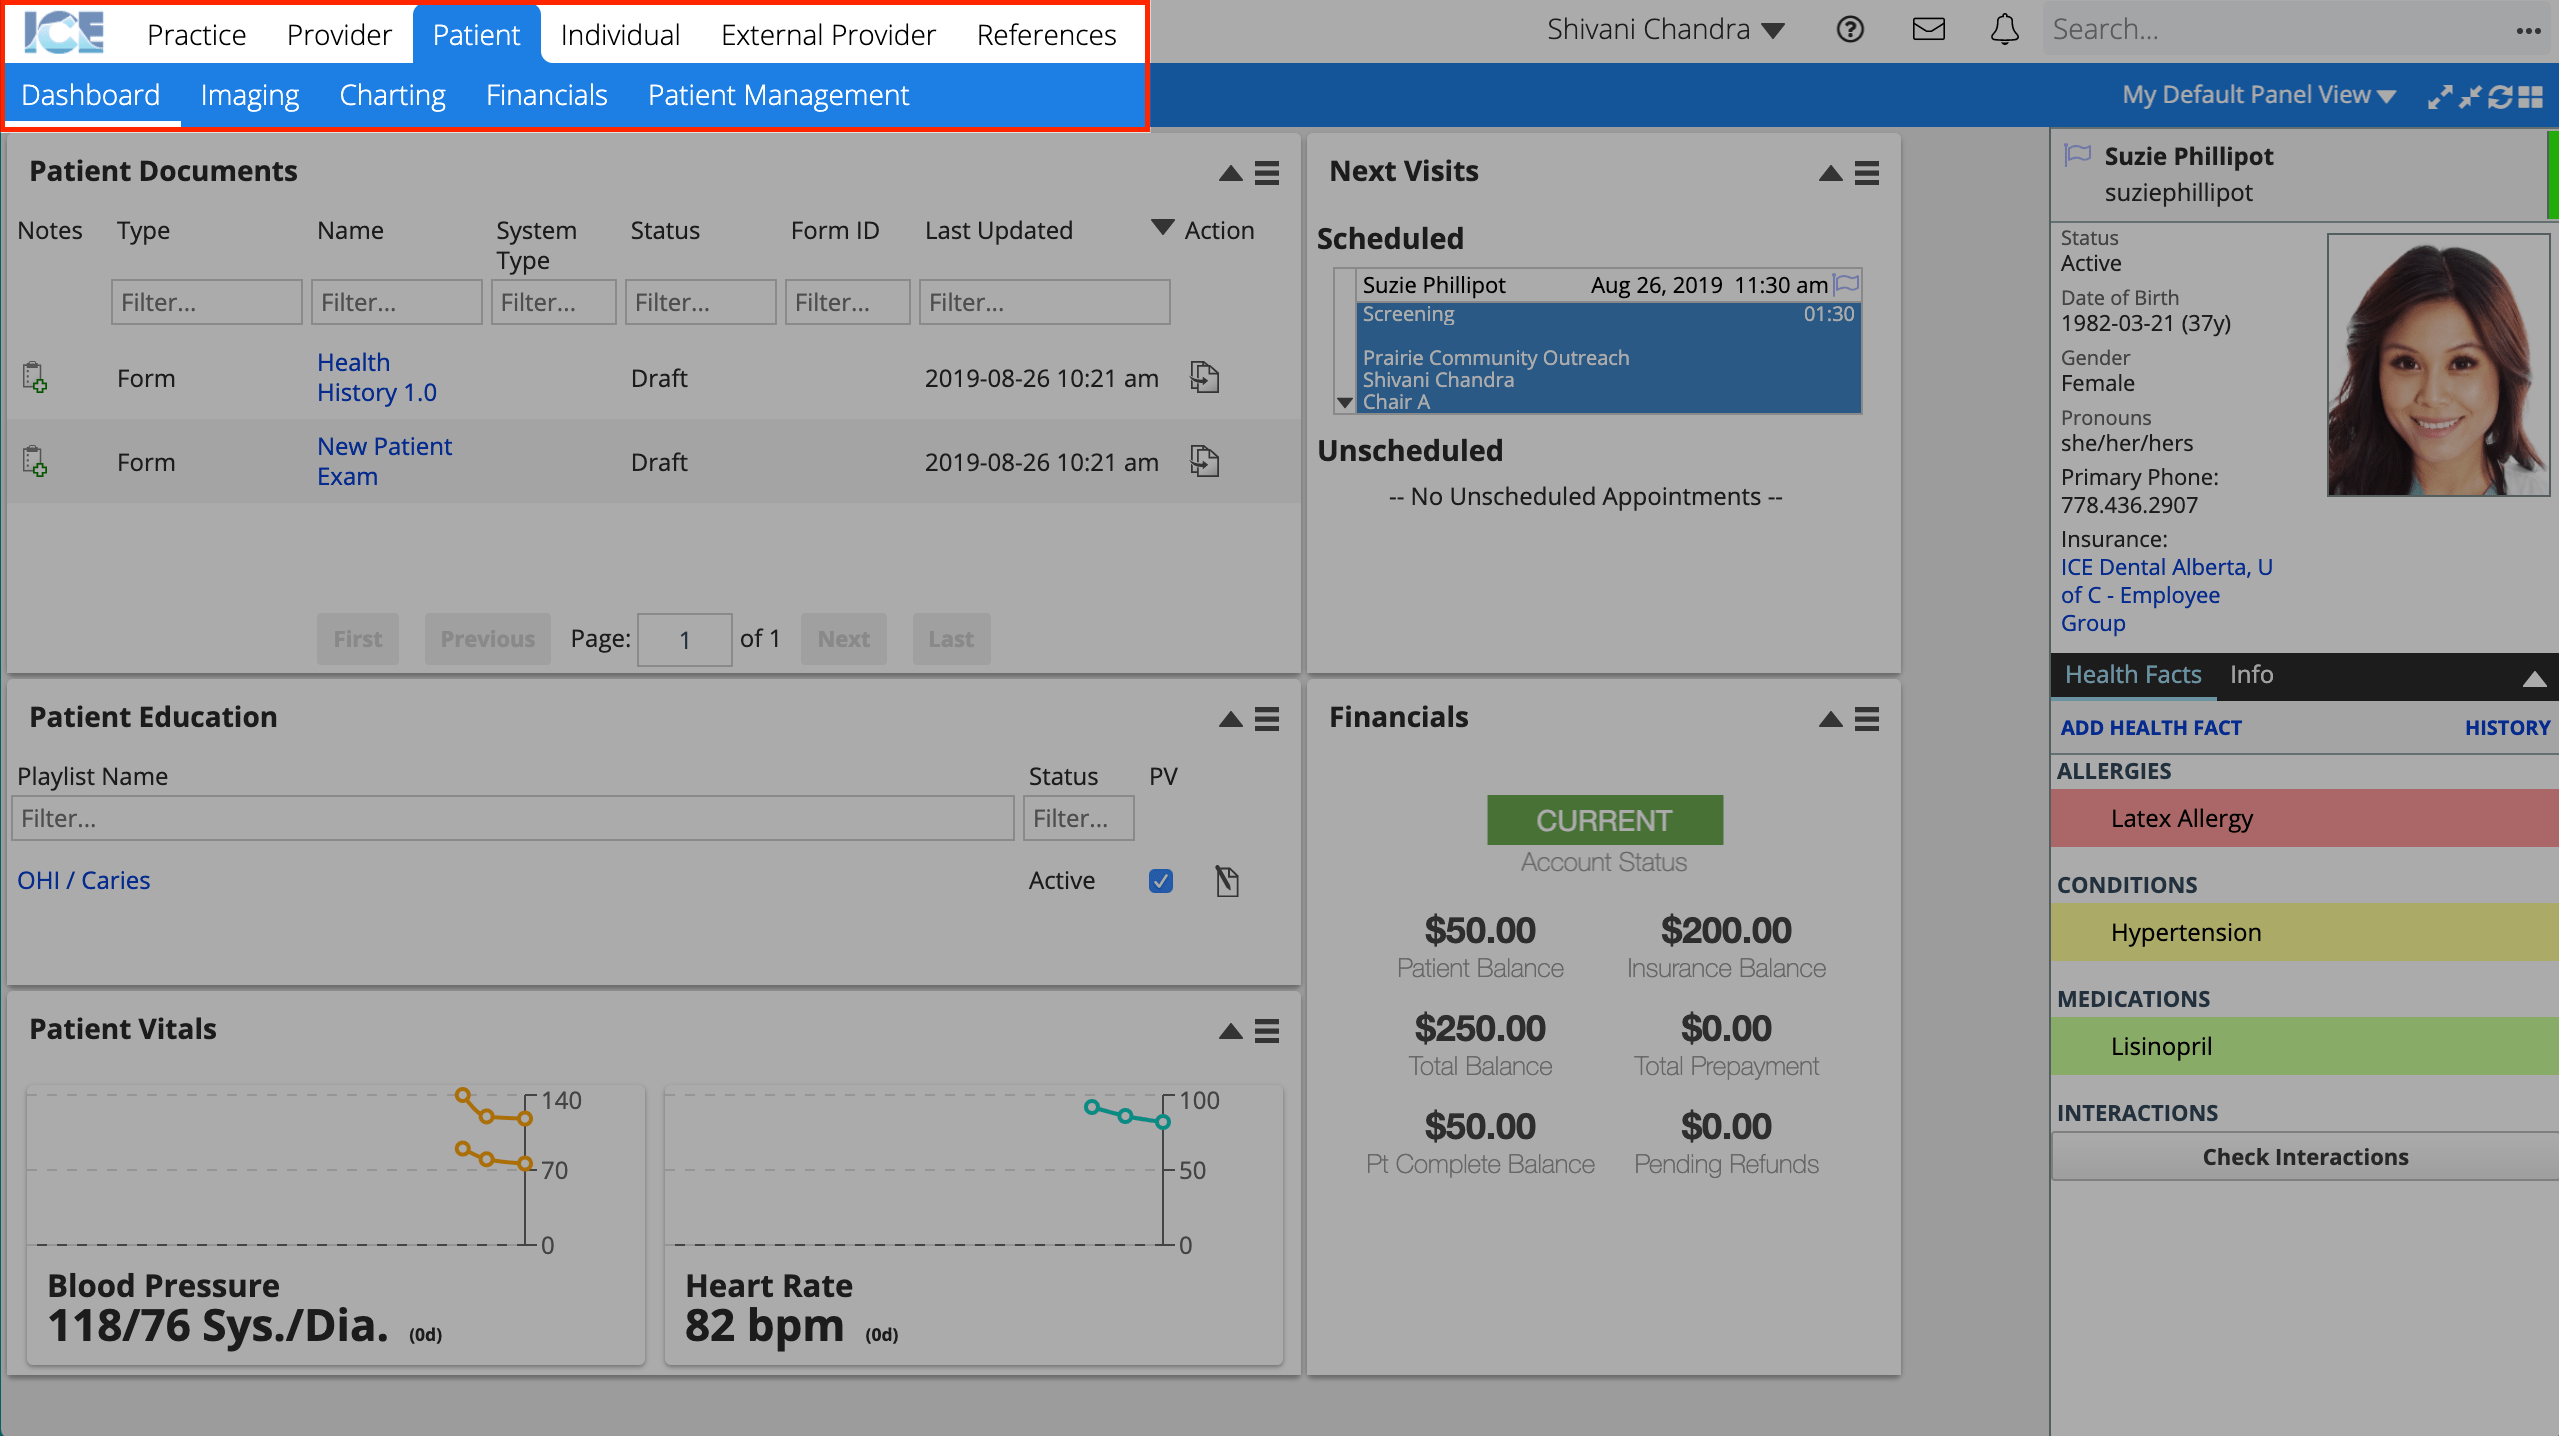
Each menu contains different tools or features. Selecting a menu lets you access the tools below it.
The most important menus are: Practice, Provider, and Patient.
Practice is for clinic or practice wide information.
- It includes tools like reporting, practice configuration, and scheduling.
- For example: To view the schedule, select Practice, and then select Scheduling.

Provider is for tools specific to your account inside the system.
- It includes your dashboard, messages, and account settings.
- For example: To see your latest messages, select Provider, and then select Collaborations.

Patient is for viewing and adding information to a patient record.
- It includes tools to enter patient information, track treatment, and record patient financials.
- For example: To enter a patient's contact information, select Patient, then select Patient Management, and then select Demographics.

The workspace below the menus can include a variety of different panels.
A panel is small window or widget that appears on your workspace. Panels display many types of information and give you access to multiple tools.
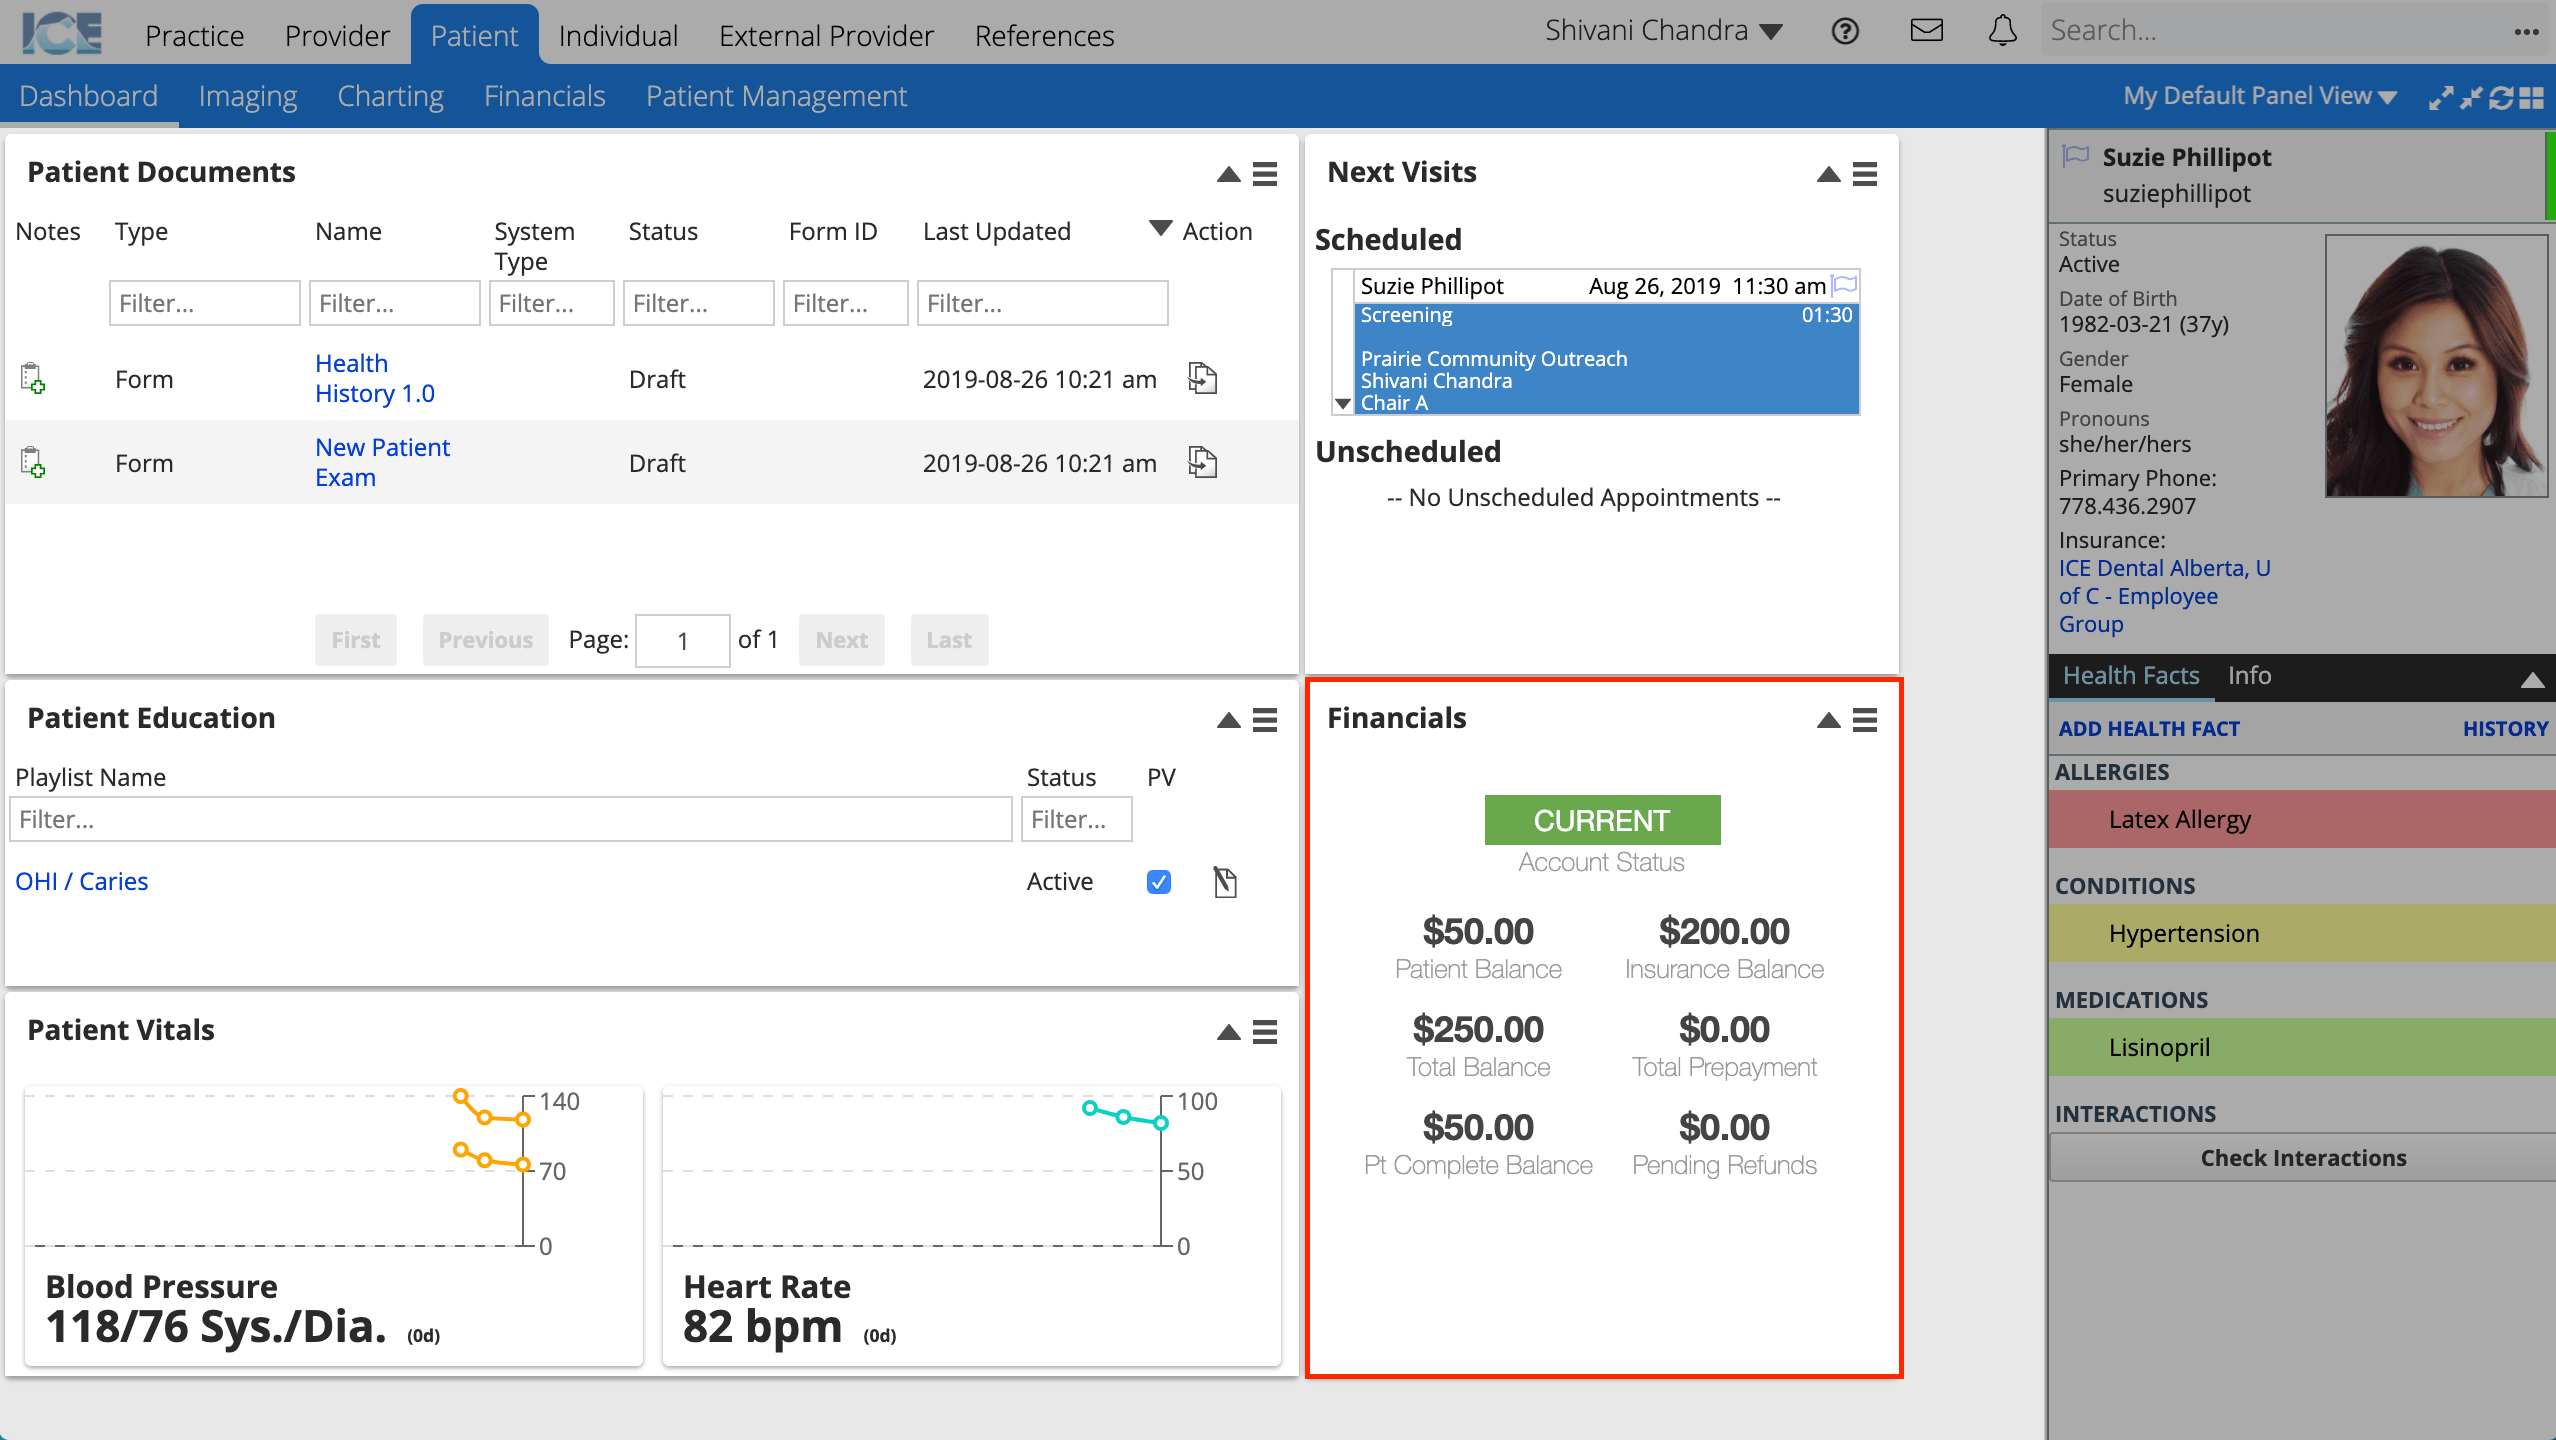
- For example, the Patient Dashboard for front desk staff has the Financials panel on it so that you can quickly check a patient's balance or select the panel's menu icon
 to take a payment.
To learn more about what the system looks like and familiarize yourself with basic navigation and terminology, see the quick reference guide and videos below.
- Video - Navigate the System A 2 minute overview of how to navigate the system using the menus.
- Video - Panels Overview A 1 minute video describing what panels are and how to work with them.
- PDF - Workspace Tour Quick Reference Guide A handout to familiarize yourself with the system layout and terminology.
To learn what the different tools available in the system look like and how they can connect to each other, see the overview video below.
- Video - System Overview A 50 minute video overview of the system that follows a scenario of a patient arriving for their first appointment.