Process a predetermination
Processing a predetermination involves receiving a response from the insurance carrier and recording the details in the patient's Claims tab.
This workflow assumes that you:
- Created a predetermination, which was sent to either the electronic or paper queue.
- Approved the details in the queue.
- Submitted a batch of claims to insurance, either electronically or manually by paper.
- Received a response from the insurance carrier
If you have created the predetermination but not yet reviewed the claims queue and submitted it, review the steps in Claims queue overview.
After you submit the predetermination and receive a response from the insurance carrier, you can record the details by processing the predetermination.
- Go to Patient > Financials
- Open the Claims tab and find the predetermination you want to process
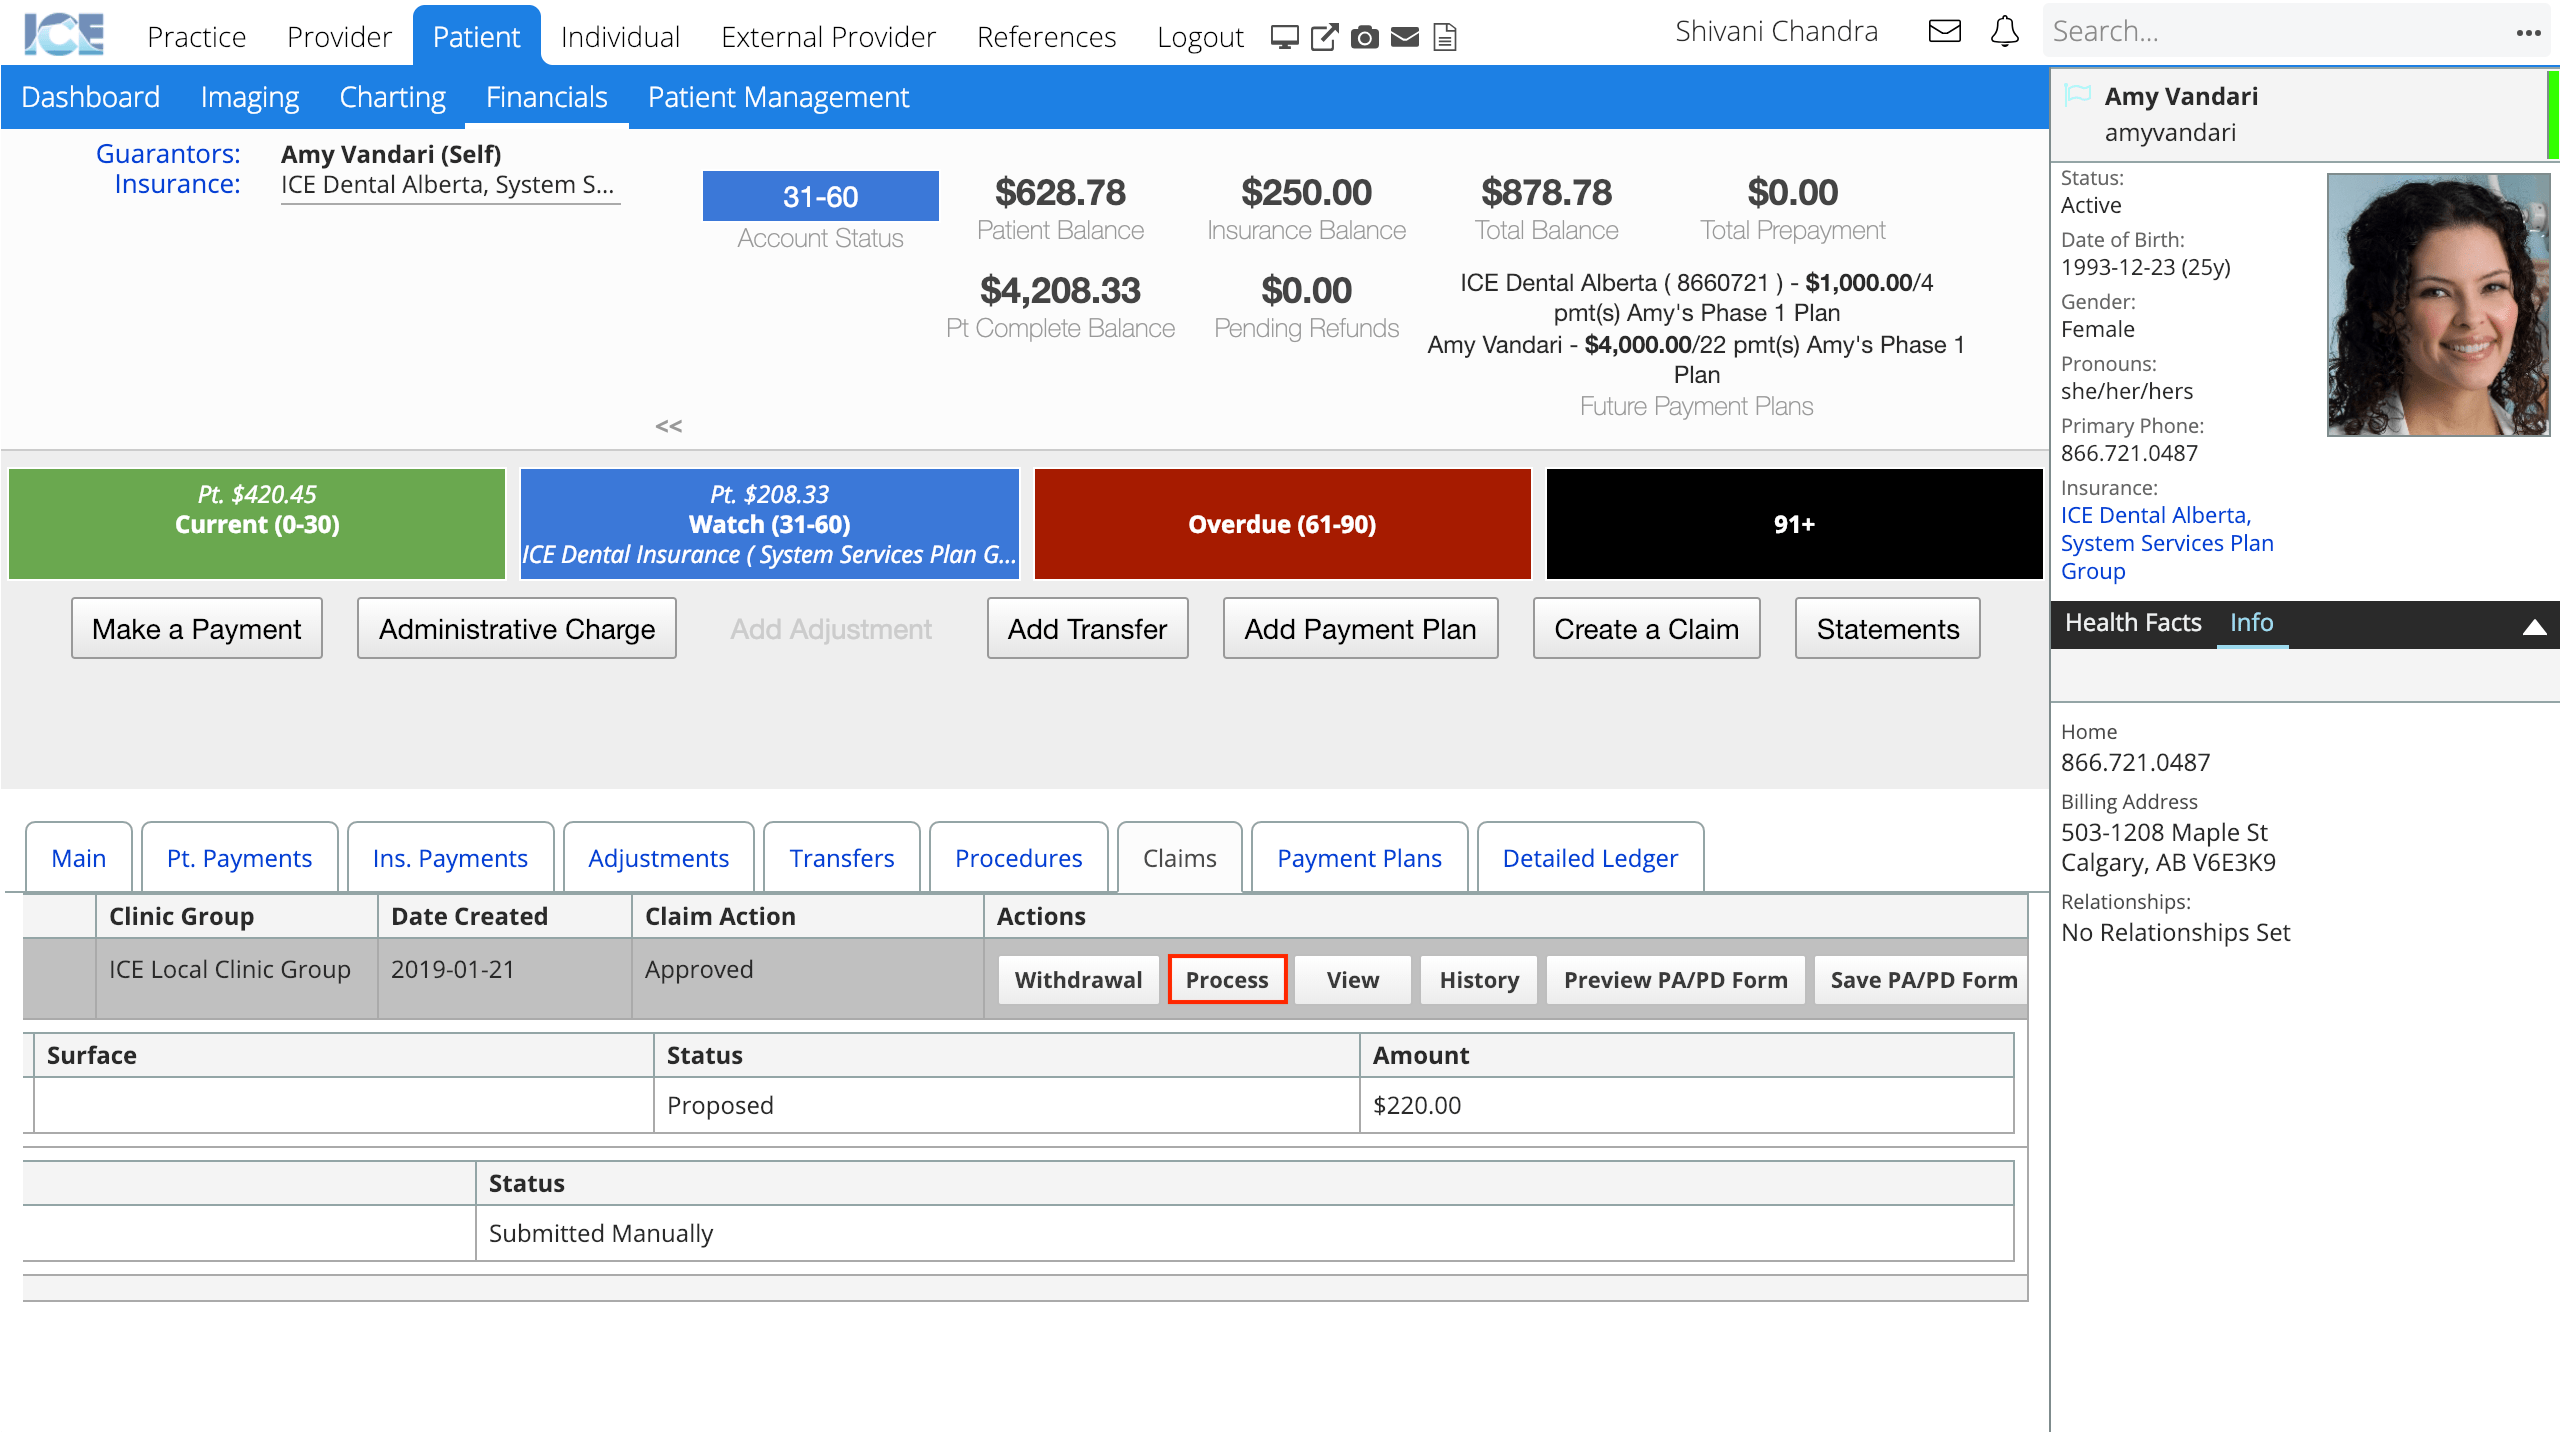
- Select Process
- Choose one of the four Set Status drop-down menu options: Approved, Denied, Withdrawal or Expired.
- If the claim was approved:
- Enter the Authorization Number, From Date, To Date, the amount that was approved for the procedure(s).

- Enter the Authorization Number, From Date, To Date, the amount that was approved for the procedure(s).
- If the claim was denied or withdrawn:
- Enter a zero dollar approved amount for the procedure(s).
- If the claim has expired:
- Confirm the From Date, and To Date.
- If the claim had multiple procedures and was only partially approved:
- Set the predetermination status to approved
- Enter a zero dollar amount for the denied procedure(s).
- Enter the approved amount for the approved procedure(s).
- If the claim was approved:
- Optional: Select Attach File to upload and link a file to this predetermination.
- For most submissions, this is often a PDF copy of the insurance carrier's response.
- Optional: Select Add Note to type any comments or explanations about the predetermination for others to reference.
- Select Save Predetermination
After a predetermination is processed, other financial staff can review the coverage, authorization number, files, and any time limitations from the Claims tab in Patient > Financials
Clinical staff can review the predetermination status of a procedure that requires it, by selecting the requirements popover ![]() or
or ![]() beside the procedure code in Patient > Charting
beside the procedure code in Patient > Charting
- These icons appear on both the General Procedure List panel and the Treatment Planning panel.
- Selecting the predetermination note displays the current status of the predetermination and insurance policy details.
When the treatment is completed and a claim is generated, the system will check if a predetermination was processed and, if it was approved and valid at the time of treatment, will automatically enter the authorization number into the claim generated for the procedure(s).
The predetermination approved amount does not change the estimated patient and insurance split calculated from the fee schedule and policy settings. When you complete the procedure, the account owing split is also based on the original estimate.
Automate predeterminations
Administrators can configure automated tasks in Practice Settings that:
- Check if any predeterminations have expired and update their predetermination status to expired.
- Generate predeterminations for any planned or proposed treatment that requires one.
- This removes the need to have someone manually create predeterminations for each patient. However, the predetermination will still appear in the relevant claims queue and need to be submitted. To learn more about submitting claims, see Claims queue overview.
To learn more about configuring financial features, see Practice settings: financials.