Create a predetermination
When you create a new predetermination, the system only shows the patient's procedures that require one. This makes it easier to find predetermination procedures. Especially because the rules for what procedures require predetermination can be different across insurance policies.
You can however, choose to select any proposed or planned procedure from the patient's charting record in order to create a predetermination.
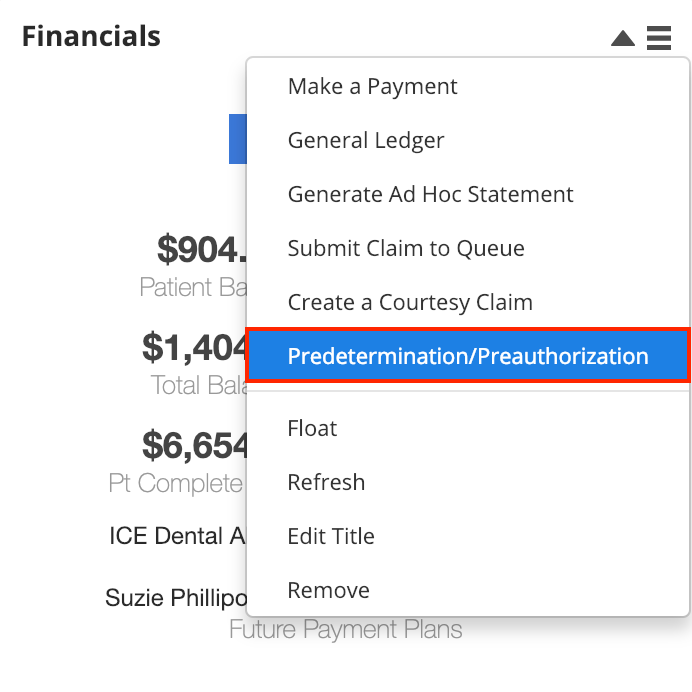
- You start creating a predetermination from one of two locations:
- From the Financials panel
- Select

- Choose Predetermination/Preauthorization
or
- Select
- From Patient > Financials
- Select Create a Claim
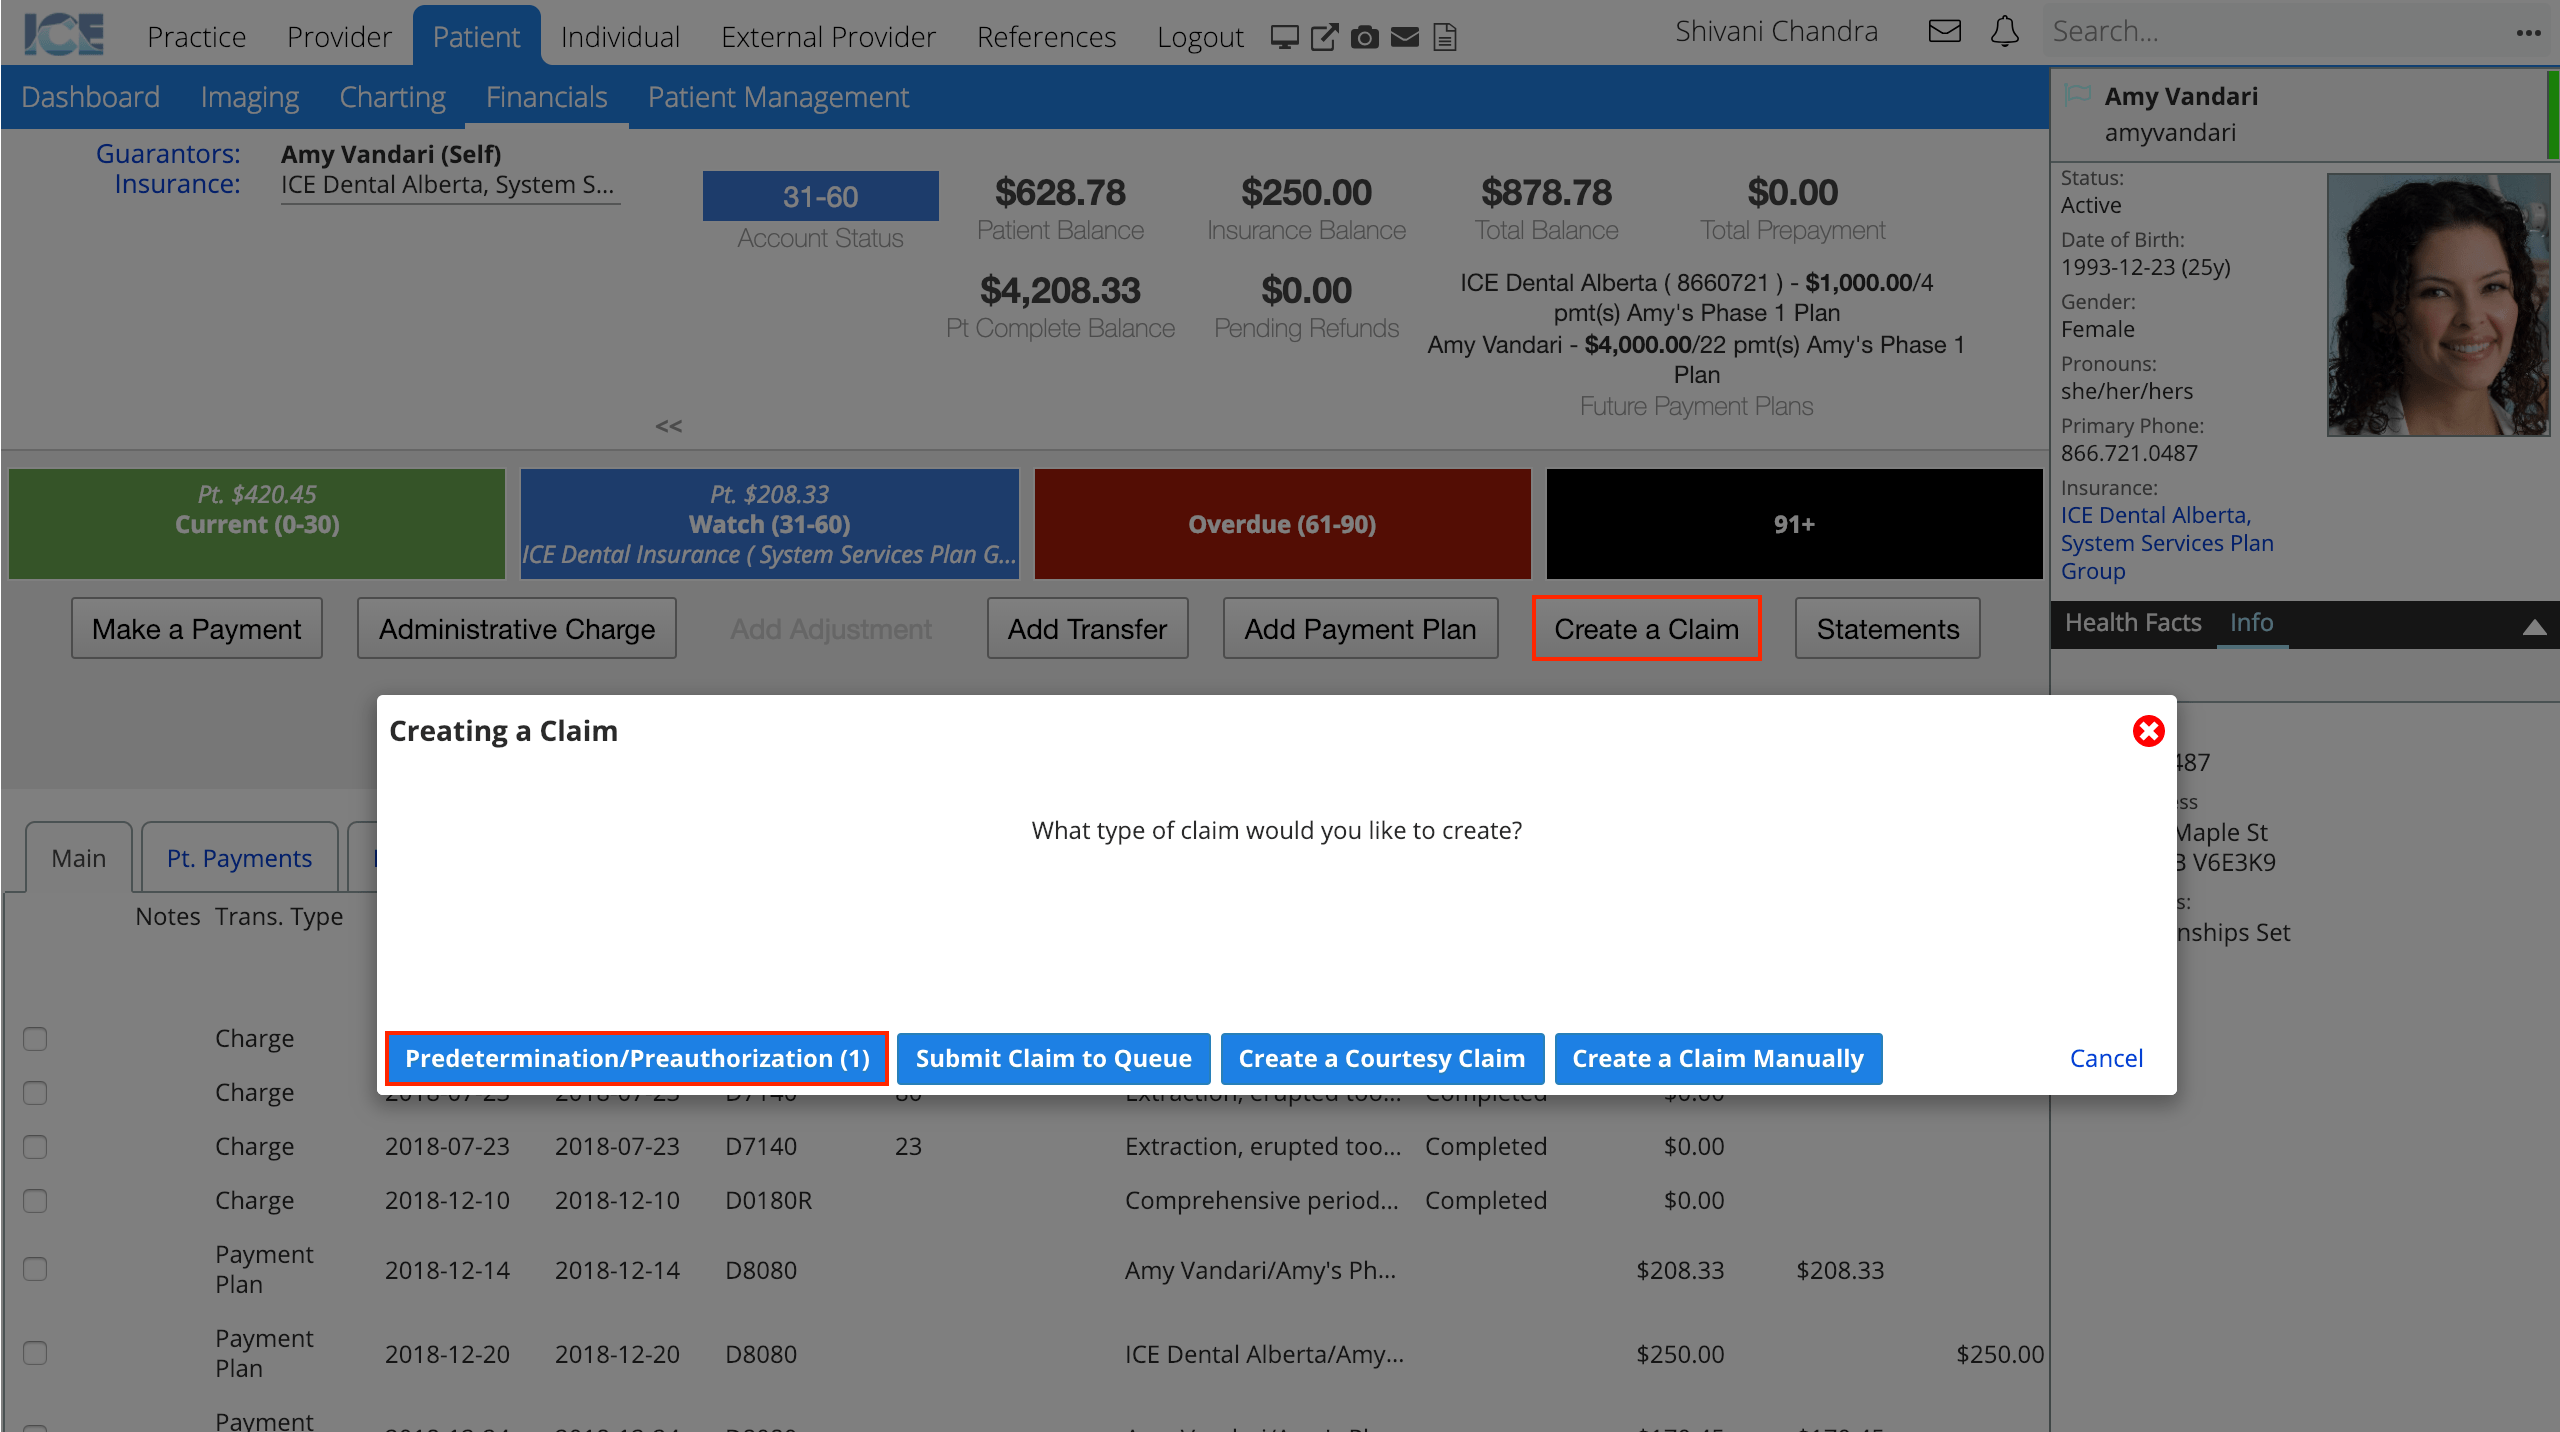
- Choose Predetermination/Preauthorization
- The number of procedures requiring a predetermination appears in parentheses, e.g., (1).
- Select Create a Claim
- From the Financials panel
- Confirm that the selected insurance policy details are correct
- Select the procedure(s) from the table
- By default, only procedures that require a predetermination are displayed.
- Optional: Use the No/Yes toggle to show and select procedures that do not require predeterminations based on the patient's insurance policies, but that you want to submit.
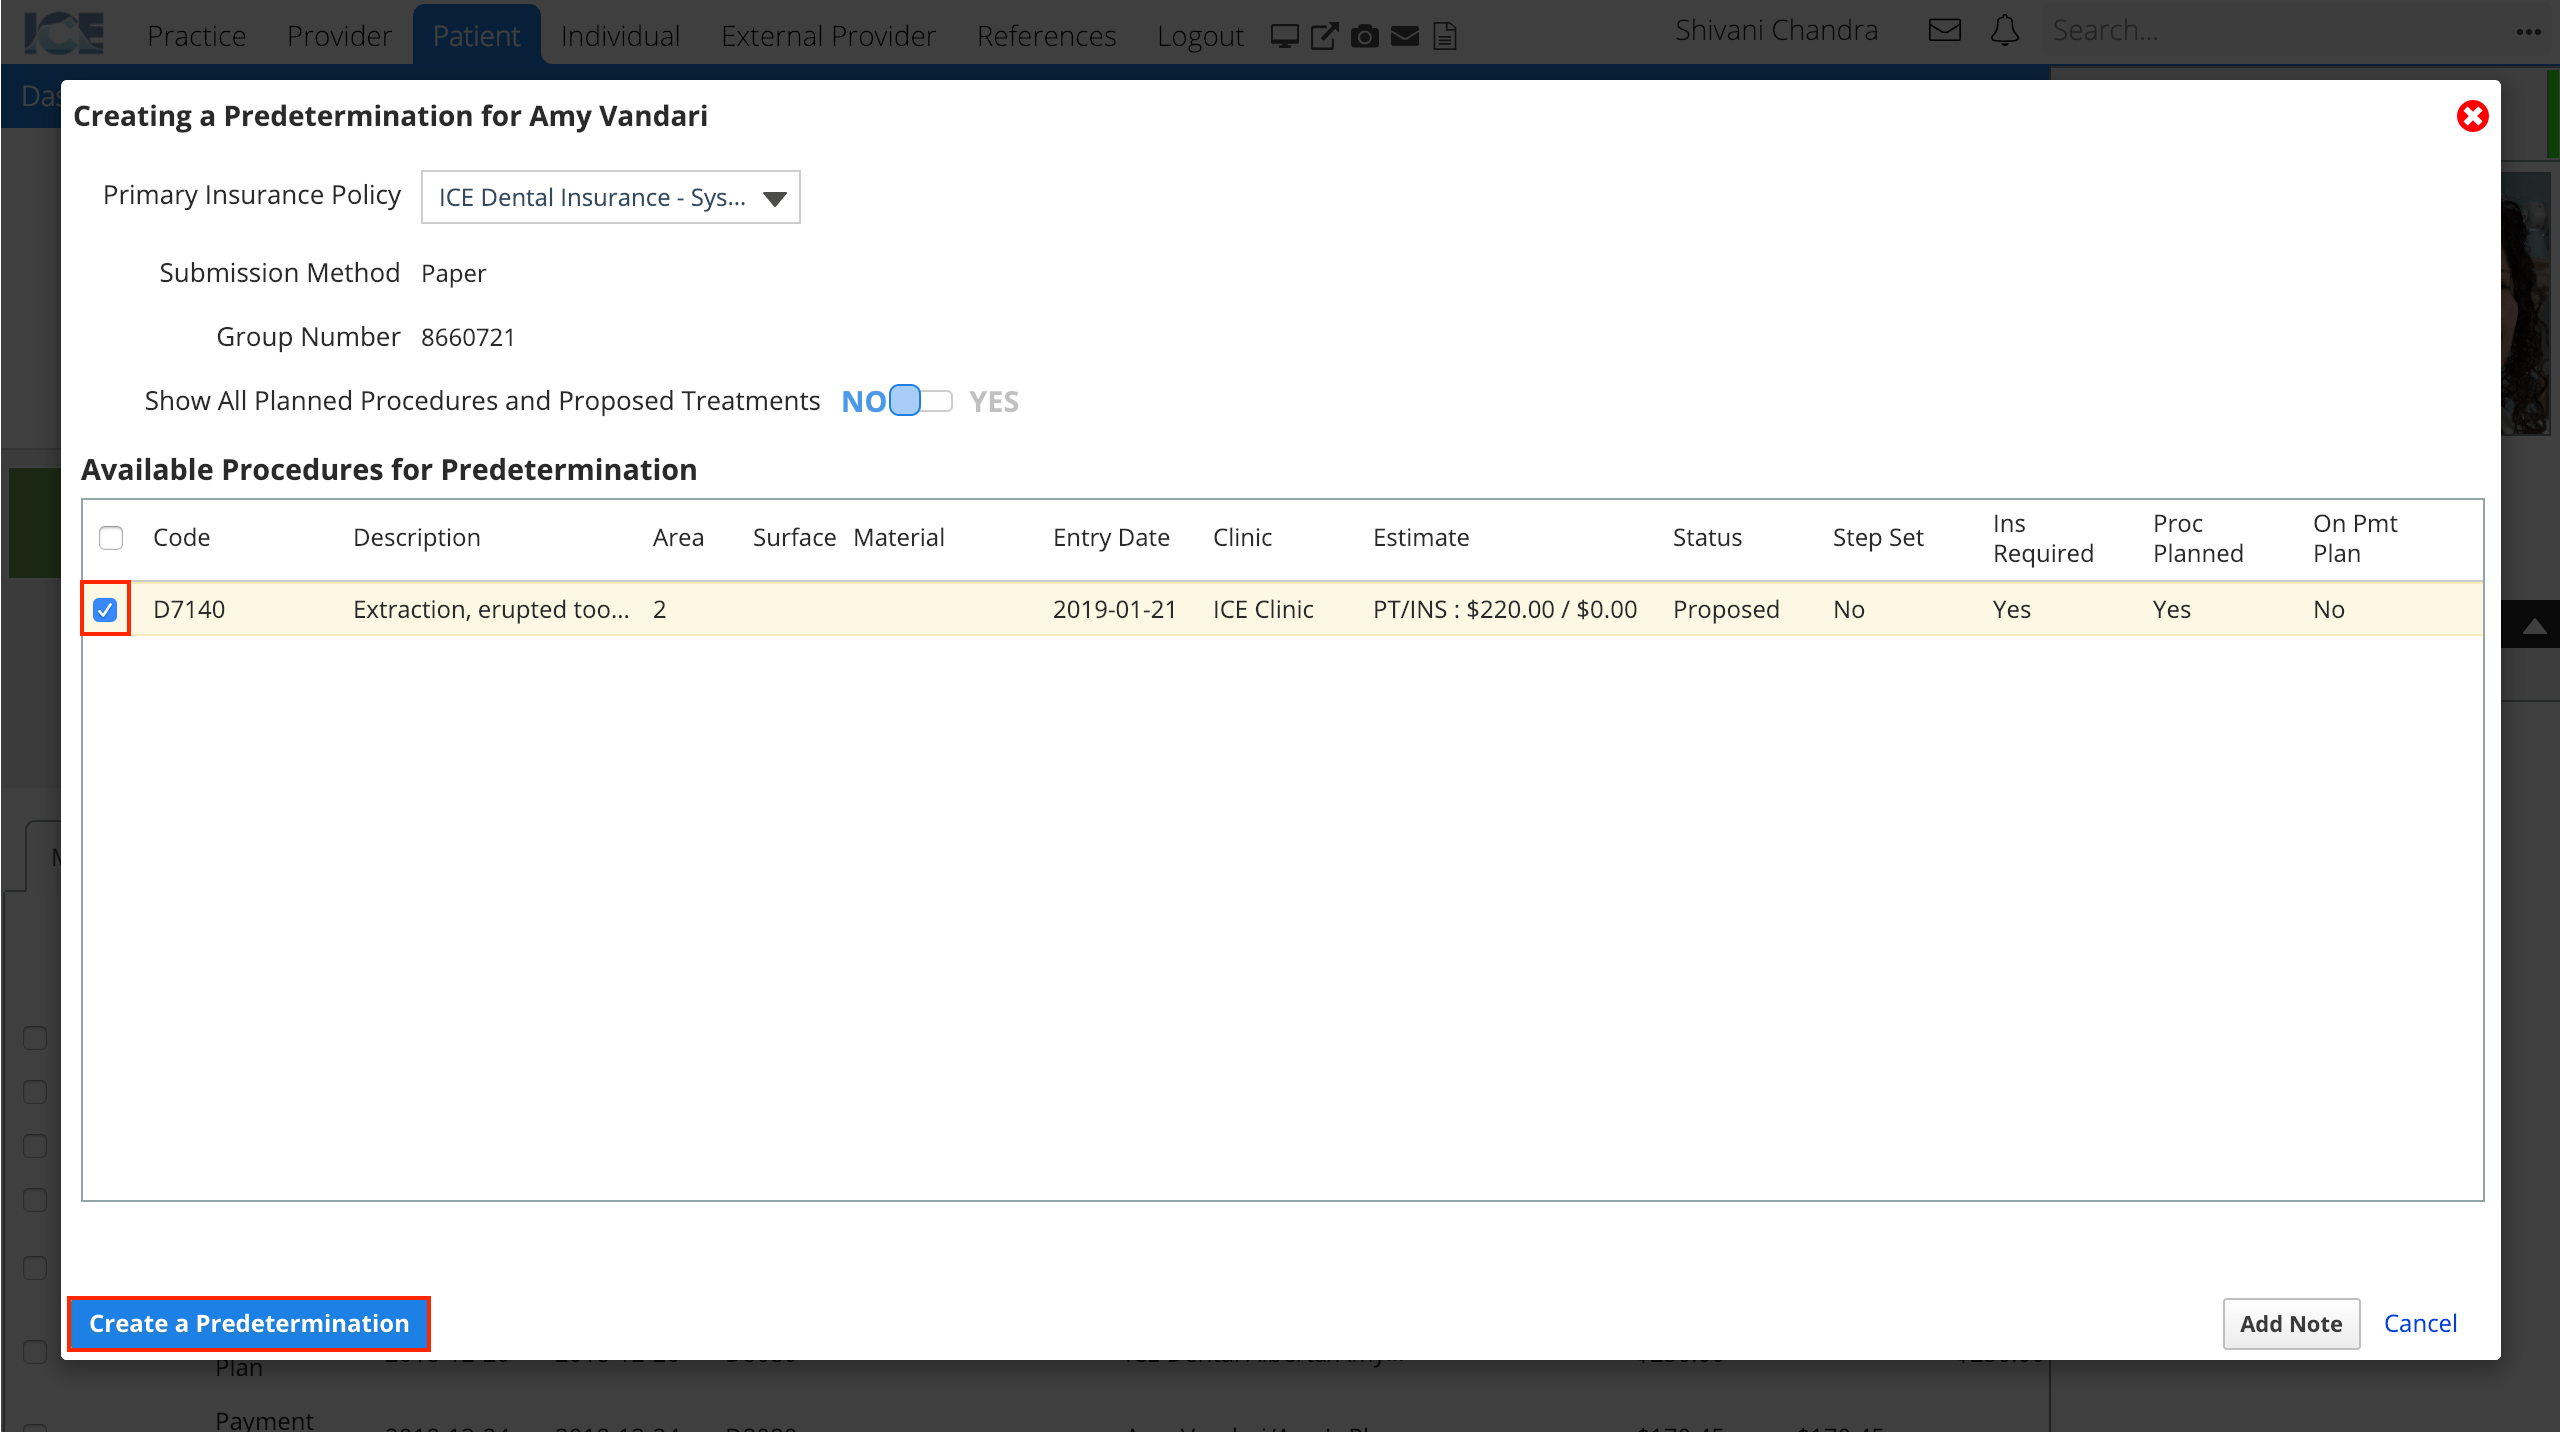
- Select Create a Predetermination
- The predetermination you create appears in the patient's Claims tab and is labelled as a predetermination.
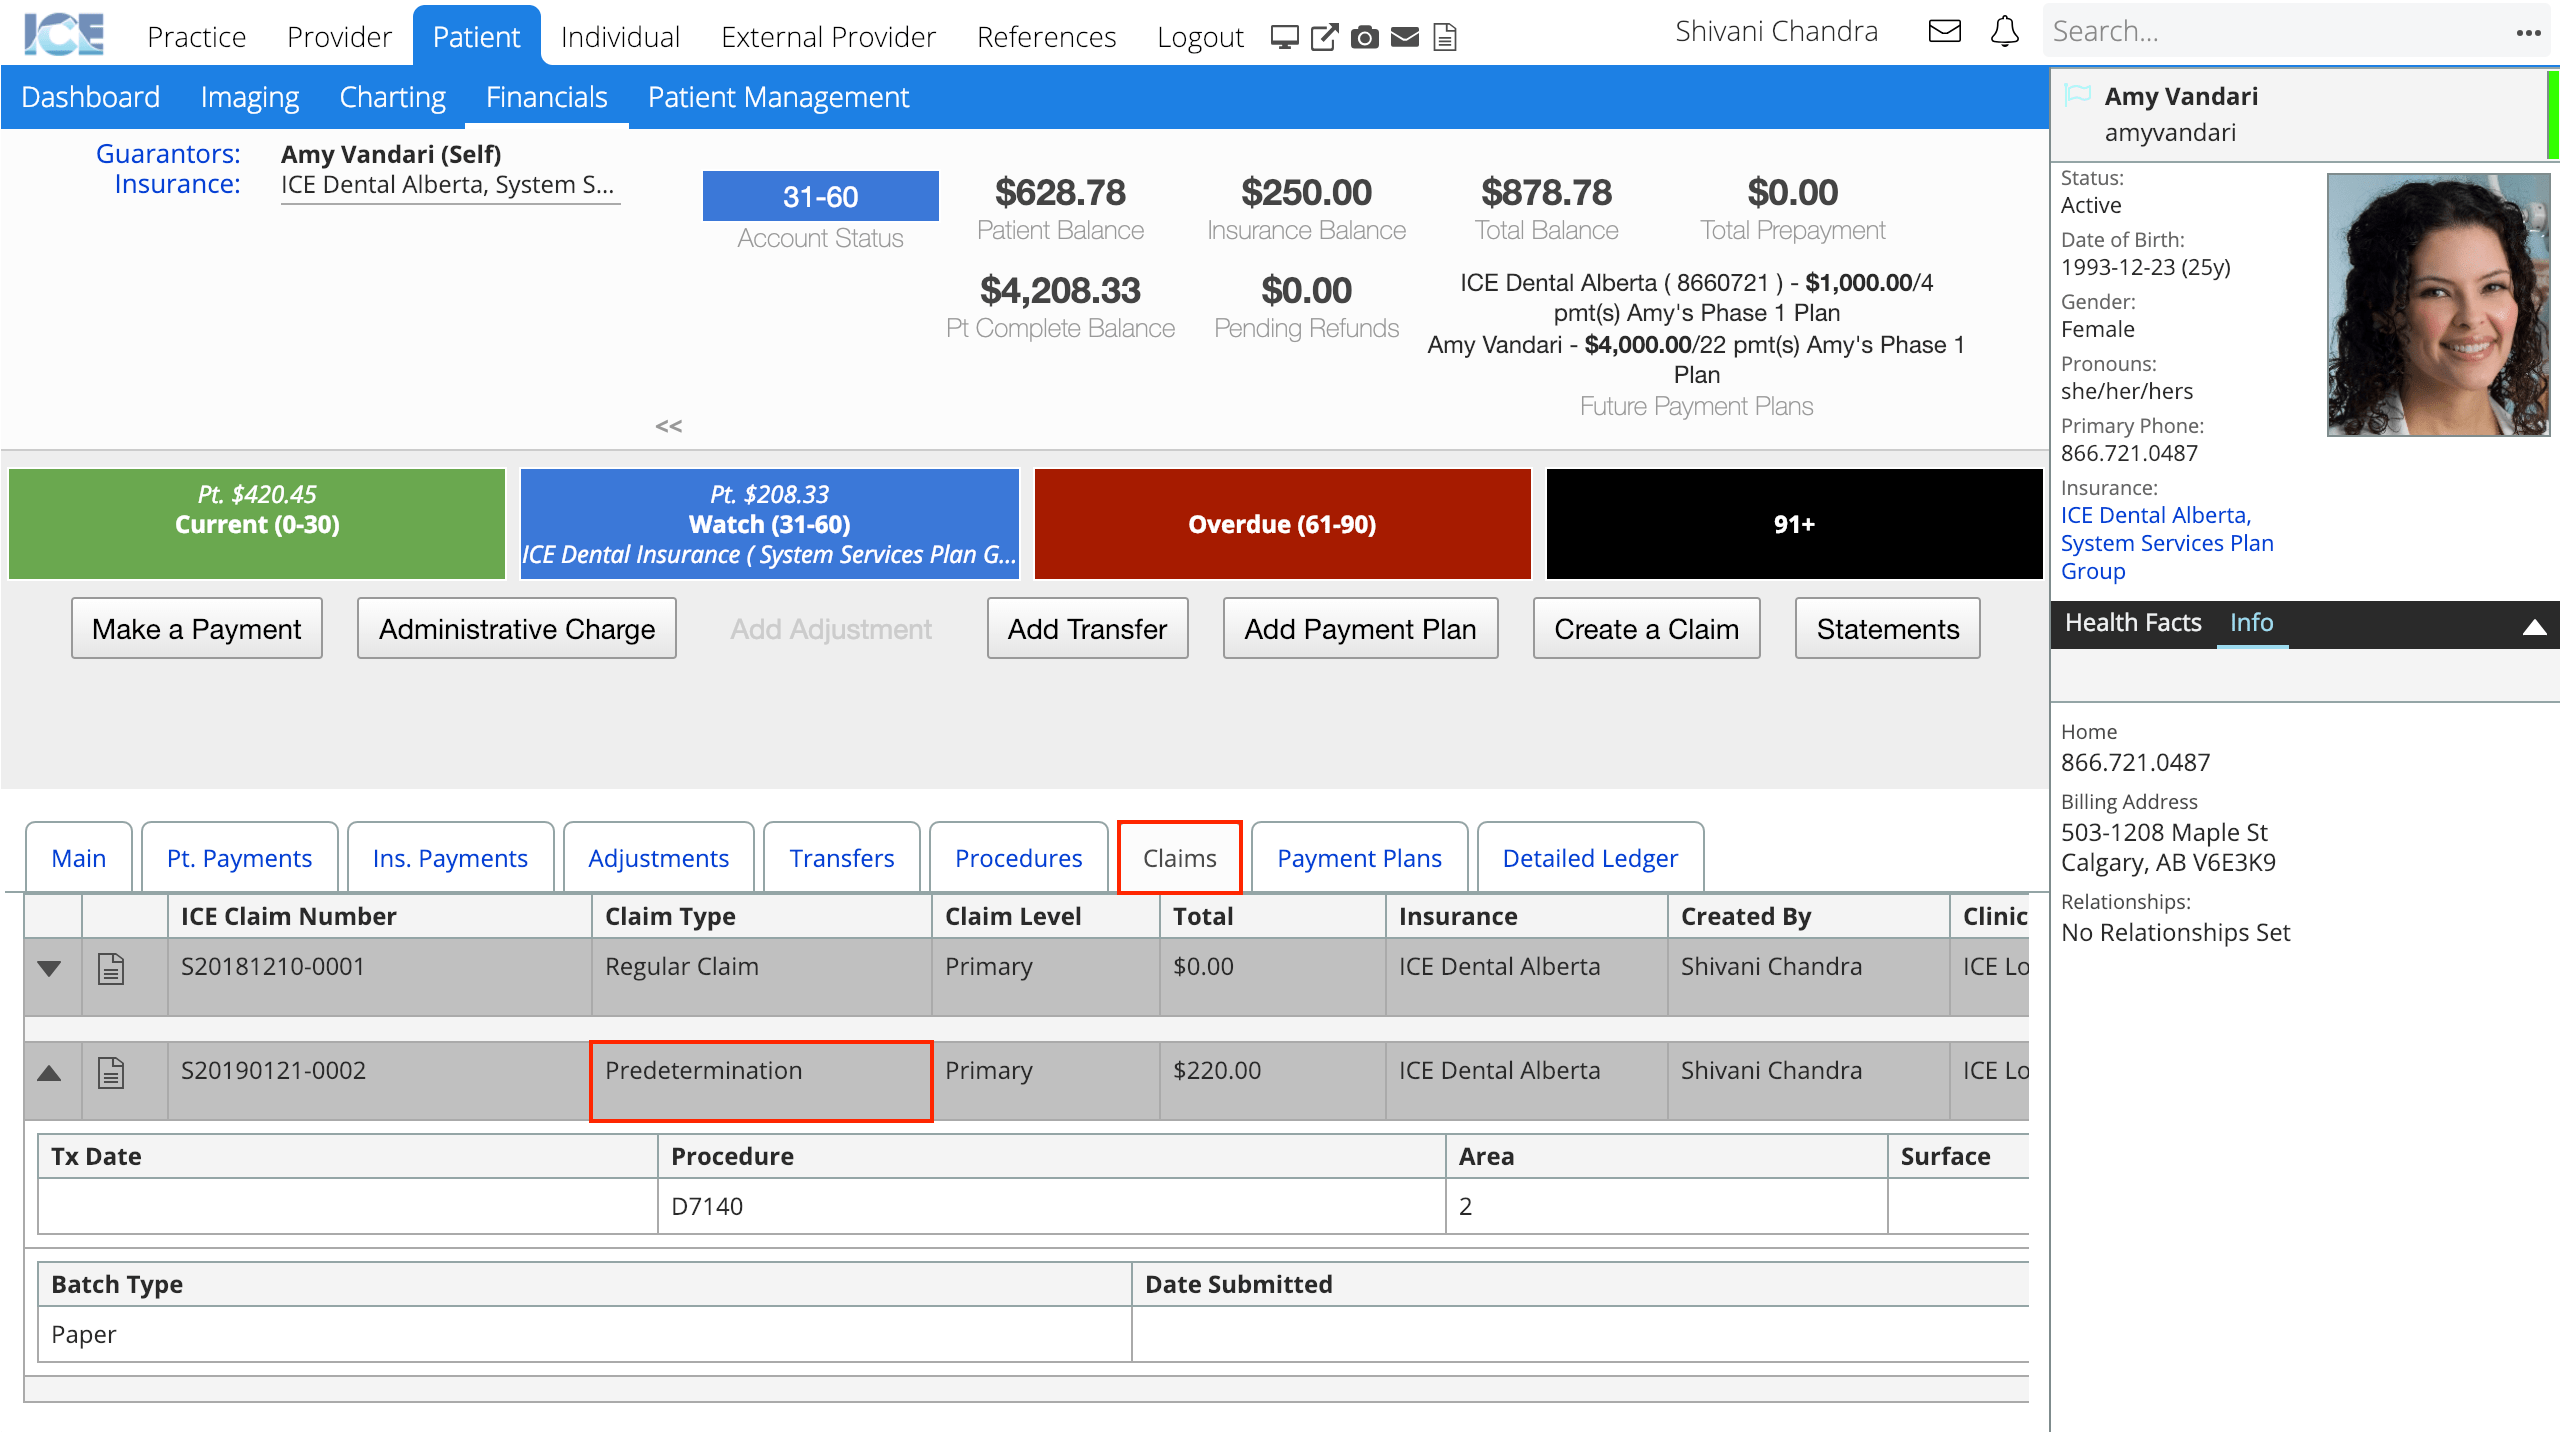
- You can use the Action buttons to View the predetermination details or preview and print the PDF form. Select the Save PA/PD Form button to add a copy of the PDF to the patient's Files panel.

- The predetermination you create appears in the patient's Claims tab and is labelled as a predetermination.
After you create a predetermination, it appears in either the electronic or print queue in Practice > Insurance > Batches, depending on the insurance payer's settings.
Now it must be approved and submitted to insurance. To learn how to process claims in the queue and submit a batch, see Claims queue overview.