Electronic Remittance Advice (ERA) integration
You can receive electronic insurance payment and claim adjudication information through the ERA 835 integration with the Change Healthcare clearing house.
ERAs are similar to an electronic Explanation of Benefits (EOB) that describe how much an insurance payer paid for a patient's treatment.
In Practice > Insurance > ERAs you can:
- Download ERAs from the clearing house.
- Upload ERAs manually from your computer.
- View the payment, claim, procedure, and remark details included in an ERA.
- Add an ERA payment to a batch payment for allocation and claim processing.
Download new ERAs
You can download new ERAs that have been processed by the clearing house since the last time you downloaded them.
- Go to Practice > Insurance > ERAs
- Select Download ERAs
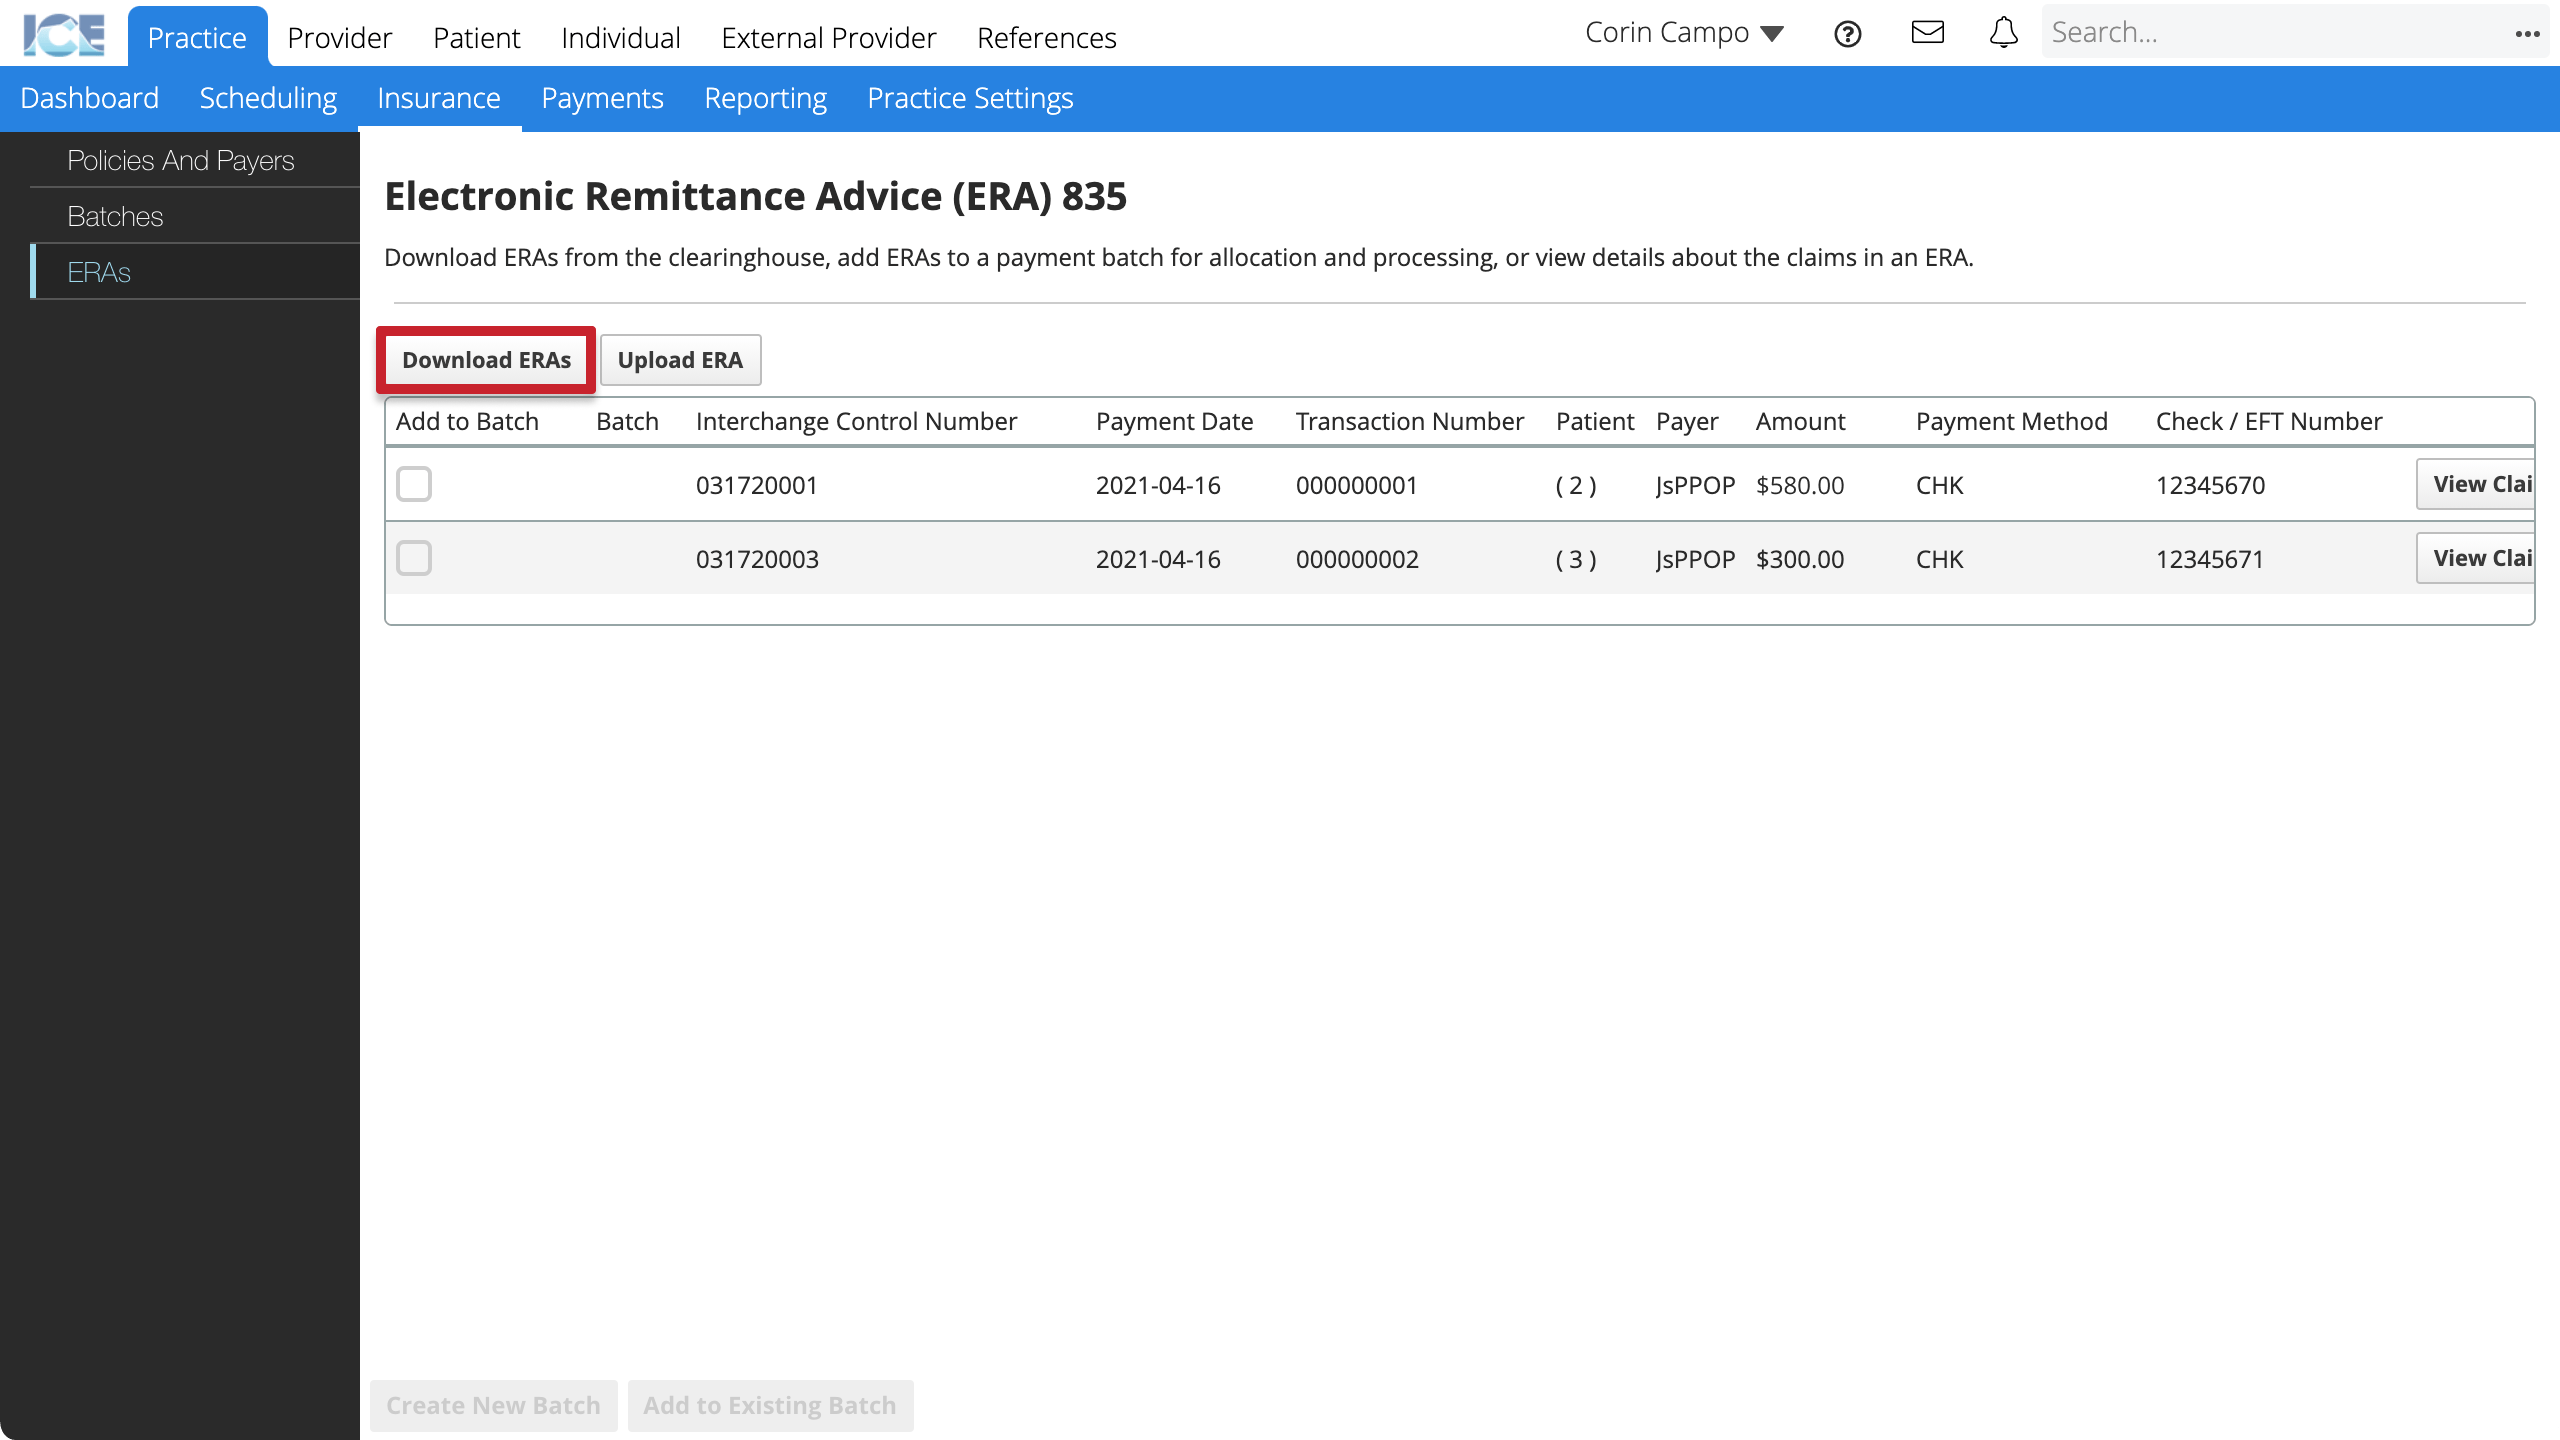
- The system contacts the clearing house to request any new ERAs since the last time the system downloaded them
- If there are new ERAs, the system adds them to the ERA table
Now you can view the ERA details or add the ERA payments to a batch for allocation and claims processing.
Upload an ERA
If you have an ERA file in the 835 format you can upload it to the system directly.
This is helpful if a payer isn't integrated with the clearing house but still provides ERA 835 files.
- Go to Practice > Insurance > ERAs
- Select Upload ERA
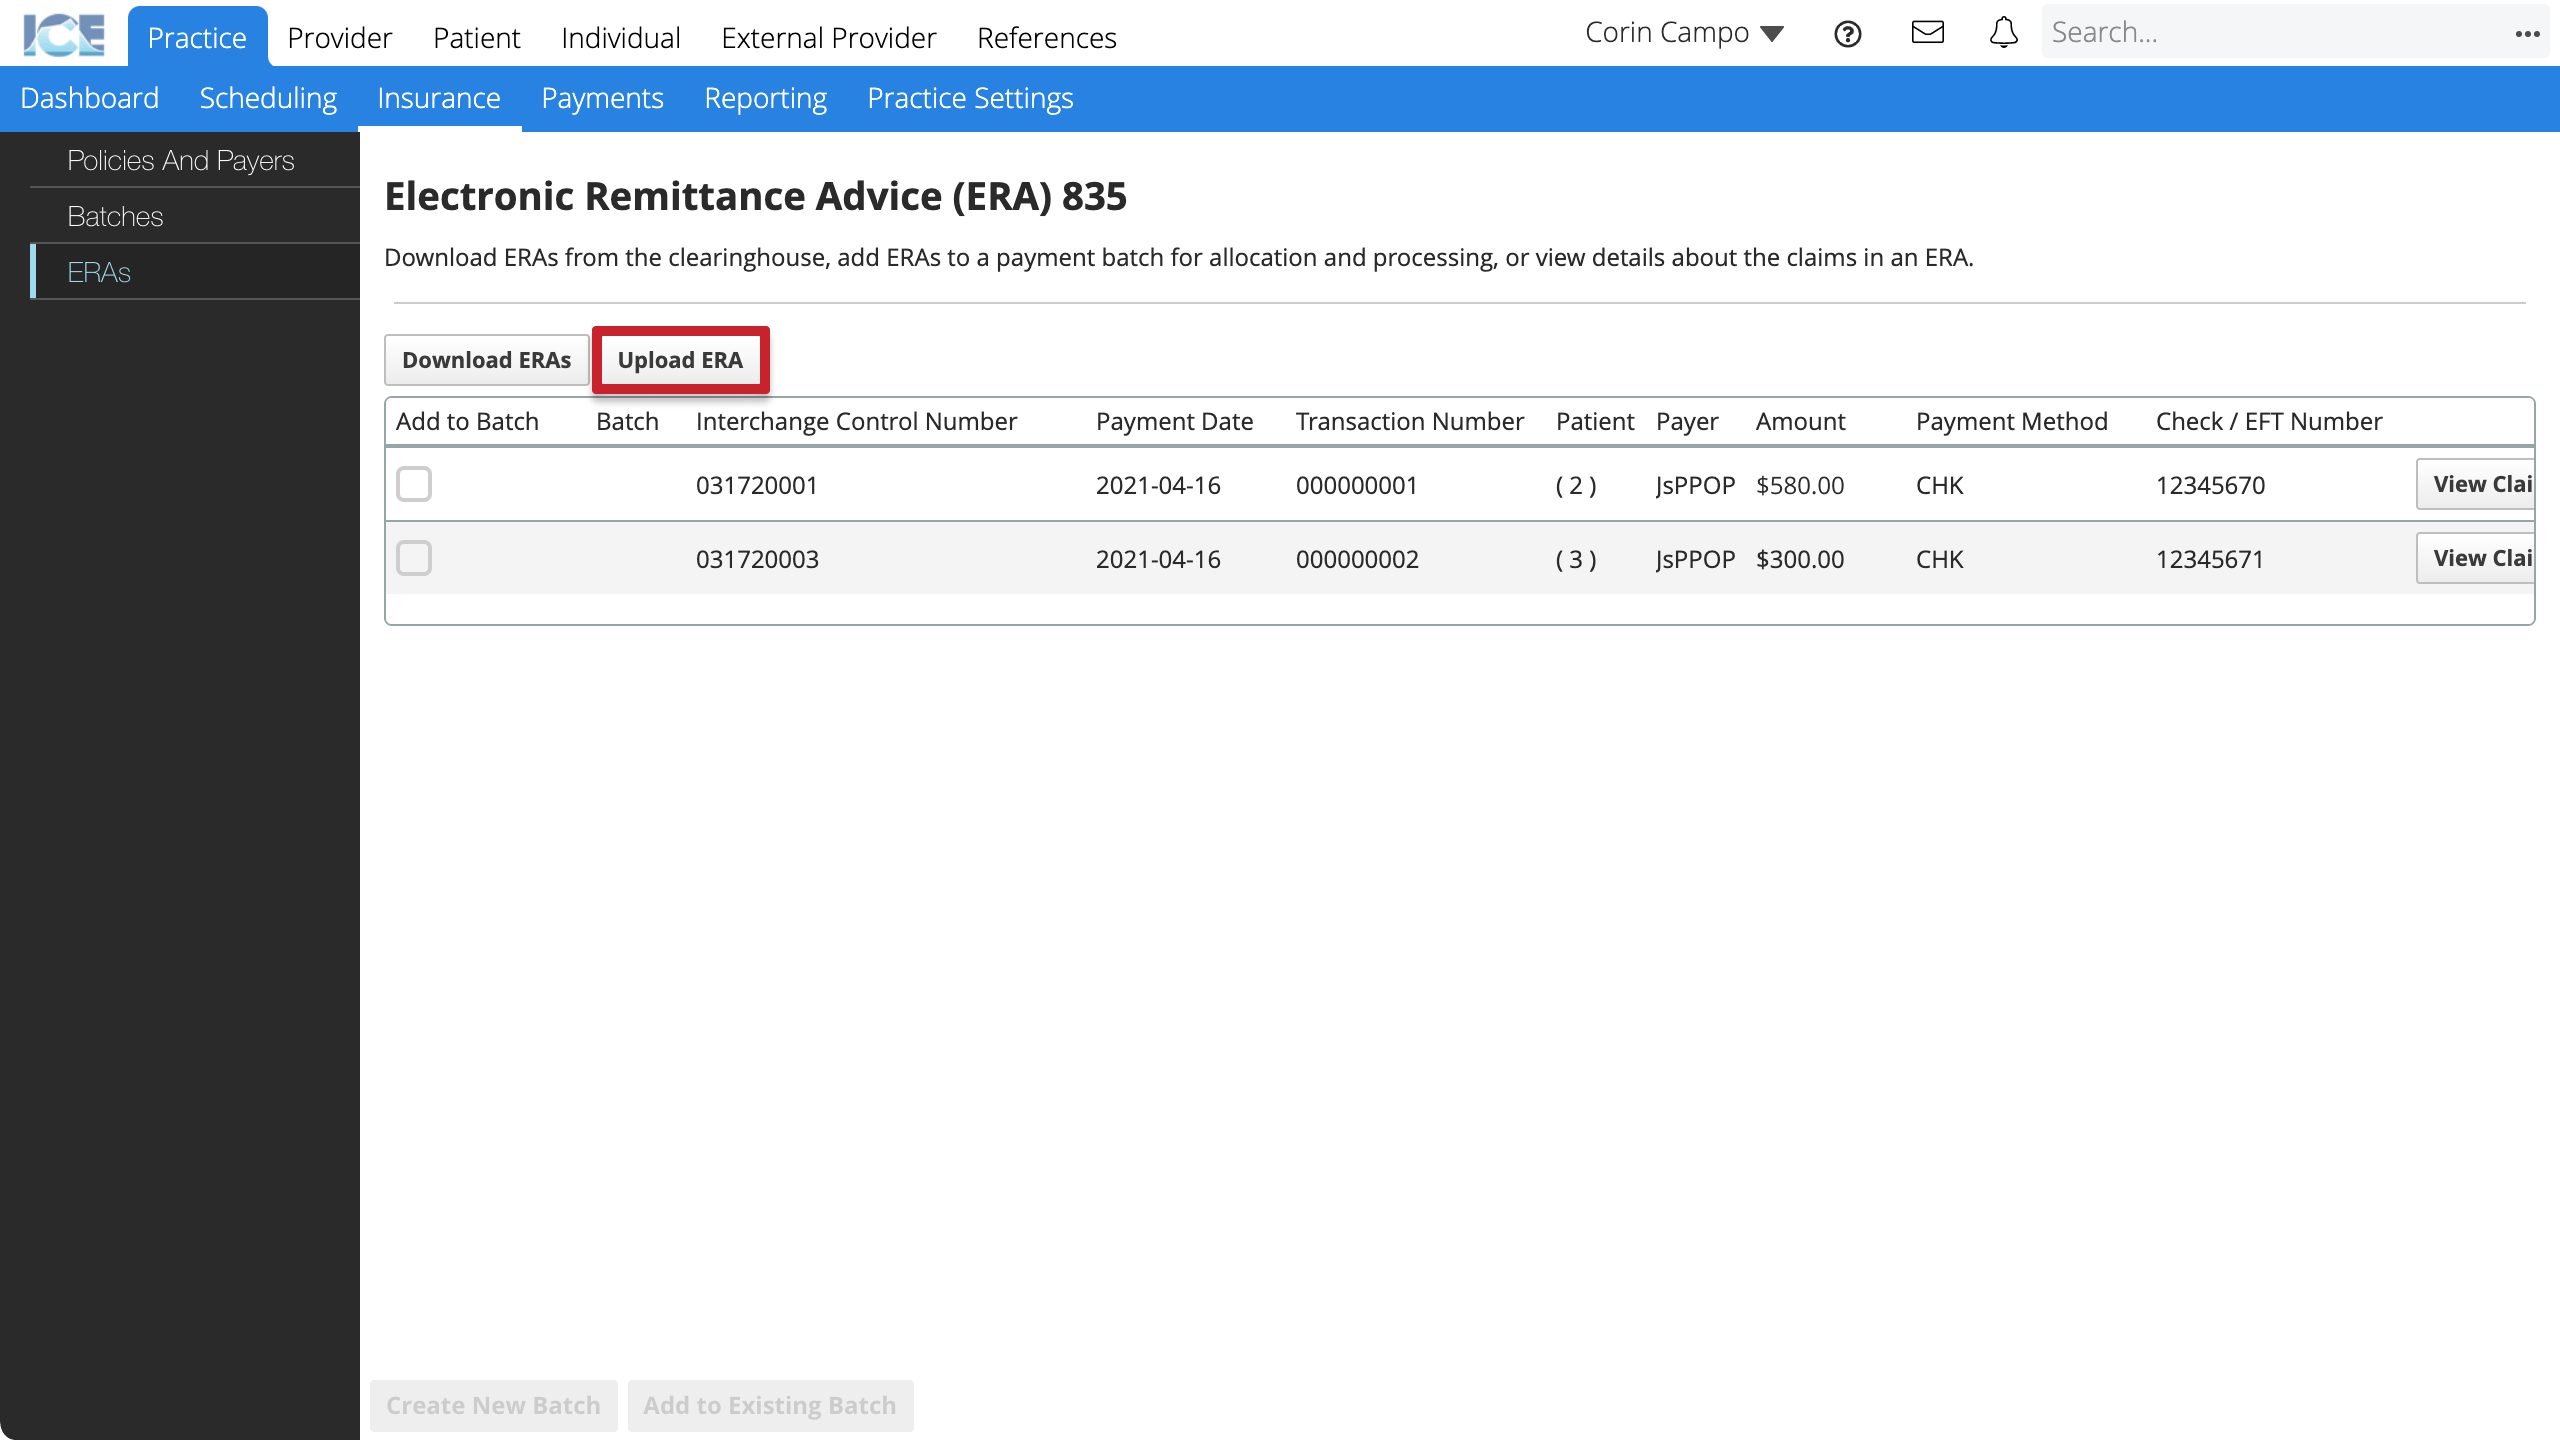
- Select Choose File to find the file you want to upload
- Select Upload
Now you can view the ERA details or add payments to a batch for allocation and claims processing.
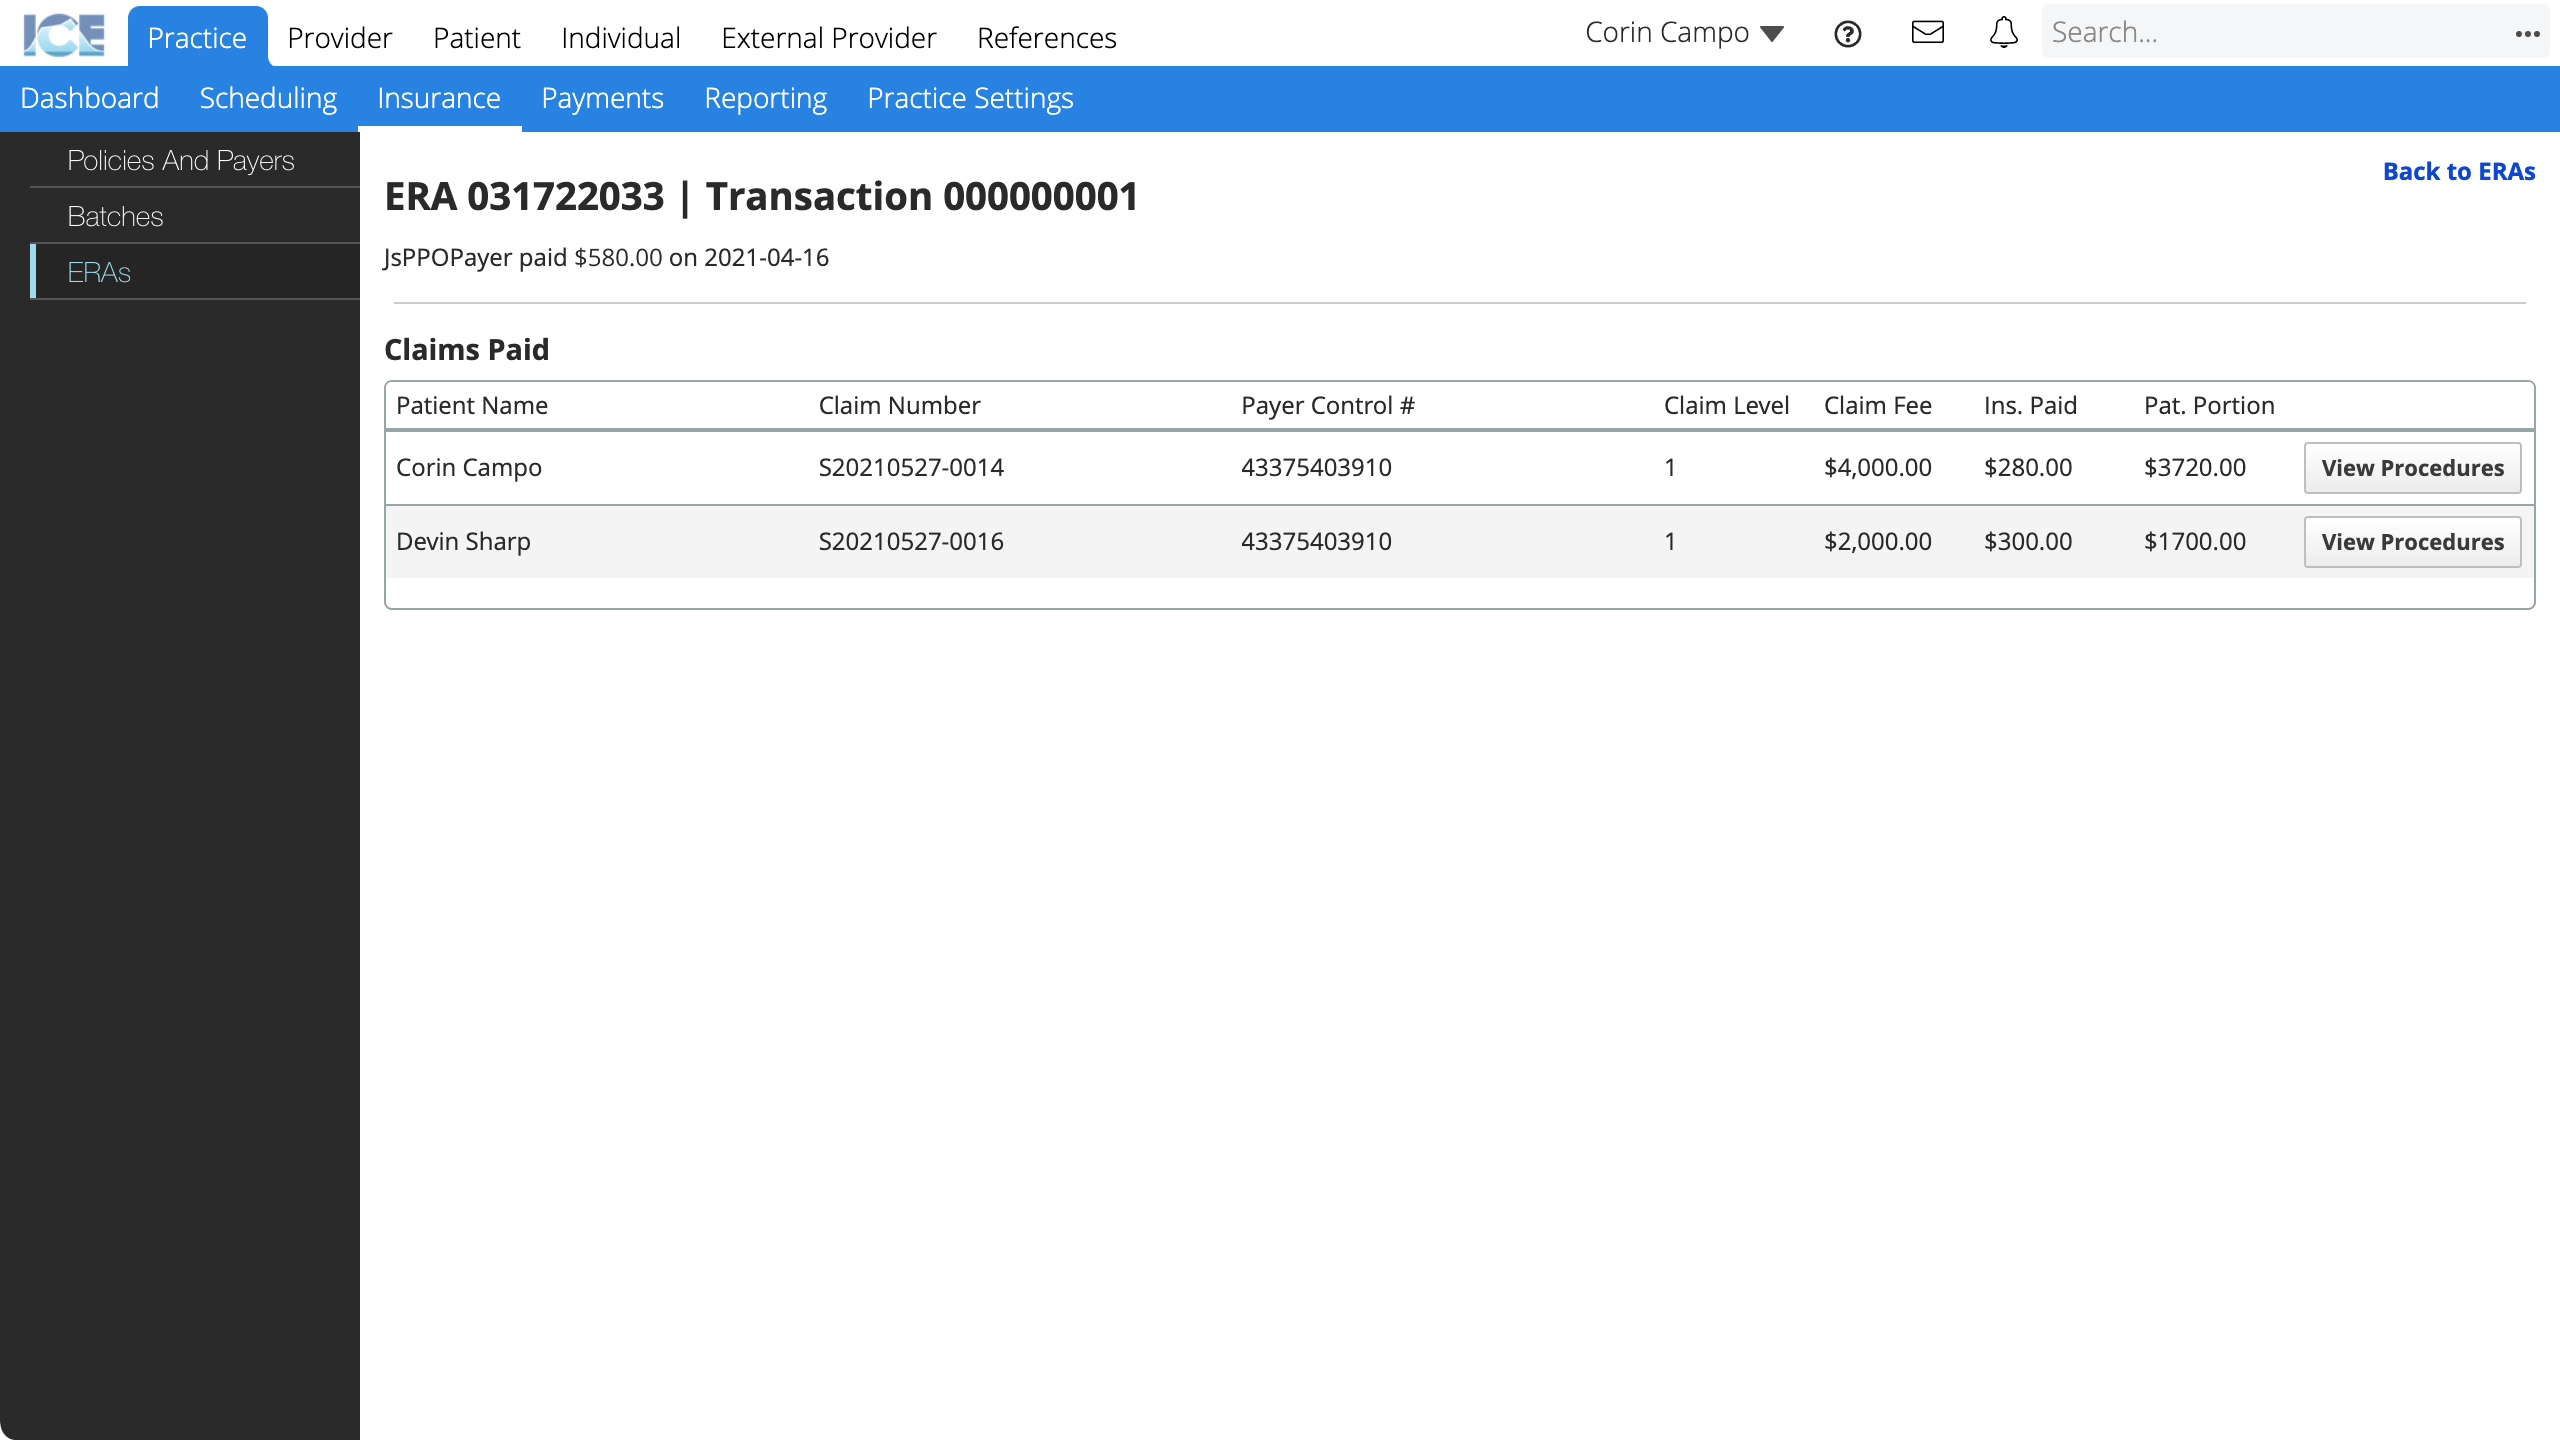
View ERA details
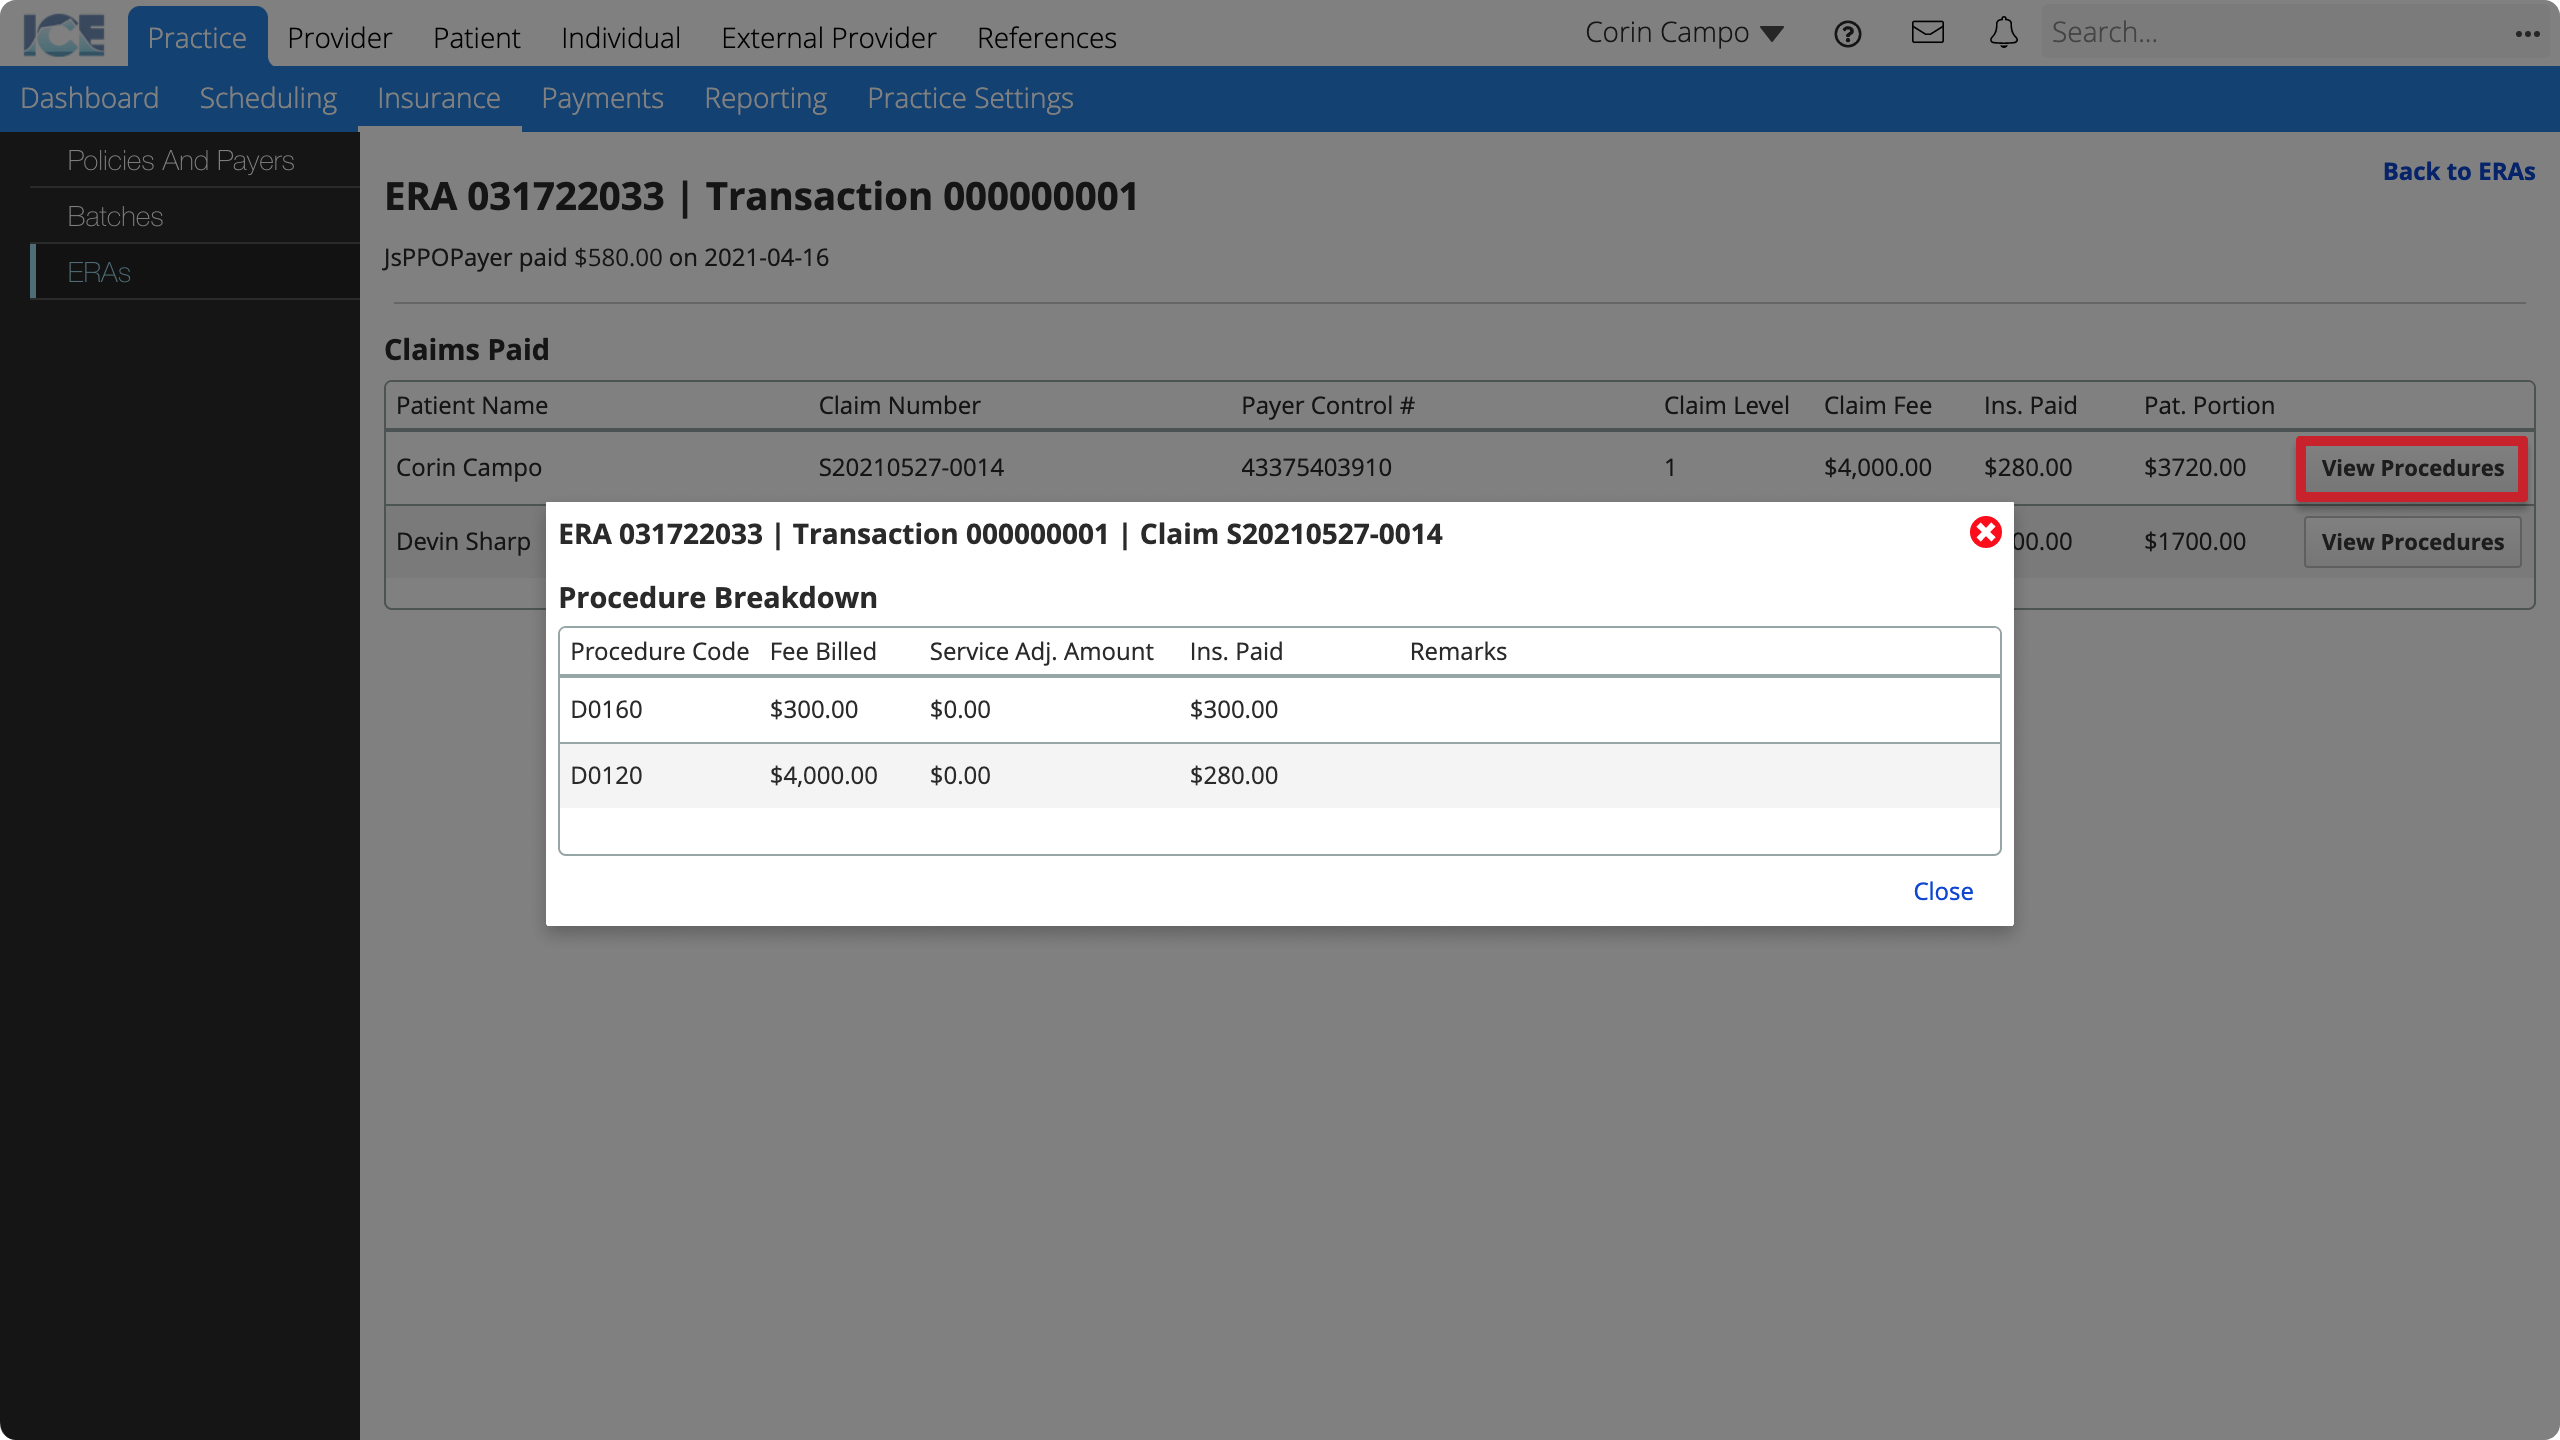
The ERA detailed views show the patients, claims, and procedure details for an ERA in a human-readable format.
You cannot edit or act on the Claims Paid and Procedure Breakdown information. The tables are a reference tool for the adjudication and allocation details of an ERA.
View claims in an ERA
For each ERA, you can see a list of all the claims, patients, and paid amounts referenced in the ERA.
- Go to Practice > Insurance > ERAs
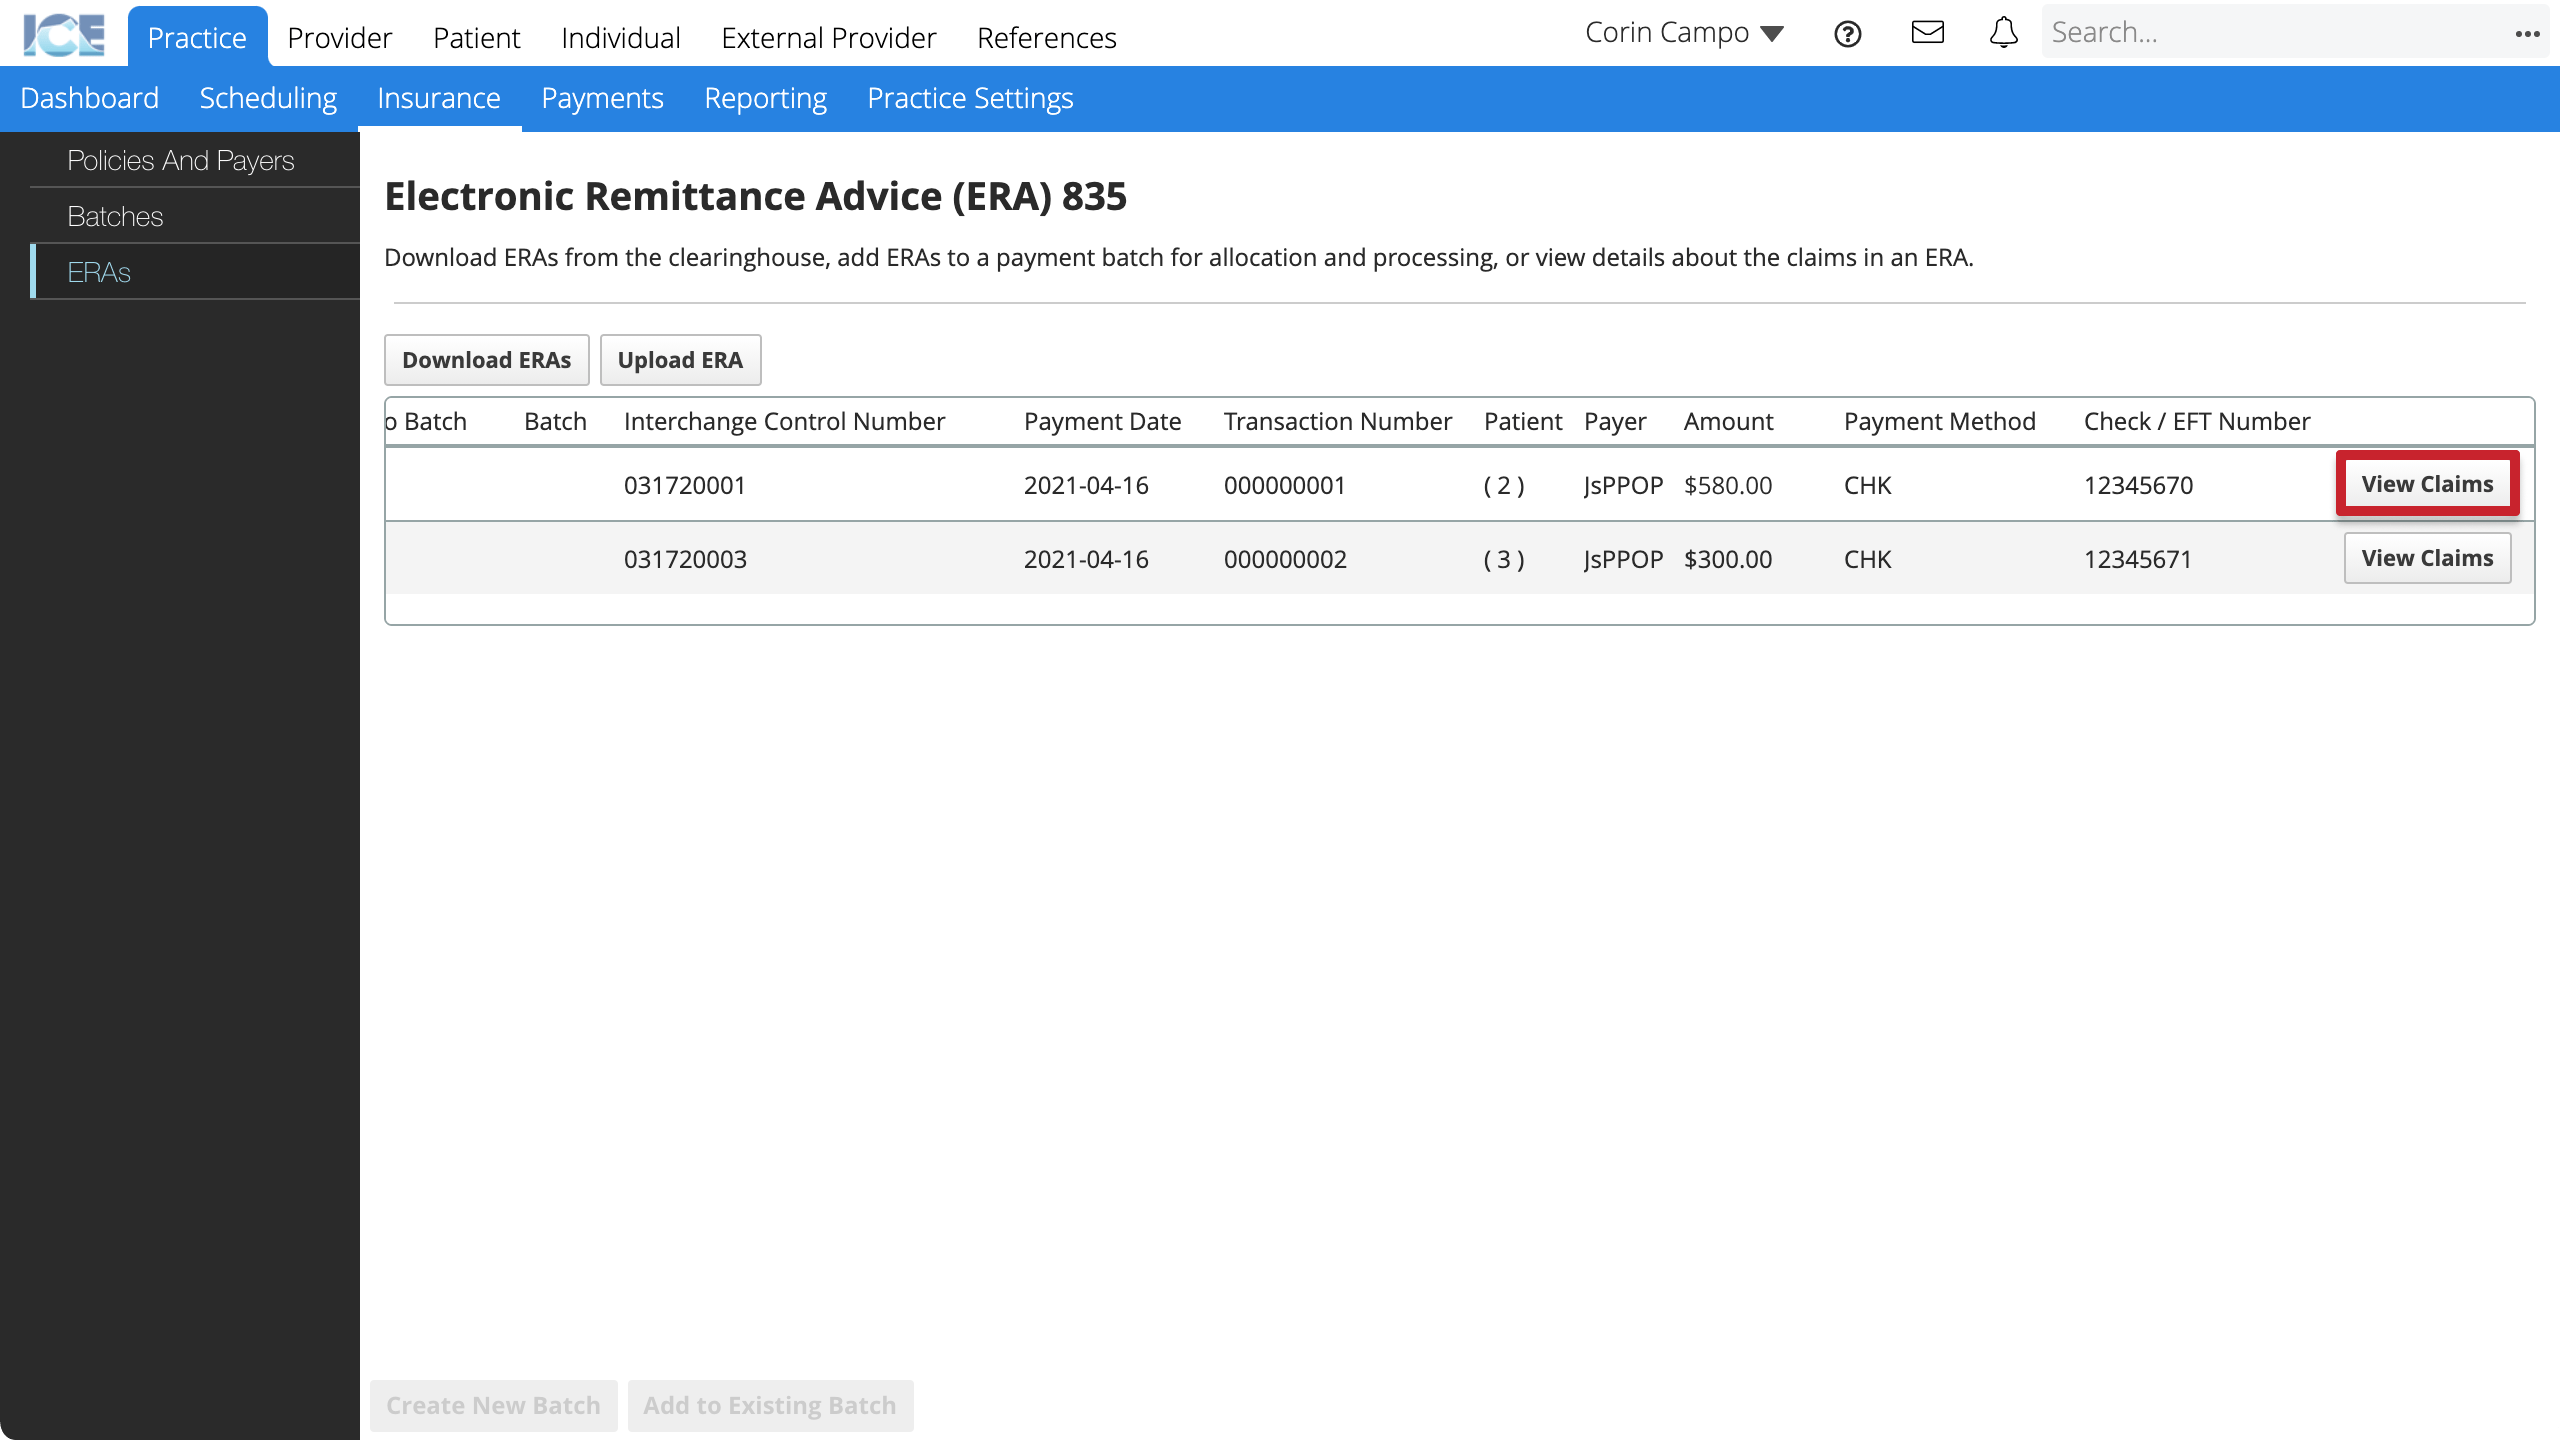
- Select View Claims
View procedure breakdown on a claim
For each claim in an ERA, you can see fees, paid amounts, and remarks for procedures on the claim.
- Go to Practice > Insurance > ERAs
- Select View Claims
- Select View Procedures
Add an ERA payment to a batch
Adding an ERA payment to a batch allows you to allocate the funds to insurance charges and process the claims.
After an ERA is in a batch, the system uses the ERA details to auto-fill patients, paid amounts, allocations, and reason codes to help you process claims faster.
- Select the ERA payment(s) you want to add to a batch
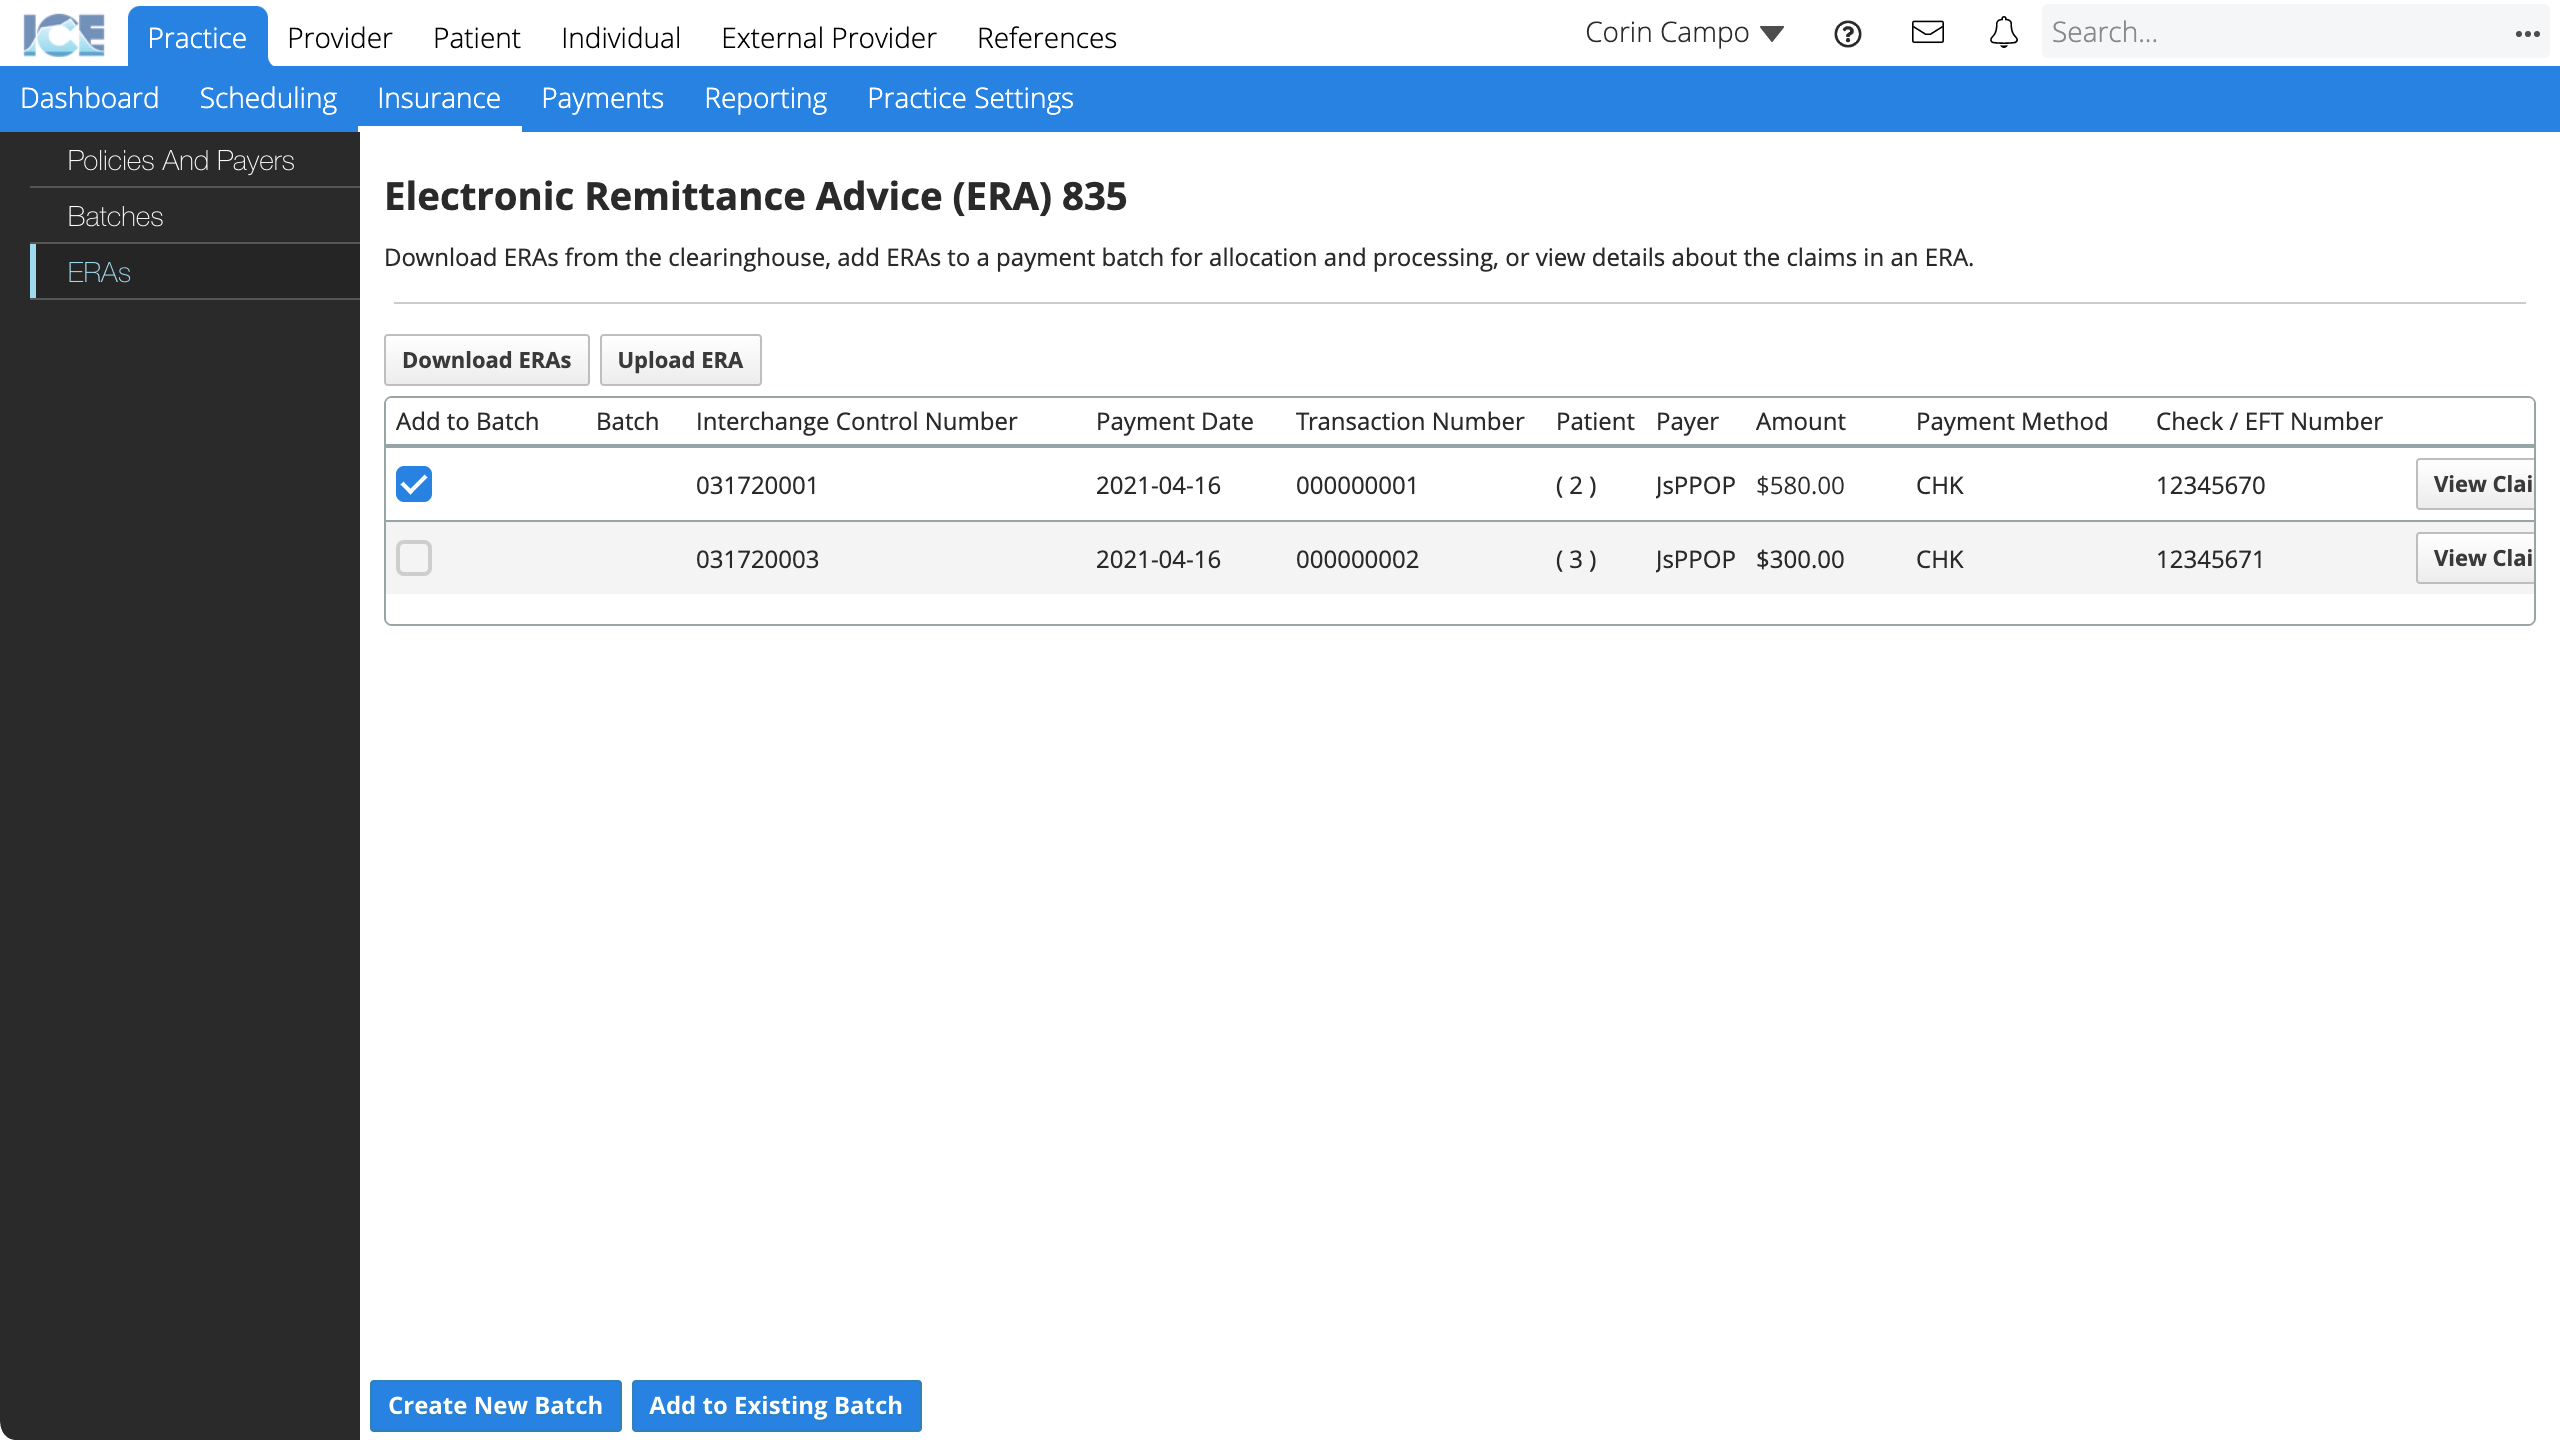
- Choose whether to add the selected payment(s) to a new or existing batch payment
- Create New Batch: Define a new batch to add the payment(s) to.
- Add to Existing Batch: Choose an existing batch from the Financials Batch drop-down menu.
- Choose the Payment Location where you want to record each payment
- To set all payment locations as the same, choose a location from the Set All Payment Location To drop-down and select Apply.
- Choose the Payment Method for each payment
- To set all payment methods as the same, choose a method from the Set All Payment Method To drop-down and select Apply.
- The system auto-fills payment methods based on the configuration in Practice Settings > Insurance > ERAs.
- Confirm the auto-filled Check/Authorization numbers for each payment
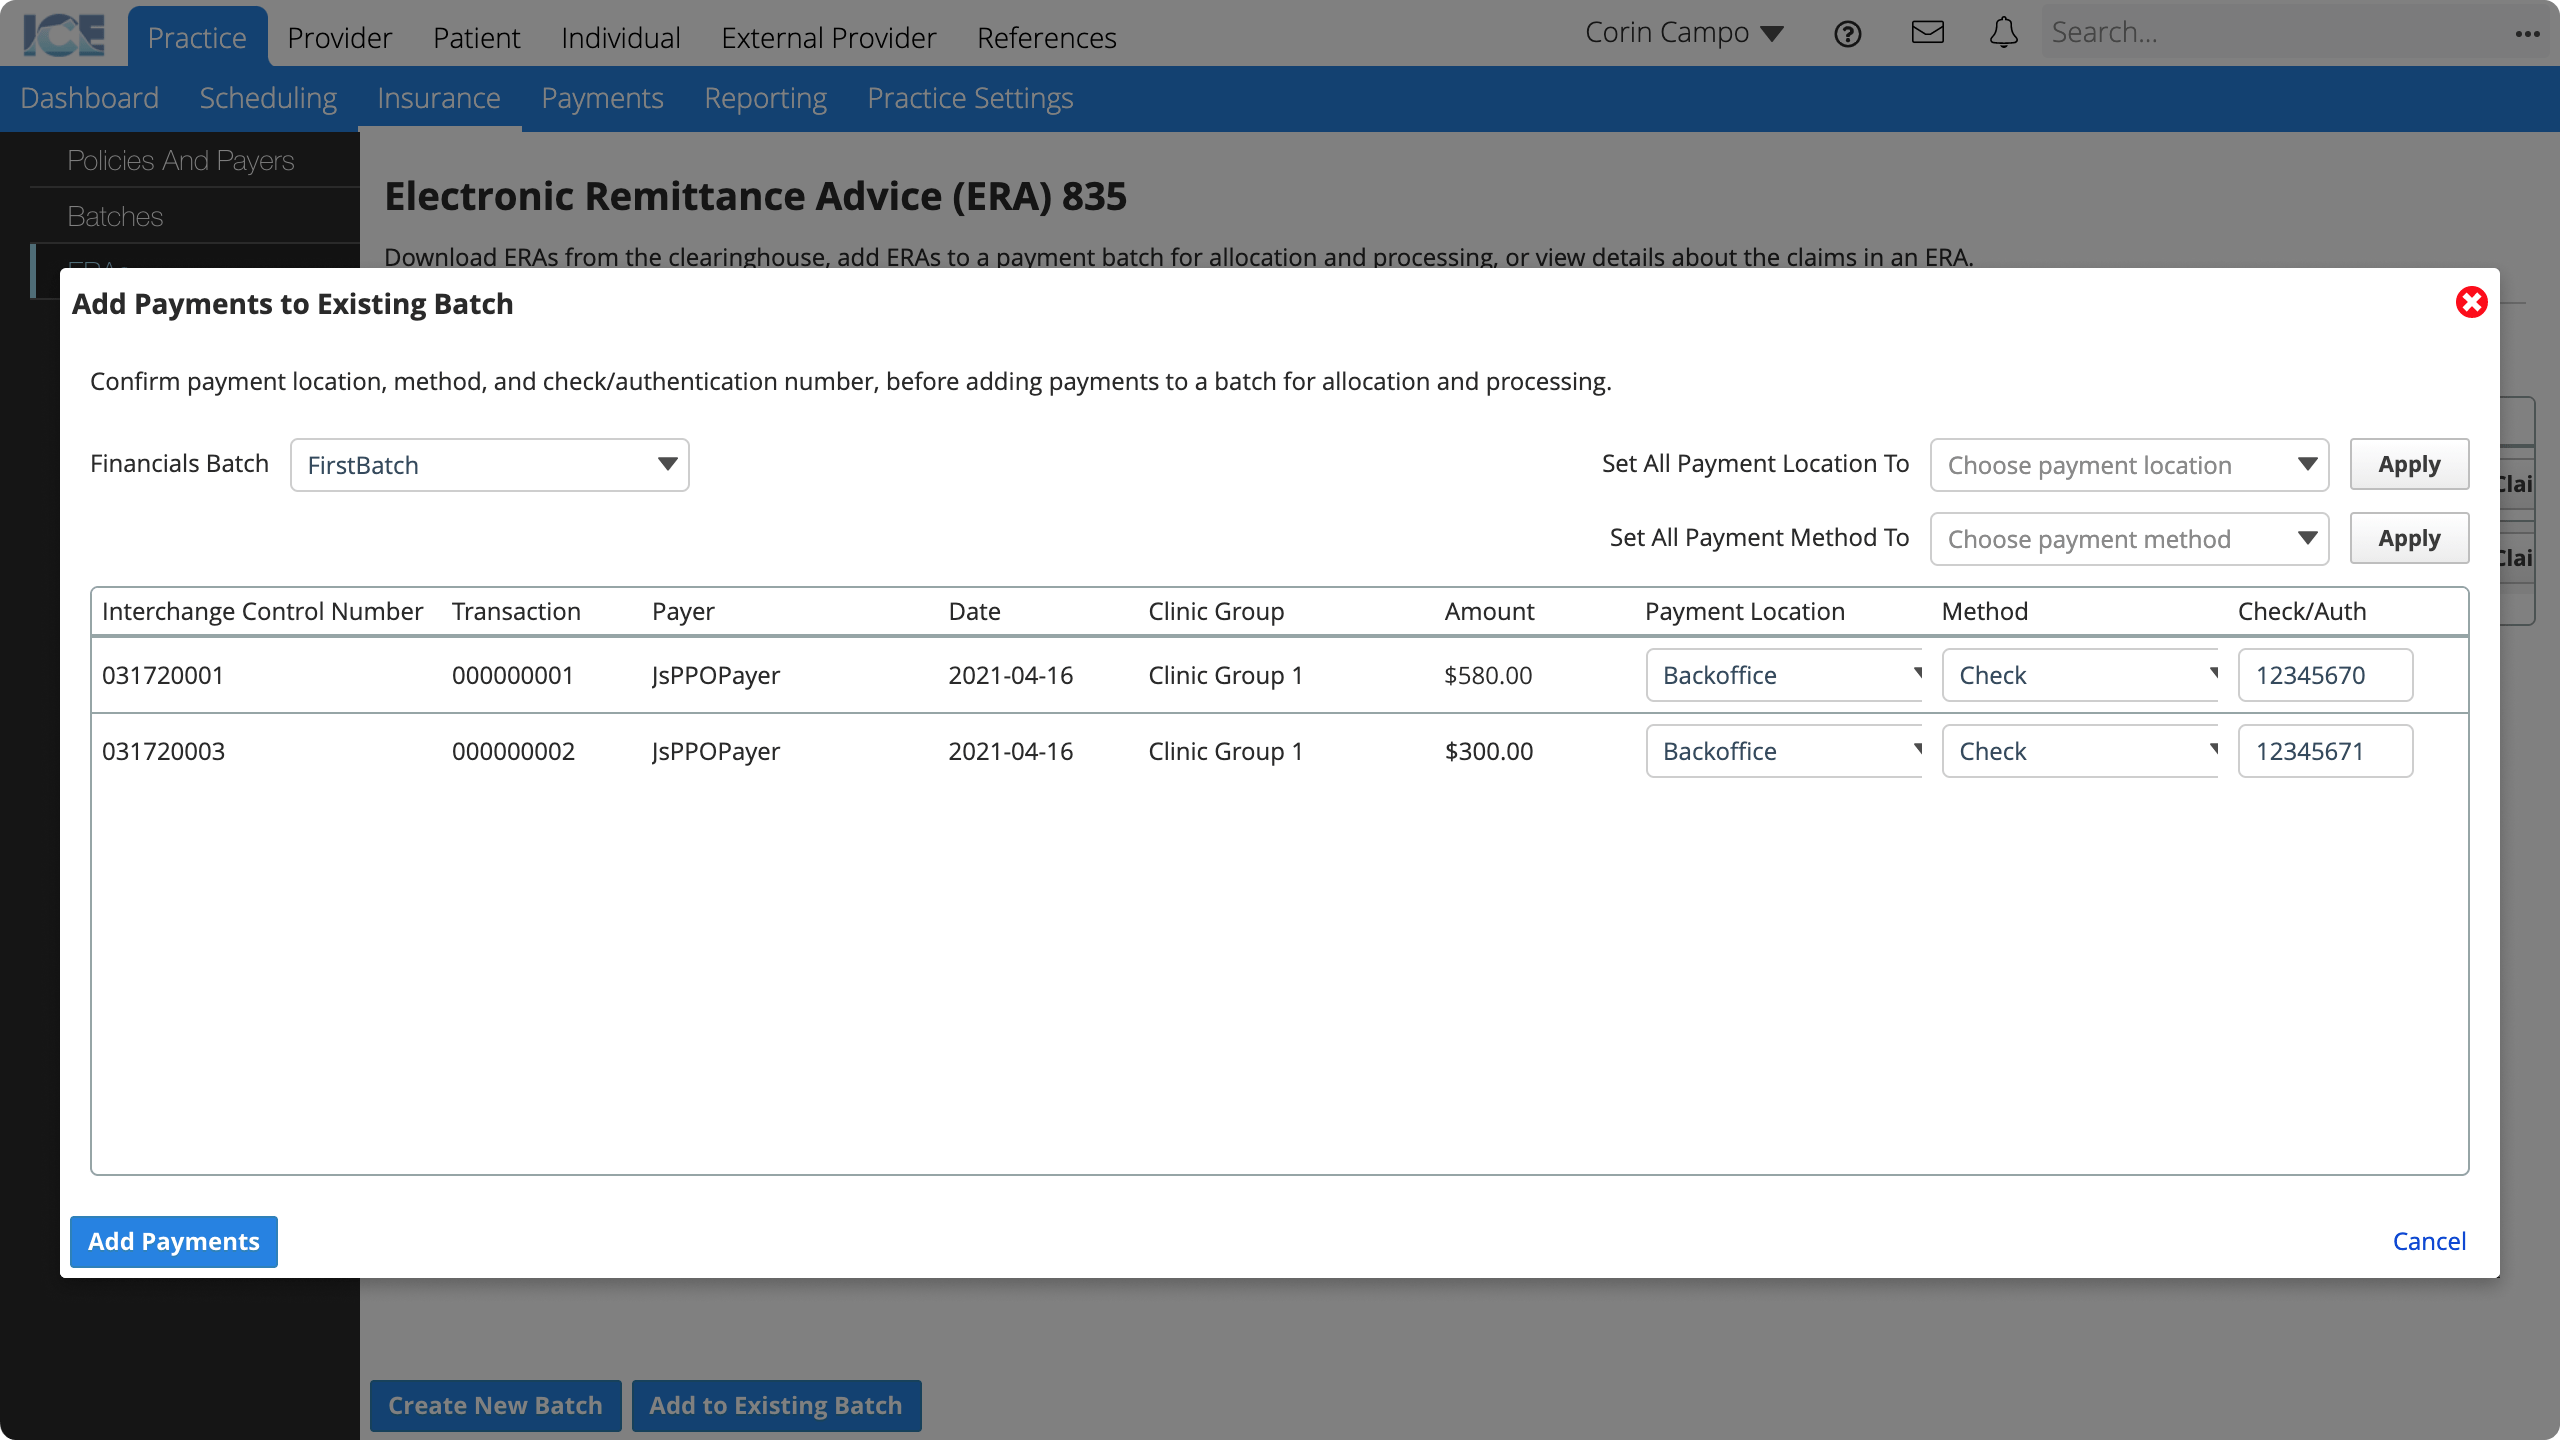
- Select Add Payments
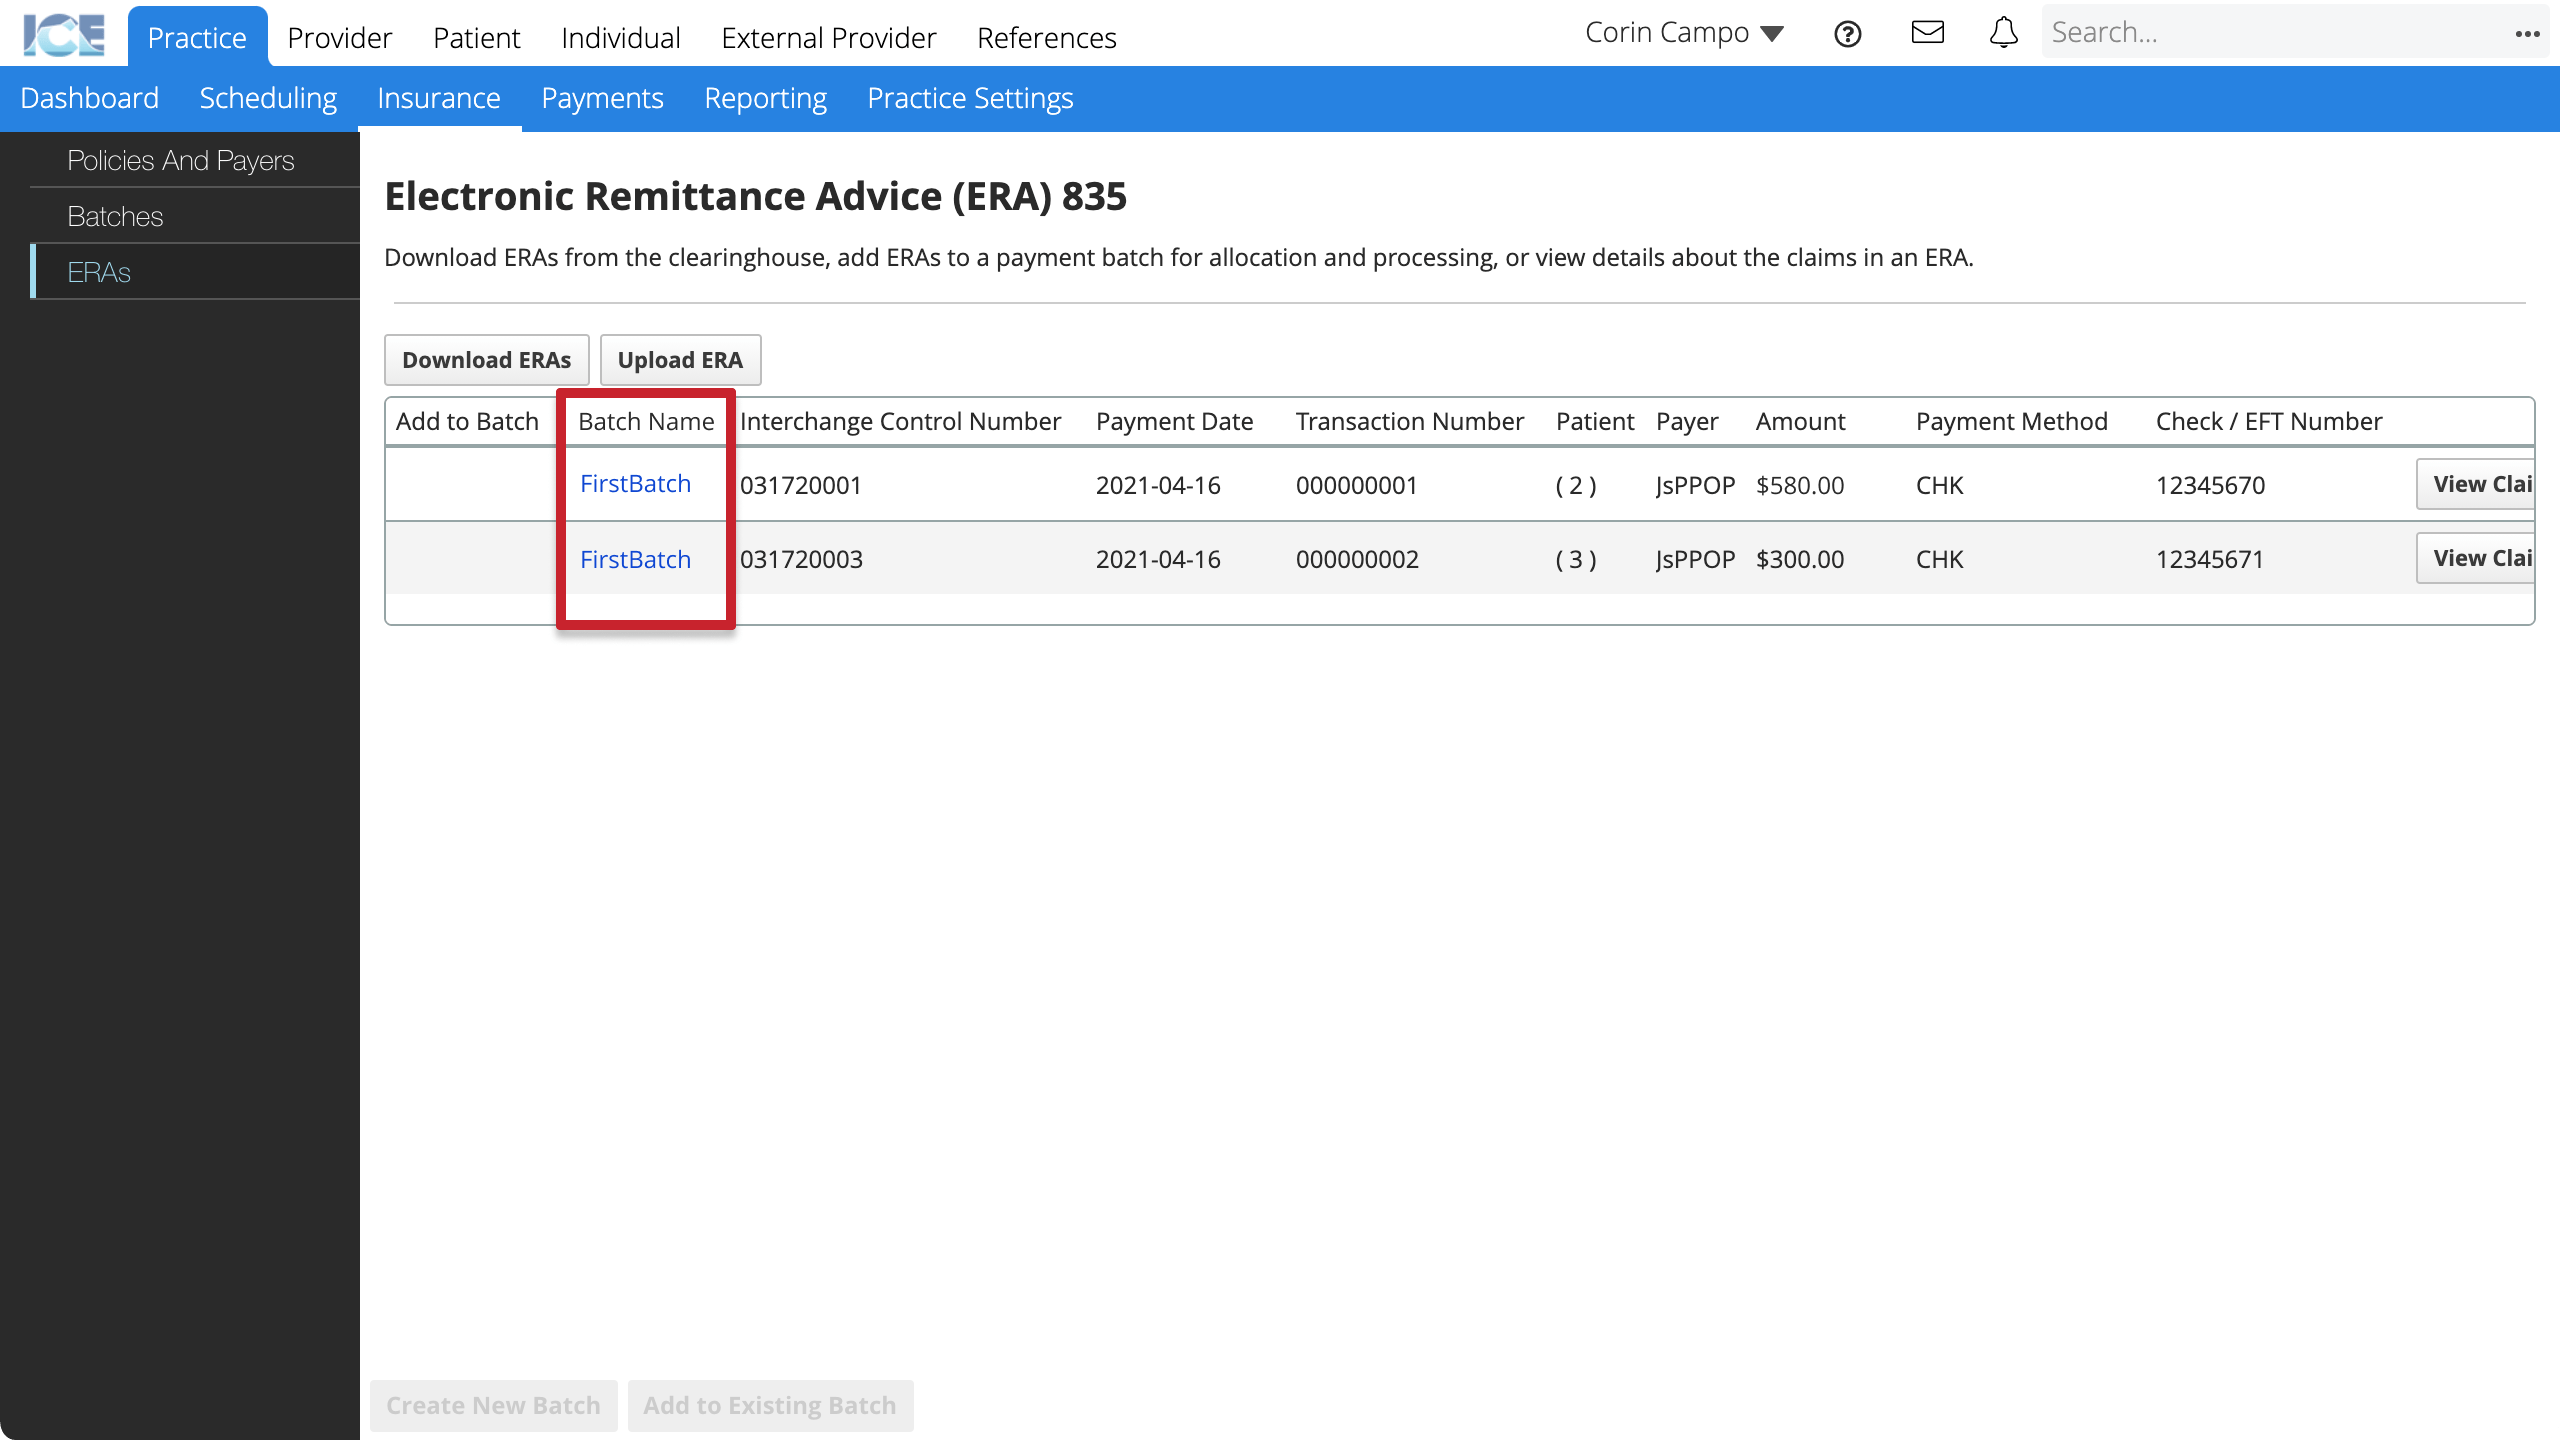
To view the batch you added an ERA payment to, select the batch's name from the Batch Name column or go to Practice > Payments > Batch Payments and find it in the list.
Now you can continue the allocation and claims processing workflow.
To learn how to allocate a payment, see Allocate an insurance payment in a batch.
Flexible task management batches
Batches are a tool for organizing your work. It is up to you to decide if you should add a payment to an existing or new batch.
Some people create a batch to group payments by time frame, payer, or staff member processing the payments. They can use the batch to keep track of their progress as they move towards a deadline or to match the group of payments to an important accounting time period.
Others create a new batch for every single payment because they don't want to group the work or associate it with a timeframe.
Whichever method you choose, you have the same allocation and processing tools.