Process an insurance refund
You can only refund insurance credits. These are created during the payment allocation process when an insurance overpayment is recorded as an insurance credit.
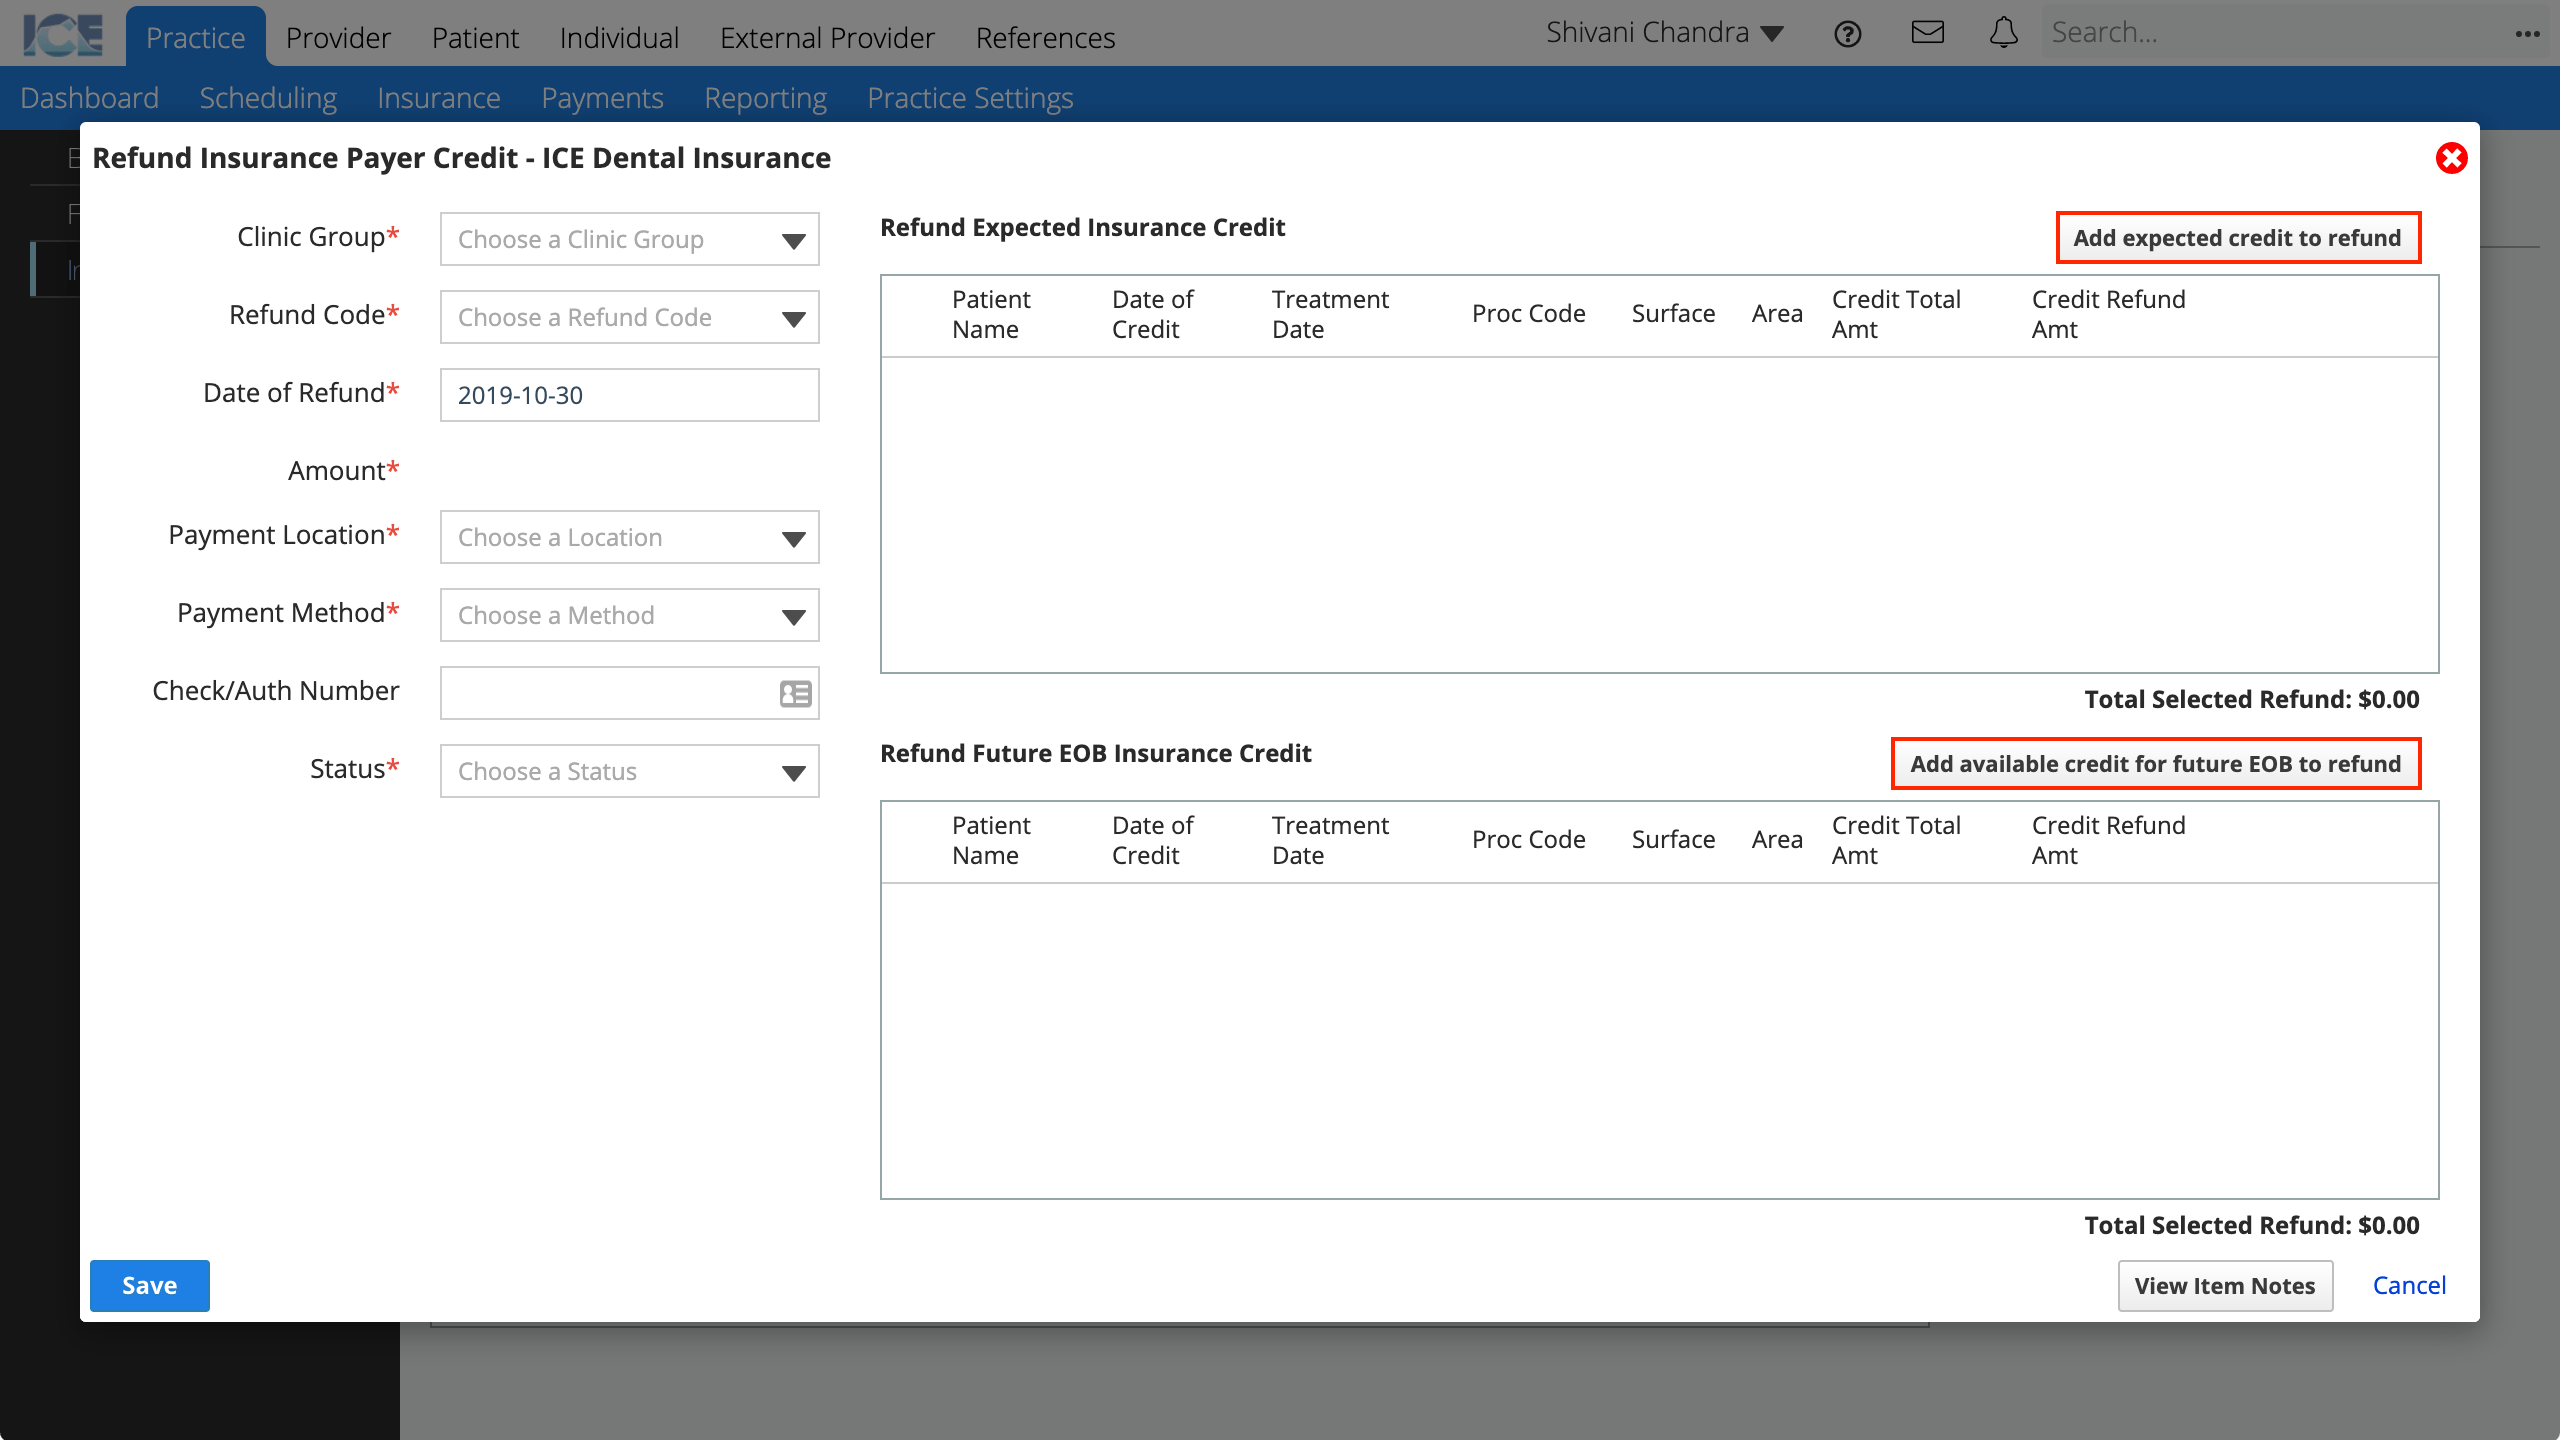
- Go to Practice > Payments > Insurance Payer Credit
- Select Refund Credit beside the insurance payer whose credit you want to refund

- Credit available for this insurance payer is organized into two groups:
- Credit expected to used for a future EOB.
- Credit expected to be refunded.
- Credit available for this insurance payer is organized into two groups:
- Select the Add expected credit to refund or the Add available credit for future EOB to refund depending on the type of credit you want to refund
- Enter filter criteria that match the credit(s) you want to refund
- Select Search to show results based on your filter criteria
- Select the checkbox for each credit you want to include
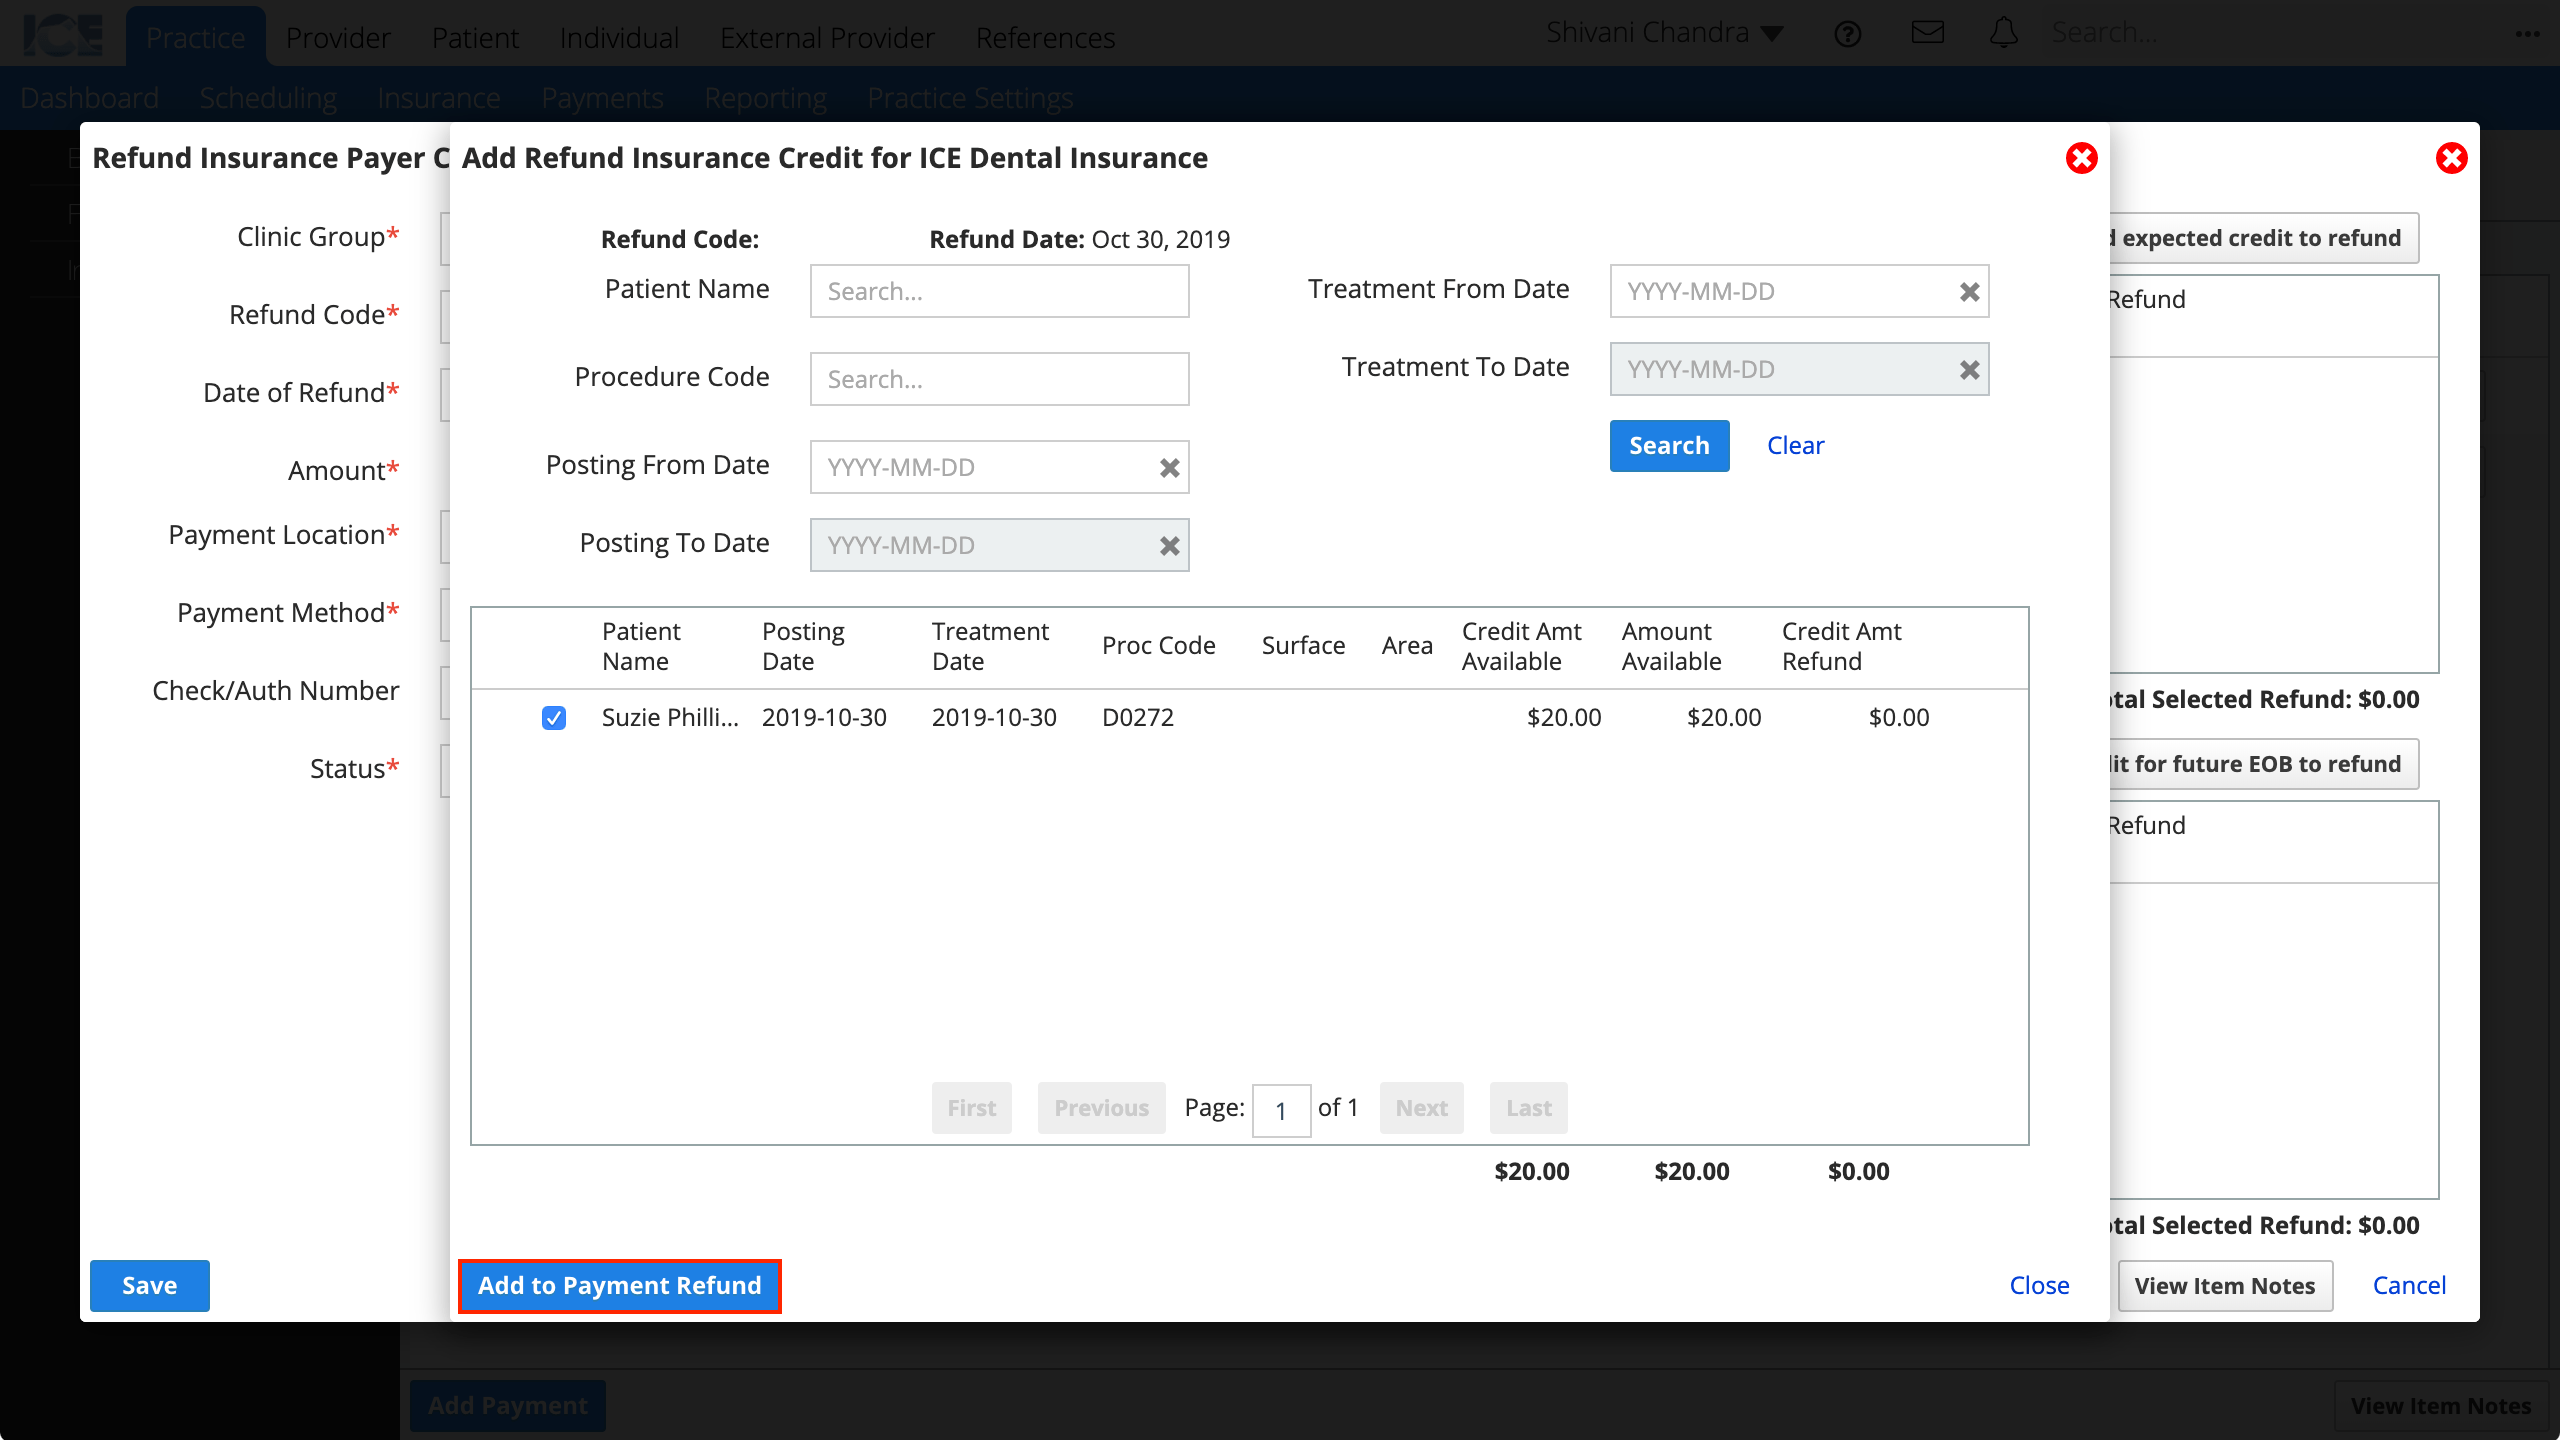
- Select Add to Payment Refund
- The credit amount appears in one of the tables on the right.
- Repeat step 3-7 to process refunds for multiple credits at once.
- Confirm the refund details:
- Clinic Group
- Refund Code
- Select the refund code that best describes this refund. Refund codes are managed in Practice Settings > Financials.
- Date of Refund
- Amount
- This number is based on the Credit Refund Amt values in the table on the right.
- Payment Location
- Payment Method
- Check/Auth Number
- Status
- Posted: The refund is posted to the insurance payer account and shows a refund payment in the account.
- In Progress: Credits have been assigned to a refund but the refund is not posted yet. Assigned credit amounts cannot be used in other financial transactions
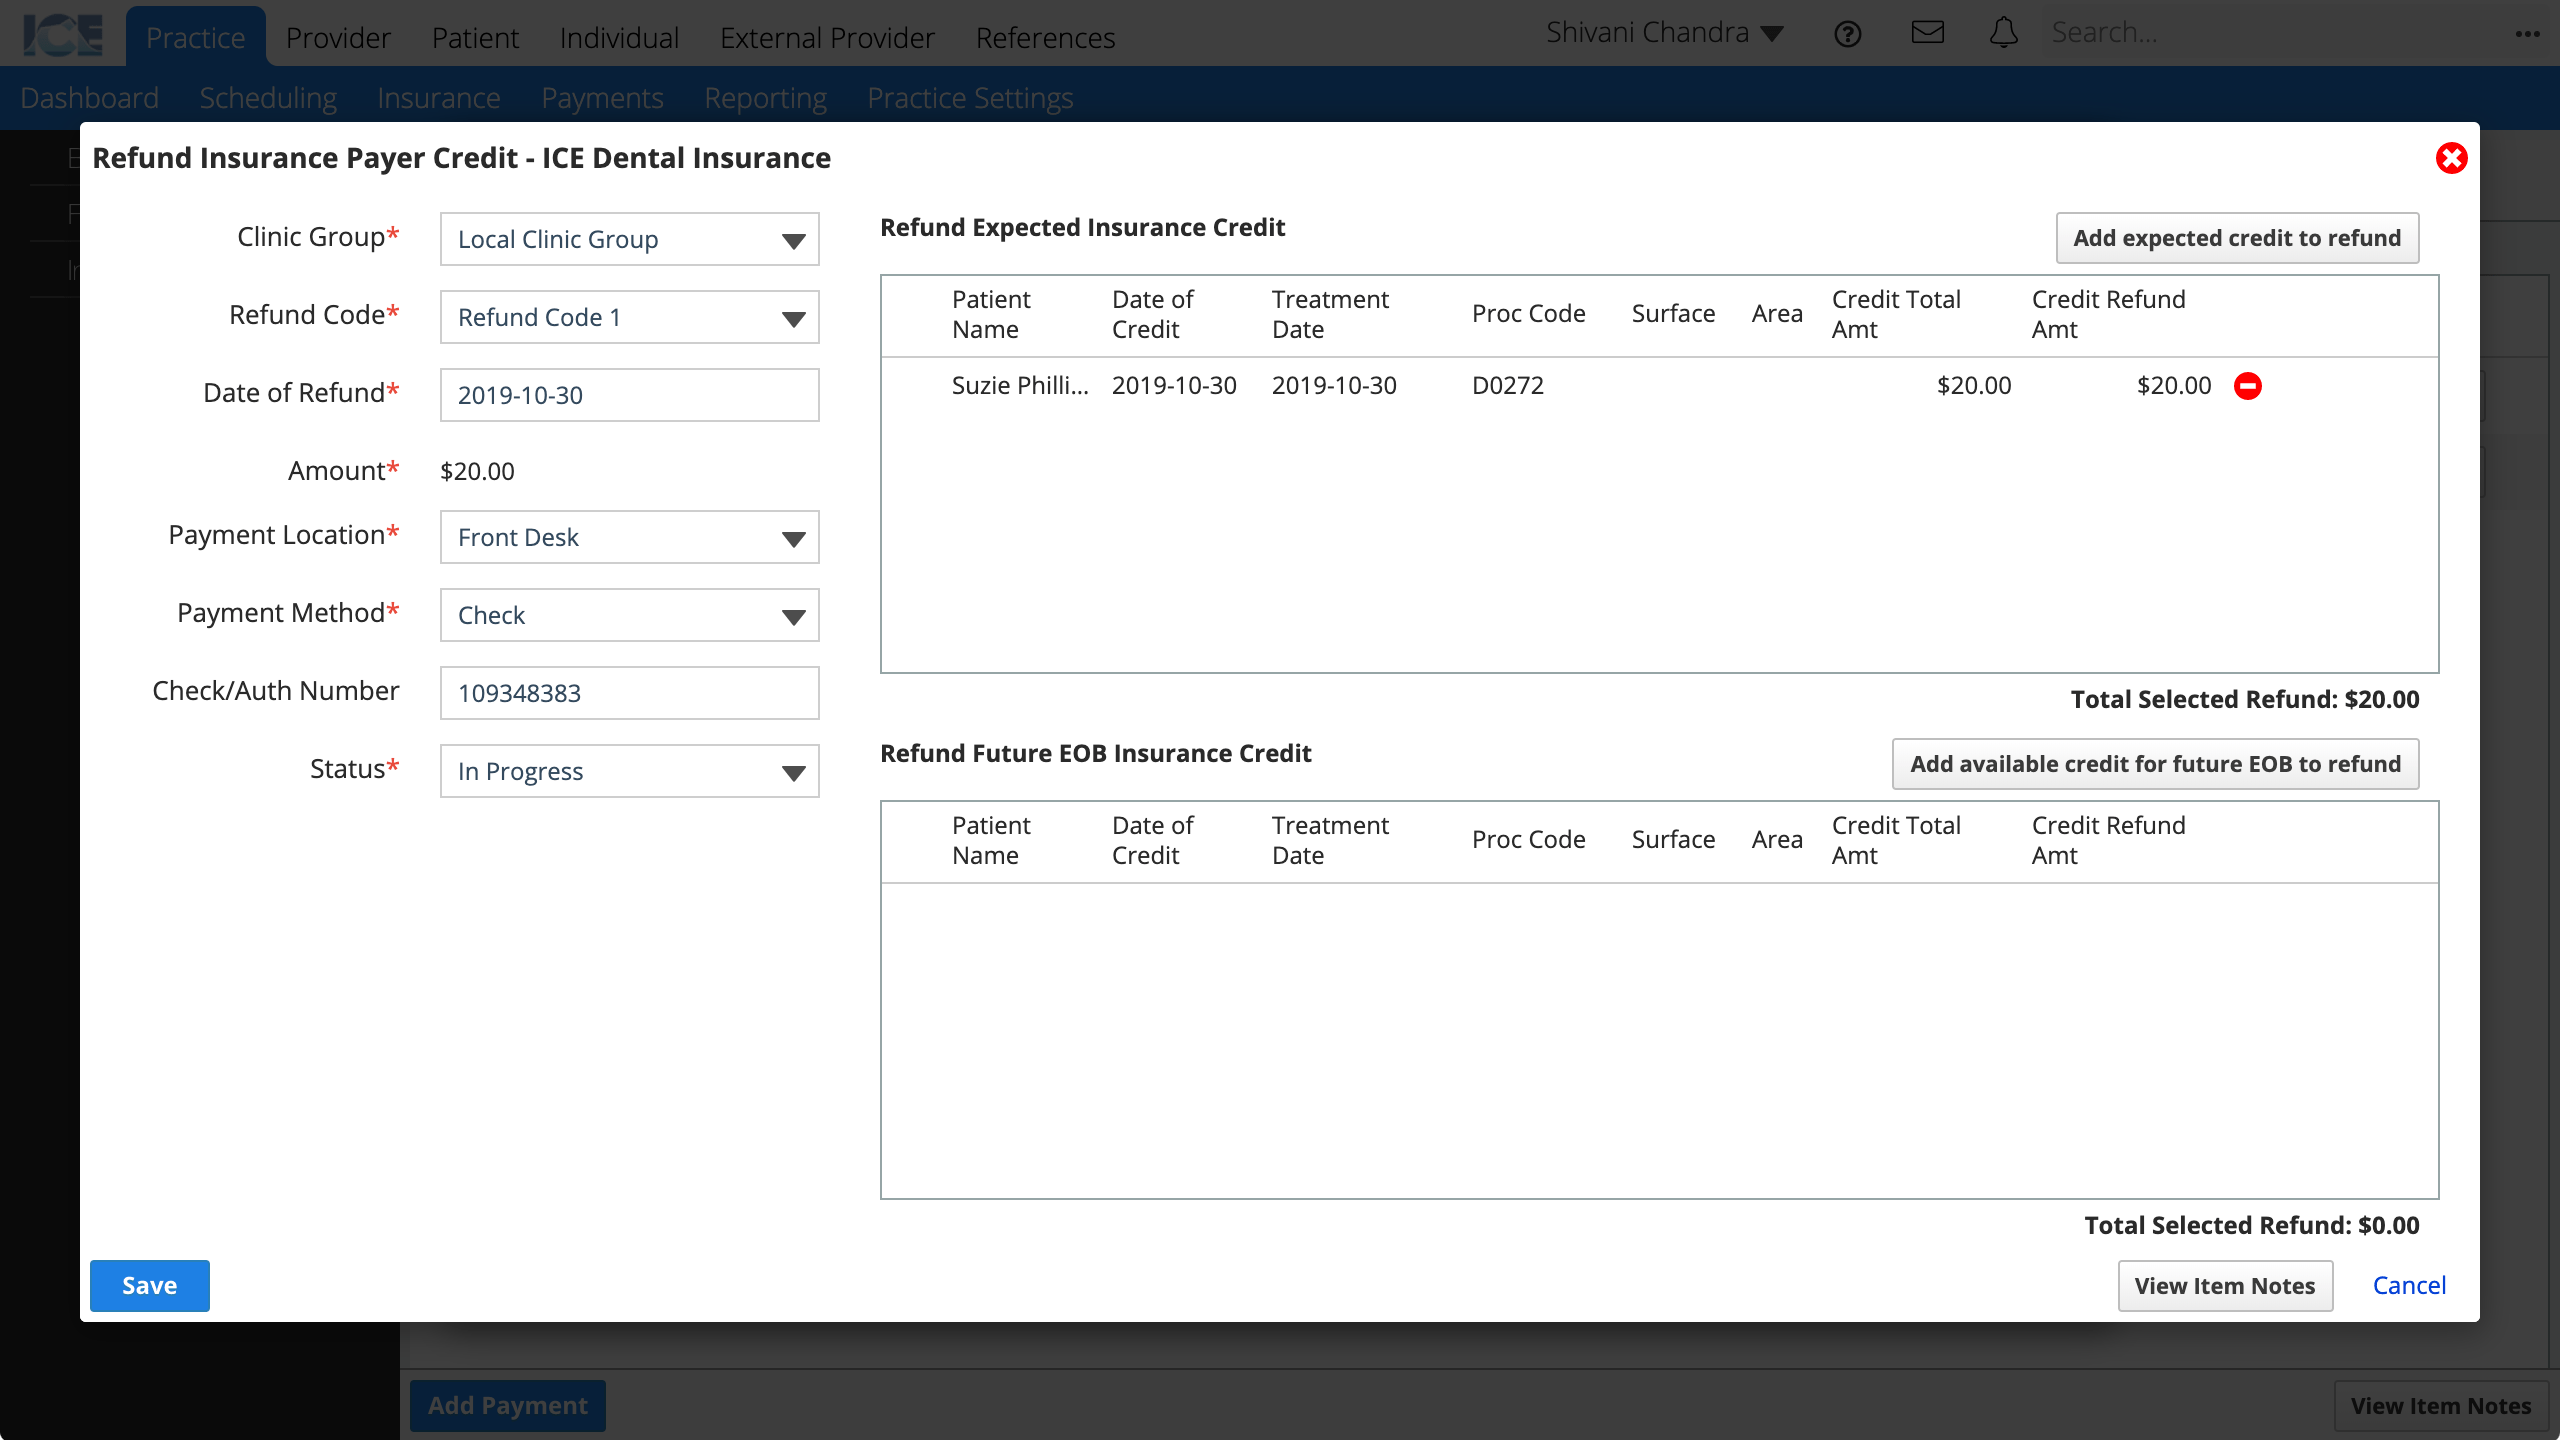
- Select Save
After you save a refund as Posted or In Progress, you can cancel it by finding the refund in Practice > Payments > Find Payments, selecting Refund, and changing its status to Cancel. The amount that had been allocated for the refund can now be used for any future transactions as an insurance credit.