Process a patient refund
Only payment amounts that are unallocated can be refunded to a patient. You have the option to update allocations during the refund workflow.
- Go to Practice > Payments > Find Payments
- Enter filter criteria that match the payment you want to refund
- Select Find Payments to show results based on your filter criteria
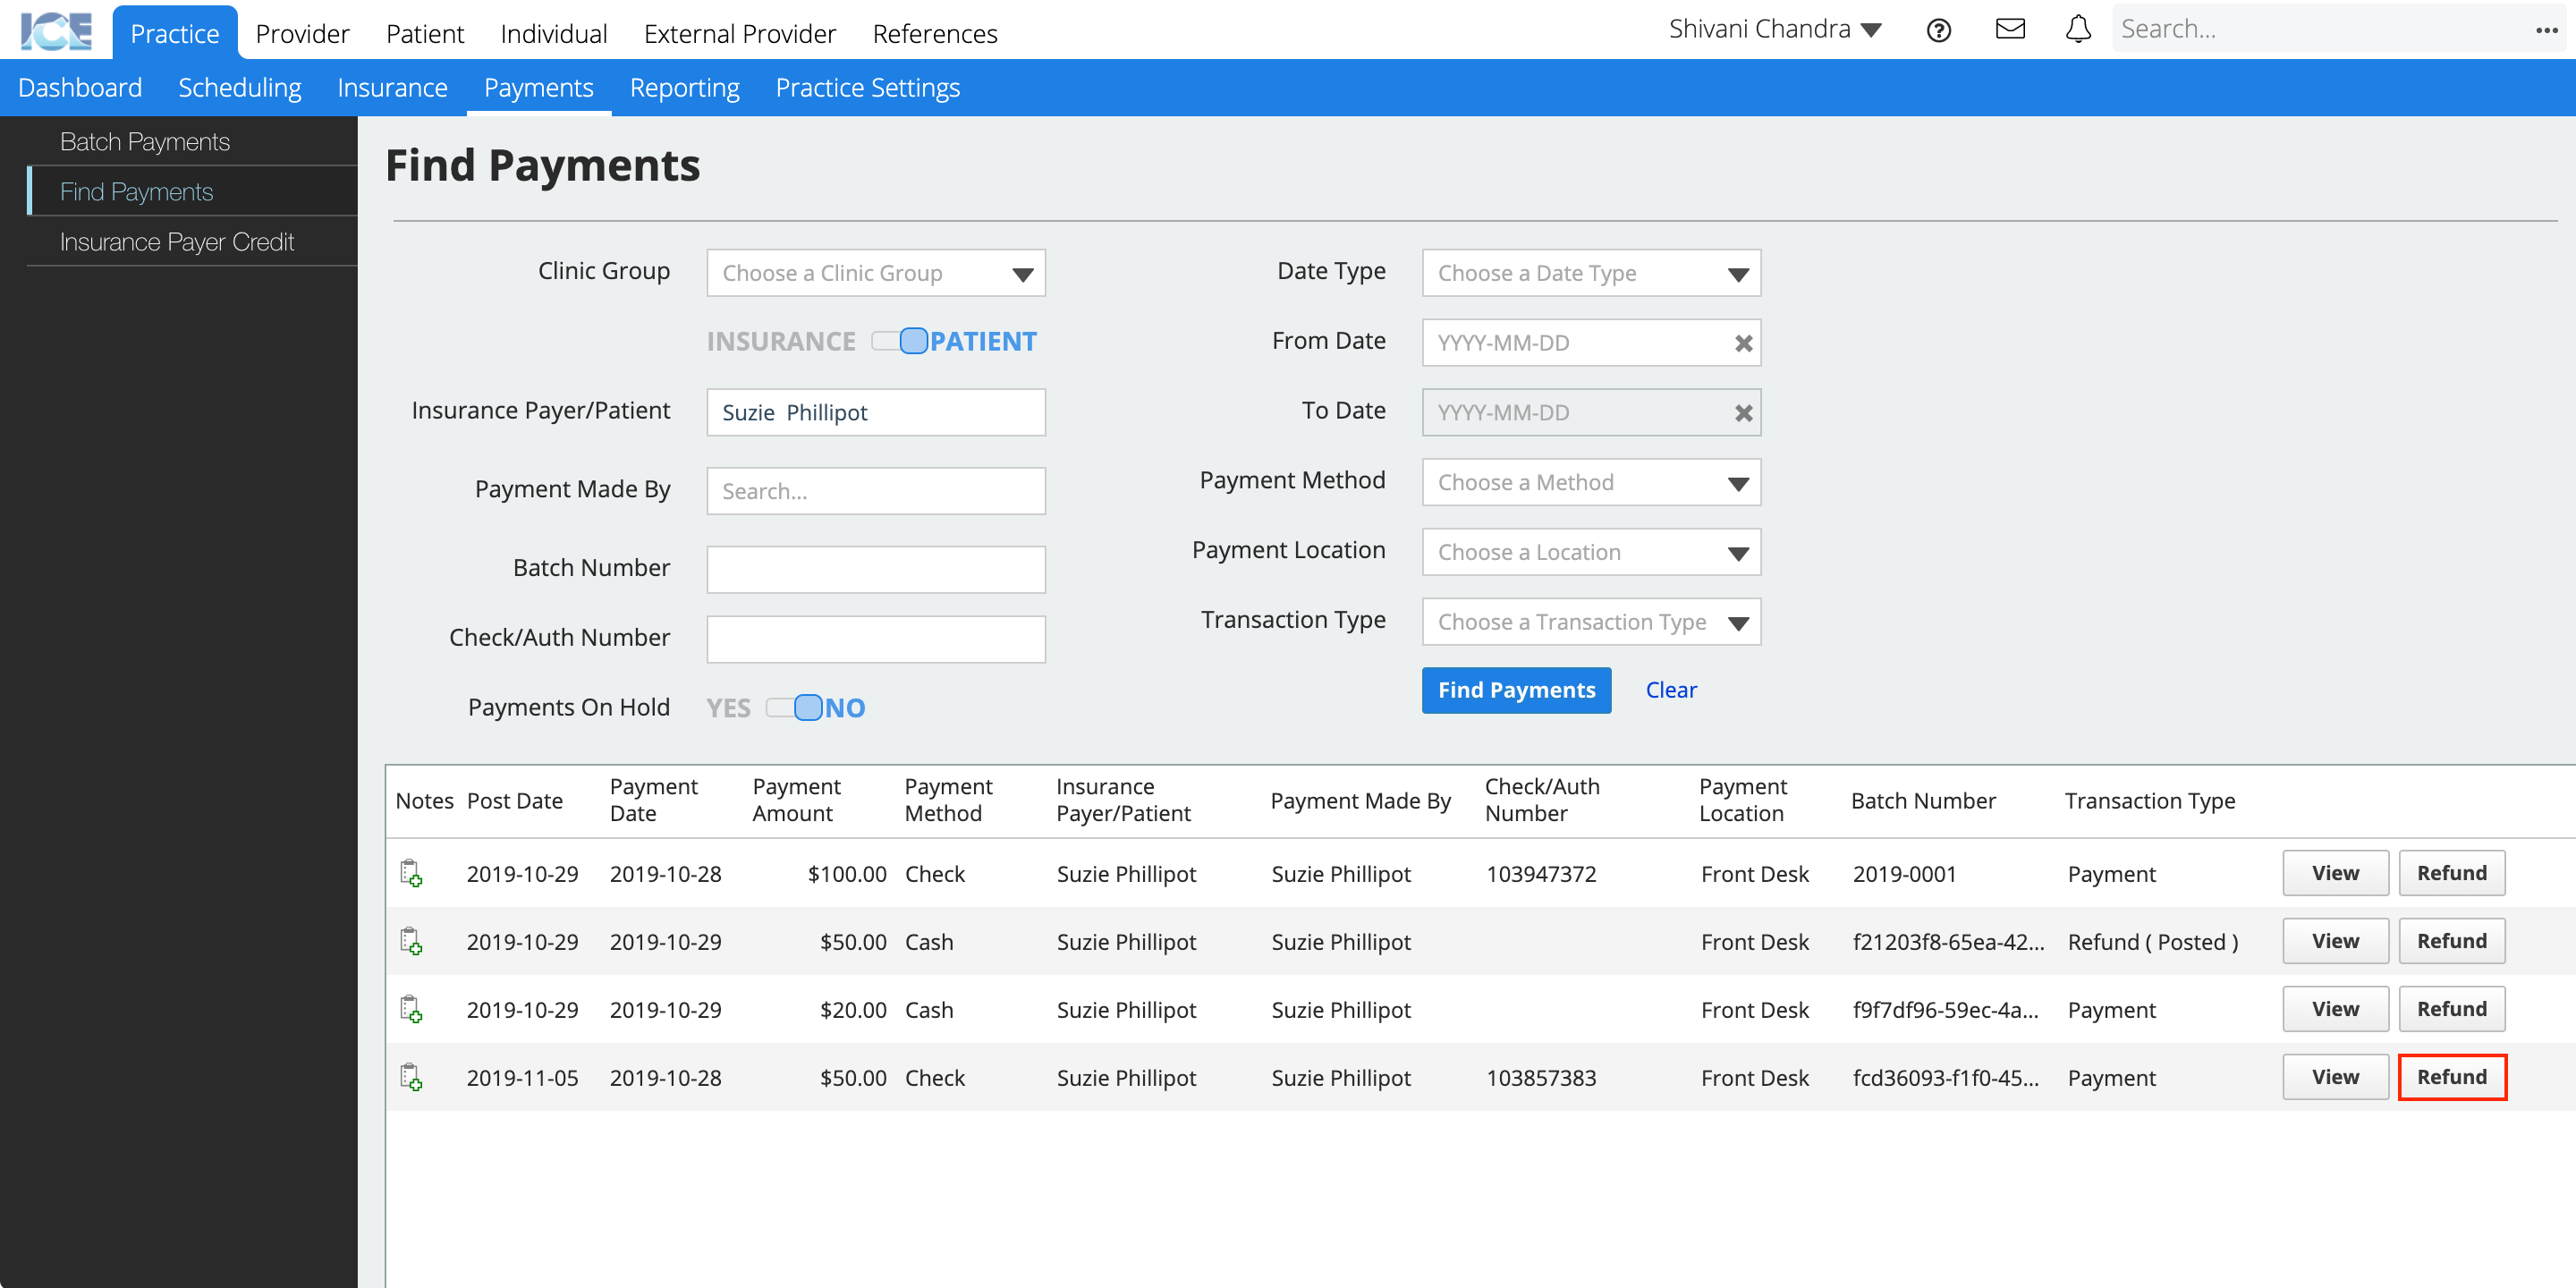
- Select Refund on the payment you want to refund
- Confirm the amount of the payment that you want to refund is entered in the Amount to Refund column
- The unallocated amount of the payment is used to automatically fill out the Amount to Refund column.
- Optional: If you still need to unallocate a portion of a payment to be refunded, select View to see the payment details and unallocate the amount you want to refund.
- Optional: To process refunds for multiple payments at once, select Select Payments to Refund in the bottom-right corner of the table to find and add more payments to the refund.
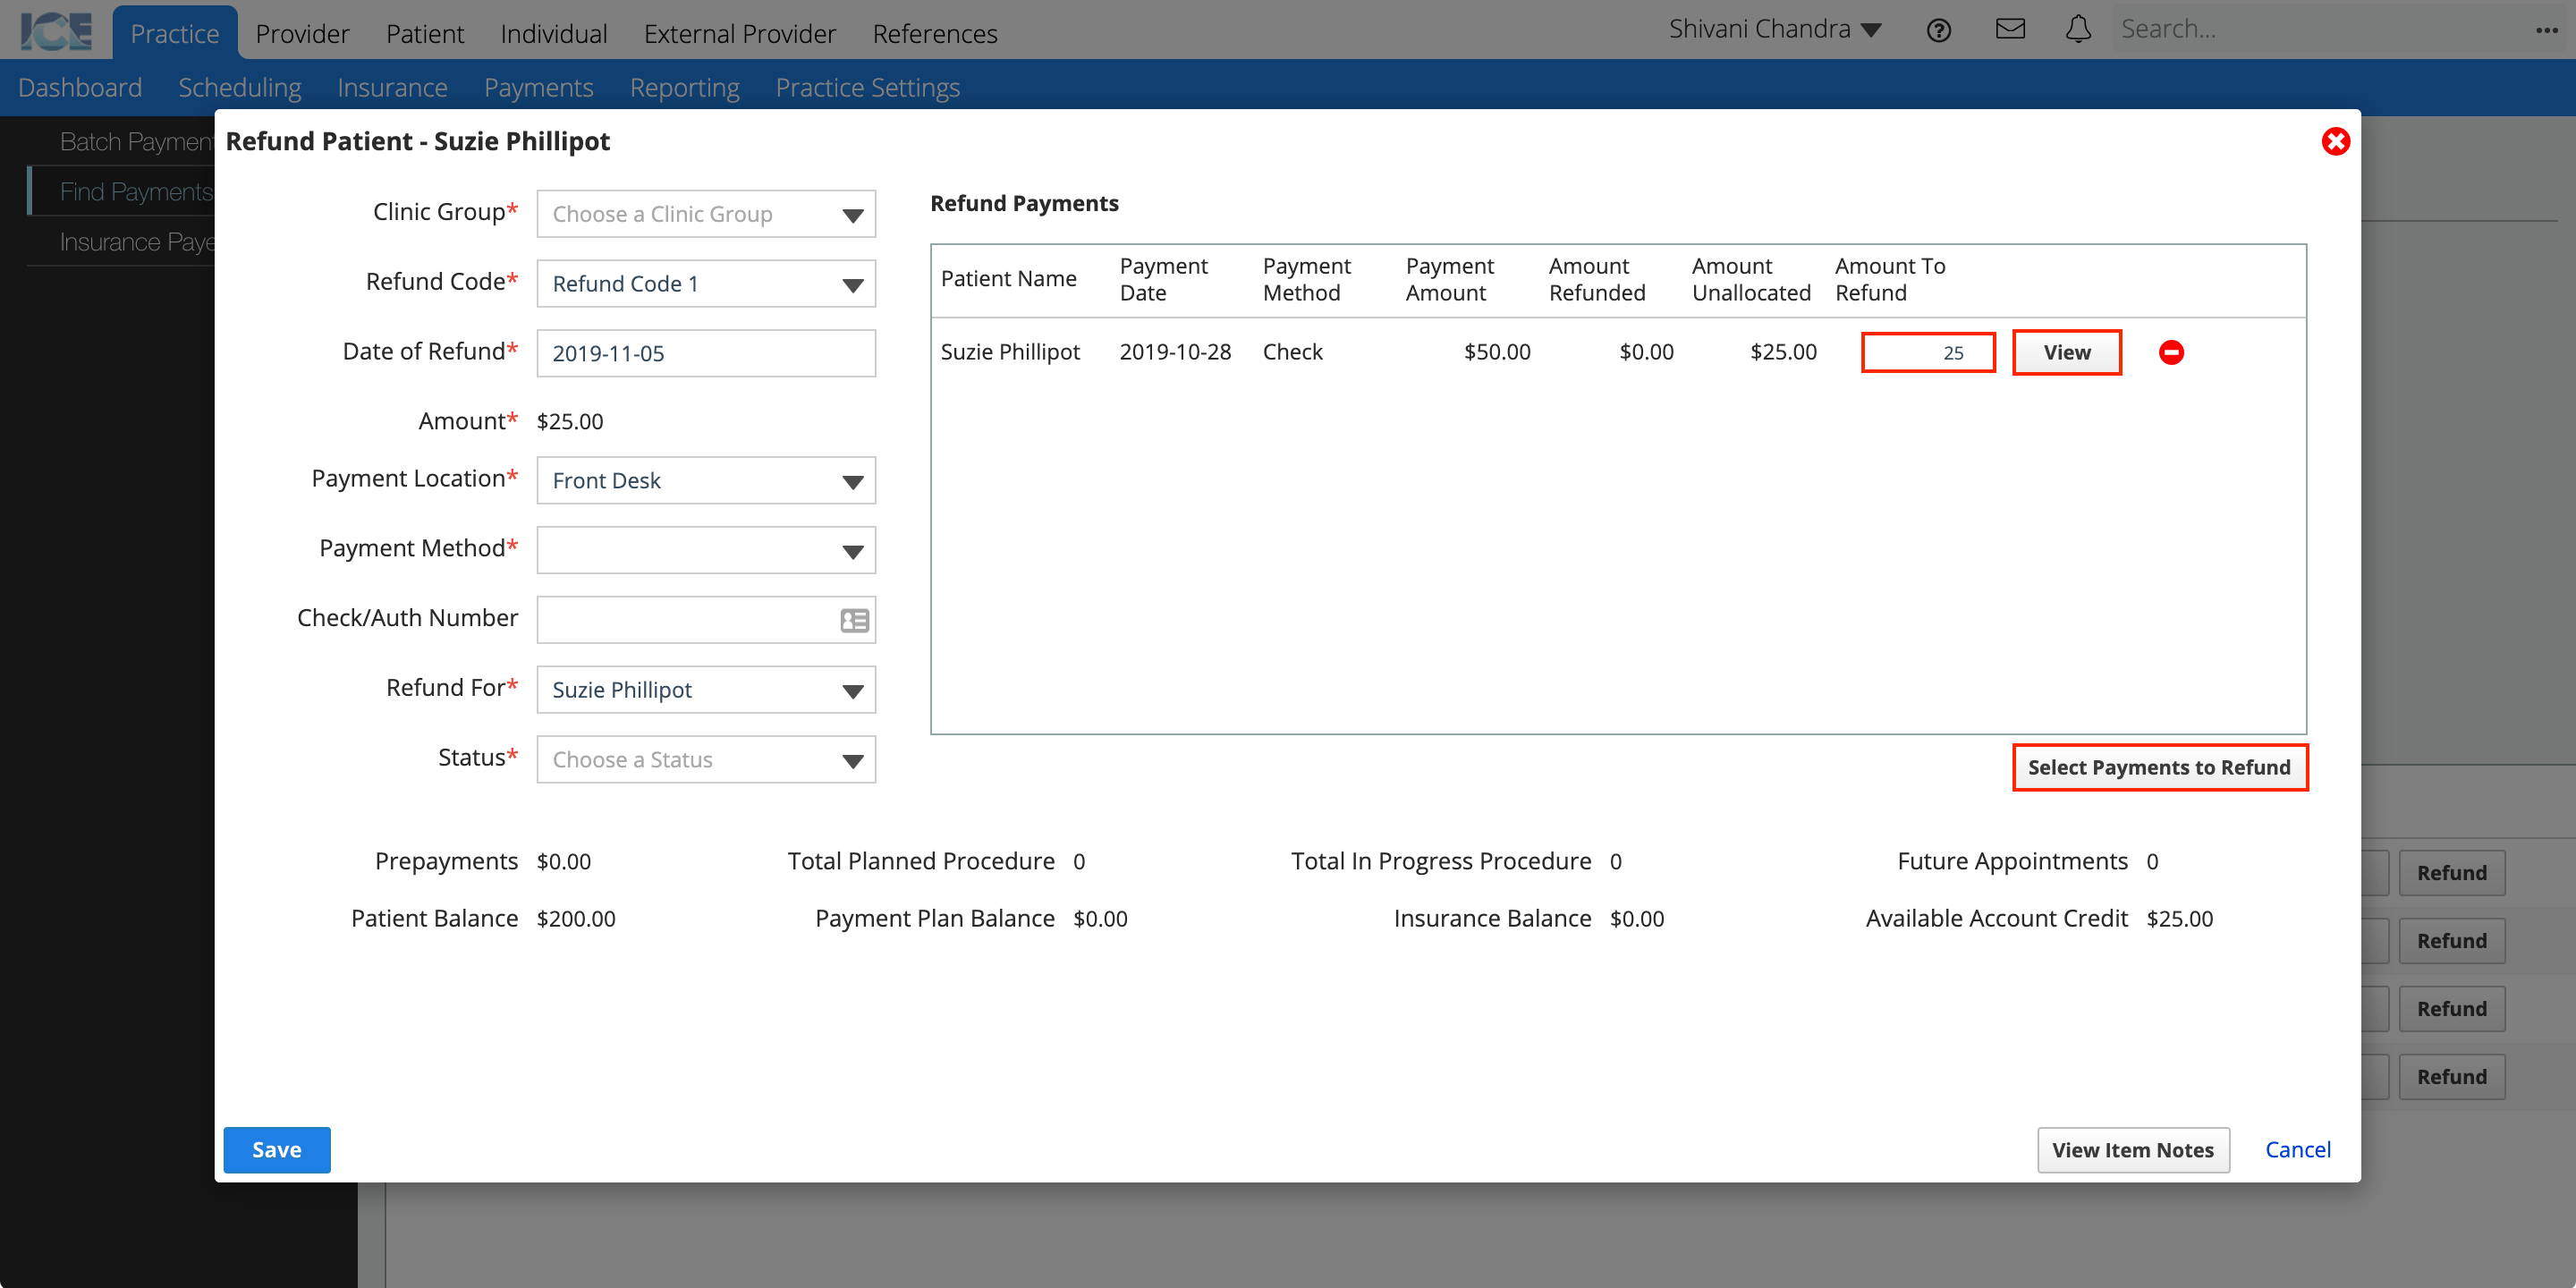
- Confirm the refund details:
- Clinic Group
- Refund Code
- Select the refund code that best describes this refund. Refund codes are managed in Practice Settings > Financials.
- Date of Refund
- Amount
- This number is based on the Amount to Refund values entered in the table on the right.
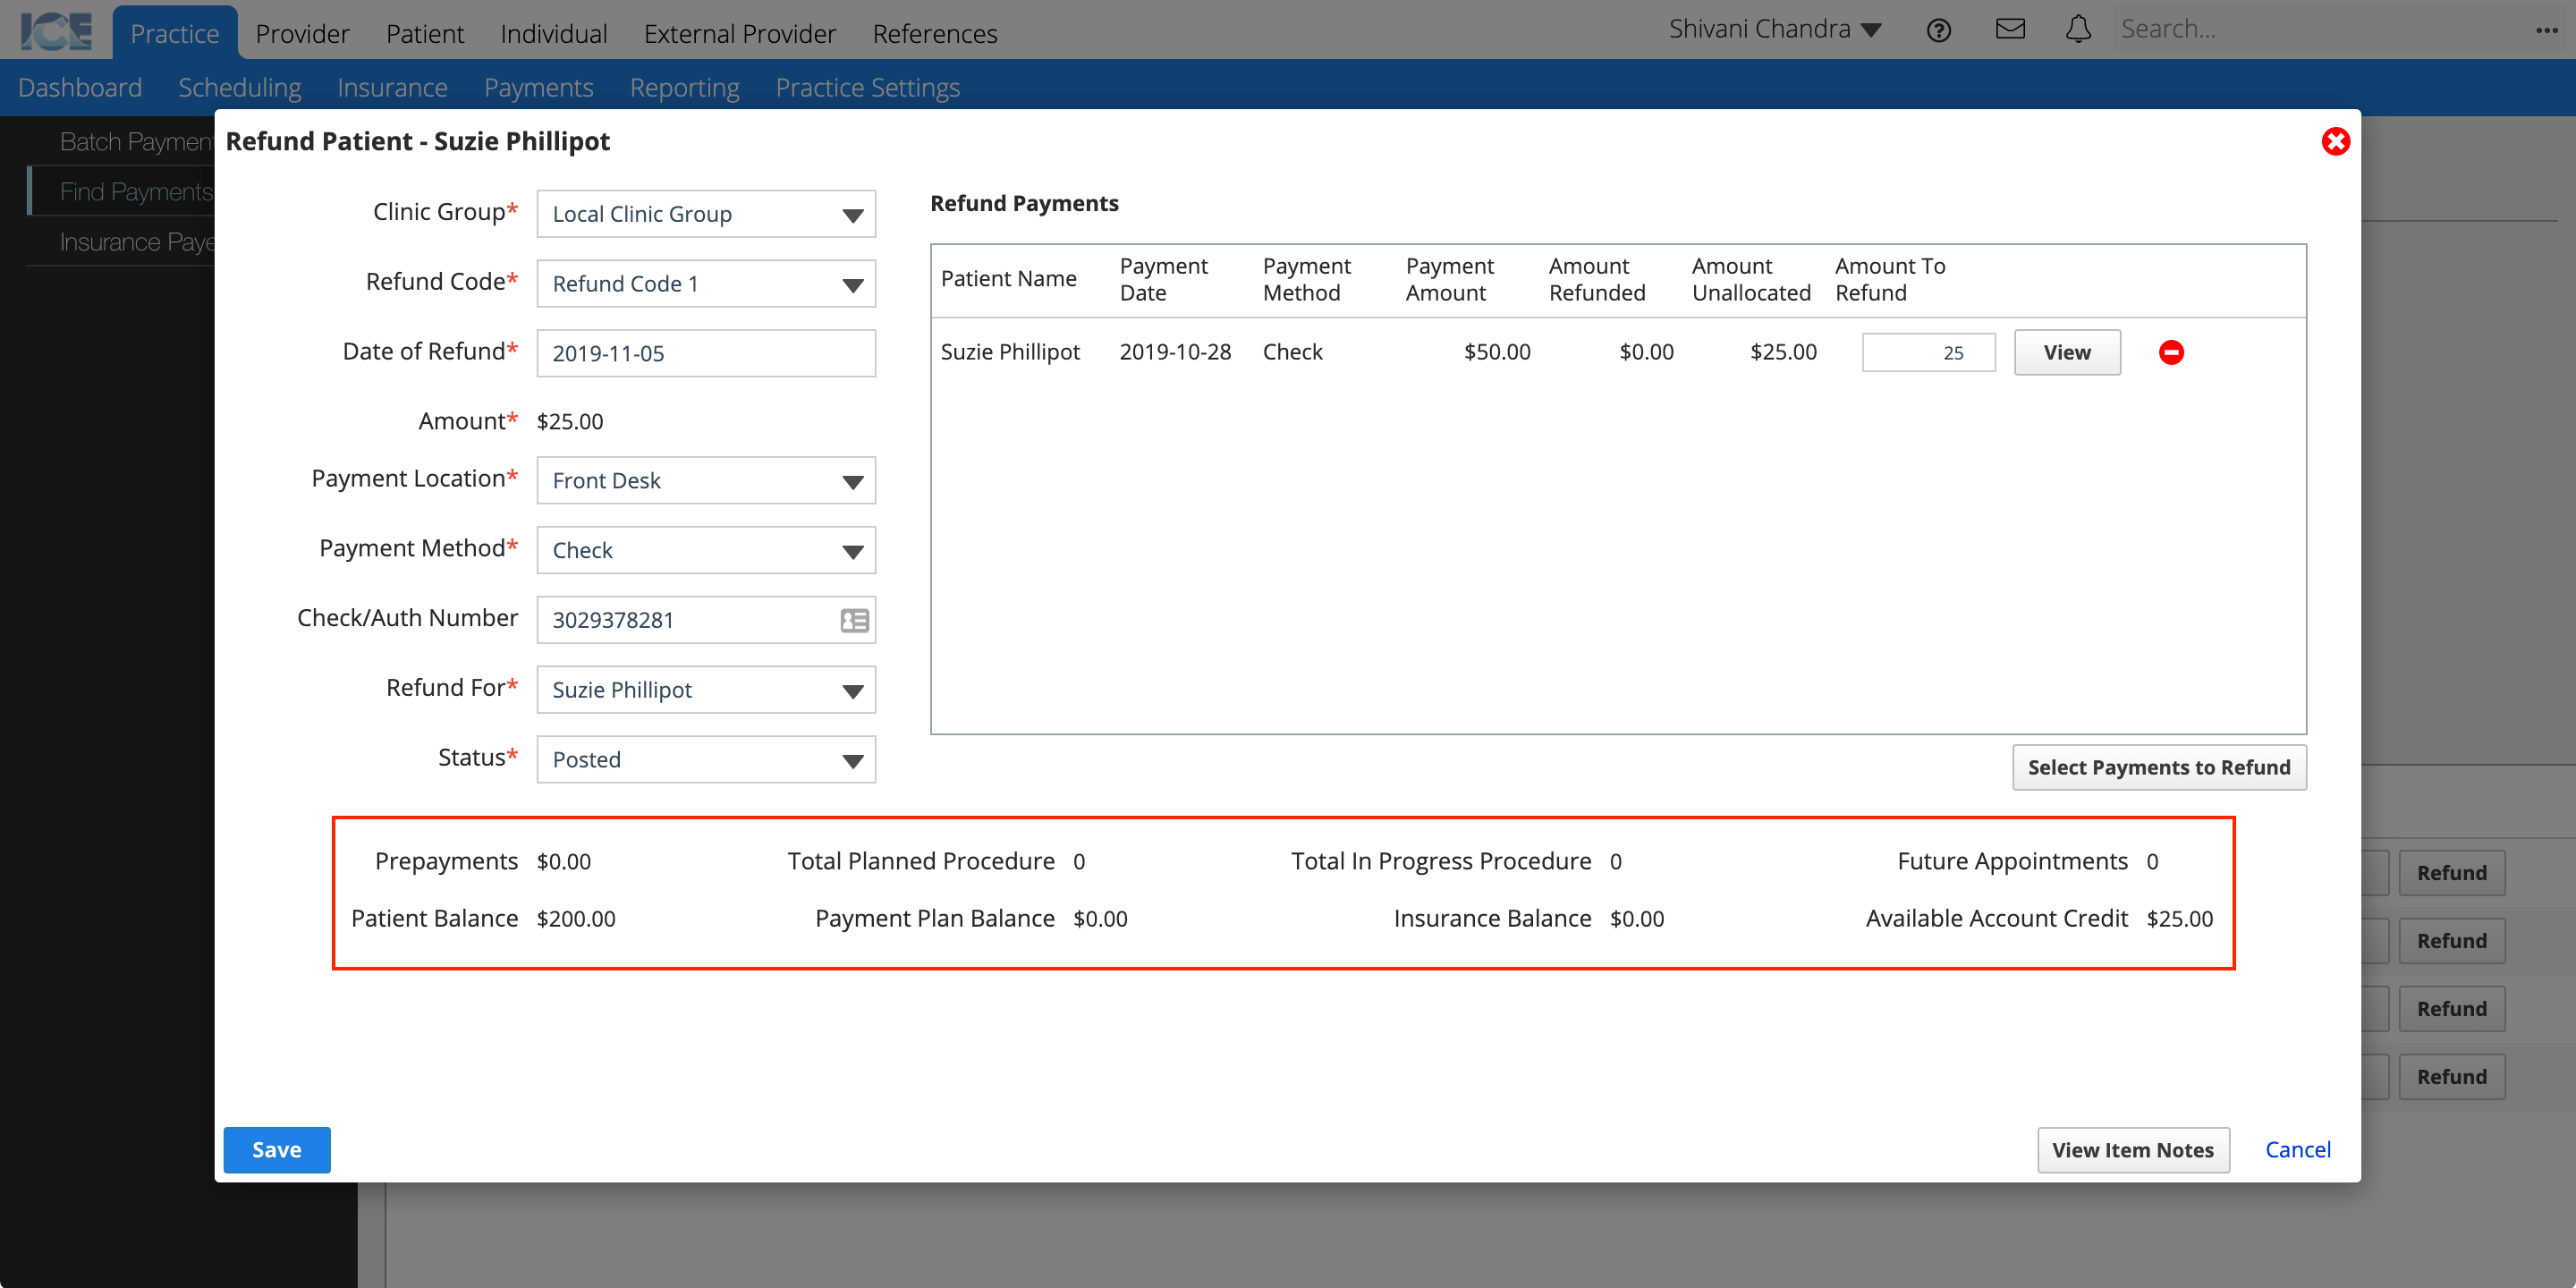
- Payment Location
- Payment Method
- Check/Auth Number
- Refund For
- You can refund the payment to the patient guarantor or to insurance.
- Status
- Posted: The refund is posted and the patient balance and payment details are updated.
- In Progress: The refund is saved and the amount cannot be used on other transactions, but it does not affect the patient balance.
- The refund appears as a pending refund in the account summaries in Patient > Financials and on the Patient Financials panel.
- Review the account summaries at the bottom of the window to make sure there aren't any upcoming or outstanding charges that this payment could be used for instead of being refunded
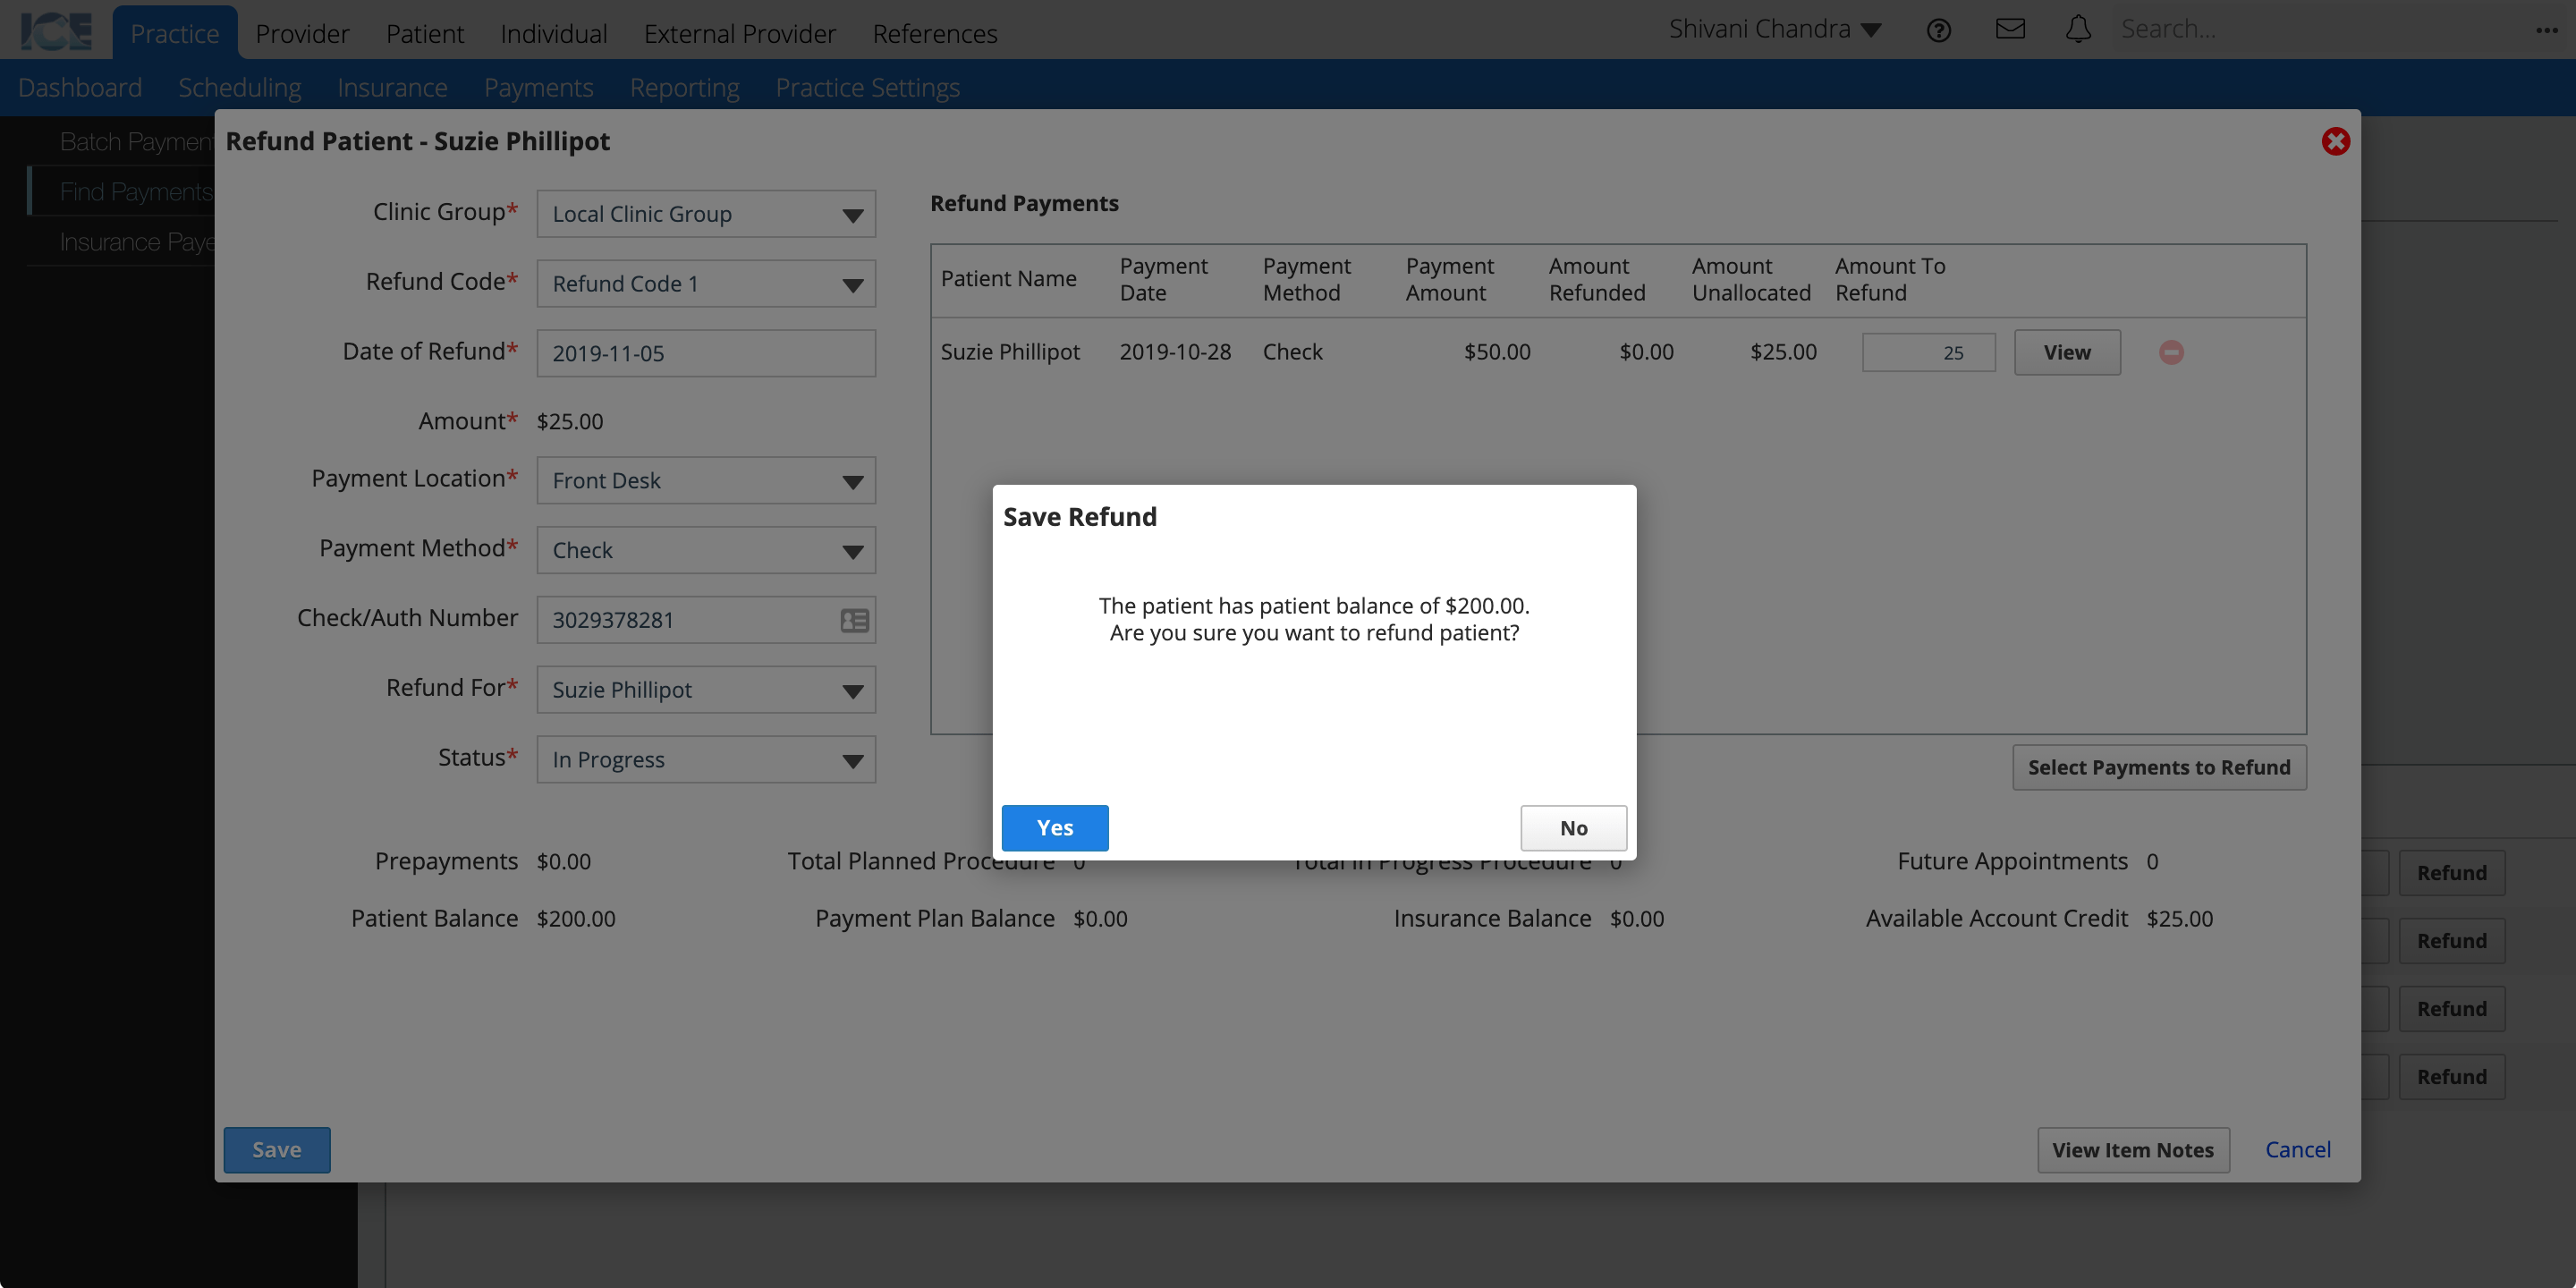
- Select Save
When you save a refund, the system warns you if the patient has any payment plans, future appointments, planned procedures, or an outstanding insurance or patient balance.
After you save a refund as Posted or In Progress, you can cancel it by finding the refund in Practice > Payments > Find Payments, selecting Refund, and changing its status to Cancel. The amount that had been allocated for the refund can now be used for any future transactions.