Enter a detailed payment
Detailed payments let you manually allocate patient payments to historical charges rather than a first-in, first-out basis. Simple payments use first-in, first-out.
You can also record a patient payment that is only allocated to charges associated with a specific provider or payment plan. All payments are tied to accounts.
- Select Switch to Detailed Payment

- Choose the account the payment is for
- This could be a guarantor or the patient themselves.
- Confirm the clinic group that the payment is for
- Optional: Select the specific clinic the payment is for.
- Once you have confirmed the account and clinic details, the table automatically populates with charges that have outstanding balances for that account, clinic group, and clinic(s)
- The badge number in parenthesis to the right of the clinic group represents the number of outstanding charges for that clinic group.

- The badge number in parenthesis to the right of the clinic group represents the number of outstanding charges for that clinic group.
- Select the specific checkboxes above the table to filter the charges
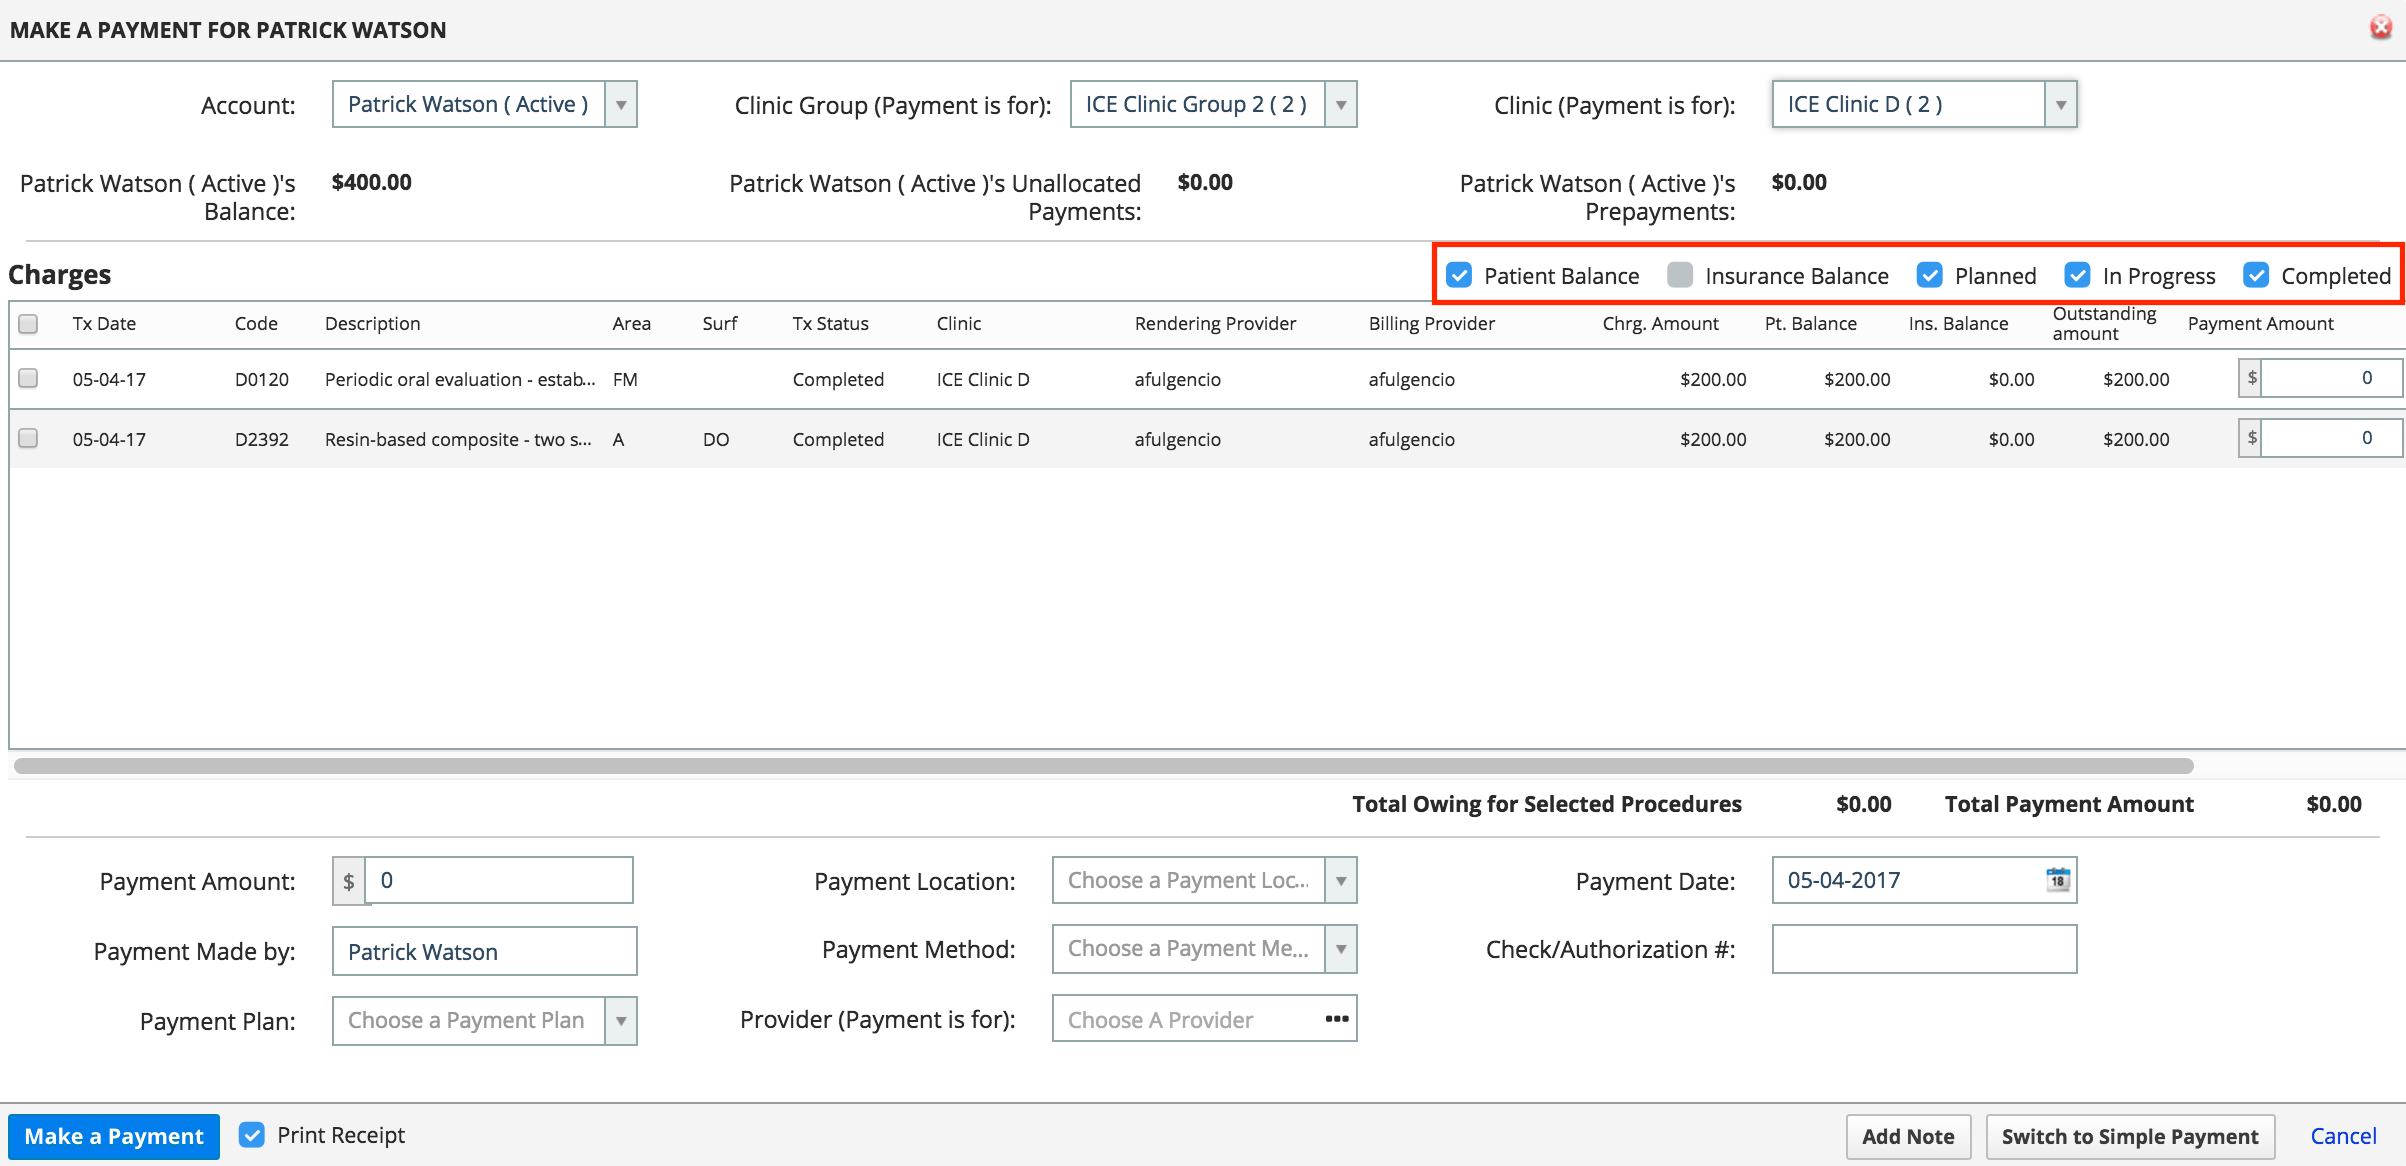
- Select the checkbox to the left of the charge(s) that you want to allocate the payment to
- The payment amount can be edited by selecting the field and updating the value.
 or
or
Identify a provider using the Provider (Payment is for) field - The payment is only allocated to charges associated with that provider on a first-in, first-out basis.

- The payment amount can be edited by selecting the field and updating the value.
- Enter the Payment Location, Payment Date, Payment Made By, Payment Method, and Check/Authorization #
- Select Make a Payment

- All patient payments are tracked in the Main, Pt. Payments, and Detailed Ledger tabs.
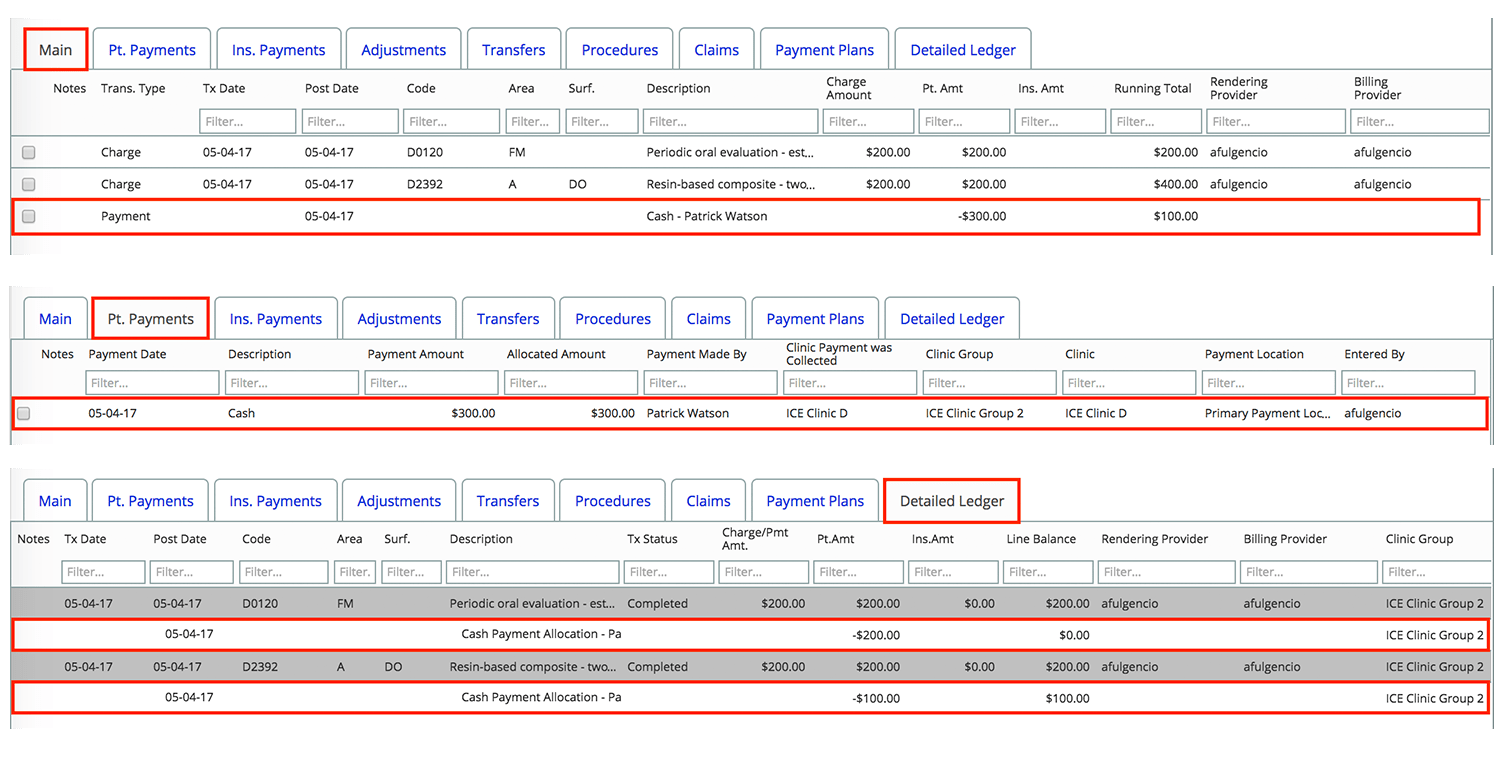
- All patient payments are tracked in the Main, Pt. Payments, and Detailed Ledger tabs.